- Home
- About
-
Shop
-
Sewing Patterns
-
Fabric
- Sewing Supplies
- Folkwear Clothing
-
- Blog
- Customer Gallery
- Contact

In this blog post the 210 Armistice Blouse will undergo a few simple modifications to turn it into an everyday summer wardrobe staple. Make as simple or embellished as you like, the Edwardian Charm is not going anywhere. Just shortening the sleeves and turning it into a pull-on version does the trick for making the 210 Armistice Blouse into a refreshing top to beat the heat!
Check out the post, 210 Armistice Blouse... a Symbol For Change, for a bit of inspiring history to help get you started in what will become a new favorite summer top.
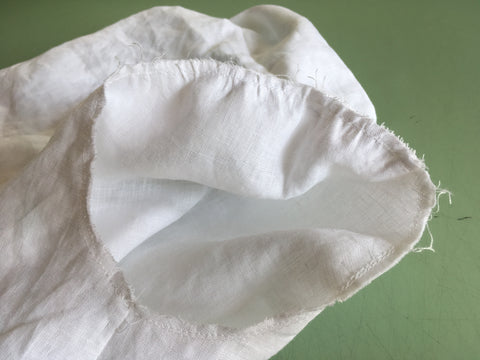
I am making this version of the Armistice blouse, with a nod to it’s history by using white handkerchief linen and adding a few small tucks to embellish the Vestee. I am also using French Seams as Edwardian women would have. Since I am demonstrating how to make a pull-on-over-the-head design, the Vestee is sewn to the front of the blouse on both sides, eliminating the need for buttonholes and buttons. However, you could add buttons for decorative touch? To keep the top loose and comfy I have decided to leave off the back shaping tie. However, there is no reason not to include the tie on the next version. The sleeves will be shortened. And I need to add a bit of length too.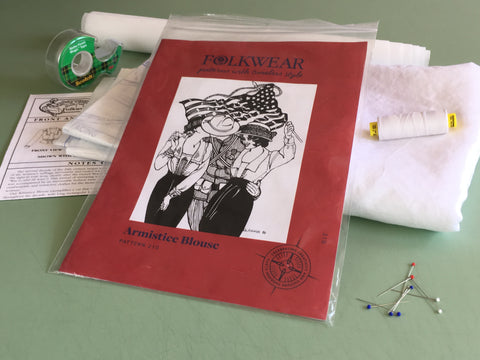
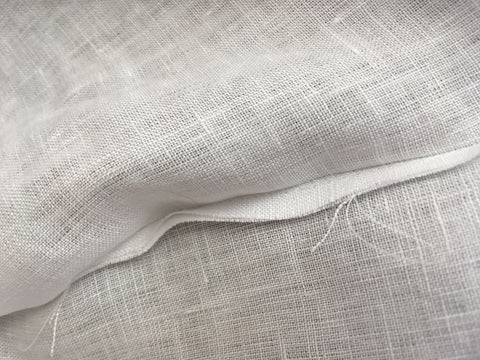
The Armistice Blouse was traditionally made of light-weight gauzy linen and cotton fabrics. Keep in mind that these early Edwardian blouses were worn with sometimes two or three layers underneath, which helped to prevent see through. Just keep the fabric opacity of the fabric you chose in mind. Though sheer fabrics are a lovely excuse to add a dainty camisole underneath.
White was the color de jour for fabrics and synonymous with the Edwardian period (See 210 Armistice History blog to learn more), that is not to say that colored fabrics, as well as prints and stripes were were not popular too. Take a good look at the lovely use of white stripes used in the version below.

Just about any woven fabric is an excellent choice for making this blouse for modern wearing. Since we are focusing on a summer version, light weight to mid-weight fabrics are ideal. To achieve the crisp-airiness of the original designs look for light-weight cottons, like cotton batiste, voile, lawn, broadcloth, shirting, seersucker, and eyelet.

Of course, you can not go wrong with handkerchief linen. Consider light-weight silk like haboti or cotton and silk blends as well. For a truly comfortable fabric and in keeping with the soft Edwardian-look, pick a fabric with a nice soft drape. If you like the idea of naturally dyed colored cotton and linen fabrics with eyelet laces and ribbons to match check out www.botanicatinctoria.com.
Making Pattern Adjustments
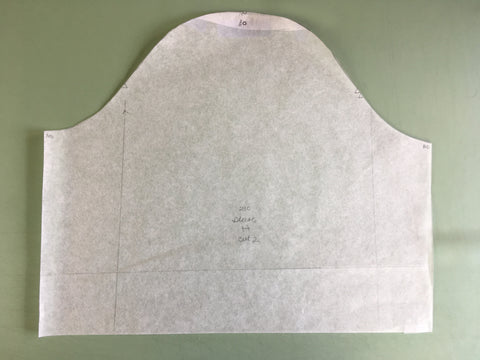
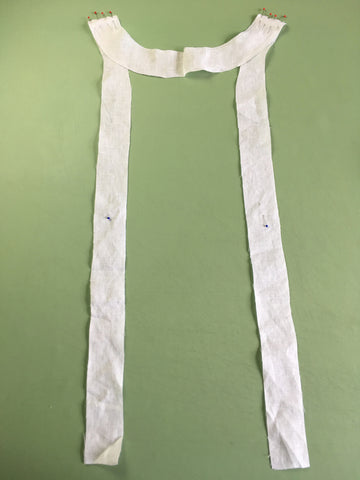
To get started I need to make a few pattern adjustments first. I am adding 1/2-inch (13mm) to the length of the size medium. That means I need to add a 1/2-inch (13mm) to The Front A, Back B, Front Facing F, and Vestee C pattern pieces. The sleeve is simply cut to the length I have decided on, including the hem.

Adjust Vestee to Accomodate Hoizontal Tucks
Even though the pattern comes with a vestee pattern piece with vertical tucks, I want to add horizontal tucks to my vestee. Folding up the fabric to make tucks takes up the length, so I need to accommodate for this by adding more length. But how much? Well that depends on the width of the tuck. I am using five 1/4-inch (3mm) tucks. When folded each tuck takes up 1/2-inch (13mm) of fabric "real estate", so to speak. This results in 2 1/2-inches (6cm) being used up to create the five tucks.
That means I need to add back the 2 1/2-inches (6cm) to the orignial length of the size medium. Plus, the 1/2-inch (13mm) I decided to add to the blouse length.

To keep the vestee approximately the width the pattern intended, use the extra width at the foldline as the seam allowance. The idea is to have 1/2-inch (6mm) seam allowance on each vetical edge of the vestee. (See the photo above).
Cutting Out the Pattern
To keep this version of the Armistice blouse simple, I am eliminating the need for pattern pieces; Tie D, Turn Back Cuff J, Cuff K, and Placket I. And I am not using the wider vertical tucked version of pattern piece C.
Decide on Seam Finish Before Starting Construction
Once all the pattern pieces are adjusted and cut out, decide how you want to finish the seams? The Armistce Blouse is a perfect project for using French Seams. The use of French Seaming was popular in Edwardian garment making. Before sewing machines were available, fine French Seams were sewn by hand. Luckily, French Seams can easily be made using a sewing machine. This technique is not hard, creating a strong encased seam, with a lovely finish. Using French Seams is a way to celebrate a historical technique that is still considered fine craftswoman-ship today. French Seams are ideal for fine fabric seamwork. So consider giving French Seams a try using Folkwear's 210 Armistce Blouse Pattern!
Use the usual 1/2-inch (13mm) seam allowance and finish the seams as you like... if not using French Seams.
Note: French seams are not used for all sewing construction needs. Typically, only the shoulder seams, side seams, and the sleeves seams are made with French Seams. Sleeves that have a tight curve at the shoulder can be tricky, resulting in a finished seam that will not lay nicely and may pucker-up. It is perfectly ok to pick and choose where French Seams work best.
French Seam Shoulder and Side Seam Construction Using 1/2-Inch (13mm) Seam Allowance
French Seams are made by starting with the WRONG sides of the fabric together... NOT right sides together, as you normally would. On the raw edge of your work, align and match any notches, stitch a scant 3/16-inch (4mm) seam. Press the seam to one side (either will do). Turn right sides together, encasing the tiny seam, and press the edge neatly or pinch the fabric with your fingers to create a clean edge. The tiny seam should be sandwiched between the two layers of fabric. Then stitch a 5/16-inch (8mm) seamline, taking care to avoid catching the tiny raw edge encased in the fold.
The idea is to only use up the amount allotted for the seam allowance. In this case the seam allowance is 1/2-inch (13mm). You will need to adjust your French Seam calculations depending on the width of your seam allowance and how small you want the finished French Seam to be. Experiment with different weight fabrics and varying seam allowances widths to see what the limitations are. Extremely small French Seams were a badge of pride and craftswoman-ship for Edwardian sewists.
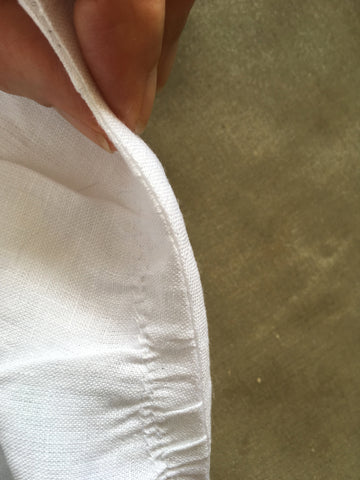
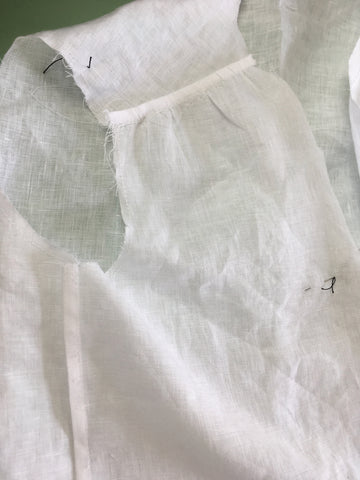
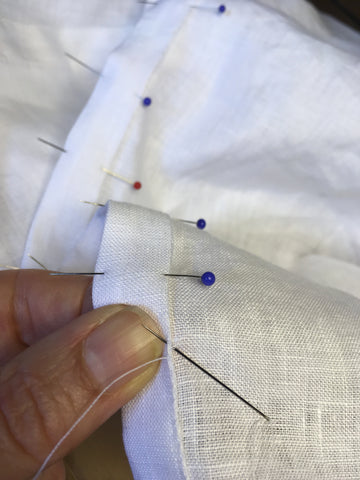
Before the shoulder seams are made, the gathers at the shoulders need to made first. Make two rows of gathering stitches outside the 1/2-inch (13mm) seam allowance as indicated on the Front A pattern piece. Pull the gathers up so that the Front fits the Back at the shoulder, pin to hold in place then stitch the seam allowance. Remember... wrong sides together and a scant 3/16-inch (4mm) seam if making French Seams.

Below is a view with wrong sides together and the scant 3/16-inch (4mm) seam. The gathering is made below the 1/2-nch (13mm) seam allowance.


The right sides turned together with the scant seam sandwiched in between the two layers of fabric. This is where the right and wrong sides can get confusing, but follow along.
Sew the next stitch line at 5/16-Inch (8mm). Besure to back stitch at hte beginning and ends of the stitchline.

Repeat for the opposite shoulder seam.
Sew the side seams now as you prefer. Side seams are perfect for French Seams, so use the same technique as above.
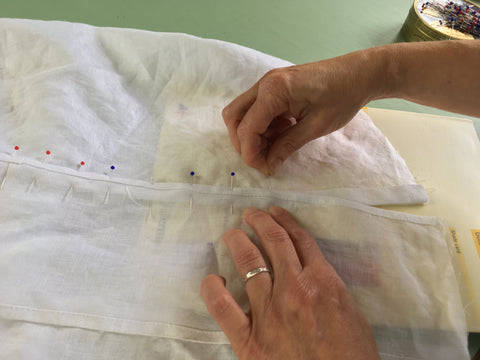
Notice below, the side seams are pinned with wrong sides together. The gathered seam at the shoulder is rightside facing up.

Stitch a scant 3/16-inch (4mm) seam.
Turn the right sides together sandwiching the scant seam allowance inside.
Stitch the next seam allowance at 5/16-inch (8mm ) on the wrong side.

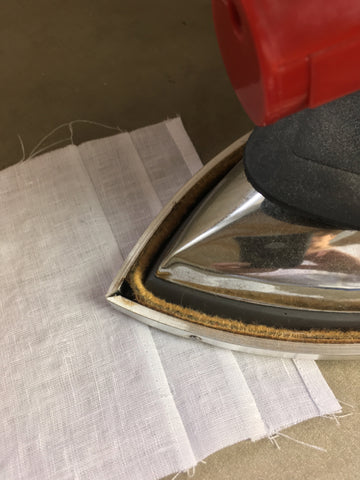
Press the side seams towards the back.

Notice that the shoulder is pressed up towards the back of the blouse and the side seams are pressed towards the back of the blouse.
Neck and Front Facing
Next, construct the Front facing. With right sides together, stitch the Neck Facing to the Front Facings F matching the notch. Press the seams open. Press under on the 1/2-inch (13mm) Fold Line on the Facings.
Note: It is not recommented to use French Seams in this sort of situation, because the seams are too bulky. In this case the seams should lay as flat as possible.
It is always a good idea to make a stabilizing stay-stitch along any curves, as seen on the Neck Facing.

To make pressing a turned under edge easier and quicker, make a long basting stitch to use as a guide (see below). The basting stitch can easily be removed later.


The Collar
With right sides together pin and stitch Collar Piece(s) C, using 1/2-inch (13mm) seam allowance, stitching on all un-notched sides. Trim the seam allowances and corners. Turn the collar rightside out and press, being sure to slightly roll the edges under to create a clean finish.
Note: If you are embellishing your collar with lace, be sure to see the pattern instructions for more helpful details.


Attach the Collar and Facing to the Front
With the right side of the blouse facing up, pin the Collar to the edge of the blouse neckline, matching the Center Backs and notches. Be sure to treat both layers of the collar as one layer. Baste to secure the collar is in place.

With right sides together, pin and stitch the front and Neck Facings to the blouse at th Neck and Front Opening, sandwiching the Collar in between. Match the shoulder seams, Center Backs, and the notches. Trim the seam allowances to cut down on the bulk fabric at the neck and collar. Trim the seam allowance down the front facings as well.


Turn the facing to the inside of the blouse, press creating a clean edge, and hand whip-stitch the pressed-under edges to the inside of the blouse. Please do not let hand work disuade you. Sometimes the only way to achieve a nice finish is to to use a needle and thread. Handstitching forces you to slow down, it is relaxing (if you give it a chance), and sometimes allows for more control than machine sewing.
The Vestee Tucks
I am using the narrow Vestee C pattern piece. The top edge is finished with two 1/4-inch (6mm) turned under edges according to the pattern instructions, four evenly spaced 1/4-inch (6mm) tucks are added (I change my mind from my original tuck making plan). Then the bottom edge is hemmed and the vertical side edges are finished with two 1/4-inch (6mm) turned under edges.
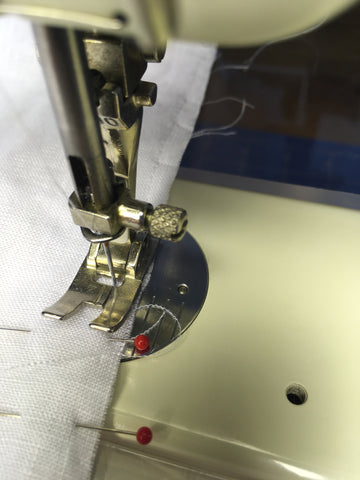
Below shows the pinned fold where a 1/4-inch (6mm) tuck will be sewn.

Sewing the tuck using the edge of the presser foot as a guide.

Below the wrong side of the Vestee Facing is facing up and the tucks are pressed downward. FYI: Tucks generally fold downwards and outwards.
See "Adjust Vestee to Accomodate Hoizontal Tucks", earlier in the blog to see how to calculated and add the tucks.
Sewing Vestee to Blouse Front
Next the Vestee is added to the blouse front. By sewing the vestee to the blouse on both long sides, the blouse becomes a pull-on-over-the-head version. So easy!
Stitch the right side of the Vestee to the right side of the Blouse. Attach the Vestee underneath the Front Facing, liniing up the pressed edge of the Vestee and whip-stitch or machine stitch, matching the large O's at the top as marked on the pattern. It is helpful to turn the blouse the blouse and Vestee with wrong side facing up. Before you completely stitch the Vestee to the blouse, double check the placement of the Vestee to be sure there is enough room to comfortably pull-on-over-your head. You don't want the Vestee to be too low either. Keep reading and learn what not to do.


Repeat for the left side. To make aligning and pining the left side easier, place a thin book or pad of paper sandwiched inside the blouse. An ironing board works too.
The instructions recommend hand whip-stitching the Vestee to the front sides, which I did the first time. ALERT. Notice, I said the "first time?" I hand whip-stitched the vestee into place... then after trying it on... discovered it was too low. The second time I machine stitched it. The look is different but it works.

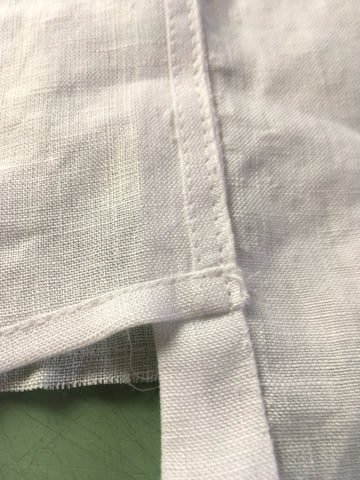
Below shows the stitching hidden under the collar and ending at the top of the Vestee.

The front is all complete, even if I did not end up with the hand sewn finish as I had planned.

Sleeves Side Seam
Stitch the side seams of the sleeves right sides together as normal if you are not using French Seams. Because this pattern is ideal for French Seams the sleeves are finished neatly and cleanly. Refer to French Seam Shoulder and Side Seam Construction if you need a reminder follow the visual aid below.


Sleeve Hem
Once again I am using a basting stitch as a guide for turning under edges of the sleeve hem. Once the sleeve edge is turned, give it a clean press and stitch close to the fold edge. It is fine to hem sleeves before attaching to the armhole if you are confident about the sleeve length.


Whether using French Seams of not, to finish the sides seams of the sleeves be sure to press the seam towards the back.

Adding the Sleeves to the Armhole Using a French Seam
Below is the armhole ready to receive the sleeve if using the normal method for setting a sleeve. Notice the shoulder seam and side seam are wrong side facing up, the black thread marks the cap of the shoulder, and the pin is pointing to the double back notch. Add a stay-stitch to the armhole, inside the seam allowance, if you have not already done so.

If adding the sleeve to the armhole using French Seams be sure to work with wrong sides together. To set the sleeve, ease the sleeve into the armhole, matching the underarm seams, shoulder cap, and notches as in the photo above. Note: The seam with the gathers that we first sewed fall forward on the front of the blouse and are not the actual shoulder seam. The shoulder seam is marked by a notch on the pattern.
For French Seaming following the same technique demonstrated previously. Follow the photos below for a visual aid.
Below the first scant seam for the French Seam is sewn.

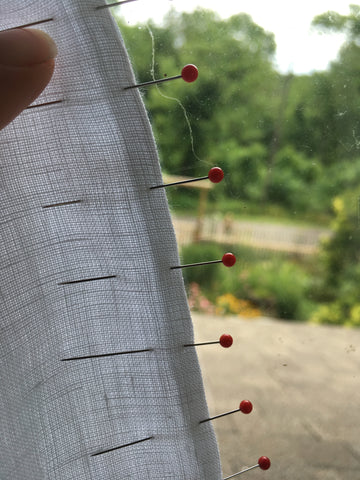
Whether making French Seams or not, lots of pins will help ensure your sleeve will lay as flat as possible to the armhole. Setting sleeves can be tricky, so take your time to avoid doing over.

Notice the tiny puckers inthe photo below. Despite all the pins, sometimes you stil get some puckers. Luckily they will press out.
The rights sides are turned togther and the edges aligned to create a clean edge. The pin to secure and sew the last 5/16-inch (8mm) seam line.


Press the seam towards the sleeve.
Hem the Bottom Edge
To hem the bottom of the blouse edge turn the raw edge under 1/4-inch (6mm) and press. Turn under again 1/4-inch (6mm) for a total of 1/2-inch (13mm) and press. Hand whip-stitch the hem or machine sew, stitching close to the folded edge.
Be sure both edges of the blouse front are even.

A Final Touch
To better secure the Vestee and preventing it from gaping, simply hand whip-stitch to the facing edge.

I hope you found this blog helpful, in not only how to make an everyday pull-on version of Folkwear's 210 Arnmistice Blouse... but in the extra tips as well. Tag this blog as a reference on how to make French Seams and for the technique behind making tucks. Learning new tip and techniques makes sewing such a pleasure.
The 210 Armistice Blouse Pattern and the PDF version are on sale through the month. Don't delay, get your copy and discover why the 210 Armistice Blouse is a Folkwear Favorite!


Susan Felton
August 17, 2021
I echo JudyB’s comment. I think this is fabulous.