-
Sewing Patterns
-
Fabric
- Sewing Supplies
- About
- Blog
- Gallery
-

by Esi Hutchison
The Basics patterns are a great for novice sewers and we really encourage our customers to have fun with these patterns (and all of our patterns in general of course). However, the Basics are especially non-intimidating in terms of the construction which can allow easier alterations, options for finishing, and embellishing that can make these pieces fit your style. This blog post will focus on the Basics Pants but altering them into shorts. Warmer weather is coming, so get ready and start making some summer outfits with this great pattern. I was wanting a pair of simple and comfortable shorts so I decided to show how I altered the Basics Pants in shorts for myself.
Fabric Suggestions:
For casual and formal looks one could use light to medium weight fabrics such as linen, wool, gabardine, twill, lightweight denim, nylon, polyester. We recently have gotten a batch of beautiful raw silks that would be perfect for these shorts. Check out our fabric. Hopefully something will inspire you.
For bedtime you could even make these out of flannel or lightweight, soft fabrics of silk, cotton, rayon, synthetics, or blends such as crepe, challis, batiste, voile, or satin. Even a soft jersey would work.
There are so many options for different occasions, casual, formal, bedtime, outdoor activities . . . for making the shorts and or pants.
I am also going to show you how to add a drawstring instead (or in addition to) the elastic waistband in this post.
Making the Shorts
If you are not confident in diving straight into making the shorts from your final fabric I advise you to make a muslin first. If you haven't read our blog post for sewing these pants, please refer back to that for altering the rise of the pants because I will be using the same technique for the shorts that I made for myself. This post also has all the basic constructions details.
Measure how long you would like your shorts to be, I went with 15½" (39.4cm) which includes the ½" (13mm) seam allowance at the top. They will sit approximately around your natural waist. Include the final waistband width which is 1¼ (3.18cm) and the length or your desired hem, for me I decided to go with a 1½" (3.8cm) hemline, my idea is to fold under ½" (13mm) then fold under 1" (2.5cm) for my hem .
With the measurement of the front/back pieces and your hem take away your waistband width and that is the length you will cut the front and back of the pants to make your shorts, my total length will be 17" (43.2cm) You can also just decide how long you want the inseam to be, and cut your shorts that length, plus a hem allowance. If you do this, be sure to take into account the 1/2" (13mm) seam allowance at the top of the inseam.

Draw a line across the pattern pieces at the length you want your shorts to be on the Front and Back pattern pieces. Those will be the pieces for the Front and Back of the Shorts.
Sewing the Shorts
Lets get started. The instructions are still the same as for making the Pants, except they are shorter!
Pattern pieces cut out.

With right sides together, sew one POCKET C to FRONT A between boxes, matching notch 1. Don't forget to clip ⅜" (1cm) into seam allowance to boxes. Trim corner and seam allowance between boxes.

The key detail of these shorts are these sweet flap pockets, which could easily be embellished with an embroidered pattern or a button sewn on the keep the pocket down.

Inner leg seam stitched.

Waistband pinned.

Adding a Drawstring
If you want to add a drawstring, mark where you would want the tie to come out after the waistband has been sewn to the shorts, but before you fold the waistband down and stich to the inside of the shorts. The drawstring holes can be hand or machine sewn eyelets or buttonholes. In this case I have decided to go with buttonholes. Mark them an inch away from each other from the center front (or wherever you have chosen to place them). I used a visible thread on this muslin so you can see exactly where I put the openings for the drawstring. Cut the buttonhole or eyelets open before moving forward.

After you have made your drawstring holes, fold the waistband to the inside along the foldline, stitch in the ditch or slipstitch on the inside of the shorts.

Insert your drawstring through one hole, around the waistband, and out through the other hole. You can use a safety pin or bodkin attached to your string to do this. You can use a sturdy ribbon or string for your drawstring.

Hem your shorts hand sew your pocket flaps down if you haven't already. And you are done!

Once I made the muslin I knew for sure what I liked and what I didn't like from the fit of the shorts, the style and length. And, I made my final shorts from my fashion fabric with the adjustments I wanted.
I chose a less casual look for the shorts and used a green herringbone wool for my final pair.
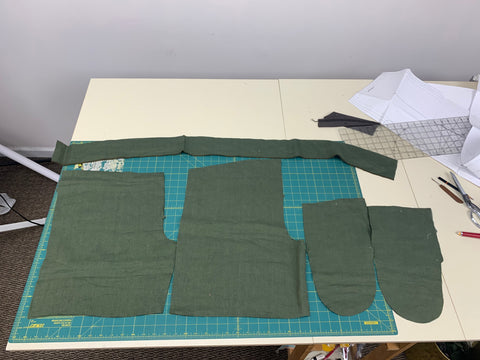
These are my fabric pieces.
And, here is the result! I love these shorts. They are very comfortable and will be easy to wear in the spring with a pair of short boots or trainers.


