Country

  • Log in
  • Cart (0)
  • Checkout
  • Home
  • About
  • Shop 
    • Sewing Patterns 
      • Folk Patterns
      • Vintage Patterns
      • PDF Patterns
      • Men's Patterns
      • Children's Patterns
    • Fabric 
      • Linen
      • Cotton
      • Silk
      • Wool
    • Sewing Supplies
    • Folkwear Clothing
  • Blog
  • Customer Gallery
  • Contact
  • Country

News

Making the Black Forest Smock with Knits

November 15, 2020

Making the Black Forest Smock with Knits

I feel that the 148 Black Forest Smock and the 110 Little Kittel are under-appreciated Folkwear patterns.  They are fun to make, and really quite easy, with lots of options for special customization.  Embroidery can be added to the neckband, cuffs, pocket openings, and/or shoulder yokes.  And, the patterns include embroidery designs to use! Different fabrics combined for fun color blocking.  And, the smocks make a simple silhouette that is easy to wear and can be made formal or informal depending on fabric - and made into a dress or shirt, depending on length!

I made the 110 Little Kittel for my daughter a few years ago from a beautiful blue corduroy.  I really wanted to add embroidery, but did not have time to do hand-embroidery, so I tried out some stitches on my machine to simulate the embroidery designs included in the pattern.  It was not hard at all and a lot of fun to figure out which stitches to use (and finally use some of those stitches my machine can do, but I never use).  If you use your sewing machine to embroider, make sure to use a stabilizer on the back side of the fabric - interfacing or a tear-away stabilizer will work fine.  

Girl wearing a short blue corduroy dress with long sleeves.

Close up of embroidery on shoulder of blue dress worn by a blond girl

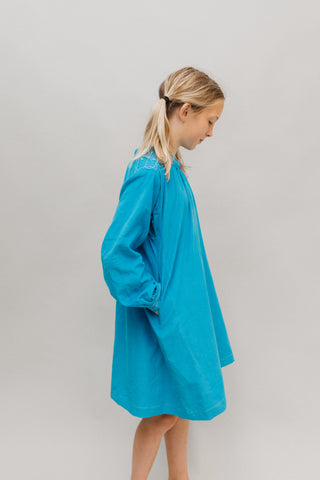
This past week, I decided to make a 148 Black Forest Smock for myself.  I wanted to make a simple smock (no embroidery) made into a short dress that I could wear with boots for winter.  I had a great, warm brown fabric in my stash, but it was a knit.  I decided that the medium-weight knit might be perfect for this pattern and it would be fun to see how it could work out.  And, then I could show you how to do the same!

The fabric is some combination of wool and/or mohair and synthetic.  It is thicker and heavier than a jersey and is a 2-way stretch, with over 50% stretch.  It is probably easier to use a knit with a little less stretch, but this fabric worked just fine.

There were only a few adjustments I made to the pattern to work for a knit fabric, and I am outlining those below.  I followed the instructions in the pattern for everything else.  I did not cut the welts (noted below) and I did not cut or use the shoulder yoke facings (only cut and used one set of shoulder yokes and did not face them).  I used a serger for sewing most seams; exceptions are outlined below as well.  If you don't have a serger, just use a zig-zag or stretch stitch for seams. I cut the smallest size, and since this pattern has a lot of ease, and I would be making it from a knit, this was perfect.  This is a traditional-style garment and one of our oldest patterns, so the sizing and construction is a little different from typical modern construction.  It is fairly easy to size the pattern up by adding to the front and back side seams and to the sleeve seam, as needed.  

brown fabric with pattern on top ready to be cut out.

Pockets

First, I cut all the pattern pieces as I would have for a woven fabric, except that I did not cut the welts for the pocket.  

But, I cut all the pocket pieces with an extra long section where it joins the smock so that I could use the technique for welt pockets that is a little easier to do and does not require an extra welt piece.  I added about an inch extra to the part of the pocket that juts out to join the body of the garment.

The first step in making the smock is to add the pockets.  To do this one-welt pocket without the welt, I started by putting the two pocket pieces (front and back) together over the pocket opening.  I've marked the corners of the welt pocket and the opening on the side piece with a purple marker. Then, I centered the pocket pieces over the opening and lined up the edges of the pocket with the opening line of the pocket.

brown fabric pieces lined up to sew the pocket

I sewed, with a regular sewing machine and a straight stitch, along both long edges of the welt pocket, starting and ending at the corners of the welt pocket (marked with purple).

pocket opening sewn on long edges

Then, I cut the welt pocket opening to 1/2" of the ends and snipped to each corner (don't cut the pocket pieces, just the side panel piece, as seen below). Note that the side panel is facing up in the photo below,  and the pocket pieces are on the other side.

Welt pocket opening cut on right wrong side of fabric.
I pulled the pocket pieces through the welt pocket opening and smoothed down the edges to create, basically, a rectangular opening.  Then, i pressed it really well.  
pocket pieces pulled through the welt pocket opening.
I then used the extra fabric I added when cutting the pattern piece out to pull the fabric from one pocket into a fold that covered the welt opening.
pocket folded to cover welt opening
Next, I sewed around the three sides of the welt - each short end and the long end where the pocket fabric was folded up to make the welt.  Again, I used a straight stitch and backstitched at each end to secure.  And, I did this with both pocket pieces facing away from each other. 
Then, I pulled the backside of the pocket around to the front (the welt is on the front side of the smock).  You can see that I was not accurate in the amount of fabric I added to the edges of the pockets when I cut them out, so the pockets don't line up correctly - i.e. there is extra fabric on one pocket.  This was not a big deal to me, because I just serged the pocket pieces together and trimmed the extra fabric as I serged.  
pockets pulled to front side of side panel, ready to sew
pocket pieces serged together with the side panel of the smock on a stained ironing board
I made the other side panel the same as I did for this side panel, but making sure I made the welt on the opposite side so that I would have pockets that both faced forward.  
Welt pockets on side panels done, setting on a green cutting mat.
This was the most tedious part of the smock, but still quite easy to do.  It does make a nice looking pocket too, and I was glad to see how easily it could be made with a heavier knit fabric.

Pleating, Cuffs, and Neckband
These smocks have a bit of pleating around the neck and sleeve cuffs.  I snipped the pleats to make it a little easier to fold them, then pinned them in place and stitched them down with a straight stitch on my regular sewing machine.  I did have to lift the presser foot and adjust the pleats every few stitches so they would not stretch out in the knit fabric.  They weren't perfect, but they were absolutely fine for this dress and fabric.  I think making the pleats a little more exact is more important in a woven garment where they are seen more easily and are an obvious part of the design.  
pleats made on a sleeve cuff
For the sleeves, I also sewed the entire length of the sleeve, not leaving an opening for a buttoned cuff.  The opening was large enough for my hand and would have some stretch anyway (even with the sewn pleats).  Doing this also makes the sleeve and cuff easier to sew.  I sewed the ends of each cuff together and folded the cuffs with wrong sides together.  Then sewed the cuff to the sleeve with right side of sleeve to a right side of the cuff, serging all layers together.  The cuff ended up being slightly smaller than the sleeve opening, which was perfect.  It kept the cuff from looking "loose".  I slightly stretched the cuff fabric as I sewed it onto the sleeve.

For the neck opening, I did a similar technique.  But, the neckband was a slightly larger than my neck opening, and I actually wanted it to be smaller than the neck opening so the band would not gape when sewed on.  I cut off nearly 2 inches of the neckband, and sewed the short ends together.  Then, I folded the neckband with wrong sides together and pinned it to the neck opening.  I had to stretch the neckband slightly to fit around the opening and kept the stretch when sewing it to the neck.  This made the neckband pull in and not gape, as some knit neckbands can do.  Also, again note that I did not face the shoulder yokes as the pattern says.  This means a lot less bulk in the shoulders for this particular garment, which also does not really need the reinforcement.  
neck and neckband of brown dress
I cut the dress to above knee - and can wear it with boots, leggings and flats, as a dress or a tunic.  It is warm and cozy and has pockets!! And will definitely be a staple in my wardrobe this winter.
close up of pocket on brown dress
Woman outside under a tree with yellow leaves on the ground, wearing a short brown dress with boots.
Woman wearing a short brown dress with brown boots standing outside under a tree with yellow leaves on the ground.
Woman standing on a swing in a brown dress and boots under a tree.
I really can't wait to make another dress from this pattern.  I have my eye on some grey linen in our shop, embroidered with a red or pink embroidery thread (also from our shop).  Perhaps a winter project for me!


Tweet Share Pin It Email

Leave a comment


Also in News

A smiling woman stands before a grey wall and is wearing a light colored silk slip dress. She has her hands up behind her head.
219 Intimacies Pattern: Making a Vintage Style Slip

March 21, 2023

Continue Reading

Making 219 Intimacies Teddy into a Romper: Part 2

March 15, 2023

Continue Reading

Make the 219 Intimacies Teddy into a Romper!  Part 1
Make the 219 Intimacies Teddy into a Romper! Part 1

March 13, 2023

Continue Reading

More Info
  • Stockists
  • Wholesale
  • Policies
  • Search
Sign up for our newsletter

Sign up to get the latest on sales, new releases and more…

Contact Us

info@folkwear.com

P.O. Box 732, 1185 Charlotte Hwy, Unit G Fairview, NC 28730

828-628-2049