-
Sewing Patterns
-
Fabric
- Sewing Supplies
- About
- Blog
- Gallery
-
July 15, 2022
by Cynthia Anderson
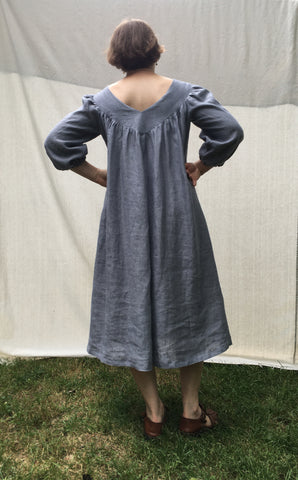
In this final day of the 160 Hawaiian Mu'umu'u sew along, we will complete the finishing details by adding an interior elastic tab for shaping, hem the three quarter sleeve (View B) with elastic, and hem the bottom edge of the dress. These finishing details for the interior shaping belt and hemming are the same for all views.
Check back to our other posts for Day 1, Day 2, and Day 3 of this sew along. The next blog post will show how the yoke is attached with the sleeveless version, as this sew along just focused on the dresses with sleeves (View B and View C).
Shaping Belt Tab (optional)
The interior belt tab can be hooked on the interior of the dress to provide shaping at the waist. The tab/hook helps to add shaping by holding the fullness of the back of the dress in place. Of course, this is an optional feature, but it is a great way to add some interest and formality to this dress.
If you have not already done so, cut out two pairs of the belt tab and two pieces of 3/4" (20mm) elastic the length indicated for your size according to the pattern instructions. You will also need the bow tie hook and bow tie eye pieces as seen below. You can find these bow tie hook and eye sets at fabric stores (Dritz is one brand) or you can order them online. They are easy to find. You will not need the slider in the set, just the hook and eye.

Thread the hook onto one length of elastic and an eye on the other length. Fold the elastic in half with the shorts ends together.
Sandwich one folded elastic strip between two piece of the belt tab holder with right sides together a seen below.

Stitch the short ends of the belt tab, being sure to securely catch the double layer of elastic in the seamline. Make another pass of stitching to secure the elastic.

Stitch each outer edge of the belt, leaving the wide end open. Trim the seam allowances and corners, then turn and press.

Trim the raw wide ends of the belt holder evenly and finish the open edge or turn the ends under 1/4" (6mm) and stitch to close to the fold. Repeat for the second belt tab.

Add the Belt Tab
The wide edge of the belt tab aligns to the seam allowance of the Side Front and Back seam, between the dots as marked on the pattern. Stitch the belt tabs to the seam allowance. If the seam is pressed open, stitch to the Back seam allowance, and the wide end is covered by the seam allowance.
Note: It does not matter which side the belt tabs are sewn to, but the hook should face towards the back of the dress as seen below.

The belt tabs hook together as seen on the interior, or with the wrong side of the dress facing up.

Finishing the Cuff, View B
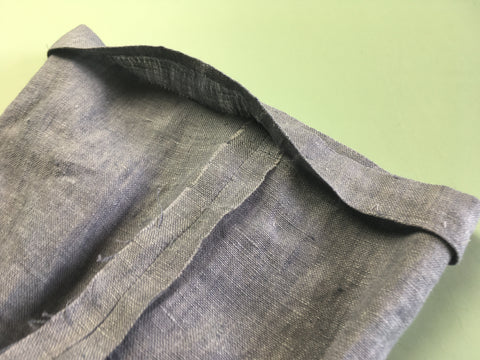
To finish the three quarter length sleeve, turn under the raw edge of the sleeve by 1/4" (6mm) and press. Turn under again 1" (2.5cm) and press.


Leave 1/2" (13mm) to 1" (2.5cm) opening at the sleeve seam. Stitch close to the folded-under edge to create a channel.

Cut two pieces of 1/4" (6mm) wide elastic to be 1/2" (13mm) wider than your arm circumference at your lower forearm (or where the sleeve will fall on your arm.) It may be a good idea to measure the circumference of your arm where the sleeve will hit your arm when wearing the dress, and make the elastic fit where it will hit your arm.

Thread the elastic through the channel and pin the ends of elastic together. Adjust as needed and overlap ends of elastic 1/2"(13mm). Stitch the ends of the elastic together on the sewing machine. Make a few passes of stitching to securely hold the elastic.
Tip: Add a safety pin or bodkin to one end of the elastic to help feed the strip through the channel. Be sure to secure the elastic tail with a pin to keep it from pulling through.

Close the opening of the channel by hand or machine. Repeat for the other sleeve.

To finish View C, simply turn under the hem as indicated in the pattern, and stitch close to the folded edge.
Hem the Bottom Edge of the Dress
Hem the dress by turning up 1/2" (13mm) and then again 3/4" (2cm). Stitch, or blind hem stitch, close to the folded edge using a machine or hand stitch. You may need to ease the fabric a bit when hemming to keep the fabric from creating folds in the hem.


Hope you have enjoyed making this new Folkwear pattern: 160 Hawaiian Mu'umu'u! To celebrate the pattern's debut, it is on sale for the month of July. It is offered in a paper or pdf version, in sizes XS-3XL. Enjoy the versatility of this pattern by making it year around.

