-
Sewing Patterns
-
Fabric
- Sewing Supplies
- About
- Blog
- Gallery
-
By Esi Hutchinson
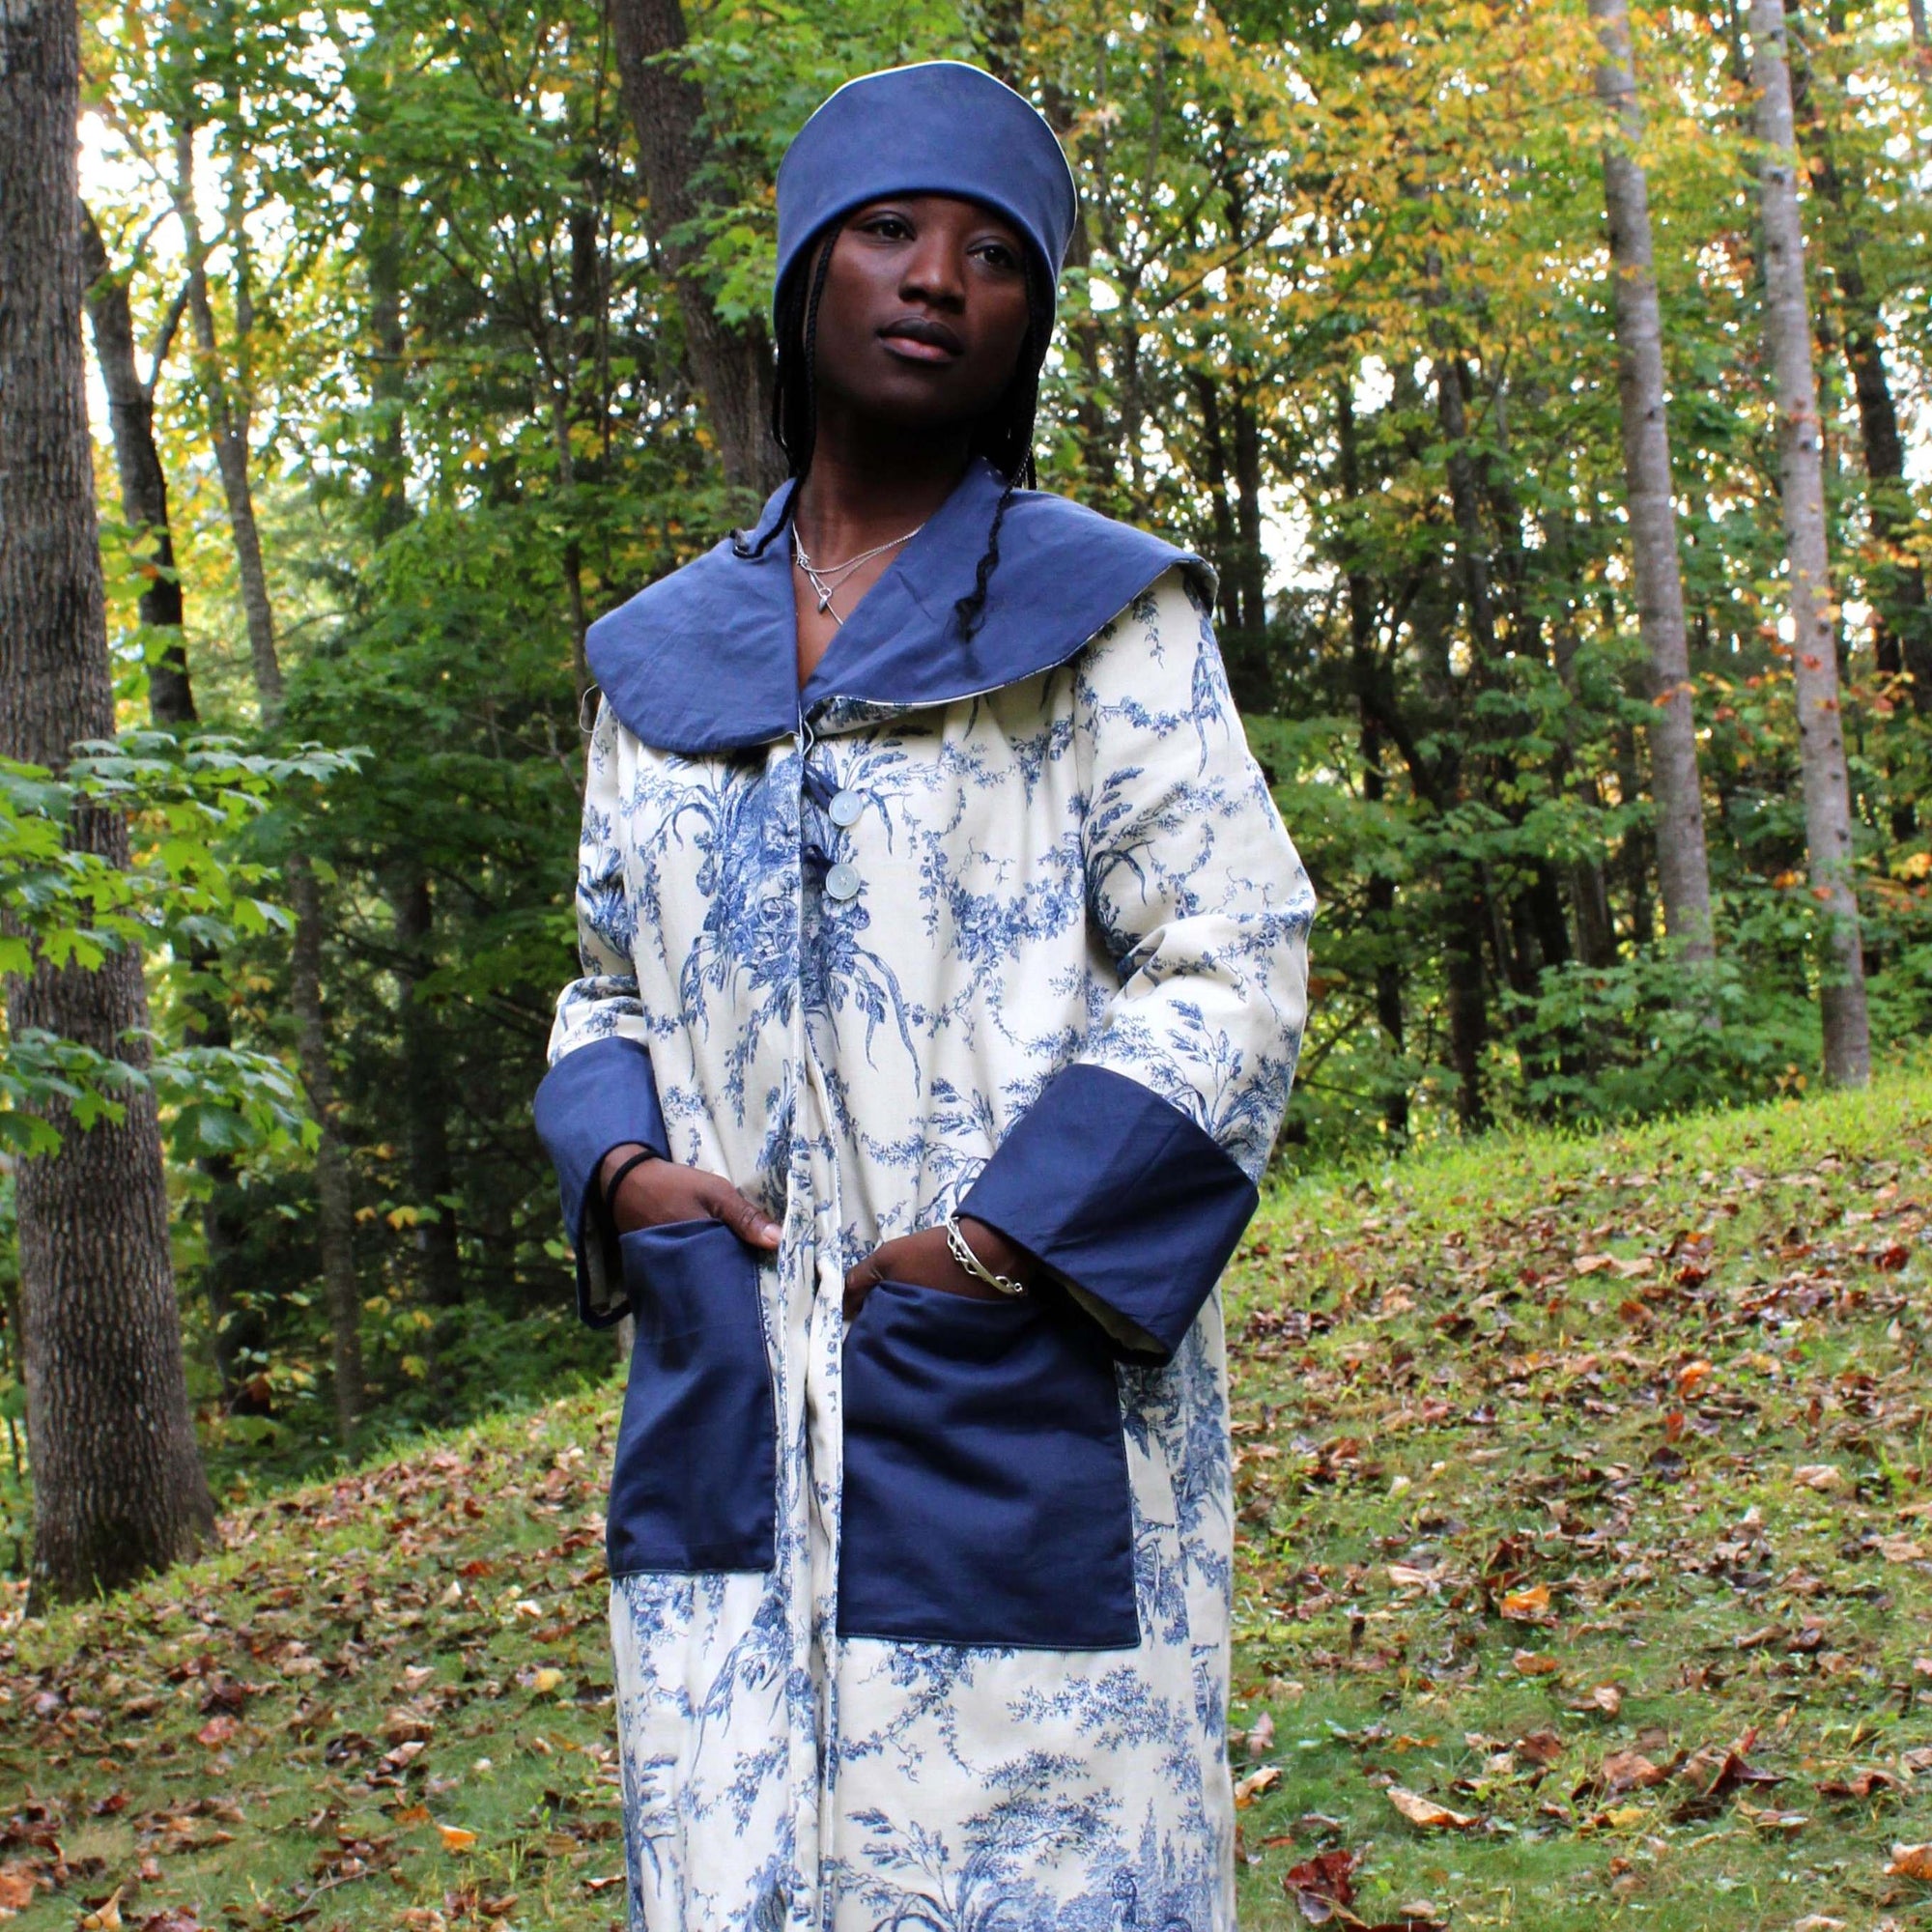
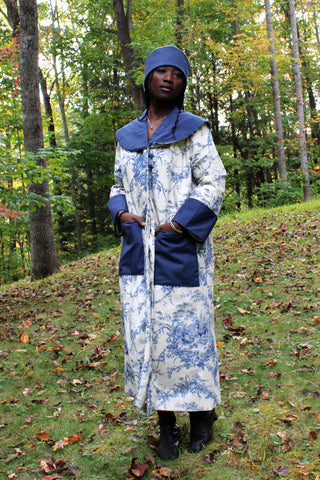
In the 1920's coat fashion shifted towards loose, straight, and undefined waistlines. Coat details, such as cuffs, collars, and pockets, were enlarged with options for contrasting fabrics and decorative embellishments. View A of our 262 Spectator Coat, based on a coat from 1925, is very typical of this 20's style, featuring a sweeping cape collar, big sleeve cuffs, and large rectangular pockets.
In this post I will show you how I made a version of View A of the Spectator Coat. I made some modifications, mainly to the construction of the pattern, that is slightly different from the original construction. I made a more informal, less tailored, coat without shoulder pads, sleeve heads and interfacing. However I do think referring to the "Professional Tips for Sewing Success" that is included in the pattern is very helpful. These Tips teach how to make your own interfacing and shoulder pads from Hair Canvas is really interesting. Hair Canvas gives the garment a more structured shape but without the stiffness of interfacing we have now. Cotton batting, fleece, and flannel can also be used to make your own shoulder pads and sleeve heads. But I did not do any of this for the coat here.
I picked View A of this pattern because I love the dramatic collar -- it's like a cape and it feels empowering. 266 Greek Island Dress, 270 Metro Middy Blouse (which was the first Folkwear pattern I used), 211 Two Middies, and 150 Hungarian Szur all have large collars and I really like them all.
For me, making this coat was actually a very simple assembly process, not tricky at all. This pattern may look intimidating but it comes together quite easily. I hope this post helps you also find that this coat is not nearly as intimidating as it looks at first.
Lets talk about fabric options!
Medium to heavy weight fabrics are suggested for this coat. Silk and cotton velvet would look very luxurious, twill or wool for a more casual look. Boucle (fabric made from looped yarn) and corduroy (make sure you choose a layout with nap) would be great as well. And check out our fabric suggestion post for this coat.
I used a medium-weight, blue and cream French toile cotton canvas as the main fabric for my coat. It's not fabric designed to be very warm, but this jacket is meant to have layers worn underneath and I thought this fabric would be a lot of fun to use to make a coat from. It is perfect for the informal-looking coat that I had in mind. We actually have this fabric in our shop now!
For the lining, we suggest a medium to light weight fabric like silk, cotton, or rayon. If your main fabric is quite thick or heavy-weight, use something lighter such as a cotton voile, silk, or Bemberg. I used an off-white cotton linen blend for my lining. It complemented the cream in the toile of my main fabric, and it was a little lighter weight than the canvas of the main fabric. You can also find the fabric here in our shop.
For the cuffs, collar, and pockets, you can choose anything from contrasting fabrics to complimentary, or use your main fabric. Faux fur would be really fun and fitting for the 20's era for the collar and cuffs. Boiled wool, jacquard, satin brocade, suede, leather and medium weight silk are also great options for contrasting fabrics. Usually you want a fabric of similar weight as your main fabric for these details. However, we had a cotton voile in our fabric collection that matched perfectly the blue in the toile of my main fabric, so I went with that. It is lighter weight that you would normally want to use in these details, but it worked very well. I used this marine blue cotton voile.
Another thing to consider when planning this coat and choosing fabric is how you might want to embellish it. The collar, cuffs, and pockets of this view are particularly good canvases for embroidery, applique, and fabric painting. Here are previous blog posts that show how to do some embellishment techniques. Maybe checking these out will help you come up with your own to embellishments for this coat: Chinese Jacket Embellishment, Flapper Dress Embroidery, How To Transfer Embroidery Designs to Fabric, Sewing Designs onto Fabric.
Sizing
Pick your size using the yardage chart, and keep in mind that the coat is not fitted, but very loose. So if your want it to be a closer fit, think about making a smaller size. I made a size Small. View A measures 51"/129.5cm from center back neckline to hemline on all sizes. This is meant to hit about mid-calf, but was low-calf length on me. If you need to lengthen or shorten, do so before cutting your fabric. If you do want to lengthen or shorten, you may need to increase or decrease your yardage of fabric before purchasing and cutting your fabric.
Seam Finishes
Since this pattern has a lining, the only seam finishing you really need to do is press! However, if your fabric ravels, I would suggest that you finish the seams with some type of overcast stitch (serge, zigzag, etc.).
Make sure you press really well (there are tips for pressing in the pattern!). I used to never press while I sewed and now I can't stand it if my seams aren't pressed well at each step. It really makes a difference and the assembly process goes more smoothly.
This was my process!

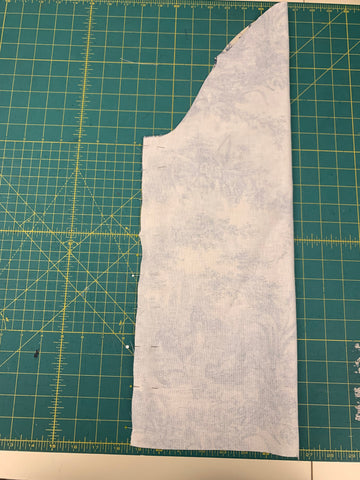
First I traced by pattern and cut out my fabric. View A has softer lines and a less formal structure than View B. Since I used a canvas fabric, I didn't feel the need to have more structure in this garment. So I did not use interfacing that the pattern calls for.
To start, I marked darts on the wrong side of the front and back pattern pieces, I like to press my darts in place before I stitch. And I tie the darts at the tip rather than back stitching to secure in place.


I sewed the shoulders together.

Easy seam finishing, just press seams open.


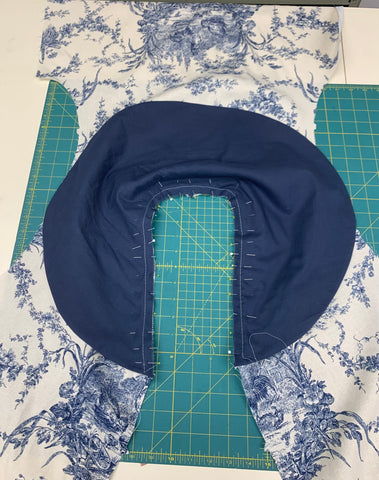
If you are embellishing the collar with applique, decorative embroidery, or any other techniques (which I would love to see someone do) do so now on an interfaced Collar piece. The interfacing here for embellishments is important to provide stability for the fabric.
Since I used cotton voile as my contrasting fabric, I doubled my voile for more opacity (since the voile is semi sheer) and stability.

If you are using three layers, as I was, it is probably wise to baste the layers together along the outer edge before assembling, just to keep everything together and neat.

I trimmed the outer seam allowance and clipped into and cut notches out of the seam for a for the fabric to lay flat when turned right side out.

Then I basted the Collar neckline edges together.

I basted the collar to the coat neckline edge between the squares, with non-interfaced collar toward coat if you are using interfacing. I was not using interfacing, so I placed the outer fabric (not my contrasting fabric) toward the coat.
I did not have any trouble matching the notches on the collar to the coat Center Back and shoulder seams. Depending on your fabric stability, you may need to clip along the coat neckline as needed to fit collar smoothly. Another good tip is to hand baste the collar onto the coat before stitching with a machine. This allows you to adjust it and not worry about pins when you are sewing.
Next, I made button loops.
To make button loops, cut a bias strip of coat fabric 1-1/2” x 10” (4 x 25.5cm). To cut on the bias is to cut at a 45 degree angle from the selvage which is the grain direction of the fabric.

Fold strip in half lengthwise, and make sure to press. You want this piece to be pressed really well before sewing because it makes it much easier to sew. I used lightweight fabric for this, and it might have been a good idea to interface my bias binding to make them more sturdy.
With right sides together, stitch 3/8” (1cm) from raw edge and trim close to stitching. Turn right side out and press. Use a loop turner, bodkin, tube tuner, or even a safety pin and string could work.
Cut the strip in half.

Like folding a paper airplane!
To form loop, fold each piece in half, bringing seamed edges together. If your fabric has a mind of its own, do like the instructions say to maintain loop’s shaped end and make a few invisible hand stitches through seam edge at 1/2” (1.25cm) from end to ensure that folded end of loop protrudes beyond button.

If you already know the buttons you will be using, adjust the length of the loops to fit buttons and baste in place along seamline. I didn't know what buttons I was going to use, so I just adjusted the button positioning when I finally pick some out.

Again, I staystitched along the neckline edge of the coat facing.

 .
.

I also understitched the seam allowances to the facing to keep seamline from rolling to the outside. To understitch, always press the seam allowance toward the lining or facing and stich to about 1/16"-1/8" (1.6-3mm) from previous stitching, or seam line.

For the sleeves, if you want more structure, baste or fuse sleeve cap interfacing to the sleeve caps. Again, I didn't feel the need to do this with the soft, more gentle, look I was wanting from my coat.
 I wanted the lining of my cuff to be my outer fabric and the solid blue to be the outer cuff. I used two layers of the cotton voile again for the outer fabric for the cuffs and pockets.


I like how the cuff is assembled to the sleeve. It makes the lining assembly look more professional. It was a good tip to turn up the cuff 1/2” (1.25cm) from seam so that seam is tucked inside sleeve. This seam was eventually covered by the coat lining.

I really like this fabric combination!

Pressing up the hem of this coat has can be difficult since it is so wide. I used a ruler and marked the hem length on the right side of the fabric so I could see the hem line easily when I pressed towards the wrong side. Here I measured up 3" (7.6cm) from the edge to create my hem for the outer fabric.

I followed the steps of the lining as instructed and finished the coat.
 Lining of my coat inside out on the dress form.
This was a great project with very clear pattern instructions which were easy to follow. I'm really happy with how this turned out, and I think this fabric combination is beautiful. I see that toile is making a comeback again as a trendy fabric to use in garments.
I also made the cloche hat that comes with this pattern! I used the doubled-up voile for the hat cuff and the toile for the main part of the hat, and lined the hat with the scraps from my coat lining. It was a quick project that took very little fabric.
We would love to see what you make with this 262 Spectator Coat pattern! Show us your rendition and fabric combo for this coat in either view.


Mary Noble
October 15, 2023
I really like that you used toile on this coat; I love the toile but would have never thought of using it for a coat and it looks beautiful! You did an excellent job of explaining how you made the coat, as well as sewing it and your thoughts as you worked on it. The details you gave and the photos really brought the process to life and I felt like I was right there with you…I will have to get this pattern for myself as it definitely looks like it’s not super complicated and think I might even get some of the toile as I love the blue pattern to make the coat. Maybe I will do the contrasts in a different color and add covered buttons and trim on the collar and cuffs…Thanks for sharing your instructions and taking the time to do a super job with this posting and coat!!