-
Sewing Patterns
-
Fabric
- Sewing Supplies
- About
- Blog
- Gallery
-
March 11, 2024 2 Comments
Folkwear has a 40+ year history in pattern making. And, some patterns from certain eras of the company are only available in a limited range of sizes. While we work on grading up our patterns when they come up for re-printing, there are some patterns that are easy to grade up on their own (and some that are truly uneconomical to grade up). Some of our traditional patterns that have very simple geometric shapes - are easy to add width or length. This pattern, 256 At the Hop, is not one of those patterns at first glance. The shirt would take quite a bit of adjustment (so we did add two more sizes to this pattern recently for the PDF version!). But the skirt is actually quite easy to grade up (or down). And I'm going to show you how in this post.
This skirt pattern is a circle skirt which you can make very simply, or embellish with embroidery, applique, etc. (check out the amazing RBG skirt that one or our employees made). First, this skirt is really only fitted at the waist. Your hip measurement is not really important for this skirt (though you may want to make sure the zipper opening is large enough to pull over your hips -- double check to be sure, and install a longer zipper with a little more room for the zipper if needed). Your hips will definitely fit in the skirt if you fit it at the waist.
The skirt is only graded for a 22" waist to a 34" waist. For this example, I am going to show you how to grade up one to two sizes. However, you can keep going with this technique to just about any size you need. You can also use this same technique to grade down a size or two. If grading down more than that, you can probably use the child's sizes also provided in the pattern.
Start with the Skirt Front/back
The skirt is cut on the fold: one front, one back. The waist of the skirt is graded at 5/16" between each size. So, to grade up one size, you will add 5/16" to the largest size, and increase in 5/16" increments for each size larger you wish to make.
I marked 5/16" from size 34, all the way around the waist to make size 36 using a regular measuring tape and marking between the 1/8" increments on the tape. You could use metric measurements/rulers for even more accuracy.

Then I connected all my marks with a curved ruler to make the cutting line for size 36.
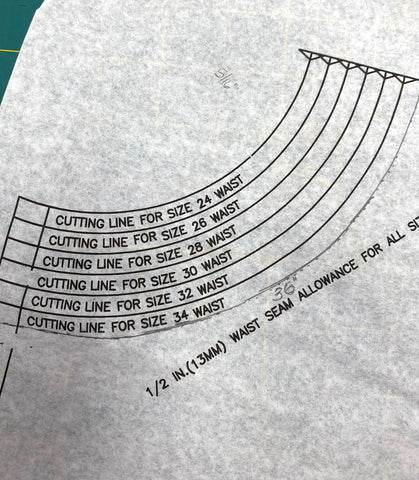
If you want to make size 38, add 5/8" (5/16"+5/16") to the size 34. To make larger sizes, just keep adding 5/16" for every size up you wish to make the skirt.
Then, because we have taken away fabric at the top of the skirt, you want to add it to the bottom of the skirt (unless, of course, you want a shorter skirt!). Again, add 5/16" for each size up you are grading, marking along the curved edge and connecting with a line to create the new size.
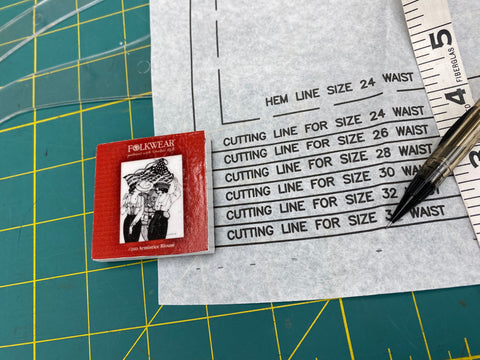

You can see the new pattern line at the bottom for new size 36.

Close up of the new size line (for 36). I used a clear plastic curved ruler to help connect the markings.
This is also a great place to adjust the length of the skirt. If you want a shorter skirt, measure up from the cutting line for your size to however much shorter you want the skirt. For instance, if you want to make the skirt 4" shorter, measure up from the cutting line by 4" all the way around the hem curve, marking, then connecting the marks with a line.

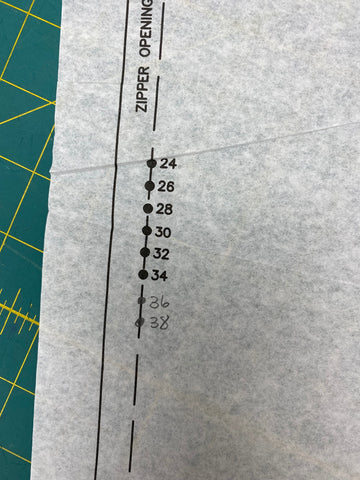
The last thing to do on the skirt is to mark new a new notch for the bottom of the zipper. Mark 5/16" down from size 34 for each size up you are grading.
Waistband
You will also need to adjust the waistband of the skirt. The waistband is straight which makes it very easy to adjust, and you only need to adjust one side of the waistband, plus the notches. You'll only add length to one side of the waist band because the other side has the overlap. The waistband is graded 2" between each size. So, to make a size 36" waistband, add 2 inches to the graded end of the waistband. To make a size 38" waistband, add 4 inches to the graded end of the waistband. A clear plastic rectangular ruler is helpful here to keep right angles and make measuring easy. I taped some Swedish tracing fabric to the pattern to have enough room to add the extra inches to my waistband end.
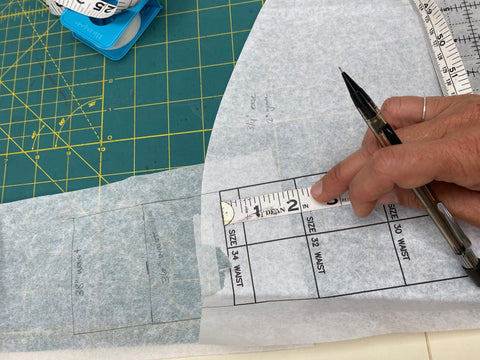
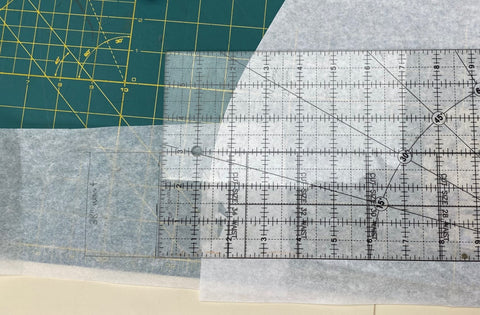
A clear plastic ruler can help you see the lines underneath when measuring straight lines and adding to the waistband end.
You probably also want to adjust the notches on the pattern. The square notches are set 1" apart for each size and are for marking where the side seams of the skirt connect to the waistband. Just mark notches for the new size by going up 1" for each size up you are grading up.
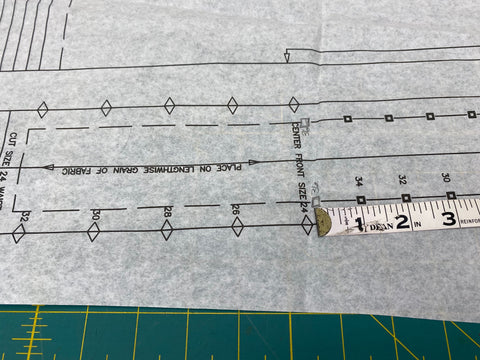
The triangle notches are graded at 1.5" between each notch and mark the center front and center back of the skirt. So mark new triangle notches 1.5" from the notch for size 34 for each size up you are going.
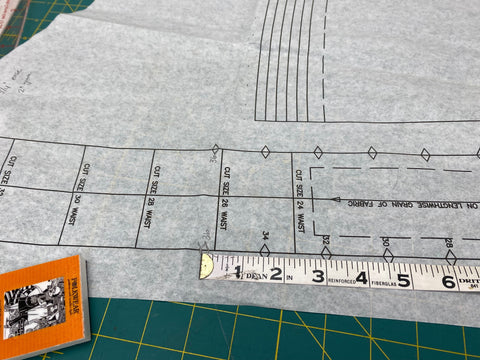
That is all there is to it! Just a few adjustments to make to get this skirt made into larger sizes. This pattern is an easy sewing project and a fabulous canvas for your creativity!
March 12, 2024
Thank you sp much for this amazinly simple method. Now I don’t need to do the math! I can’t print PDF patterns and alwalook forward to the new shet patterns. Is there a set of instructions like this for up sizing the Walking Skirt. My all time favorite Pattern!!!!

Molly
March 18, 2024
Hi Cheryl. This pattern is available as a paper pattern here: https://www.folkwear.com/products/256-at-the-hop
And, the 209 Walking Skirt is available up to size 3XL.
Thanks!