Skip to Content
    • Log in
    • Cart (0)
    • Checkout
    Menu
    • Home
    • About
    • Shop 
      • Sewing Patterns 
        • Folk Patterns
        • Vintage Patterns
        • PDF Patterns
        • Men's Patterns
        • Children's Patterns
      • Fabric 
        • Linen
        • Cotton
        • Silk
        • Wool
      • Sewing Supplies
      • Folkwear Clothing
    • Blog
    • Customer Gallery
    • Contact
    News

    How I made 223 A Lady's Chemise into a Blouse!

    November 09, 2023 7 Comments on How I made 223 A Lady's Chemise into a Blouse!

    African American woman wearing 223 Chemise Blouse looking  down at the garment and head turned to her right. The top is made out of a cotton linen chambray in plum. she is outside with the orange, yellow and red leaves of fall on the ground.

    by Esi Hutchinson

    When it comes to lingerie, there are countless options to choose from.  And Folkwear has been exploring our own designs of lingerie this year in particular, with our new 1950s-inspired patterns 510 Passion Flower and 511 Juliette's Dream. We also have the Edwardian 226 Princess Slip which makes great nighttime wear but could also be made for a more formal outing in my opinion. I've been thinking about making it recently into an everyday dress, so maybe I'll tackle that project soon.  And lots of other vintage lingerie, undergarments, and nighwear patterns can also be great modern day daywear. However, this blog post will show you how I made another one of Folkwear's undergarment patterns into a blouse from the 223 A Lady's Chemise.

    Folkwear's 223 A Lady's Chemise pattern is based on chemises that were worn in the mid- to late-1800s. Chemises were originally worn right next to the skin as a simple, practical garment to protect outer clothing (including corsets and stays) from sweat and body oils. However, over time, they evolved into a fashionable and seductive lingerie item. This vintage dress still resonates in style today, with baby doll style dresses, tops and lingerie with beautiful lace and bows. 

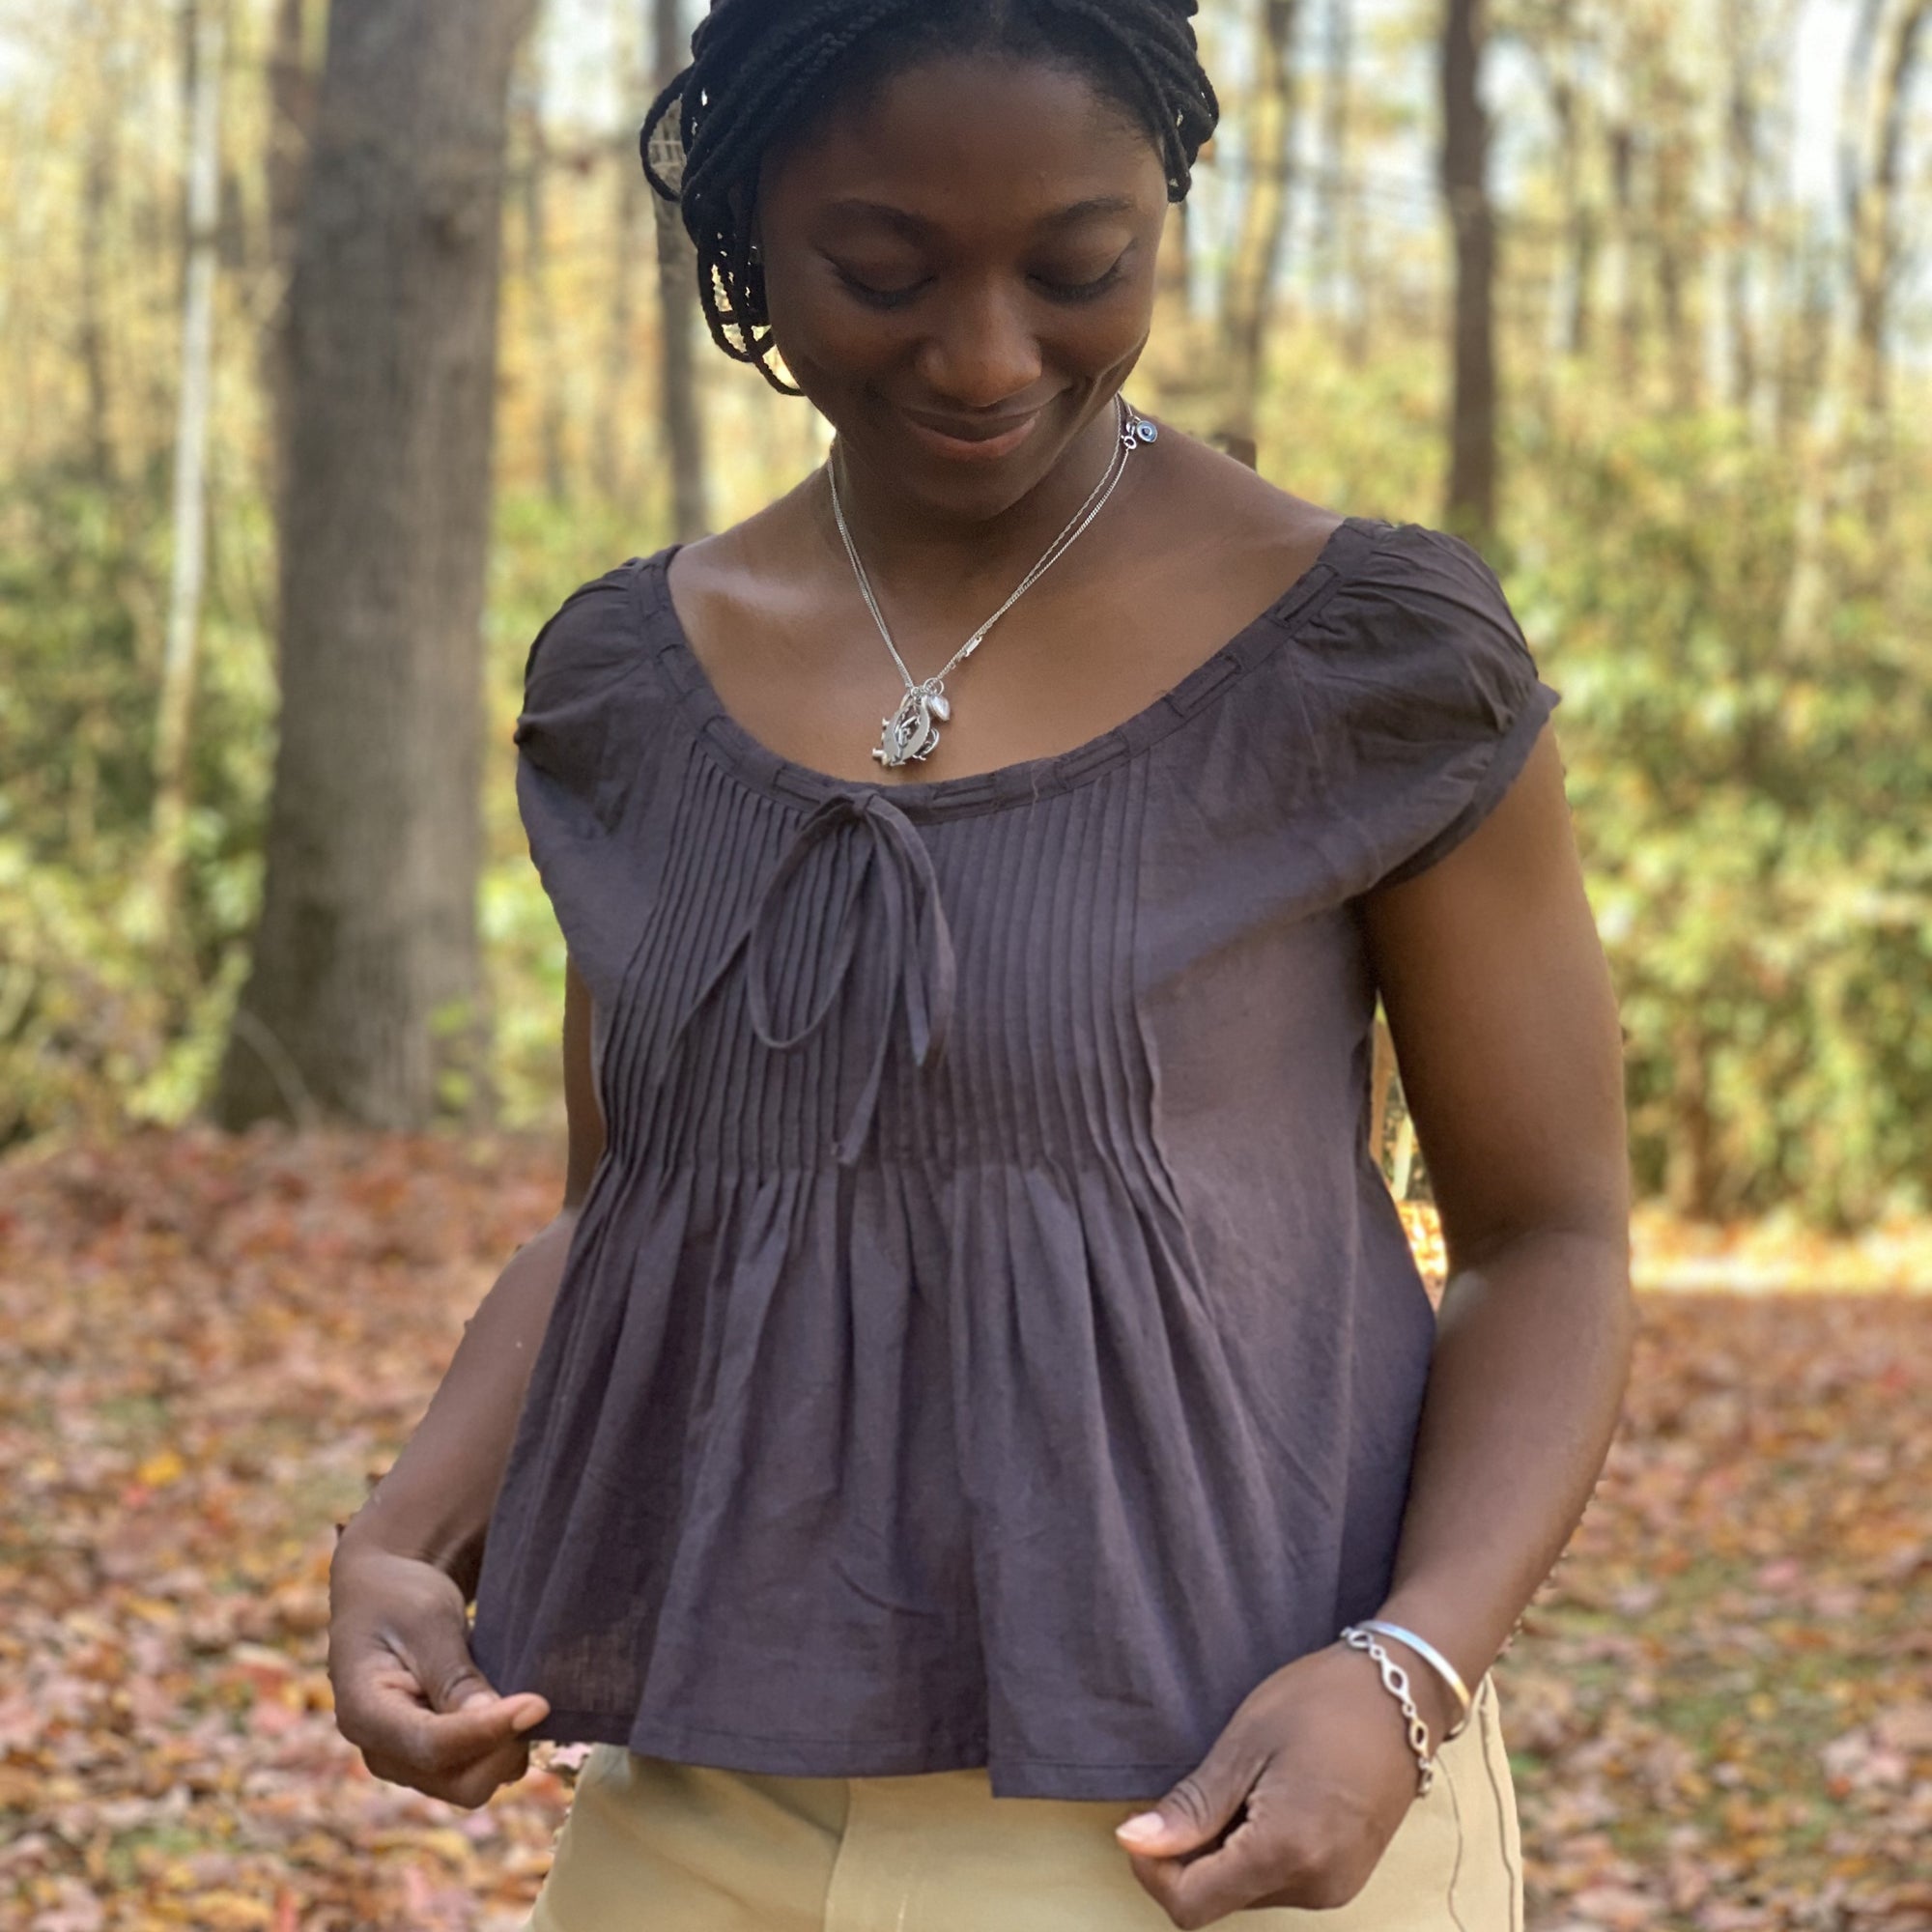
    Our chemise is a loose-fitting undergarment that can be made into a blouse or a dress, falling to whatever length you desire. It makes a great nightdress or a dress for everyday wear.  I made a blouse and will show you the changes I made so that you can do it too!

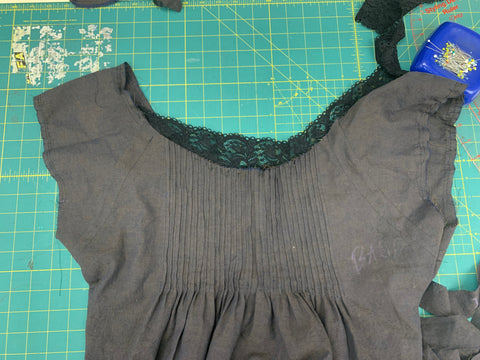
    Typically, the chemise was made from lightweight and breathable fabrics such as cotton lawn, voile, silks, lightweight muslin, and linen. For our pattern, you also need eyelet beading, lace or eyelet ruffles to finish and embellish the neckline and sleeves.

    Folkwear suggests using silks, like crepe de chine and charmeuse, which would give it such a beautiful and luxurious look and feel (I don't know who doesn't love silk). Satin, cotton, or rayon challis and other lightweight fabrics such as batiste, lawn, voile, gauze, eyelet, and handkerchief linen would also work well. We recently have been loving our new cotton/linen blends from Merchant and Mills, its a great substitute for linen or cotton that would work really well. Our cotton voiles and Indian cotton are also light and breathable and would suit this garment as well.  For this shirt, I used our cotton/linen blend in Blackberry.  It is a bit hard to tell on the screen, but this fabric is woven like a chambray and looks different at different angles.  It is very pretty!  Check out or fabric collection, I am super proud of it right now, we have so many options and I just want to buy everything for myself.

    Now to show you how I made this pattern into a shirt for myself.  Not only did I shorten the pattern to make a blouse, I made some design changes as I went that were fun and gave me a look I was really pleased with.  I love using my creativity when sewing to take a fabulous pattern and make it perfect for me (and you should too!).  Lets begin!

    Cutting the Pattern and Tracing the Pleats

    First, I traced the pattern in a size small.  I wanted to make a shirt-length top, not a dress-length garment, so I shortened the front and back by cutting the pattern about 18.5" (47cm) from the top of the center front/back on the pattern piece (I did not use the lengthen/shorten lines, but you could!).  The other thing to know about this pattern when starting, is that the front and back are cut and pleated, and then they are cut again after pleating to make the neckline (after the pleats are basted).  This is to make the tiny pleats easier to manage.  But it also gives you some flexibility about where you want your neckline to fall.  

    Front/Back pattern piece traced with markings, african american hand pointing a correct cutting line for blouse.I traced my pattern on tracing fabric (and to get the most out of this fabulous sewing product, we often tape sections together of previously used pieces to get full pattern pieces).


    There are a LOT of pleat lines, but don't let that discourage you!  The easiest way to transfer these markings to your fabric is to use tracing paper and a tracing wheel.  If you don't have these tools, they are indispensable and last a very long time.  

    Tracing paper under the pattern piece with a tracing wheel on ton.

    I used a double tracing wheel here because I could set it to trace several lines at the same time.  

    Pleat lines marked on bodice front cut out of a dark plum color fabric with chalk

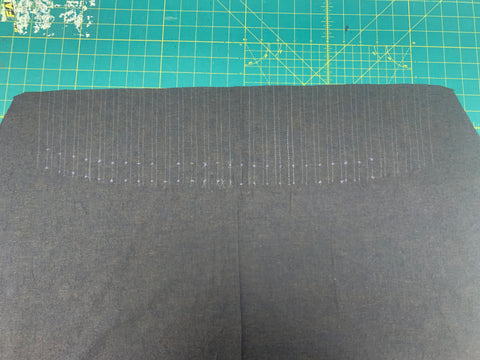
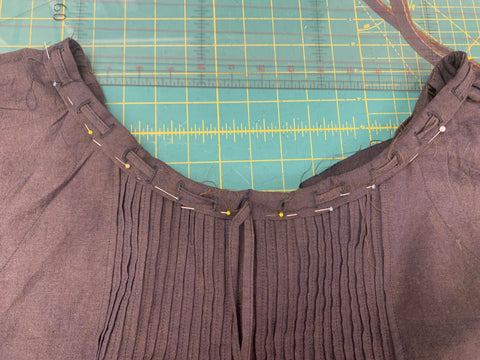
    With wrong sides together, I folded along all the pleat lines lines with dots; bringing folds to meet the second line, in the direction of the arrows. I pin-basted the pleats lengthwise from the top edge to bottom dots. This will helped keep everything together. The pleats fall away from Center Back and Center Front. 

    Pinned pleats on bodice front on a green cutting mat.
    I took a long break to decide what I wanted the blouse to look like. I love the way the pleats look pinned in the image above, however in the pattern, the pleats are released as the pattern is sewn.  I liked the pintucked look better than released tucks, but was concerned that when I cut the neckline with the pattern template, it would so reduce the length of these pintucks I liked that I would hardly see them after cutting the neckline according to the pattern template.  So I raised the neckline 1" (2.5cm) above the original neckline and cut a new neckline. 

    View B neckline placement on pleated bodice front , on a green cutting mat.
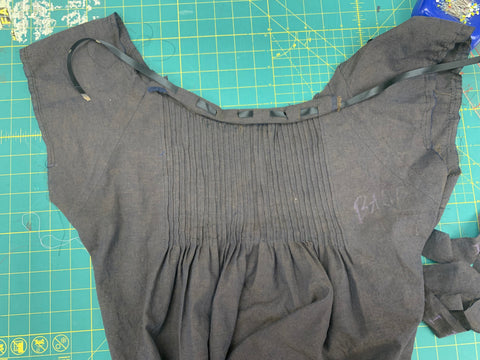
Original pattern neckline template on my front.

    View B neckline placement on pleated bodice front , on a green cutting mat.
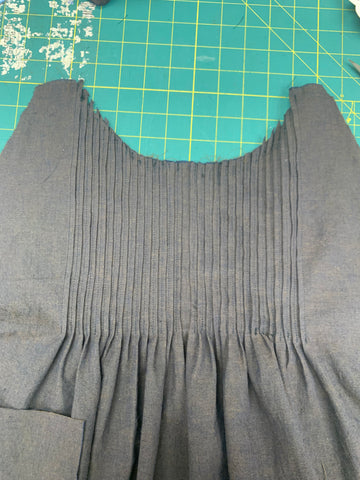
Here I chalked a new cutting line, 1" above the template neckline. Note that by doing this I added to the shoulder of the pattern too. I could have made the chalk line go toward the original shoulder line, but I liked my pintucks too much, I guess.

    The extra 1" (2.5cm) on the neckline was still not enough for me.  I wanted more length on the pintucks.  So I did something crazy!  I unpicked all the pleats and redrew the pleat lines so they would extend down 6.5" (16.5cm) total from my new neckline.  Then, I restitched the pleat lines to create pin tucks.

    Pleat lines marked on bodice front cut out of a dark plum color fabric with chalk 
    Close up of stitched pin tucks on one side on a dark plum fabric.
    I liked the look of both the "right" and "wrong" sides of my front and back, but I had to pick one. I picked the side that looked like an accordion, the one on the right to be my "right" side of the front (and back).

    Finished stitched pin tucks on one side on a dark plum fabric on a green cutting mat.

    Sewing the Rest of the Top
    I continued making my blouse as the pattern instructs.

    Sleeve C attached to bodice front and back on a green cutting mat.


    This pattern has clever ways of covering the seams around the sleeves and neckline.

    Pinned facing J to the wrong side of sleeve C with a hand placed on the garment, on a green cutting mat.

    pinned  facing J faced down revealing previous stitching line.
    I machine stitched the pressed edge of the facing towards the bodice.

    Since I changed the neckline I forgot to change the sleeves and facing prior. However I think its best to assemble the sleeves and cut them after to fit the neckline if you made any changes.

    I just drew a gradual line from the center of the front and back to where the facing and sleeve connect.  You can see that if I had cut the neckline so that it gradually met the original seam line, this wouldn't have happened, but it worked out fine!

    Purple chalk line from the center of the bodice to the sleeve and facing seam line. on a green cutting mat.

    Finishing
    Once the front and back were together, all that was left was finishing the neckline.  I also used my creativity to make something that suited my vision of this top. 

    I was torn on whether to use lace, ruffles, both, or none at all.  This pattern has clever ways of finishing the neckline and armholes and they all use eyelet beading, lace, and/or ruffles.  You can finish with any of these, but to finish with none would be to face everything with bias binding (which is not in the instructions, but is quite easy).  I thought about making my own eyelet beading or using lace, so I placed some options on the top to see how things might look.

    Black Lace placed on the edge of the sleeve on a green cutting mat
    Black lace placed on neckline of pleated bodice front on a green cutting mat.
    With the lace.

    sample of hand made eyelet beading from dark plum cotton linen fabric with a black ribbon through it. place on the edge of the sleeve laying on a green cutting mat.
    sample of hand made eyelet beading from dark plum cotton linen fabric with a black ribbon through it. place on the edge on the neckline of the beaded bodice front, laying on a green cutting mat.
    With eyelet.  I made this scrap of handmade eyelet to test the look by snipping little holes in a long scrap of fabric and weaving in the black ribbon.

    I liked the eyelet beading look the best, so decided to to make my own eyelet beading using the same fabric.  I cut the fabric using the neckline casing, piece K. I marked 1/2" (13mm) buttonholes that were 1"(2.5cm) apart from one another. I made sure to have an even number of buttonholes so that the ribbon would go through the holes to come out the same side at the center front of the bodice.

    Button holes marked using purple chalk on a strip of dark plum cotton linen fabric.

    I made all my button holes (I was very patient!). And, also made sure to mark the dots on this piece that indicate where they meet on the sleeves. I cut the buttonholes open (note: you can use fray check on the buttonholes before you cut them open). And I stitched this neckline casing with right sides together at the short ends.

    buttonholes sewn on on casing K on a green cutting mat.

    Then I pinned the right side of my neckline casing to the wrong side of the bodice, and stitched it in place with a 1/4" (6mm) seam allowance. 

    pinned button hole beading casing K on bodice neckline
    I turned the casing all the way to the front of the bodice (wrong side of casing to right side of bodice) and pressed.  I then folded under 1/4" (6mm) on the un-stitched side of the casing and topstitched the casing close to the folded edge on the right side of the bodice. 

    Pinned casing to the right side of the bodice with a ribbon through the handmade eyelet. all made out of plum cotton/linen fabric.
     
    I did not want ruffles, so I left off the pieces needed for ruffles.  I also didn't need the other neckline casing.

    For the sleeves I wanted them left plain, without beading or lace, so I just needed the sleeve band, piece F, and followed the instructions.

    Sleeve band F stitched together right sides together on a grey background.
    Wrong sides together pinned sleeve band F to bottom edge of sleeve on a green cutting mat. 
    Pressed 3/8" under on sleeve band pinned to right side of sleeve on a green cutting mat.


    I even made my own ribbon from the same fabric. I cut two strips of fabric one yard long and 1" (2.5cm) wide and stitched them together. I then put the strip through a 1/2" (13mm) bias tape maker.

    a strip of 1"/2.5cm x 2 yards of dark plum cotton linen fabric through a 1/2"/13mm bias maker on a grey background.

    I folded and pressed in 1/4" (6mm) on either short end and folded and pressed the tape in half and stitched on the long edge.

    Hand made 1/4"/6mm ribbon rolled into a circle on a grey background.My finished fabric ribbon.

    The sleeves and neckline are bound so I wanted to do the same to the hem.  If you want to do that, measure your hem and add one inch to each strip of fabric you cut for the binding. I wanted my hem to be about the same width as my sleeves so made them 1" (2.5cm) wide. 
    I only cut two fabric strips and sewed them together on each end using 1/2" (13mm) seam allowance.

    two strips  of dark plum fabric sewn together on either side on a green cutting mat,

    I stitched binding to the bodice hem using 1/4" (6mm) seam allowance with wrong sides together.  I trimmed seam to be very even.  I then pressed under 1/4" (6mm) on the binding towards the right side of the bodice and stitched the binding to bodice close to the pressed edge.

    pressed under 1/4"/6mm on binding stitched to bodice hem.
    Finished!!! I worked really hard on this piece and I am very happy with how it turned out!  It is a very cute top that I will wear often in warm weather.
    I really enjoyed this pattern and love the options that open up to me when I think about what look I want, or what creative finishes I can do with it.  I encourage you to experiment with your sewing and use your creativity to come up with fun garments to make.  
    Close up of 223 chemise with pin tucks and a bow through the eyelet lace on the neckline. fabric used is cotton linen blend in plum. African american woman is wearing this top.

    African American woman wearing 223 Chemise Blouse looking  down at the garment and smiling. The top is made out of a cotton linen chambray in plum. she is outside with the orange, yellow and red leaves of fall on the ground.

    African American woman wearing 223 Chemise Blouse looking  down at the garment and head turned to her right. The top is made out of a cotton linen chambray in plum. she is outside with the orange, yellow and red leaves of fall on the ground.

    Back of African American woman wearing 223 Chemise Blouse head  looking  towards her right .The top is made out of a cotton linen chambray in plum. she is outside with the orange, yellow and red leaves of fall on the ground.


    Tweet Share Pin It Email

    7 Responses

    Joann smith
    Joann smith

    November 21, 2023

    This is a beautiful garment and the sewing looks very well done. I am wondering though about the fold of fabric that starts at the bust point and runs through the sleeve. Is this just the posture of the model or might the top be a little too snug across the bust?

    Mary
    Mary

    November 15, 2023

    Your blouse is spectacular. You’re diffinatly a very skilled seamstress.

    VICTORIA
    VICTORIA

    November 12, 2023

    Esi, your top is beautiful! I love the way you experimented, followed your instincts and and knowhow on the way to make it the way you wanted it to look and feel! I was thinking a bit later while looking at stripe fabrics how it might work to use the stripes to make the pleats….then that led to visualizing a patterned fabric and how that would turn the back and front bodice into a mosaic. I’m going to give that a try on a few leftover fabrics and find out. Victoria B.

    Jane
    Jane

    November 11, 2023

    I have made the chemise using a stunning cotton voile, so comfortable. One of my daughters was asking me about my “high end” nightie. I will definitely make this little top over our southern hemisphere summer.

    Evelyn
    Evelyn

    November 11, 2023

    Thank you for showing all the steps that you used to make your wonderful top. It looks great one you. It was clever of you to use a pattern already in your stash. I am guessing that you had made the chemise already, yes?

    I have the pattern, but have not made it yet.

    Karen
    Karen

    November 11, 2023

    Beautifully done!

    Kyenne
    Kyenne

    November 11, 2023

    Just gorgeous – thank you for outlining the choices you made and why,.as well as ‘showing your work’. Inspiring!

    Leave a comment


    Also in News

    African woman wearing the 147 Bunad, White blouse, red vest with embroidery, royal blue skirt and white embroidered with silver thread apron. She is standing outside in front of a brick building with greenery behind her.
    147 Norwegian Bunad Apron Sew Along

    April 30, 2025

    Continue Reading

    African woman wearing a white bunad blouse and royal blue pleated bunad skirt standing outside in front of a brick building and smiling with hands in her pockets.
    147 Norwegian Bunad Skirt Sew Along

    April 28, 2025 2 Comments on How I made 223 A Lady's Chemise into a Blouse!

    Continue Reading

    African woman wearing 147 white bunad blouse and red vest standing in front of a bring wall. With hands raised to the hem of the vest.
    147 Norwegian Bunad Vest Sew Along

    April 17, 2025 1 Comment on How I made 223 A Lady's Chemise into a Blouse!

    Continue Reading

    More Info
    • Patterns
    • Fabric
    • Blog
    • Stockists
    • Wholesale
    • Policies
    • Search
    Sign up for our newsletter

    Sign up to get the latest on sales, new releases and more…

    Contact Us

    info@folkwear.com

    P.O. Box 732, Fairview, NC 28730

    Office/Studio: 240 Clingman Ave Ext, Asheville, NC 28801

    828-628-2049


    © 2025 Folkwear. Powered by Shopify