- Home
- About
-
Shop
-
Sewing Patterns
-
Fabric
- Sewing Supplies
- Folkwear Clothing
-
- Blog
- Customer Gallery
- Contact


by Victoria Watkins
Our 144 Belly Dancer sewing pattern is packed with directions for three garments as well as embellishment instructions for several accessories. While originally intended for belly dancers (originally American Tribal Style belly dancers, now FatChanceBellyDance) to create a complete performance costume, bits and pieces can absolutely be isolated and worn on their own. In these photos I am wearing the pantaloons I made and the choli in Folkwear's garment stash - both from this pattern.

My decision to sew the pantaloons is a bit of a funny story. The city where I live (Asheville, NC) is a bit eccentric, with a bit of an artsy, bohemian reputation. It is entirely in the character of our town that I met a woman running pay-what-you-want belly dance lessons in her front yard. An avid dancer myself, I decided to learn what I can from her. Between watching her chickens mill about the yard, poring over vinyl records of belly dance music from the 70s, and my own struggle to keep my arms raised above my head for the duration of a session, it's become one of the highlights of my week. However, the solitary yellow skirt I wore to practice every week began to feel a bit repetitive. I remembered that we have a pattern for exactly this sort of thing and quickly got to work.
The main components of the pattern are the choli (top), pantaloons, and a ten-yard skirt. I originally considered making the skirt, but I needed time to come to terms with the cost of the yardage necessary to sew it. Additionally, I was aiming to put together something for practice and not performance, so I determined that the pantaloons would be more ideal.
The instructions for how to construct the pantaloons were easy to follow. I chose to make a couple modifications, which you will likely want to do as well if you want to wear these as pants without an overskirt. First, I wanted to finish the pants in the crotch, because the instructions tell you to leave an opening at the intersection of the inseams by default. I found this weird (I didn't want to flash anyone during the post-lesson stretches), but my teacher later informed me that the pantaloons have a large opening for a practical purpose: to make bathroom breaks for performers covered in yards and yards of cloth much quicker. That said, the pattern does offer the suggestion of adding a gusset to close the gap. I made a diamond shaped gusset without much fuss or precision, and it worked great.
An additional modification that I made was to make the legs a more practical length. For stage, the pantaloons are supposed to brush the floor. This effect is definitely lovely, but it also is not suitable for daily wear. I decided to just cut down the legs and cuff them at about ankle height.
Even made out of a quilting cotton, these pants are surprisingly comfortable - I even wear them to work. They're roomy, free of any zippers or buttons to pinch, and cute on top of it all. When showing them off to my friend, I (dramatically) told her that I wanted to be buried in these pants. Not only are they practical for dance lessons, but they're a fantastic choice for pajamas or loungewear. I could also see them looking totally chic in a more upscale fabric, too.
I highly suggest you make a pair! What do you think? Would you wear these out and about?


by Victoria Watkins
The 251 Varsity Jacket pattern is fun, iconic, and currently very on trend. In order to help you figure out how to style your jacket, here's a collection of fabric suggestions I thought of that would be perfect for this jacket, whether you are wanting a traditional look or something modern. This jacket is great because it doesn't take a huge amount of fabric - and the pattern pieces are not large. Molly made the jacket above with scraps of left over cashmere (and silk for lining) scraps. Keep note that when you are looking at the yardage chart, we have the yardage for the sleeves and body separate in case you want to make the sleeves from different fabric than the body. This is traditionally in case you want to make the sleeves from leather (and body from wool), but you could also use different color combos of the same type fabric, or just make it all from the same fabric.
Keep an eye out for a second blog with lining and notion suggestions!

The 251 Varsity Jacket is perfect for fall and winter weather, and my immediate thought is to make it out of wool. Our Italian Wool in Camel is a terrific base fabric to sew this jacket with. This lux wool would be warm, and lined with a silk charmeuse would be so very nice!
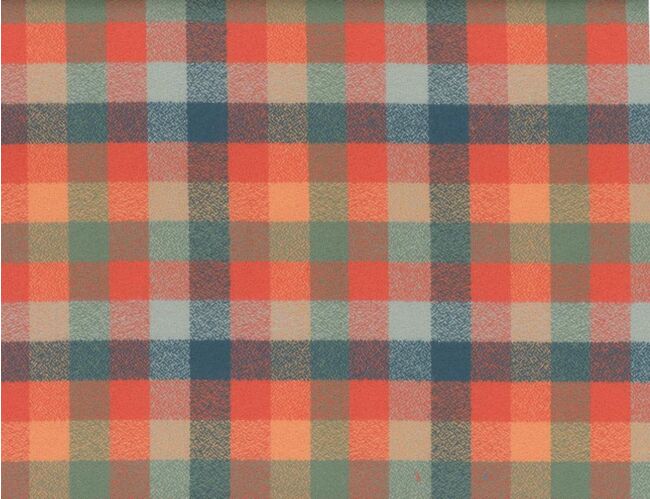
I personally love to sew Autumn and Winter projects in flannel. This cotton flannel from Hart's combines fashion with practicality for chillier weather. You could also work the pattern to have the checks in different directions for different pattern pieces.

Floral brocade bomber-style jackets are quite in fashion at the moment, and the varsity jacket is perfect as a base to build your stylish take on the trend. This gorgeous brocade from Mood Fabrics is just one of many endless options for a modern twist on the jacket. Again, use a silk charmeuse for the lining and you will have an amazing jacket!


The 217 Poet's Shirt is a popular pattern for making historic clothing or costumes - for Ren Faire outfits, pirate clothes, or early Victorian dress. It is also a beautifully romantic shirt you can wear everyday with leggings, jeans, slacks, or a skirt. Great on men and women!
We've just released this pattern again as a paper pattern, and updated the PDF pattern. We did not increase the original sizing (to save you paper and money) because all the pieces are rectangles (as traditionally clothes were constructed), and it is very easy to size up. This blog will show you how to size this shirt up, as well as how to sew the tricky bits of the shirt (hello, gussets).

Sizing the Poet's Shirt Up
First, cut out all the pieces you need in the largest size. My model for this shirt is about one size larger than the largest size in this pattern, so I am showing that size increase, but you can keep expanding this pattern in the same way to go up many sizes.
You can see the sizing chart here. But, the finished measurements at the waist and chest for the shirt are as follows (don't forget the underarm gusset adds a little extra room at the chest, but is not accounted for below):
Women's Small: 44"
Women's Medium/Men's Small: 46"
Women's Large/Men's Medium: 50"
Men's Large: 54"
The pattern is made with 10"-12" of ease at the chest/bust, so keep that in mind when deciding which size you want to make, or if and how you want to make it larger.
I wanted to add a total of 2" (5cm) total to the width of the largest size of this pattern - to have a finished measurement of 56" at the chest/waist.
Here are the front and back pieces. They are taped together at the shoulder and cut as one long piece. Note that this pattern does not work well with fabrics with nap or one way designs.


Matching shoulder lines. Tape the pattern together here, overlapping the pattern pieces so shoulder lines match.
To increase the width of the pattern, I added a strip of paper to the outside edge (side seam) of the front and back pieces. I added 1/2" paper strip to give an extra 2" (total of 1" on front + 1" on back). If you want to increase the total circumference of the pattern by 4", you would add 1" to the front/back side seam. If you want to add 8", you would add 2" to the front/back side seam, etc.
 I added a strip of paper to increase the width of the front/back by 1/2" (13mm) at the side seam.
 You can see how long the front/back piece is taped together at the shoulder seam. This is ready to cut on the fold to get a full front/back with the extra width at the side seams.
You will also need to add the same amount you added to the side seam to the shoulder reinforcement piece. In this case, I also added 1/2" (13mm) to the shoulder reinforcement piece at the side seam.

You can also make the sleeve wider if you like. The sleeve is very billowy, so I did not add anything to it. The sleeve finishes at about 21-1/2" wide for the largest size and I felt that was plenty of room. If you want to make the sleeve wider, just add half the amount you want to make it wider by to the outside edge of the sleeve pattern piece. You will also need to change the markings on the front/back pattern piece to reflect where to add the gusset. For instance, if you increase the width of the sleeve by 1/2" (for a total of 1" (2.5cm) added to the sleeve width), you will also need to lower the gusset markings on the pattern by 1/2" on the front/back pattern pieces, as I've shown below. If you aren't increasing the size of the sleeve, you don't need to do this.

If you aren't increasing the width of the sleeve, you can just transfer the markings on the pattern for the largest size over to the edge of your fabric when you cut it out.

Finally, if you want to add length to this pattern, you can add whatever length you want at the lengthen/shorten lines on the front and back pattern pieces (and to the sleeve). You will need to slash at the lengthen/shorten line and tape paper to the pattern to make it the length you want. Be sure to add the same amount to the front and the back pieces.
Sewing the Tricky Bits
Neck Gusset: The first tricky bit of this pattern is the neck gusset. This is not typically how most shirt today are constructed, but when fabric was more dear (because it was hand woven, etc.), making lots of curved pattern pieces was wasteful. So, the neck of this pattern is cut directly from the front/back rectangles and a clever little neck gusset gives shape and room to the neck/collar area.
First, be sure to transfer all the markings to the fabric on both sides of the front and back. I use Crayola ultra washable fine tipped markers to mark my fabric. I also used a handkerchief linen, so it was easy to see marks from the front and back of my fabric. You can transfer marks to both sides if needed. Transfer paper and a tracing wheel are great for this too.
The next step is to sew your neck reinforcement pieces to the inside of the front/back, lining them up with the side notches and stars on the neck area. You can see the shoulder reinforcements below, through the fabric. Please excuse my semi-messy pattern markings.

You need to reinforce the side slits by stay stitching (use a short stitch length) around the slit (follow the stitching lines). Stitch right to the box, pivot, and go back up the other side.

Then you cut the neck slit from box to box. Don't cut the front slit yet.

Now take that little neck gusset, press it once with wrong sides together on a diagonal. Then, with right sides together, match one square on the neck gusset with the square on the neck slit, and the star on the neck gusset with the star at the neck slit - as below. Pin.


Then stitch on the inside of the shirt from the square to the star. Stitch on the inside so that you follow the stitching line (the stay stitch line you've already stitched) and you won't accidently not stitch these two pieces together. The gusset will hang over the edge of the neck slit near the square. That is fine and normal.
 On the outside of the shirt, you can see to stitch from the square to the star.
 On the inside of the shirt, you can see that the gusset overhangs the neck slit. Stitch from inside the shirt so that you don't miss stitching the neck to the gusset.
Now, open the neck slit up a bit, and you will pivot the gusset at the square, rotating it around so that the other star meets the other star on the neck slit. Pin the gusset to the other side of the neck slit and sew from the star to the square on the inside of the shirt.

 Align the star on the gusset with the star on the neck. Then manipulate the fabric by the square to even out.
 Pin the gusset to the neck slit at the star and square.

Again, stitch on the inside of the shirt, along the stay stitching line.
Now, fold and press the remaining 1/4" (6mm) seam allowance on the neck gusset to the inside. Then, fold the neck gusset along the foldline so that it covers the stitching. Whipstitch the neck gusset to the shoulder reinforcement, just covering the seamline.
 Remaining 1/4" (6mm) seam allowances are folded in on the neck gusset.

Neck gusset folded to the inside. Now I just whip stitched this in place.
Front Facing: There are two front facings. If you are using a one-sided print, you should use the wide facing, as the wide facing is not seen from the outside. If you are using fabric where the right side and wrong side of the fabric are the same, the narrow facing is better (less bulky). I used the narrow facing.

First, press under seam allowances. Then, pin the right side of the facing to the wrong side of the shirt, matching squares and dots and slit lines. Stitch along the stitching line, narrowing to and pivoting at the square, keeping a 1/4" (6mm) seamline for most of the length. Cut down through the slash line to the box, through all layers of fabric. Then turn the facing to the right side of the shirt and press the folded seam allowance over the stitching lines. You can top stitch the facing down from the front, or slip stitch it to the front.
 Press under 1/4" (6mm) seam allowance on facing.
 Front facing stitched, slashed, and turned to the front of the shirt. Now it can be pressed and topstitched down.
Underarm Gusset
Underarm gussets are rarely used in modern shirt patterns, but they are often used in old, or traditional, shirts. This is because curved armholes and sleeves were not used until fairly recently. Usually all shirt pieces were cut as rectangles (or square) due to the fact that it was less wasteful to use these geometric shapes when using precious handmade (or expensive) cloth. Hence the gusset, a square-shaped piece of fabric that allows more movement in the arm that does not have any curves.
Gussets are really very simple. Just make sure you line up everything well and only stitch to the markings, trying not to catch any other seams in your sewing. I also think it's a good idea to plan how you will finish your seams. Gussets require a little bit more thought, though many seam finishes will work. I finished my seams here with a zig-zag stitch after they were complete, but it would probably be even better to finish the seams before starting to sew everything together (make sure you don't loose any markings when you do this). What you do depends on the fabric you are using (and what you want to do!).
First, line up one gusset with the sleeve, matching the stars and dots. Stitch just between the star and dot.


Now, take match the other star on the gusset to the star on the other side of the sleeve and the dot (where gusset and sleeve are already sewn together) to the dot on the other side of the sleeve. Sew just between this star and the dot - don't catch the other seam in the stitching. This is where the stitching can get tricky (and why some people prefer to sew this shirt by hand). But, you can slow down your stitching and even just move the needle wheel by hand for the last few stitching to make sure you don't cross into the other seam line.


Next, pin and stitch the sleeve together from the dot at the bottom of the gusset to the square (below the square is made into a seamed placket for the cuff). Again, make sure to not catch any of the other gusset seams in your stitching.


Our 251 Varsity Jacket pattern traditionally closes with snaps. You need to have fairly heavy duty snaps to use in this pattern. If using snaps as closures, you will need snaps and fasteners such as these (from Wawak).
However, I was inspired by a bomber jacket I saw on Black-ish a few years ago and have been thinking of ever since. You can see the jacket here. But, honestly there were so many good varsity/bomber jackets on that show (it was a great one for fashion) - there's one here (Black-ish Bomber Jacket) and here (Black-ish Pink Bomber Jacket and here (Black-ish Varsity Jacket), for inspiration. And, I also really like many of the bomber jackets I've seen lately made from silk and florals. But nearly all of these jackets close with zippers rather than snaps. So I decided to add a zipper to this jacket rather than snaps. It is quite easy to do, so I'll show how I did this.
I constructed the jacket exactly how the pattern describes until the end. I used a poly brocade fabric and lined it with black silk. I also used athletic trim from Pacific Trimming. Then, instead of inserting the snaps in the jacket after it is all constructed, I used a 22" separating zipper. I chose one with metal coils and coordinating color, but you can pick just about anything you want it to be.
I simply pinned and sewed the zipper on one side of the jacket, with the zipper side to the inside of the jacket. I used a zipper foot to sew close to the edge of the zipper. Since this jacket calls for topstitching (which is optional), it makes sense to do this and have the topstitching as a reinforcement for the zipper. I did not add any additional topstitching since I did not think it would look any better.


by Cynthia Anderson
In this blog I will demonstrate how to make a bust adjustment for View C of 222 Vintage Vests pattern. While the Folkwear 222 Vintage Vests pattern offers three different style versions, View C has a double-breasted front closure and four darts that create a snug fit at the bust. The focus of this blog is to show how to create a custom fit by adjusting the position of the front bust darts, using a test muslin. There are instructions in the pattern on how to do this, but I also thought it would be helpful to see someone else do it and show you how .
To get started, determine your approximate vest size using the Sizing Chart included in the 222 Vintage Vests pattern. Find the bust measurement on the sizing chart that corresponds with your bust measurement. I made a size medium, which is for measurements 36"(91cm) to 38"(97cm) at the bust.
Make a Test Muslin
I made a test muslin of the vest pattern (view C) according to the pattern instructions, but I only used the pattern pieces needed to determine fit and for making the bust adjustments. I cut out the Front, Side Back, and Back. The collar and lining are not needed for this exercise.
Make the vest muslin for your size according to the instructions. Fold darts along the Fold Lines, with right sides together, and baste along the dart stitching lines. Using a basting stitch makes it easier to remove the stitching when adjusting. Press the darts lightly.
Note: Wear the muslin wrong side out and make the dart adjustment markings on the wrong side, and to make it easier to make adjustments.
Ensure a Good Fit
Try on the muslin (inside out) and match and pin the center front of the vest to hold it closed. The vest will fit more accurately if you include any undergarments and garments you intend to wear under the vest. For instance, don't make adjustments over a t-shirt, if you plan on wearing a peasant shirt underneath the vest. For the purposes of this demonstration I have not used undergarments or a shirt on my dress form.
Ideally, you want to make the adjustments while wearing the muslin yourself with the help of a sewing buddy to do the pinning. For this demonstration, I used a dress form made to my size.

Determine the Bust Point
For the most flattering fit, darts should end about 1/2" (13mm) below your bust point. With the vest on, determine the widest, or fullest, part of your bust. This is the Bust Point or Bust Apex. Often nipple position is mistaken for the bust point, but this does not always ensure the best fit. Wear a bra to help finding the bust point easier.
Stand up straight and view your profile while looking in a mirror. Stretch a length of ribbon or string horizontally across the fullest part of the bust and secure with a pin to hold.


I have used a blue dot sticker to mark the bust point on the ribbon, to make it easier to see.

I inserted a pin into the center of the dot and transferred this point using a pen/pencil on the vest muslin.

Adjust the Dart Placement
The original darts may fall to the left or to the right of your newly marked bust point. To adjust the darts to align with your bust points, take off the vest and remove the original dart stitching and press the muslin flat. Redraw (on the wrong side) the new Dart Fold Lines so that the new dart points fall 1/2" (13mm) on either side of and below the bust point.
Follow the series of illustrations and instructions below for a step by step explanation.
Use the illustrations below as a guide to make the bust adjustment on the wrong side of your test muslin. The illustration below shows the new bust point, the original flat darts, and center front line. The circle around the bust point shows the 1/2" (13mm) space needed below the bust point.

Mark the center between the original darts at the bottom edge of the vest. Draw a line (dashed here) connecting the line 1/2" (13mm) below the bust point and the center between the two darts.

Draw a small horizontal line 1/2" (13mm) below the bust point, and measure 1/2" (13mm) on either side of the new vertical bust point line. Mark where these lines intersect to create the new dart points.

Draw in the new Dart Fold Lines. The new Dart Fold Lines should begin at the same point on the bottom edge of the vest as the original dart fold line markings. They will connected to the new dart points. Re-draw in the new Dart Stitching Lines with chalk or erasable marker. The Dart Stitching Lines should also start at the same place as the original lines. Keep the darts equally spaced on either side of the bust point center line.

Connect the the original bottom dart edges to the new dart points to create the new dart stitching lines.

Baste the new darts and try the vest muslin on, right side out and evaluate the fit. The darts should not extend beyond the 1/2' (13mm) line under the bust point.
Once you are satisfied with the bust adjustment fit transfer the re-drawn darts to your pattern for future reference. Also re-draw in the new darts on both sides of the front and on the lining pieces. You may also need to even off the bottom edge of the front pieces.
Look closely below to compare original darts lines and the new stitched darts.


Even a slight adjustment can make a noticeable difference in the look and feel of how a garment fits. My bust adjustment changed only slightly, but the result is obvious both visually and in the way the fit feels when worn. Making a muslin is a great way to try out new skills, and test for fit, enabling you to make your final project with confidence.

Making a bust adjustment for View C of the Folkwear 222 Vintage Vests is not hard and it is a skill you can apply to other projects with darts. You only have to learn a few easy steps to create a custom bust fit for this charming vest.
Check-out the blogs Vintage Vests Inspiration, Add a Folkwear 222 Vintage Vest to Your Wardrobe, and Make a 222 Vintage Vest for Fall to see how fun and easy it is to make a vest. Fall is here and the 222 Vintage Vests Paper Pattern is a great pattern for layering! Find the PDF pattern here. Make one or all the styles offered in the pattern to add new life to your fall and winter wardrobe.

by Cynthia Anderson
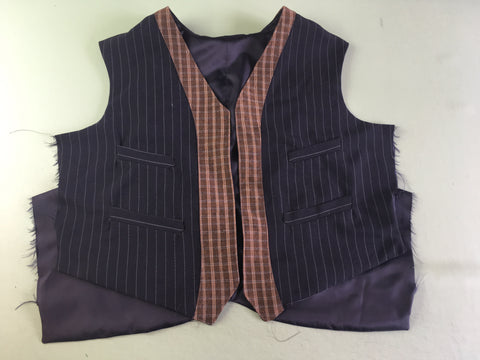
In this blog I am going to show you how I made View A of the 222 Vintage Vests pattern, adding a contrasting facing for a custom look. See Add a 222 Vintage Vest to Your Fall Wardrobe and Vintage Vest Inspiration for more ideas to get you started in making your own vest.
I used a light-weight dark navy wool suiting with a white pin-stripe for the vest front pieces, the inside facings, and the back belt. For the contrasting front facing I used a similar weight wool plaid. For the back, lining, and the pocket I used a dark navy acetate lining.
Feel free to make the back of the vest out of the same material as the front of the vest if you like. The belt is optional too. This pattern shows you how to easily line every vest. And I do recommend keeping the linking, for not only a clean interior finish, but because a lining makes wearing a vest truly luxurious. Vests are a great use of small amounts of fabric that can be used in any number of ways.
If welt pockets are new to you or you need a refresher, make a muslin. Practice transferring the pocket opening, adding the welts, and the pocket bag on a tightly woven scrap of fabric. Use a scrap of lining to make the pocket bag, so you will get a feel for what it is like to work with a slippery fabric.
Vest Front Construction
Welt Pockets
First, I transfered the pocket markings (welt pocket opening) to the right side of the vest. For dark fabrics a fine chalk pencil works well. Use a water soluble pen or black chalk pencil for light colored fabrics.
My favorite way of transfering markings like this is while the pattern piece is still attached to the fabric. Insert pins into the corners of the pocket opening, with the pin sticking through the fabric. Then, mark the corners of the pocket opening before completely removing the pattern from the fabric. Connect the dots using a ruler. I did not transferbthe stars and dots to the fabric to keep my work tidy. But I kept the pattern handy to use as a reference. I made all four of the pockets for View A, but feel free to make as many as you like, or none at all. Or add a patch pocket!


I added fusible interfacing over the pocket areas on the wrong side of the vest to reinforce the fabric. You could use sewn-on interfacing if the fabric is heavy enough to allow for invisible stitching on the right side of the fabric.

I traced the all pocket openings with a machine basting stitch to provide a guide for aligning the welt tabs and for cutting the pocket open later on. I stitched over the center slash line as well. This extra bit of stitching keeps the stitching visible on each side of the fabric long after the chalk has worn away.


Add the Optional Facing
To add a contrasting facing to the out side of the vest, I used the same facing pattern piece intended for the inside facing of the vest. Treat the facing as a trim or applique and stitch it to the outside of each vest front. It is actually easier to add the facing while the fabric is still flat and before the welt pockets are added.
I cut the plaids so that they matched at the center front. To help ensure the plaids match, I cut each facing piece separately, paying attention to where the pattern piece match/align to the plaid for each side. Once one side of the facing is cut, I flipped the pattern for the opposite side facing. If you don't have to worry about pattern matching, then feel free to cut both pieces at once.
I made a machine baste-stitch on the 1/2" (13mm) seam line on the un-notched edge of each of the facings pieces. Use the basting stitch as a guide I turned under a clean smooth edge and press the edge.


I pinned and stitched the the wrong side of the facing to the right side of vest on the center front edge, matching notch 5. I made the stitching just inside the 1/2"(13mm) seam allowance.

Then, I top-stitched the opposite un-notched edge close to the turned under edge to hold the facing in place and to create a clean finished edge.

Now I could treat the vest front as one piece of fabric and continue the construction.

Make the Welt Tabs
Now, let's get back to the welt pockets. I added interfacing to the wrong side of half the pocket welts for each welt C and D tabs.
If using fusible interfacing, pre-trim the interfacing as seen below before ironing to the fabric.
If using sewn-in interfacing, machine-baste along the seam lines. Then sew invisibly (by hand) along the horizontal Center Fold Lines. Trim the interfacing close to the basting stitches. The stitched interfacing has the benefit of making it easy to see which is the wrong side of the tab.
Note: I am using fusible interfacing because my fabric is a light-weight wool suiting.

With the right sides of the welt tabs together, I folded the welt along the Center Fold Line and stitched the short ends together, using the 1/4" (6mm) seam allowance.

I trimmed the corners, turn right side out, and press.

Then, I machine-basted the remaining long edges together using the 1/4" (6mm) seam allowance.

Add the Welts and the Pocket Bag to the Pocket Opening
I basted the interfaced side of the welt tabs to the right side of the vest, along the lower welt seam lines. The folded edge is positioned facing downward. The long raw edge of the welt meets at about the slash line.

I transferred the pocket opening lines to the pocket bags as indicated on the pattern. With right sides together, I pinned the pockets to the right side of the front (on top of the welt tab), matching the dots and stars as marked on the pattern. I stitched along the pocket opening seam lines, pivoting at the small dots and stars. I had to be careful not to catch the welt tabs in the short sides of the rectangles.


I then carefully slashed through the Pocket and Front along the slash line between the seams lines, clipping diagonally to the small dots and stars.

Next, I turned each pocket half to the inside of the vest, and pressed both of the pocket halves down on the horizontal Center Fold Line.
I pressed the welt tab up on the outside (right side) of the vest. And, I pinned and stitched the remaining raw edges of the pocket bag, right sides together to close up the pocket. I removed any basting stitching if it was visible.

On the outside (right side) of the vest, I hand whip-stitch (or machine-stitch) along both short ends to secure the welt tab. I also added a few extra stitches to the top of each corner to reinforce.

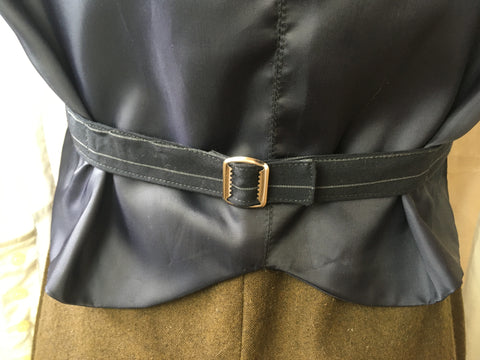
Back Belt
The patterns calls for the belt to be made out of lining fabric. The belt is best made out of a light weight material to not only cut down on bulk against the wearer's back, but a lighter fabric also makes adding the belt-buckle hardware easier and less bulky. Vests typically have belts made of lining material, but I decided to use the same light-weight wool suiting the front of the vest is made from.
If using a lighter-weight fabric like lining fabric, add fusible interfacing approximately the same weight as the belt fabric for more durability.
You could also replace the belt buckle with a button/buttonhole or create a faux buttonhole look by using a snap with a button stitched over the top of the snap.
With right sides together, I stitched the belts on three sides, leaving the notched edge open.


With right sides together, I then pinned and stitched the center back vest seam, making sure to keep the belt pieces from getting caught in the stitching.

I repeated this for the back lining as well.
In the photo below, the vest back is in the foreground and the back lining is in the background. Both backs are viewed wrong sides facing up.

Attach the Front and Back of the Vest
With right sides together, I stitched the center back neck band seam of the Vest Fronts.

The photo below shows the shoulder seam snipped on right side of vest.


Then, with right sides together, I pinned and stitched the shoulder/back neck band with right sides of the front and back together, pivoting at the dot and matching the center back seams. I failed to take a photo of this step, but it is also pretty straighforward.
Attaching the Lining
I stitched the shoulder seams of the lining right sides together, matching the dots - and pressed them open.

Instead of cutting my Lining Facing out of the lining material, I used the pin-stripe wool suiting. Typically, the interior facings are made from the lining fabric. But, I continued to use the main outer fabric on the inside. I like the the way the facing looks and feels on the interior of the vest, especially when worn unbuttoned. Of course, this is totally up to you. I cut both the lower front and front facings out of the pin-stripe wool suiting.
Because of the extra layer of facing fabric added on the outside front of the vest, I eliminated using the interfacing the pattern recommends. The three layers of wool suiting are sufficient enough to support the use of buttonholes and buttons. But if you are not adding an extra layer of interfacing, or you are using lightweight lining fabric, you might want to use the interfacing.

With right sides together, I pinned and stitched the lower front facing to the front lining, and pressed the seams open.

I then pinned and stitched the center back seam of the front facing, right sides together (and pressed seams open).

With right sides together, I also pinned and stitched the front facing to the lining, clipping along the curves, and matching the Center Back seams. The seam is pressed towards the facing.

I added stitching close to the edge of the facing to create strength and add a nice finish.


With right sides together, I pinned the lining to the outer vest, matching the Center Back seams and notches.

Then, I stitched along the outer front opening edges, pivoting at the corners and stopping at the boxes that mark the top of the side slits/vents.

I then pinned and stitched around the armholes. I clipped the seam allowances to release the fabric in the curves. And I stitched the back bottom edges as well.
I stitched all the vest edges, except the side seams. The side seam openings need to be left open for turning the vest right-side out.
It helps to clip and trim all the seam allowances (except for the side seams) to make it easier to turn the vest neatly right sides out.

I turned the vest right side out by pulling the fronts though the shoulders and then pull both fronts out one side opening of the back.
I pressed the turned edges, slightly rolling them to the inside of the vest, so the lining was not visible from the right side.
Finish the Side Seams
I started with the vest front and back outer side seams first. With right sides together, I pinned and machine stitched the vest front to the vest back at the sides seams, beginning at the boxes (at bottom side slit/vent opening) and ending the stitching 2" (5mm) past the armhole seam.

Next, I closed the lining side seams. I turned under the remaining lining seam allowances to the inside of the vest and pressed along the stitch line to create a clean edge. I worked with the right side of the side seam lining facing out, and pinned the front and back side seam lining together, matching the turned under edges and hand slip-stitched together. I made sure not to catch the side seam for the outer vest in the stitching. Because the previous machine stitching extended 2" (5mm) beyond the armhole, the amount of hand stitching is not very much.


The vest is lined!

Buttonholes & Buttons
I made the buttonholes by machine on the front as marked on the pattern, 1/4" (6mm) from the finished edge. I used 1/2" (13mm) buttons. You could also make the buttonholes by hand or change up the size and number of the buttons used. Generally, men's buttonholes should be made on the left front, women's on the right. Then I sewed on the buttons to properly align with the buttonholes.


Due to the outer facing, I preferred the way the front of the vest looks with my buttonholes on the left front side, so am breaking the "rules".
If you are new to buttonhole/button making or need a refresher, see the blogs Buttonhole 101: Part One and Buttonhole 101: Part Two.
Add the Buckle As a Final Touch
Buckle designs may vary, so have a look at the instructions for how to add them to the belt. For the buckle I used, one end of the belt is attached to the center post of the buckle, by wrapping the belt end around the center post approximately 1/2" (13mm) and stitching on the back side to hold. I chose to hand-stitch the edge, but machine stitching would work too.


Vests are not only functional and versatile, but they are an fun way to spruce up any wardrobe. Plus, vests are a perfect fall project to practice tailoring construction techniques and skills in preparation for making a new coat or jacket. Have a look at all the Folkwear coat and jacket patterns and enjoy making a special piece for yourself or someone else. Don't forget to add a vest for extra warmth and style to whatever you make!


I love this vest and even wore it today with a coordinating grey skirt and a white buttoned shirt underneath. Perfect fall layering for the cool weather we are starting to get.


by Cynthia Anderson
Make a vest for Fall and add a bit of stylish flair to just about any outfit in your wardrobe with the 222 Vintage Vest pattern. Transform the look of jeans, skirts of any length, pants, and even dresses/tunics with a new vest. Whether worn buttoned-up or open, vests are the perfect piece to elevate a simple tee, henley, flannel shirt, crisp white blouse, or sweater. Make a vest for everyday, for a coordinated outfit, or even as a formal piece. Once you add a vest to your wardrobe it won't take long to discover what a versatile, interchangeable, comfy, and fun this piece is to make and wear. Check out these amazing creations from some of our customers.
Vests are a perfect addition to any wardrobe, especially when the temperatures drop, but when it's still not cold enough for a sweater, jacket, or coat. Then once winter truly arrives, vests create an extra layer of warmth, without adding more bulk. It is easy to spruce up your fall/winter wardrobe, with the 222 Vintage Vests pattern. The pattern is available as pdf too. Make this stylish garment for Fall and enjoy wearing throughout the cold months ahead. If you want to wear heavier layers under your vest, you might want to go up a size. Consider making vest for the first chilly days of spring as well! Or even in linen or lightweight cotton for a special summer outfit.
 View A

View B

View C
This blog post will go through the pattern details, cover fabric selection, and go over all materials needed to make a vest from this pattern. In the next blog post, I'll show you how I made my own 222 Vintage Vest.
The 222 Vintage Vest Pattern
Our 222 Vintage Vest pattern offers three Victorian Vests for women and two for men. View C is a closely fitted women's vest. All three are fully lined. The backs are cut from the lining fabric for comfort and to reduce bulk. However, you can also make the back from the main fabric as well, especially if you plan to wear the vest on it's own and not covered by a jacket or coat.
View A is a simple, collarless V-neck vest with four welt pockets and adjustable back waist belt. The center front is pointed at the bottom and raises to hip length at the side seams and back.

View B is bias-cut for a decorative fabric treatment, features a shawl collar, and ends above the hipbone with a shallow point in front. Like View A, a back waist belt adjusts to fit. This view is perfect for using a different fabric for the collar, such as velvet. You could also use a patterned or striped fabric for an interesting look with the bias cut.

View C, sized for woman only, is shorter, extending just to the waist. Four front darts fit the vest snugly to the bust. A small notched collar plunges into the double-breasted front, which closes with two rows of buttons.

The pattern also includes a traditional Bow Tie for adding the perfect finishing touch to a collared blouse or shirt. You could also add a scarf, necktie, bandanna, or make a cravat using Folkwear's free pattern.

Vests are a great project for practicing tailoring techniques, such as making welt pockets, topstitching, edge stitching, adding linings, and making buttonholes.
Fabric Selection
One of the beauties of vests is that they make up beautifully with a relative small amount of fabric. Just about any woven fabric will work and it is fun to combine fabrics using different, patterns, textures, prints, stripes, or plaids. Dig through your stash to utilize what you may already have and find a pairing of fabrics you know you already love.
The outer layer of all the vest views work best in a medium to heavy weight fabrics made of cotton, silk, wool (tweeds), linen, velvet, corduroy, canvas, pique, or synthetic suede. The bias cut of View B is especially suitable for stripes or plaids.
For all the views, use a lining made of light to medium weight lining fabric such as; (Bemberg is a good quality brand), cotton, rayon, silk (haboti), synthetics, or blends.
Hint: Feel free to make the outer front and back of the vest out of the same fabric and make the lining with a light weight fabric.
Note: When using a directional design or plaids, you may need more fabric yardage to match plaids. See how Molly matched the plaids of her vest in the blog, Vintage Vest Inspiration.
Materials Needed
To make a vest, you will need:
Feel free to change the size of the buttons you use depending on preference. But remember, if the button is sized up or down very much adjustments need to be made so the vest will fit correctly. See the blogs Buttonhole 101: Part One and Buttonhole 101: Part Two for what you need to know.
Also, the back belt and buckle can be optional. If you prefer a vest that is looser or that will be an outdoor vest, you do not need to use the belt pattern pieces or need to purchase a belt buckle.
Don't Forget the Bow Tie
For all sizes of the Bow Tie you will need 1/4 yard (23cm) of light to medium weight fabric (all widths) and the same amount of interfacing (optional).
Join me in the next sew-along blog and see how I combine different wool fabrics to make a classic everyday vest with a simple to add twist. I will show you how I make the View A of this pattern, by simply turning the facing to the outside.

Our 222 Vintage Vest pattern is a fabulous base for so many creations. It can be used to make a very current, everyday vest or a historic costume, a formal garment or an informal work garment. It can be made for men or for women. It can be made with a variety of fabrics, from wool to silk to brocades to simple cotton. And we up-sized this pattern so it now comes in sizes XS-3XL (for men and women) - and it's also available as a PDF pattern!
For a little inspiration, I am going to show you a couple of the vests that we have made for ourselves as well as vests that customers have made with this pattern. Lots of beautiful makes!

I'll start with this vest I made my late husband. This is View A from the pattern, a collarless buttoned vest with front points. The pattern calls for welt pockets, but I wanted to make a more informal, everyday-type vest. So I just added patch pockets to the front. I also lined this vest with a raw silk and used the same brown wool on the back as on the front (rather than reduce bulk with a lining fabric for the back).
 I also made a vest for myself - View A from a small piece of wool my mother brought back from England for me many years ago. I did put in the welt pockets here and they go well with the pattern. I would increase the length of the pattern for myself next time I make it, but I really like this warm layer. By the way, the jacket I'm holding is our 251 Varsity Jacket made with a woven cashmere. Both the 222 Vintage Vest pattern and 251 Varsity Jacket are made with surprisingly little fabric.
 This is a customer's version of View B of the pattern. Made with a pretty lining and with a skirt to make a whole suit.


This is @dandy.laboratory who made an gorgeous suit with our View C of this pattern. They also made pants to go with it (nice job on fitting them!). And we get to see the back as well - a beautiful habotai lining!
 Another View A vest made for a wedding by @cheval_stitching. She made it with a Robert Kaufman flannel. Looks great, and probably feels amazing (and warm!).
 This fun and gorgeous vest is View C made by @the_art_of_karro. She made it for a New Year's Eve - and it fits the theme of dazzling! She used fewer and larger buttons that the pattern calls for, which makes it looks amazing.
 Another View A with welt pockets for a more formal look. This vest was made as a Christmas present for her husband by @susanbeetonobrien.
 I absolutely adore this View C version that @republica_unicornia_yarns made. The Anne of Green Gables vibes are very strong. She also used our 209 Walking Skirt Pattern and 205 Gibson Girl Blouse pattern for this look. We love it!

 A stunning vest (View C) made by a customer of @TreadleYardGoods. She also made the blouse from our 123 Austrian Dirndl. A great combination - so pretty!
 This Steampunk version (View C) is really amazing! I love the contrasting collar. Made by @mellodytamm
 I love this fun and beautiful version (View C) by @scificheergirl. Such a great outfit! And I like how she used the directions on the plaid.
 Finally, this incredible version (View B) made by @periodwardrobe for @crowseyeproductions of their getting dressed series based on Queen Victoria and Prince Albert. Pauline does an amazing job with historic costumes and I feel honored she uses Folkwear patterns as a base for some of her creations.
.........
I hope you have found some inspiration here for making your own 222 Vintage Vest. It really is the perfect pattern for adding a layer of warmth, elegance, or ruggedness to any outfit!

by Cynthia Anderson
We are not done yet. This bat-themed costume still has a few more details that I can not wait to show you how to make. For the cloak (from our 208 Kinsale Cloak for Young Folks) go here for how I made it, and for the hat, visit this blog post to learn how to make your own!
The accessories I will be making in this blog can be adapted for all kinds of costume ideas. The wand can be for witches or wizards, fairies, or magicians. Bat hair pins can be a fun thing to wear to school on their own for a Halloween theme or add them to a costume. The neck ruff is perfect for any kind of magical or historical costume. Feel free to let these simple to make projects inspire you to make your own version. Each of the projects in this blog are perfect for little helping-hands (minus the hot glue). Include a child in making a costume or have a Halloween Costume Making Party!

The Wand
All you need to make a wand is a wooden dowel or a stick, some ribbon, and a cut out shape for the tip. Because I wanted to add a touch more color to my costume, I decided to wrap the length of the wand in seam binding dyed orange, with Ritz dye. The wand wrap you see below was made with two slightly different shades of orange seam binding. I chose seam binding because it is thin and wraps around a small dowel width without puckering.
Attach the ribbon or seam binding, to the top end of the dowel with a dab of hot glue. Begin wrapping/twisting the ribbon or seam binding down the length of the dowel, keeping the ribbons laying even and flat. Once you are satisfied with the wrap, add a touch of hot glue to hold the ribbon at the bottom of the dowel.

The star on the tip of the wand, is made from unbleached muslin with interfacing sandwiched between, stitched on the machine, and then cut out. Leave a hole in the stitching large enough to insert the dowel. In the photo below you can see the dowel inserted into the point of the star. Use a touch of hot glue to hold the dowel and the inside of the star together.
Consider adding a bow and streamers at the base of the star for a really fancy wand (perfect for a fairy wand).

Hair Pins
To add another layer of detail to the costume (or to add a little Halloween theme to an every day outfit), make hairpins. Decorate hair pins with any shape you like. Hair pins work for long and short hair, but be sure they can be seen if wearing a hat.
Depending on the type of hair, the weight of the finished pin should be considered. The decorative shape could be made of paper for a truly light-weight version. When it comes to hair pin hardware, try to find the "pinch-open" hair pins/clips. They are easier to apply and remove from hair. I used regular bobby pins, because I had them on hand and my model has lovely heavy hair that can support a bit of extra weight.
For easy assembly, slip the pin over the edge of a piece of cardboard to help stabilize the pin while you work. Apply a dot or two of glue to the center of the pin. Then center or position the bat or other shape how you like.
Don't add too much glue, just a dab will do. You can always go back and add a bit more.
Tip: Hot glue or Super Glue works well when using metal. Regular white glue does not hold as well. Be sure that all glue used has set or dried before adding to hair.


Quickly remove the bat pin from the cardboard and separate the pin opening with your fingers. This will ensure the pin does not glue shut. Hold the pin open with your fingers for a few seconds until the hot glue cools and sets.


Make lots of bats in different sizes for a dramatic look.


The Ruff
Gathered ruffs are perfect for a simple but dramatic neck detail. They are easy to make and ideal for using scraps of fabric, ribbon and trims of all kinds. Just be sure there is enough width and length for the desired effect. Light-weight fabrics typically work best, because of the tight gathering. The amount of fabric needed depends on the circumference of the neck measurement, the desired fullness of the gathers, and the width of the ruff.
Because I tried to limit and make the most of the fabrics used in this project, I made the ruff out of the muslin I lined the cape with. Use whatever you have on hand or when planning, reserve enough yardage to make a ruff.
I started with a length of muslin measuring 4.5" (11cm) wide by 45"(114cm) long. I left the edges raw, but you could finish them with a rolled hem, serged edge, zig-zag edge, turned hem, or bound hem, depending on the material and look you want.

Make a row of gathering stitches on either side of the center of the length.


Pull the bottom gathering thread, being careful not to break the thread. Make the gather as tight or lose as preferred and will fit around the neck.

Once you are satisfied with the gather and final length, tie off the gathering threads a few times on each end and trim the excess treads tails.

Cut two lengths of ribbon or seam binding long enough to tie a bow. Fold under the raw edge of the ribbon or seam binding and add to the center edge of each end. Position in from the edge approximately 1" (2.5cm) and stitch directly over the center of the gathering stitches to secure. Tie the bow at the front or back of the neck, depending on the look you like.


I hope you enjoyed making all these quick and easy excuses to have fun. Homemade stuff simply adds to making Halloween special. If you are inspired to make a Halloween costume using a Folkwear Pattern, we would love to see all your creative ideas.
Happy Halloween!


by Cynthia Anderson
Halloween is the perfect excuse to get creative and have fun making a costume, especially for a child. In the previous blog Make a Child's Halloween Costume with the 208 Kinsale Cloak for Young Folk, I made a cape as a simple foundation for bat-themed witch/wizard costume. While the cape was lots of fun to make, it was just the beginning and an excuse to make more Halloween stuff. In this blog, I will show you how to make a Harry Potter-inspired witch/wizard hat. How to make a ruff, bat hair pins, and wand is soon to follow!


Materials Needed:
Measurements Needed
Note the measurements you need down on some paper before you start. First measure the forehead circumference using a fabric measuring tape. Measure the head placing the measuring tape above the eyebrows and ears. Add 1/2" (13mm) to 1" (2.5cm) of ease to the circumference, depending on how high or low you want the hat to sit.
My circumference is 19 1/2" (50cm) + 1/2" (13mm) of ease = 20"( 51cm) total head circumference
Next, decide the width of the brim. This will also be the width of the hat. My brim diameter is 14" (36cm) . It can be any width you like.
Make the Brim Pattern
First, determine the head diameter (hat opening) using this formula: total head circumference /divide by pi (3.14159) = head diameter
For my hat:
20" (51cm) / 3.14 = 6.4" (16cm). For ease of measuring the pattern, I decided to round to the nearest 1/8" (3mm) which is 6.5" (16.5cm), which is close enough. My head diameter is 6.5" (16.5cm).
Make a center point on a large piece of paper or Swedish tracing paper. Then draw a circle for the head diameter based on your measurement. Then draw another circle outside the head diameter circle, measuring 3" from the head diameter circle (or whatever brim size you choose). The head diameter circle is centered in the width of the brim circle. Cut this pattern out, including the hat opening.

Try the paper pattern on for size and evaluate if the brim width is how you want it. But, before you cut the fabric opening for the head, consider how stiff or floppy you want the brim to be.

To create just the right amount of brim flop, I am using two layers of felt. If you prefer an even more ridged brim, sandwich a stiff layer of interfacing or fabric between the two layers. I determined one layer to be much too floppy.
To give the brim more structure I decided to stitch the two layers together with a circular free-hand stitch on the sewing machine using black thread. The stitching adds a quilted design aesthetic as well adding extra heft. I used pins to help keep the layers from shifting while stitching. It is easier to maneuver when stitching if the head opening has not been cut out yet.


Make the Cone Pattern
First, decide on the height of the hat.
My hat is 11" (20cm) tall.
Draw a horizontal line that measures the head diameter, then mark the center point.
From the center point draw a vertical line to the hat height.
Connect the vertical height point to the horizontal head diameter width.


Use the triangle template and trace it again twice more as shown.

Draw a curve to smooth out the bottom edge of the cone shape.

Be sure to add the seam allowance to each straight edge of the pattern. I am using a 1/4" (6mm) seam allowance. Cut out and use as a pattern for the hat cone.


Using the cone pattern, check to be sure it fits and be sure it fits into the head opening of the brim. Make adjustments if needed.
With right sides together pin and stitch the seam allowance.

Assemble the Hat
With right sides together match and pin the edges of the hat opening and the bottom cone edge, stitch on the seam allowance. I used 1/4" (6mm) seam allowance.


Clip the point of the cone to make turning right side out easier and for inserting the top wire detail.

With the wrong side still facing out, add a pipe cleaner along the seam stitching, using hot glue to tack it down. This will make a hat that can be bent and shaped. Only attach the pipe cleaner to the narrowest point of the cone shape first. This will help to make turning much easier. Once the cone is turned, then finish gluing the pipe cleaner in place.


Add the Finishing Touches

The hat's whimsical top detail, is made of stars, a crest-moon shape, and felt bats danging from wire. Cut the star and crest-moon shapes out of two layers of unbleached cotton muslin, with interfacing sandwiched between, and machine stitch the shapes with black thread. Leave a small hole in the stitching, in which to insert a length of 26 gauge wire. Use a dab of hot glue to seal the hole opening.


For the bats, use the same template used on the cape, but scale them down to be much smaller. Cut them out of a single layer of felt and attach a length of wire as well.
Arrange the shapes to the desired length and twist the wires together to make a bouquet. Apply a small amount of hot glue to the end of the twisted wires and wrap with masking tape before the glue sets.
Insert the wire bouquet into the tip of the hat and add a bit more hot glue from the inside the hat to secure the hold.

In the next blog the fun continues - learn how to make a simple ruff, wand, and hair pin decorations that you can copy or customize for your own inspired Halloween costume.


by Cynthia Anderson
Fall coming and it’s time to get started making a Halloween costume! Lots of Folkwear patterns can be used for costume making for big and little Halloween fans alike. Have a look at Folkwear’s Pattern Collection and get inspired to make your best Halloween costume ever! Also check out Victoria's blog (and some past ones here for some adult costume inspiration).
However, this year we wanted to inspire you with some great kids' costume patterns (plus they are on a huge sale for the next two weeks). I decided to take the 208 Kinsale Cloak for Young Folks and make a relatively simple costume, but have fun adding creative details. My plan was to start with a cape and add other detailed accessories to make a truly fun and unique costume. The 207 Kinsale Cloak and 208 Kinsale Cloak for Young Folks hold lots of possibilities for this approach.
To see how I made the hat for this costume, and how you can make one yourself, go here. For the accessories I made, go here and learn how to make them yourself!
Pattern Info and Fabric Suggestions
Both the adult and child versions of are fully lined and hand-gathered into a wide collar, falling in small unpressed pleats to a curved hem. The cloak fastens at the neck with a large hook and eye, and offers an optional detachable hood that buttons to the cloak under the collar. It may be worn loosely over the head or down over the shoulders as an over-cape. Both versions of the cloak can be unisex. You could make matching Halloween capes and enjoy trick-or-treating with a child.
When it comes to capes, any fabrics and trims you would normally sew with will work. However, costumes are a good excuse to have fun and try other types of materials and combinations. Consider using cotton, linen, canvas, corduroy, denim, wool, velvet, heavyweight silk, felt, faux fur, microfiber, burlap, polar fleece, upholstery fabric, or something in your stash. For the lining, use a lighter weight fabric such as cotton, satin, polyester, rayon, silk, or linen. Of course, you can eliminate the lining, but don’t. Linings are great excuse to get creative. Have a look at the fabric suggestions blog for the 207 Kinsale Cloak and the 208 Kinsale Cloak for Young Folks for more ideas. And, this time of year craft stores are full of fun fabrics perfect for Halloween making - there's lots to get excited about.
Don't forget the trim. Pull out your trim collection to add another layer of creative details with ribbon, rick-rack, braid, embroidered patches, beads, etc. You could even make your own ruching (check out the blog How to Make Authentic Ruching Trim to learn how to make your own). Using fabric paint or acrylic paint is also a great idea. Dig through your craft supplies and have fun.
Besides being simple to make, fit is not a crucial aspect of capes - and can be made any length. All of which makes them not only versatile, but also provides the perfect jumping off point for making all kinds of easy to put together costumes. Magicians, ringmasters, Red Riding Hoods, Harry Potter, superheroes, queens, kings, princesses, princes, detectives, Victorian characters, vampires, witches, devils, wizards, knights, stage coach drivers, sorcerers, spooks all wear capes. Even Elvis wore a cape.
I used the 208 Kinsale Cloak for Young Folks, which comes in sizes 2 thru 12, as the foundation of a unisex witch (or wizard) costume. I compared the length measurement of the pattern to the height of the child I made the cape for to determine which size to use.
To keep things really simple and unisex I made the cloak with just the collar, using black quilting cotton and a unbleached cotton muslin for the lining. I took this approach so the cape can be reused for different themed costumes for future Halloweens. Or it can be relegated to a costume play box for continued enjoyment throughout the year. For this Halloween, I made a bat-theme cloak costume complete with a traditional felt witch/wizard hat, wand, neck ruff, and lots of spooky bats attached to the cape.
FYI: My first idea was to add appliqué stars, crest-moons, and bat shapes cut out of unbleached muslin and stitch them to outside of the black fabric cape using machine black stitching. This simple application would happily result in black stitched shapes on the inside lining as well. I abandoned this idea once the cape was constructed, because I realized the shapes would get lost in the drape of the fabric. It is good to have a plan B.
Making the Cloak
Be sure to launder your fabric, and make sure the yardage is square if needed. Then make the cape/cloak according to the easy-to-follow pattern instructions. I made a Size 4 and shortened it by approximately six-inches to ensure it won’t cause my wearer to trip. Make your cape any length you choose.
Once you have the cape made, treat it like a canvas and have fun decorating it with fabric, paint, or any variety of craft materials. If you are making the costume for a child that is old enough help, invite them to join in and make your own Halloween memories together!
Have look at the internet for free templates of shapes and designs to use or draw/trace your own. To save time and effort I downloaded a couple of bat shape designs and printed them out in different sizes. I cut out the paper templates to use as a pattern. Then I pinned the pattern to the felt and cut out the bat shapes. Halloween cookie cutters make great tracing templates too.

Note: I was able to find felt in a couple different weights at my local fabric store. Thicker weight felt is typically sold by the yard and is nice because it makes larger projects or details less flimsy than the thinner weight of felt typically sold in squares. Inspect your felt to determine if the right and wrong side are noticeable. Thinner felt always works well for small details.
I cut the bats used on the cape in pairs because I wanted more thickness so the wings would stand up and not flop. The felt was easy to cut two layers at a time for the larger bats, but I resorted to cutting the smaller bats out one layer at a time.

To give the bats even more shape I taped a thin length of black 26 gauge wire to the wrong side of each of the felt bats. I bent the wire to more-or-less fit the contour of the center of the bat shape. I used little bits of masking tape to hold the wire in place.
Note: A slightly heavier gauge wire would have been better, but I used what I had on hand.


I placed the bat pairs wrong sides together, matching the edges as well as possible. And then I glued the two bats together starting in the center.
I prefer to use a small hot glue gun purchased at the craft store for adhering paper and fabric details like this, because you can work quickly.

If doing something similar, keep working/gluing on either side of the center of the bat one wing section at a time. Don’t apply the glue too thickly or too close to the edge of the felt. If using regular white glue, follow the same technique to ensure to keep your work neat.

Gently press the pieces together and set them aside until the glue is dry or set. Hand stitching or machine stitching works as well, it just takes longer.


With all the bats made, I arranged and pined them on the cape while on a dress form. To better emulate the slight shoulders of a child I pressed in the retractable shoulders. This helped with the placement of the bats.


Once I was satisfied with the bat placement, I made a few hand stitches to secure them in place. When all the bats were attached I tweaked their angle placement with a few more hand whip-stitches just to insure they would remain just so.
To hold the cape closed, I secured the front neck opening using a larger hook and eye. Lastly, I stitched the center of a bat to the neck front edge of the cape for a final touch.


Not only was the cape fun to make, but I still had plenty of time to make the hat, ruff, hair pins, and wand. I will show how to make all these accessories in the next couple of blog posts, so be sure to check back to see how to make all the other pieces for this fun and easy Halloween costume.
Remember that one of the charms of Halloween is the fun of making a homemade costume!


by Victoria Watkins
This time of the year is always so exciting for me. While it's not for everybody, Halloween is probably my favorite holiday. For that reason, I was excited to have the chance to come up with ideas for how we can modify our children's patterns into Halloween costumes.
Of all the possibilities, I settled on turning our 213 Child's Prairie Dress and Pinafore into a witch's dress and apron (NOTE: pattern deeply discounted this month). The two garments together can be used to contrast a black fabric with a novelty Halloween print quilting cotton, as I've done here. When making selections at our local fabric store, this purple bat motif was what spoke to me the most. There are always countless seasonal quilting cottons available at both mom-and-pop and chain stores, so you're sure to find something that you can use for this costume.
I made a couple considerations when choosing elements for this project. The first is that this pattern has an option for a shorter length and a longer one. I chose the shorter version. This was mainly due to personal preference, but in retrospect I think it works great because it allows room to show off the classic witchy striped socks, if you choose to include them. The pinafore also has an option to be closed or open in the back, and I chose to keep it open for a more apron-like effect. I also chose to omit the cuffs on the sleeves, which left them open and bell-shaped, which felt more magical to me.
If I'm honest, while working I didn't feel like switching the thread from black for the dress to a purple for the apron. There are areas of topstitching on the pleats, and I'm actually pretty pleased with how the contrasting thread looks on these spots! Had I sewed this a year prior, I'm sure my finishing would've been a little more off kilter, and I'd probably have wanted a purple thread to melt into that fabric...

Here is Miss Iris, kindly modeling the dress and apron for us. She loved it and twirled around quite a bit, showing it off. She also really liked having a wand, and it could definitely fit into a Harry Potter themed costume as well.


 The all black dress is also great for a witch or wizard. Lots of magic!


