-
Sewing Patterns
-
Fabric
- Sewing Supplies
- About
- Blog
- Gallery
-

by Cynthia Anderson
There are several different ways to finish seams, depending on the sewing project. Finishing the raw edges of a seam keeps the fabric from unraveling and creates a stable and clean finish to the inside of a garment. Raw edges can quickly be finished on modern sewing machines using zig-zag, overcasting, or overlocked/serge stitches. Pinking shears are also an easy way to finish raw edges. While all these techniques are perfectly acceptable, there is something special, practical, and gratifying in making French seams.
Garments made with fine, sheer, and lightweight fabrics are ideal for French seams. This neat seam is sewn twice, encasing all the seam allowances in the seam itself. This creates a small, yet strong seam that keeps the raw edges from fraying. French Seams are especially nice in unlined garments, but work nicely in lighter-weight lined garments too.
The use of French seaming was popular in Edwardian garment making which is synonymous with fine handkerchief linen, cotton voile, and lawn. Before sewing machines were available, fine French Seams were sewn by hand. Luckily, French Seams can easily be made today using a sewing machine. This technique is not hard, creating a strong encased seam, with a lovely finish. French seams are ideal for finishing seams with fine fabrics, and perfect for lots of Folkwear patterns.
French seams are not ideal for all sewing construction needs. Heavy fabrics are not recommended as the folded over seam creates bulk.
Typically, only the shoulder seams, side seams, and the underarm sleeves seams are made with French seams. Sleeves that have a tight curve can be tricky, resulting in a finished seam that will not lay as nicely and may pucker-up. It is perfectly ok to pick and choose where French seams work best.
French Seam Using 1/2-Inch (13mm) Seam Allowance
Because Folkwear patterns use 1/2" (13mm) seam allowances this demonstration will as well. I am also using a fabric with two distinctly different sides to make working on the right and wrong side easier to follow.
French seams are made by starting with the WRONG sides of the fabric together (not right sides together, as you normally would).

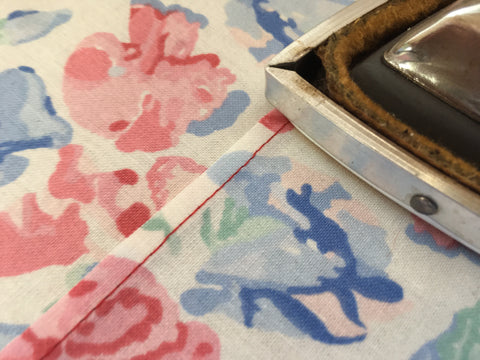
On the raw edge of your work, align and match any notches, stitch a scant 3/16-inch (4mm) seam.

Press the seam to one side (either will do).
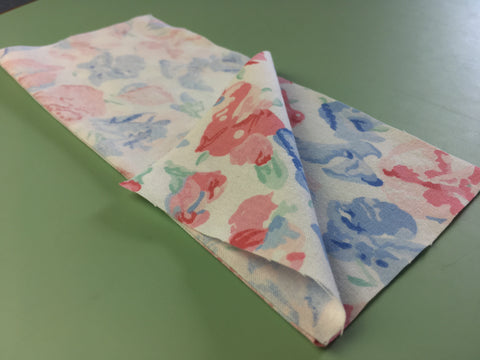
Turn right sides together, encasing the tiny seam, and press the edge neatly or pinch the fabric with your fingers to create a clean edge. The tiny seam should be sandwiched between (right side) the two layers of fabric. If your edges are a bit frayed or uneven, it is best to trim them before moving on.
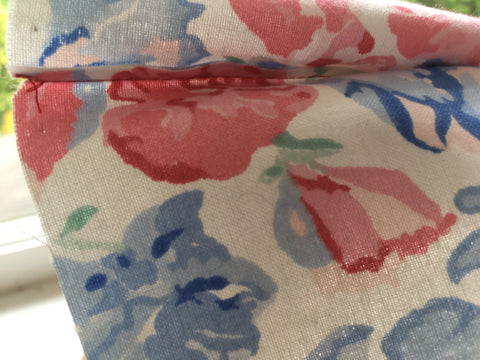
The scant seam allowance should be neatly encased in the final seam. The photo below shows the encased seam with the right sides together.

Now stitch on the seam line (which will be about 5/16-inch (8mm) from the edge) with the right sides together. You should avoid catching the tiny raw edge encased in the fold in the stitching since it is about 1/16" (1.5mm) shorter than the seam. But this is why it is important that the small first seam is trimmed and even. Back stitch at the beginning and ends of the stitchline.
Notice the seam allowance encased in the final seam in the right bottom corner of the photo below.
Press the seam towards the back if the seam is the shoulder, underarm sleeve, or side seam. If a sleeve seam, then press towards the sleeve.
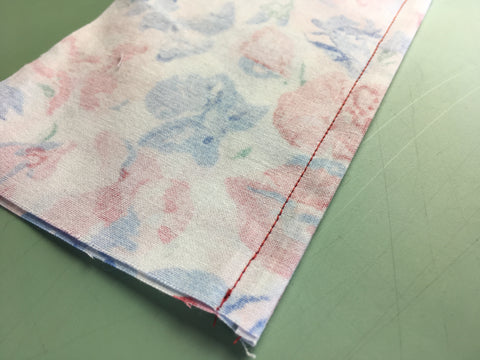
French seam seen from wrong side:


If scant trimmed edge gets caught in the final stitching of the French seam, then the seam edge needs to be trimmed back more. You can un-pick the seam and trim the raw edges.

Only use up the amount allotted for the seam allowance. In this case the seam allowance is 1/2-inch (13mm). You will need to adjust your French seam calculations depending on the width of your seam allowance and how small you want the finished French seam. Experiment with different weight fabrics and varying seam allowances widths to see what the limitations are.
French seams have a long history for very good reasons. Extremely small French seams were a badge of pride and quality work for Edwardian and modern sewists alike. The beauty of this technique is just as viable today as it has ever been. Take advantage of machine sewn French seams in your sewing and enjoy a beautiful and gratifying seam making technique!


Carolyn
August 13, 2022
Although I’ve used French seams for many years, I appreciate this clear and concise post. I encourage everyone to use French seams, where appropriate. They take a bit more time, but with such a lovely and strong result, the time is worth it!