-
Sewing Patterns
-
Fabric
- Sewing Supplies
- About
- Blog
- Gallery
-
by Esi Hutchinson
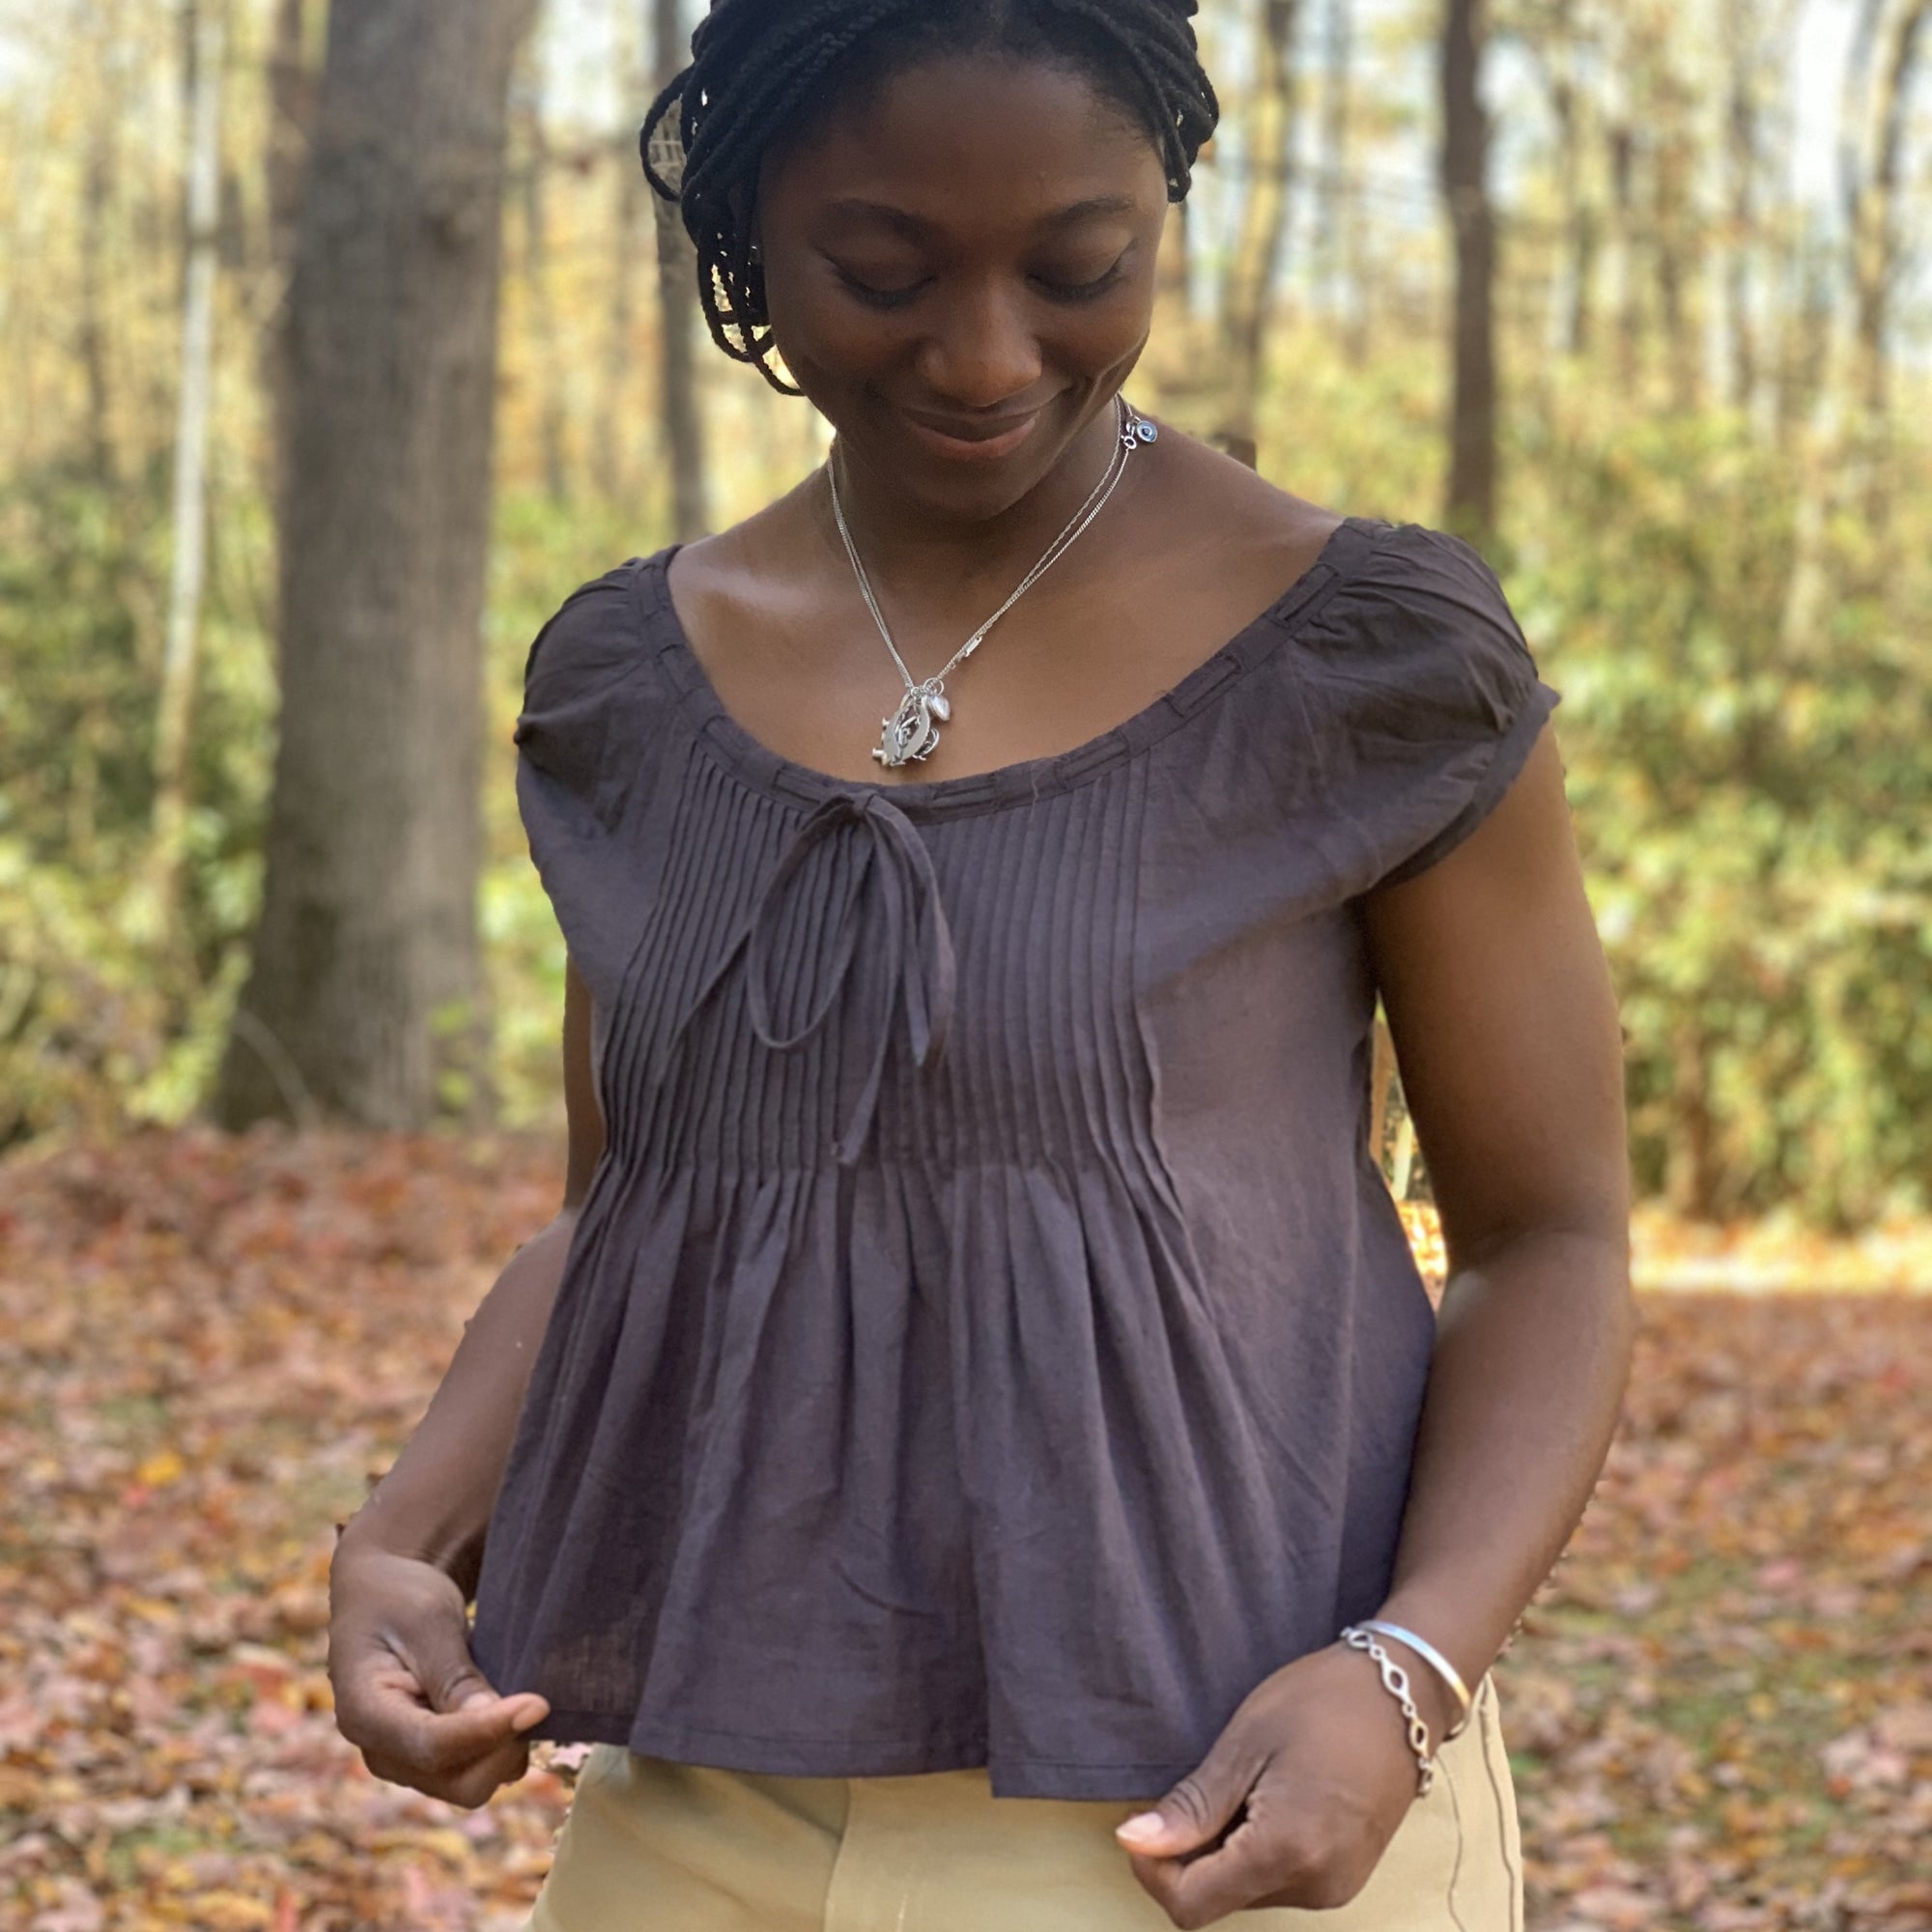
When it comes to lingerie, there are countless options to choose from. And Folkwear has been exploring our own designs of lingerie this year in particular, with our new 1950s-inspired patterns 510 Passion Flower and 511 Juliette's Dream. We also have the Edwardian 226 Princess Slip which makes great nighttime wear but could also be made for a more formal outing in my opinion. I've been thinking about making it recently into an everyday dress, so maybe I'll tackle that project soon. And lots of other vintage lingerie, undergarments, and nighwear patterns can also be great modern day daywear. However, this blog post will show you how I made another one of Folkwear's undergarment patterns into a blouse from the 223 A Lady's Chemise.
Folkwear's 223 A Lady's Chemise pattern is based on chemises that were worn in the mid- to late-1800s. Chemises were originally worn right next to the skin as a simple, practical garment to protect outer clothing (including corsets and stays) from sweat and body oils. However, over time, they evolved into a fashionable and seductive lingerie item. This vintage dress still resonates in style today, with baby doll style dresses, tops and lingerie with beautiful lace and bows.
Our chemise is a loose-fitting undergarment that can be made into a blouse or a dress, falling to whatever length you desire. It makes a great nightdress or a dress for everyday wear. I made a blouse and will show you the changes I made so that you can do it too!
Typically, the chemise was made from lightweight and breathable fabrics such as cotton lawn, voile, silks, lightweight muslin, and linen. For our pattern, you also need eyelet beading, lace or eyelet ruffles to finish and embellish the neckline and sleeves.
Folkwear suggests using silks, like crepe de chine and charmeuse, which would give it such a beautiful and luxurious look and feel (I don't know who doesn't love silk). Satin, cotton, or rayon challis and other lightweight fabrics such as batiste, lawn, voile, gauze, eyelet, and handkerchief linen would also work well. We recently have been loving our new cotton/linen blends from Merchant and Mills, its a great substitute for linen or cotton that would work really well. Our cotton voiles and Indian cotton are also light and breathable and would suit this garment as well. For this shirt, I used our cotton/linen blend in Blackberry. It is a bit hard to tell on the screen, but this fabric is woven like a chambray and looks different at different angles. It is very pretty! Check out or fabric collection, I am super proud of it right now, we have so many options and I just want to buy everything for myself.
Now to show you how I made this pattern into a shirt for myself. Not only did I shorten the pattern to make a blouse, I made some design changes as I went that were fun and gave me a look I was really pleased with. I love using my creativity when sewing to take a fabulous pattern and make it perfect for me (and you should too!). Lets begin!
Cutting the Pattern and Tracing the Pleats
First, I traced the pattern in a size small. I wanted to make a shirt-length top, not a dress-length garment, so I shortened the front and back by cutting the pattern about 18.5" (47cm) from the top of the center front/back on the pattern piece (I did not use the lengthen/shorten lines, but you could!). The other thing to know about this pattern when starting, is that the front and back are cut and pleated, and then they are cut again after pleating to make the neckline (after the pleats are basted). This is to make the tiny pleats easier to manage. But it also gives you some flexibility about where you want your neckline to fall.
 I traced my pattern on tracing fabric (and to get the most out of this fabulous sewing product, we often tape sections together of previously used pieces to get full pattern pieces).
There are a LOT of pleat lines, but don't let that discourage you! The easiest way to transfer these markings to your fabric is to use tracing paper and a tracing wheel. If you don't have these tools, they are indispensable and last a very long time. 
I used a double tracing wheel here because I could set it to trace several lines at the same time.
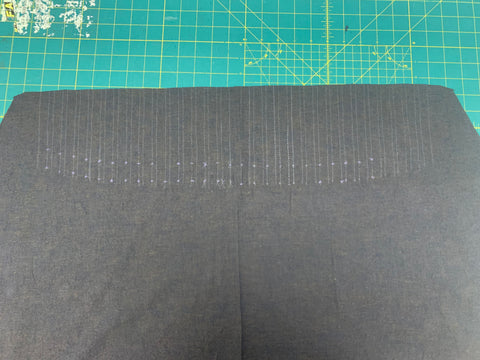
With wrong sides together, I folded along all the pleat lines lines with dots; bringing folds to meet the second line, in the direction of the arrows. I pin-basted the pleats lengthwise from the top edge to bottom dots. This will helped keep everything together. The pleats fall away from Center Back and Center Front.

 Original pattern neckline template on my front.
 Here I chalked a new cutting line, 1" above the template neckline. Note that by doing this I added to the shoulder of the pattern too. I could have made the chalk line go toward the original shoulder line, but I liked my pintucks too much, I guess.


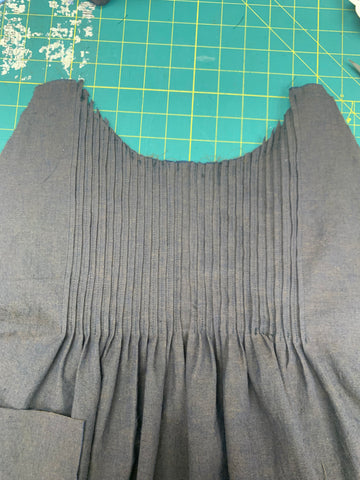

This pattern has clever ways of covering the seams around the sleeves and neckline.


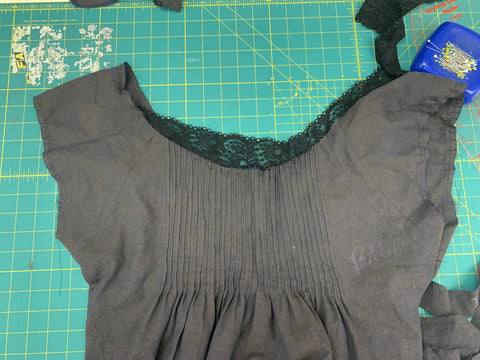

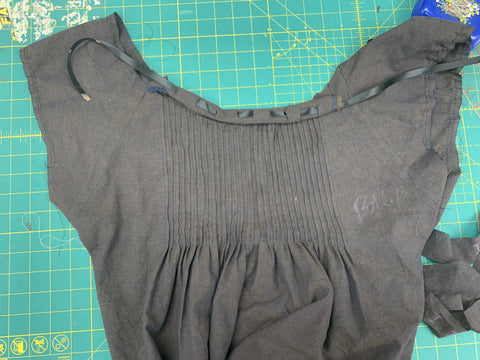


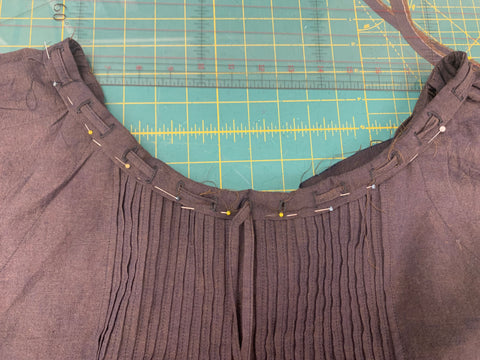


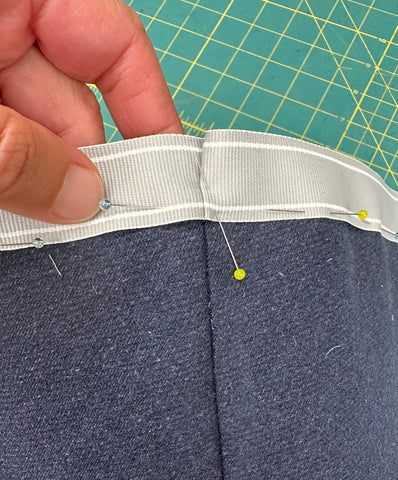
 My finished fabric ribbon.


by Esi Hutchinson
Folkwear has just gotten new fabrics in from Merchant & Mills, and already had a great collection of some fine wools -- all that are perfect for fall sewing. Molly and I are super thrilled about these fabrics that Folkwear just purchased. The colors blend so well together and compliment the beautiful hues of fall. I just had to show off some of Folkwear's fall fabric collection in a blog post!
I hope these inspire you to make something beautiful for yourself or a loved one. It's always exciting getting new fabric!
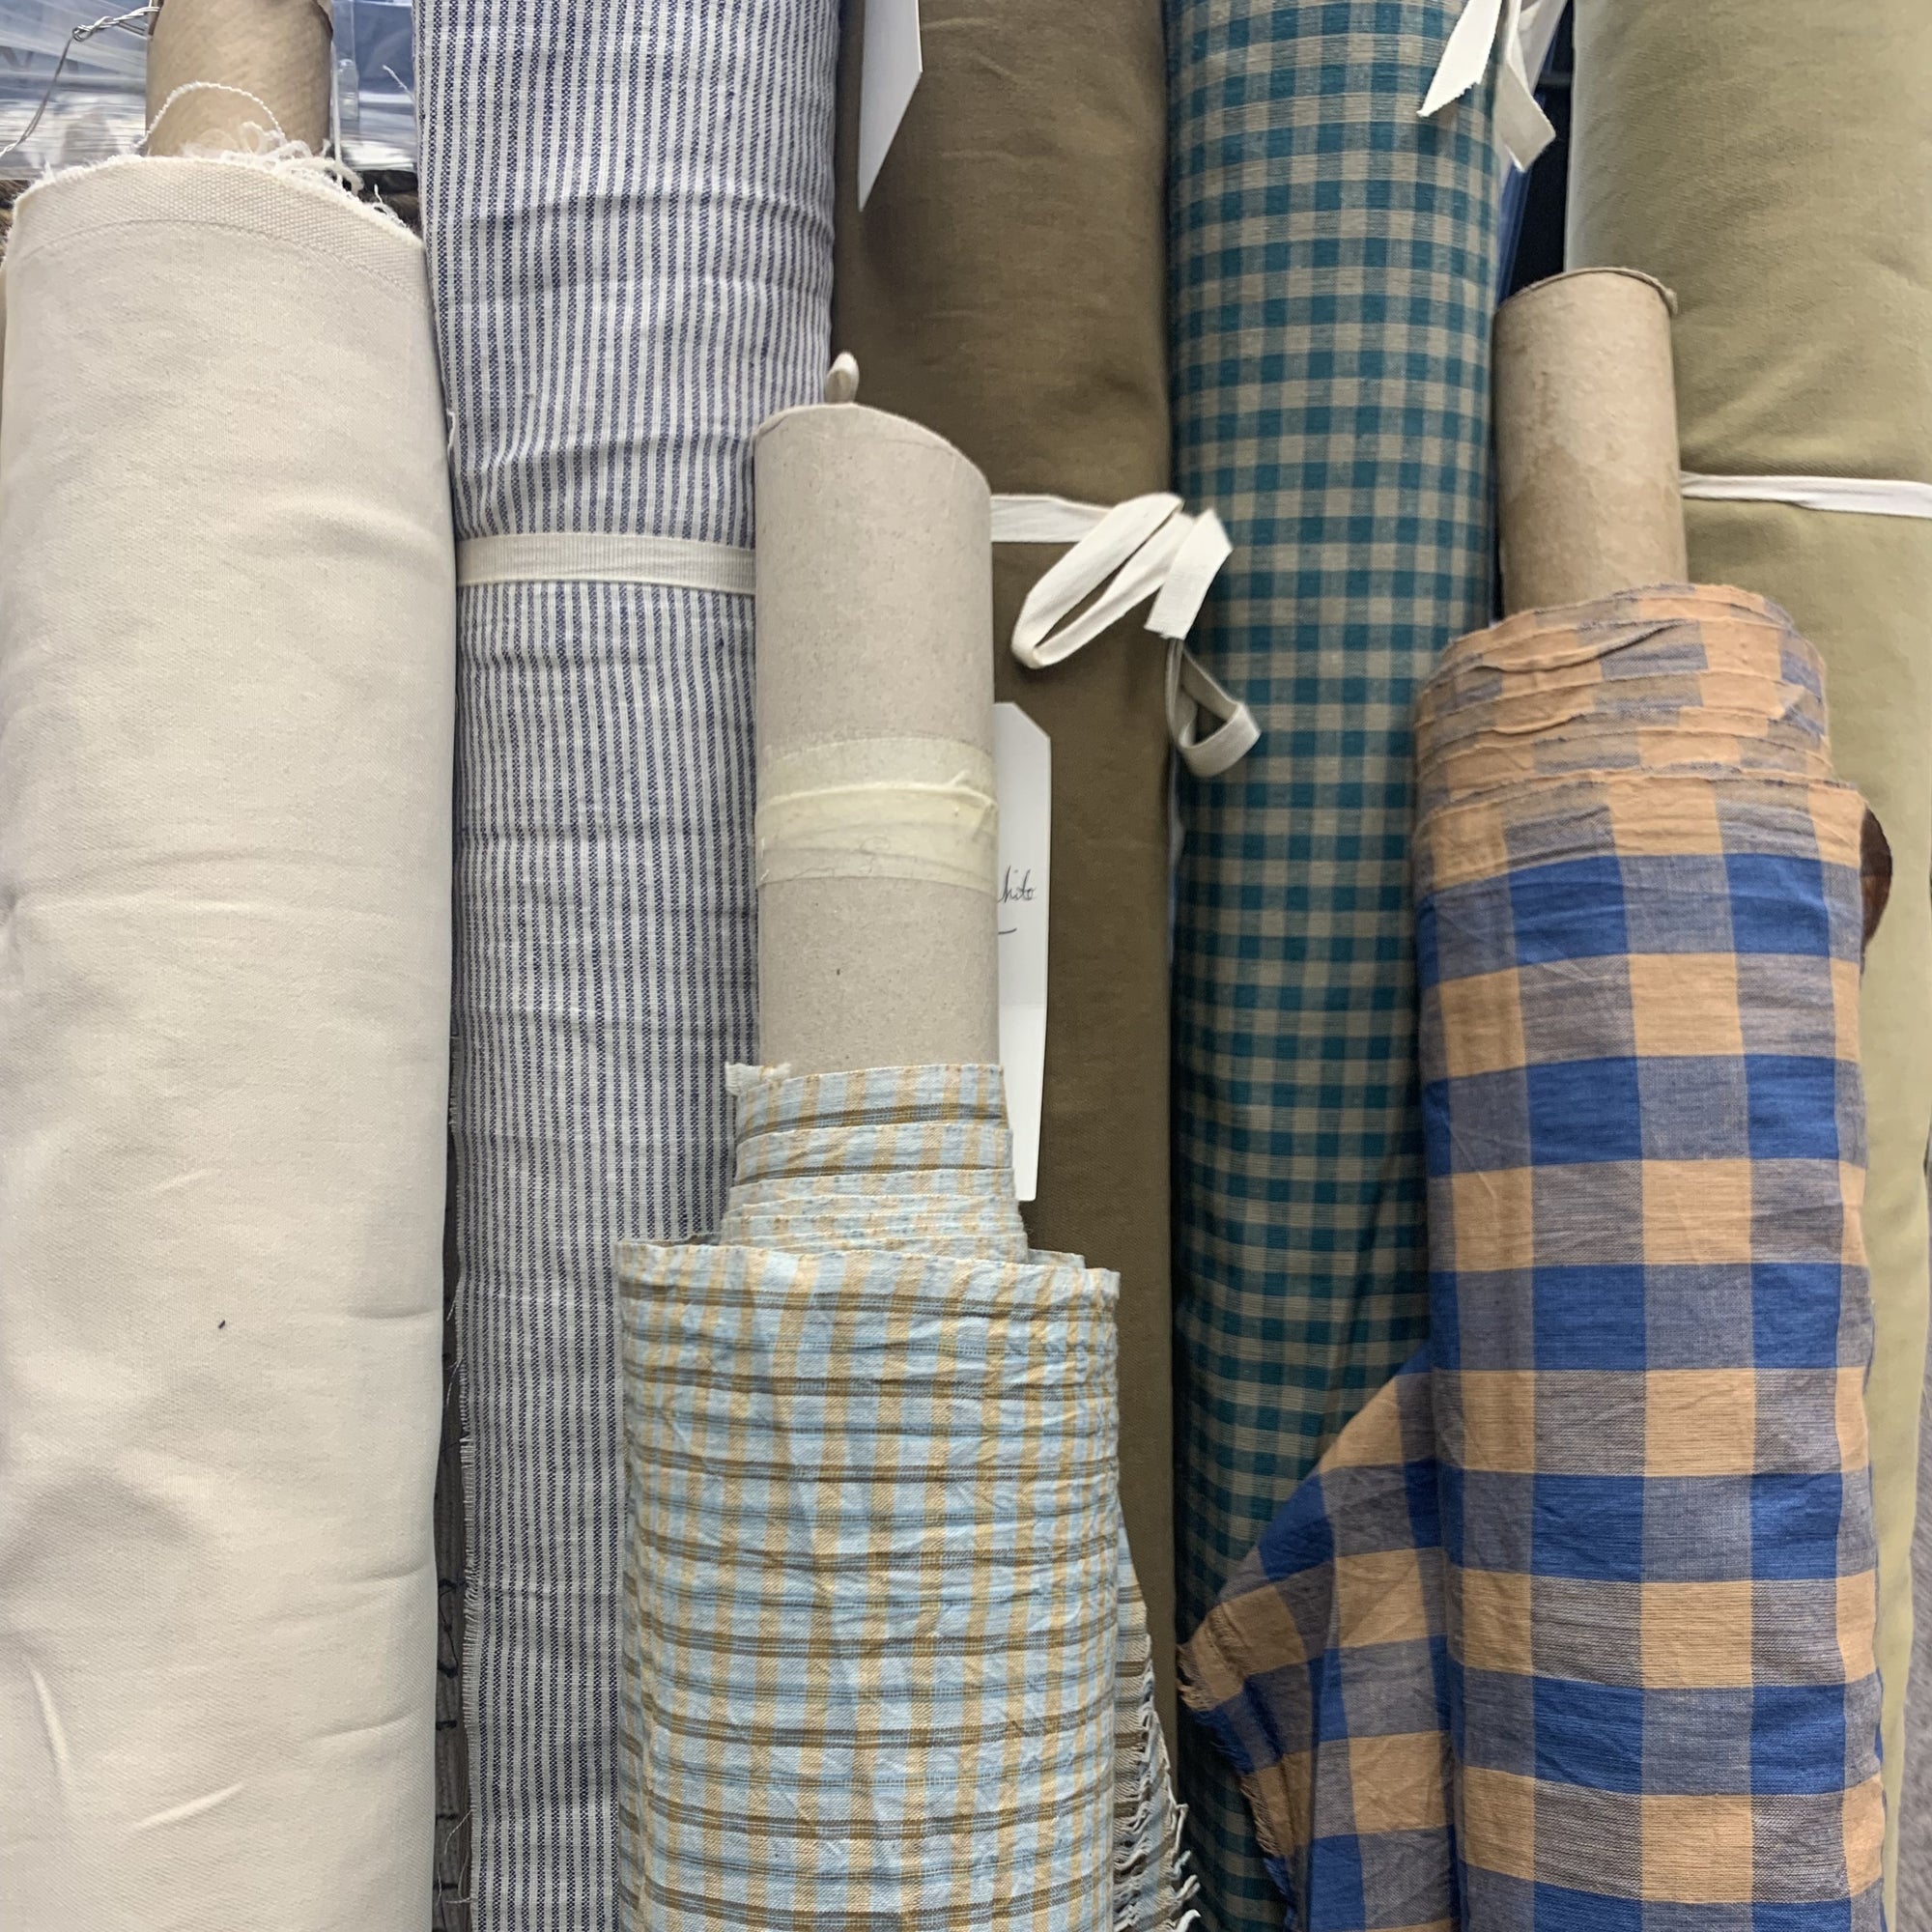
First is this soft cotton and linen blend in a teal and tan gingham. A versatile cloth that is a great alternative to linen. This fabric would be gorgeous for pattern such as 121 Guatemalan Gabacha, 123 Austrian Dirndl, 142 Old Mexico Dress, 210 Armistice Blouse and others.

Then, we have a lovely sky blue and peachy-orange gingham. This Indian cotton is very soft and lightweight and would work great for tops, shirts, and dresses. 271 Sunset Wrap, 117 Croatian Shirt, 107 Afghan Dress, 212 Five Frontier Shirts, 121 Guatemalan Gabacha and more.

We love this fine organic cotton twill that has a soft sanded finish on one side; in a beautiful classic Ecru color. Perfect for patterns like 229 Sailor Pants, 240 Rosie the Riveter, 231 Big Sky Riding Skirt, 230 Model T Duster as well as other pants, skirts and lighter weight coats and jackets. We also have this fabric in two darker shades (Sand and Tan) as well as Brick.

This is a beautiful plaid Indian Cotton in a sweet orange and pale sour blue. This would suit patterns like 131 Tibetan Chupa, 119 Sarouelles, 107 Afghan Dress, 112 Japanese Field Clothing, and 201 Prairie Dress.

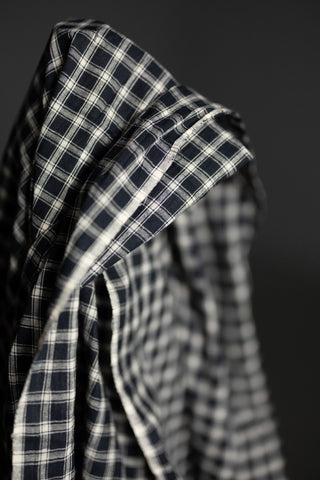
I think this great black and white check cotton fabric fits the fall theme of plaid prints in a deep hue. Use it for patterns like 121 Guatemalan Gabacha, 270 Metro Middy, Basics Pinafore, 117 Croatian Shirt, and 222 Vintage Vests.
I love this cotton/linen blend and I can't wait to make a dress from it. It is a soft fabric in a medium to light weight with navy blue and white skinny stripes. A versatile cloth that is a great alternative to linen. It would look beautiful for 102 French Cheesemaker's Smock, Basics Pinafore, 112 Japanese Field Clothing, 123 Austrian Dirndl, 210 Armistice Blouse, 203 Edwardian underthings, and would be suitable for other dresses, tops, shirts, skirts, and loose fitting pants.

by Molly Hamilton
The cloche hat became popular in the 1920s. It was originally designed in France a decade or so early by milliner Caroline Reboux, and is named with the French word for "bell" because of its typical shape. The cloche generally features a small brim or no brim and was perfect for the new short women's hair styles of the early 1920s. It's popularity surged in the 1920s with new fashions and freedoms. The hat was a huge departure from the wide-brimmed hats that were popular in the previous era, and reflected the changing fashion trends and newfound liberation of women. The cloche hat continues to be a symbol of femininity, style, and the bold spirit of the 1920s.
Folkwear's 262 Spectator Cloche hat comes from the 262 Spectator Coat pattern, and features a wide cuff that is perfect to embellish with embroidery, applique, or other trims. It can also be made from a separate coordinating or contrasting fabric or left off entirely. We recently released this hat as its own PDF pattern!
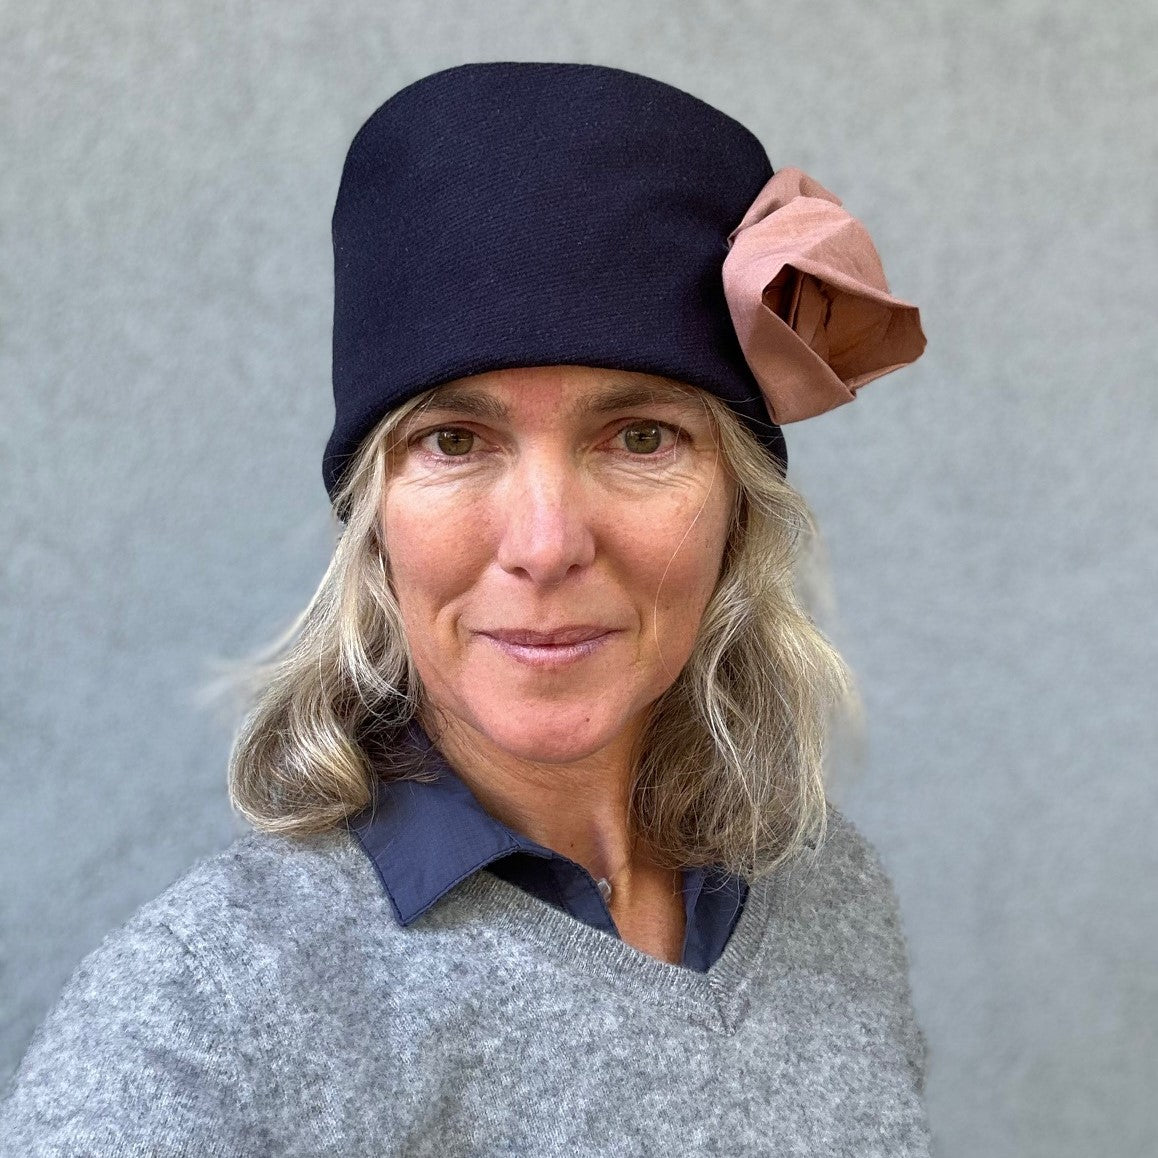
In this blog post, I am going to show you how I made the basic cloche hat. I also made a fabric flower to trim the hat and will share some tips for making one yourself. You can find instructions for making a fabric flower in this blog post.
Choosing Fabric
We have made three cloche hats in this office in the last several weeks, and each one was made with a different fabric. In general, you want to use a medium to heavy weight fabric to make a hat that holds its shape. I made the one for this post with a navy heavy weight wool blend from our collection (top photo). This fabric was perfect for a warm hat that is also sturdy. Esi made one with a cotton canvas and several layers of voile, which you can see in this post about making the 262 Spectator Coat.
And I made another that I hope to show off soon out of a lighter weight wool that we also have in stock - this vicuna wool. The photos below show the hat while I was working on it. I made the hat without the cuff and added a band of fabric that I added a ruching style to (from 123 Austrian Dirndl) and had pinned onto the hat to see how it looked. You can see the hat without the cuff, then with just a band of fabric, then with the ruched fabric. Which do you like best??


The possibilities for this hat are almost endless!
For the lining, a soft lightweight fabric is best. Think Bemberg, silk, satin, charmeuse, rayon, cotton voile. I used a navy cotton voile for the lining of this hat. Esi used a rayon/linen blend, and I used a scrap of silk charmeuse for my other hat. All were great!
Sizing
The hat comes in sizes XS to XL, which finish at 22½” (57.2cm) to 24-1/2" (62.2cm), respectively (measurements are in the pattern). However, this hat is cut on the bias which means that there is some movement or stretch that is built into the hat. You can adjust the inside ribbon band to make the hat larger or smaller by about 1/2" in either direction for whatever size you choose. So pick the size that you think works best for your head size (measure around the crown of your head), and adjust at the end of the hat making, if needed. I made my hats in size small and they fit great and did not need any adjustments. Esi made her hat size large to have more room for her hair and she was happy with that size also.
Cutting out the Pattern
For the cloche, you will need to cut one hat cuff, one hat front, and two hat backs from the main fabric and from the lining fabric. Be sure to cut the two back pieces so that they are opposites (i.e. if cutting one layer of fabric, be sure to flip the pattern piece print side down to cut the second one).
Sewing the Cloche
It is important to note that this hat pattern has a 3/8" seam allowance. This is to reduce bulk in the hat seams.
First, it is important to transfer the pattern marks to your fabric. For my wool blend hat, I decided tailor tacks would be the best way to mark the pattern. These are easy to remove and do not leave any marks that I have to wash out. Also my fabric was dark so I would have needed a white or light colored marking tool. I did not want to scrub or brush chalk out. Anyway, tailor tacks were perfect. To make tailor tacks, I used white thread and with a needle pulled the thread through the fabric at the mark on the pattern. I clipped the thread so that it marked on my fabric where the dots were located.

On the front pattern piece, I made the darts indicated on the pattern, sewing from the top dot to the dot at the bottom of the dart, with right sides of the fabric together. At the bottom of the dart, I sewed right off the fabric, cut the threads long and tied them by hand so I did not have backstitching at that point. At the top of the dart (top of hat), I backstitched to secure the thread. I matched the dots (not squares) at the top of the pattern, which I marked in the photo below with red dots so you could see it clearly. The other thread in the photo indicates the square at the top of the crown that we sew in the next step. This is important to note and make sure you sew the correct parts to make the darts. I sewed both darts on the hat front in this same way.


Now I sewed between the dot and the square, which I marked with a tailor tack - so I sewed the remaining seam at the top of the hat from my stitching (also marked by a tailor tack in the photo) to the other tailor tack. You can see how it is marked in the photo below.

Next, I sewed the same type of dart at the top of the back hat pieces. And, then sewed the small dart on the center back of each back piece. I marked the smaller dart line with red in the photo below so you could easily see where it goes. This one is a little tricky because it is so small, but it just needs to be marked clearly. I marked the start of the dart with a pin and sewed to the tailor tack.

Once the darts are in the hat back pieces, I sewed both back pieces together at the center back seam, with right sides together. I made sure to match the two dart seams that come together at the center back.
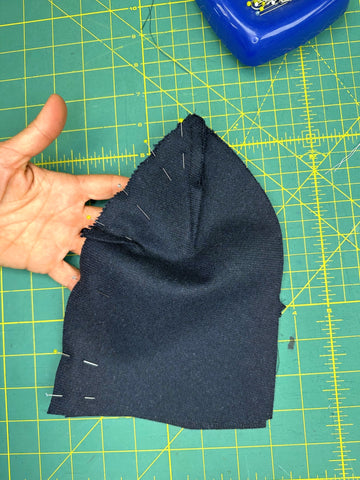
Now I was able to sew the front and back of the hat together. At the top of the hat, several seams come together to create some bulk, but you can a seam jumper to help you get over the fabric hump. My seam jumper is just some plastic pieces that you use under the presser foot to keep the foot level even when it is going over bulky seams. You can barely see my seam jumper below just behind my presser food.


Front and back of hat pinned together.
I did all the same steps for sewing my lining pieces as I did for my main fabric pieces. I have a little tip for sewing the lining darts, or really starting any seam on very fine fabric like like fine cotton voile or silk. I use a scrap of tracing fabric under the seam. This gives the fabric stability and keeps the fine fabric from getting pulled into the feed. After the seam in sewn, I just rip the tracing fabric off and I'm left with a nice seam.

Starting my seam with a scrap of tracing fabric under my lining fabric to keep the fine lining from getting pulled into the feed.

Main fabric and lining ready to be put together.
Next I sewed the cuff of the hat by sewing the center back together on the main fabric and lining. Then I put the cuff lining and main fabric together with right sides together and matching notches and center back seam.

I turned the lining to the inside and pressed it so that the outer fabric was about 1/4" to the inside (so the lining would not show on the right side).
And then placed the lining inside the main part of the hat with wrong sides together. I basted the open edges together so they could be sewn without shifting.


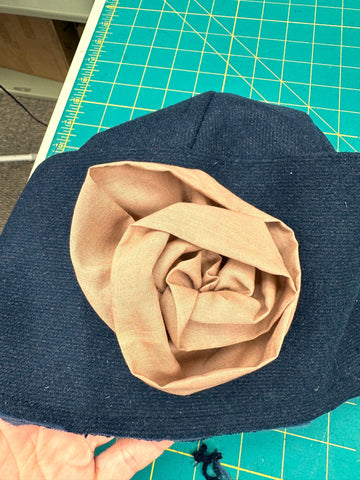
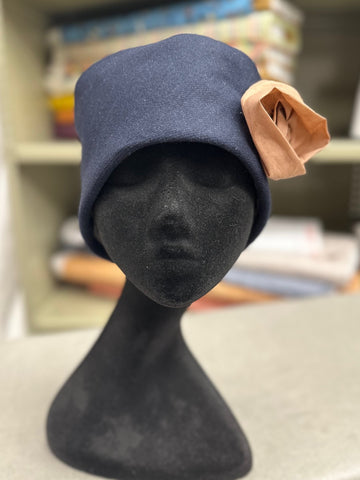


Back of cloche on a hat form.


Cloche hat on me. It is quite warm!
Now, what hat are you going to make? What trim would you add to it? What other questions do you have about this hat? There are so many options! We would love to see what you make with this pattern!
by Molly Hamilton
I have had a vision of making the 117 Croatian Shirt pattern into a dress for several years. I even bought the fabric I wanted to make it in and cut out the pattern. I just didn't get around to it until this summer. Sometimes I have to stop what I feel like is important work, like making new patterns, and work on what I want to work on, which might be doing something creative for myself. I also think it is important to focus on the amazing and wonderful old patterns that Folkwear has in its collection. These are truly unique and interesting patterns and I love working with them to make something new.
This summer I was cleaning out fabric and found this beautiful European linen I had bought from Merchant and Mills. It is a linen similar to this one, but mine was an autumn orange-brown. And I remembered I had bought it for making the Croatian Shirt which I wanted to be long enough to wear in the fall as a dress. I stopped what I was doing and started on the dress. The shirt pattern actually has two lengths marked on the pattern - one to make a shirt and one to make a mid-calf length dress. I shortened the dress-length to hit a little above my knee after it was hemmed, and cut out the pattern.

I was a little intimidated by the pintucks in this pattern, but slow and steady, as they say, and they came out fine (but not perfect). There are also a lot of pleats in this pattern - at the shoulders, neck, and cuffs - but giving each a little clip, as the pattern indicates, makes them very easy to manage. I also noticed that the number of pleats at the shoulder was incorrect in my paper pattern and I adjusted them to seven and centered them (this correction has been made in the PDF pattern).

I would not suggest using a linen of the type I used if you are wanting crisp pintucks and pleats. The linen relaxes and does not stay crisp. It also doesn't love to stay perfectly straight for making pintucks. But it was exactly the look I wanted.
 You can see the back and shoulder pleats here (dress is on a hanger for this photo!).
I had finished making the pintucks on the front of my shirt piece when I headed off to drive to Canada with my children. So I decided to use some of my travel time riding in the car (my oldest drove some of the way), making the honeycomb on the pintucks. This technique was easy and interesting and went fairly quickly. I got one side done in an hour or so riding in the car on the way to Canada, and the other side done on the way riding home. I used a slightly contrasting dark brown buttonhole thread to make the stitches. I liked using a thread that could be seen but was not as thick as perle cotton, and liked the contrasting color rather than using a matching color.

I found some buttons in our stash at the office that worked quite well to finish the project. I also like the curved cuff (and collar) on this dress. These little details make it a special piece.

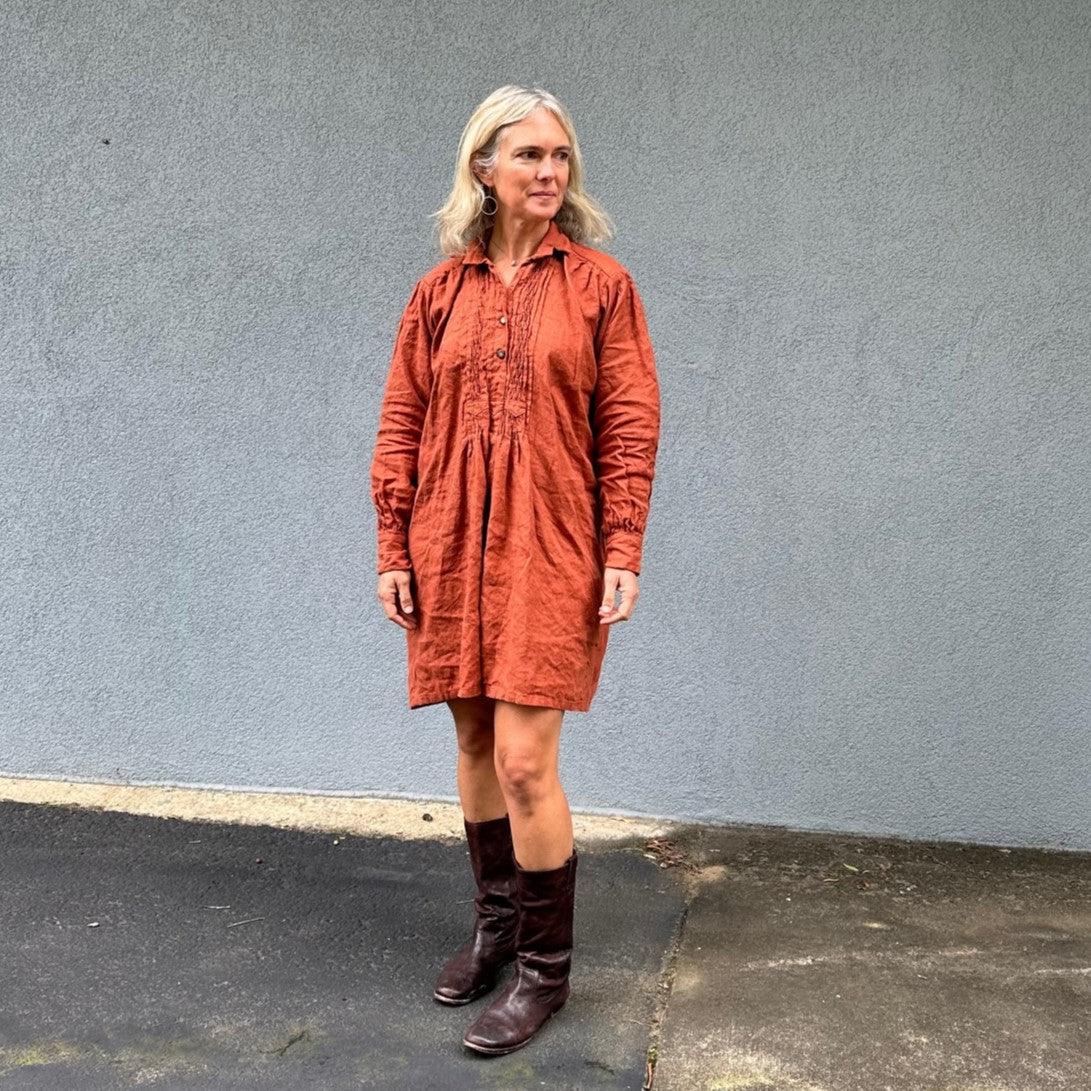
I love how this 117 Croatian Shirt dress turned out! It is exactly what I was hoping for - a perfect fall-colored, cool-weather dress that I can wear with boots for now and add leggings or tights as the weather cools further. It is comfortable and pretty, and I love wearing something that has some history behind it.

By Esi Hutchinson
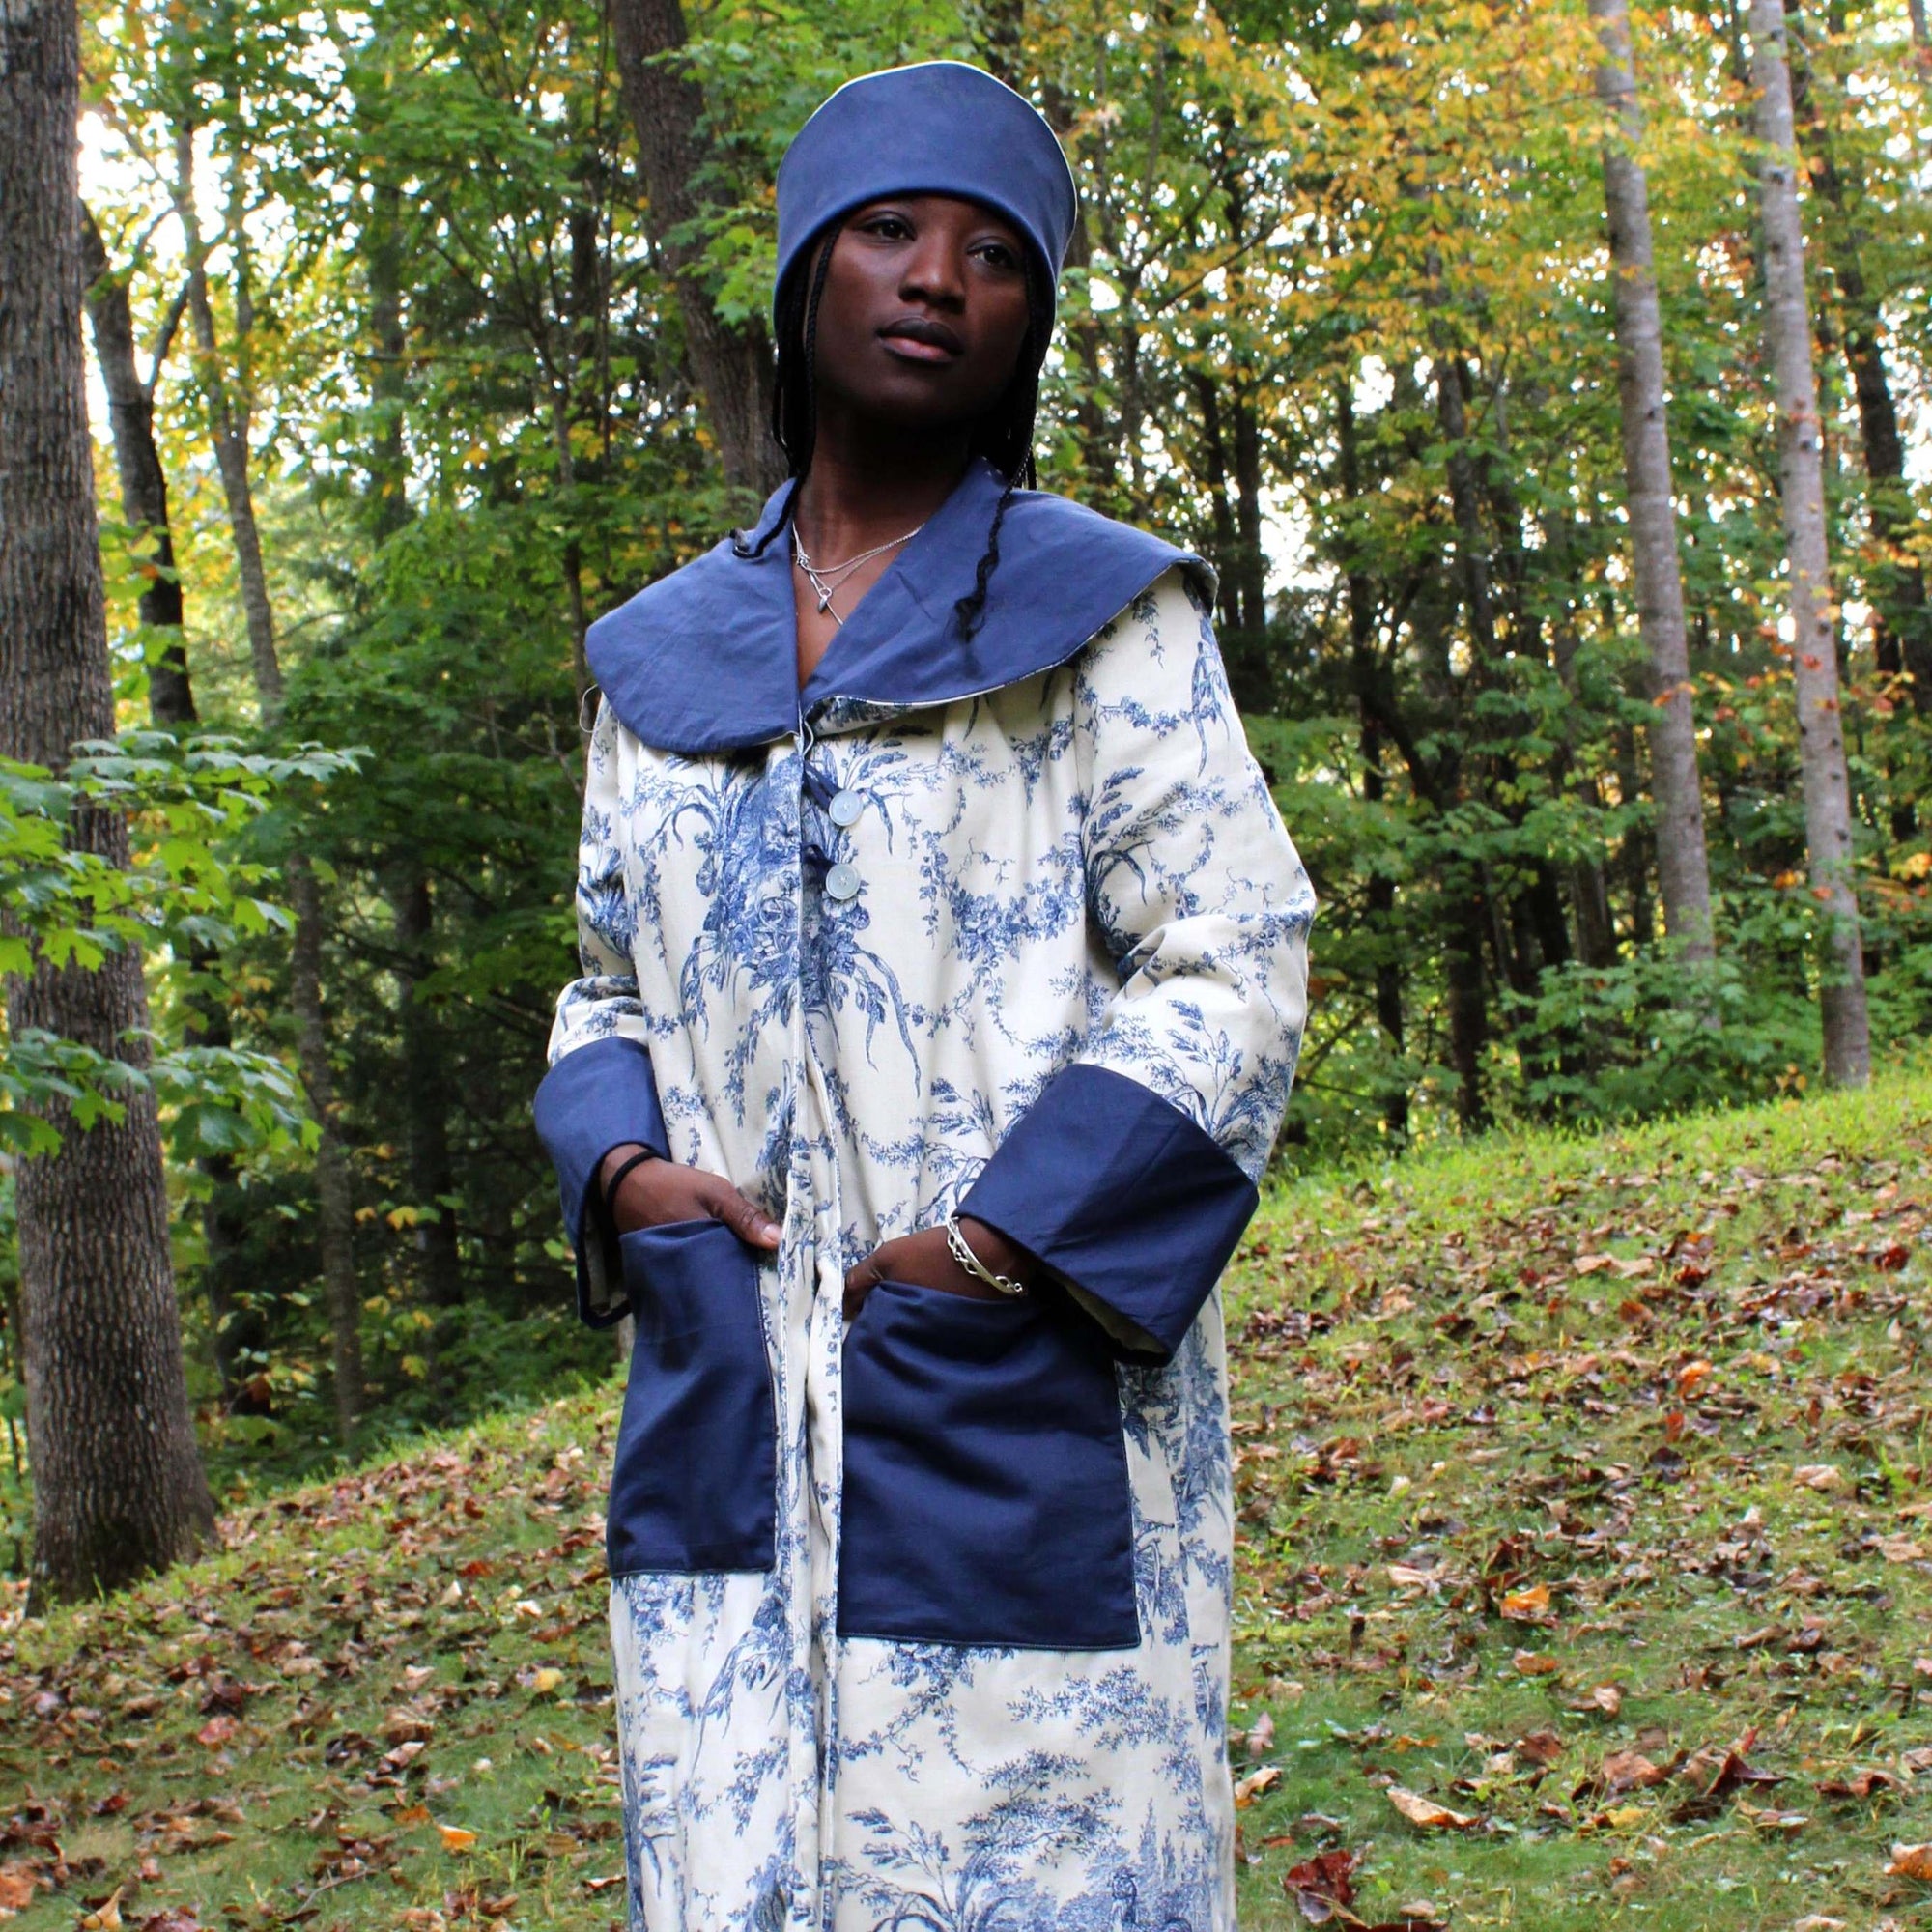
In the 1920's coat fashion shifted towards loose, straight, and undefined waistlines. Coat details, such as cuffs, collars, and pockets, were enlarged with options for contrasting fabrics and decorative embellishments. View A of our 262 Spectator Coat, based on a coat from 1925, is very typical of this 20's style, featuring a sweeping cape collar, big sleeve cuffs, and large rectangular pockets.
In this post I will show you how I made a version of View A of the Spectator Coat. I made some modifications, mainly to the construction of the pattern, that is slightly different from the original construction. I made a more informal, less tailored, coat without shoulder pads, sleeve heads and interfacing. However I do think referring to the "Professional Tips for Sewing Success" that is included in the pattern is very helpful. These Tips teach how to make your own interfacing and shoulder pads from Hair Canvas is really interesting. Hair Canvas gives the garment a more structured shape but without the stiffness of interfacing we have now. Cotton batting, fleece, and flannel can also be used to make your own shoulder pads and sleeve heads. But I did not do any of this for the coat here.
I picked View A of this pattern because I love the dramatic collar -- it's like a cape and it feels empowering. 266 Greek Island Dress, 270 Metro Middy Blouse (which was the first Folkwear pattern I used), 211 Two Middies, and 150 Hungarian Szur all have large collars and I really like them all.
For me, making this coat was actually a very simple assembly process, not tricky at all. This pattern may look intimidating but it comes together quite easily. I hope this post helps you also find that this coat is not nearly as intimidating as it looks at first.
Lets talk about fabric options!
Medium to heavy weight fabrics are suggested for this coat. Silk and cotton velvet would look very luxurious, twill or wool for a more casual look. Boucle (fabric made from looped yarn) and corduroy (make sure you choose a layout with nap) would be great as well. And check out our fabric suggestion post for this coat.
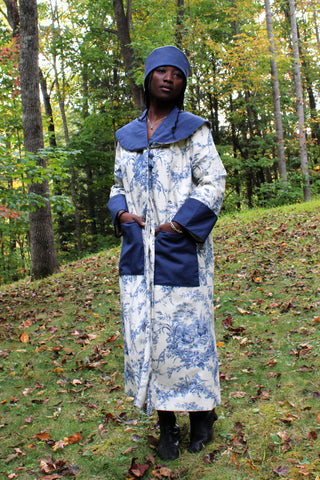
I used a medium-weight, blue and cream French toile cotton canvas as the main fabric for my coat. It's not fabric designed to be very warm, but this jacket is meant to have layers worn underneath and I thought this fabric would be a lot of fun to use to make a coat from. It is perfect for the informal-looking coat that I had in mind. We actually have this fabric in our shop now!
For the lining, we suggest a medium to light weight fabric like silk, cotton, or rayon. If your main fabric is quite thick or heavy-weight, use something lighter such as a cotton voile, silk, or Bemberg. I used an off-white cotton linen blend for my lining. It complemented the cream in the toile of my main fabric, and it was a little lighter weight than the canvas of the main fabric. You can also find the fabric here in our shop.
For the cuffs, collar, and pockets, you can choose anything from contrasting fabrics to complimentary, or use your main fabric. Faux fur would be really fun and fitting for the 20's era for the collar and cuffs. Boiled wool, jacquard, satin brocade, suede, leather and medium weight silk are also great options for contrasting fabrics. Usually you want a fabric of similar weight as your main fabric for these details. However, we had a cotton voile in our fabric collection that matched perfectly the blue in the toile of my main fabric, so I went with that. It is lighter weight that you would normally want to use in these details, but it worked very well. I used this marine blue cotton voile.
Another thing to consider when planning this coat and choosing fabric is how you might want to embellish it. The collar, cuffs, and pockets of this view are particularly good canvases for embroidery, applique, and fabric painting. Here are previous blog posts that show how to do some embellishment techniques. Maybe checking these out will help you come up with your own to embellishments for this coat: Chinese Jacket Embellishment, Flapper Dress Embroidery, How To Transfer Embroidery Designs to Fabric, Sewing Designs onto Fabric.
Sizing
Pick your size using the yardage chart, and keep in mind that the coat is not fitted, but very loose. So if your want it to be a closer fit, think about making a smaller size. I made a size Small. View A measures 51"/129.5cm from center back neckline to hemline on all sizes. This is meant to hit about mid-calf, but was low-calf length on me. If you need to lengthen or shorten, do so before cutting your fabric. If you do want to lengthen or shorten, you may need to increase or decrease your yardage of fabric before purchasing and cutting your fabric.
Seam Finishes
Since this pattern has a lining, the only seam finishing you really need to do is press! However, if your fabric ravels, I would suggest that you finish the seams with some type of overcast stitch (serge, zigzag, etc.).
Make sure you press really well (there are tips for pressing in the pattern!). I used to never press while I sewed and now I can't stand it if my seams aren't pressed well at each step. It really makes a difference and the assembly process goes more smoothly.
This was my process!

First I traced by pattern and cut out my fabric. View A has softer lines and a less formal structure than View B. Since I used a canvas fabric, I didn't feel the need to have more structure in this garment. So I did not use interfacing that the pattern calls for.
To start, I marked darts on the wrong side of the front and back pattern pieces, I like to press my darts in place before I stitch. And I tie the darts at the tip rather than back stitching to secure in place.


I sewed the shoulders together.

Easy seam finishing, just press seams open.


If you are embellishing the collar with applique, decorative embroidery, or any other techniques (which I would love to see someone do) do so now on an interfaced Collar piece. The interfacing here for embellishments is important to provide stability for the fabric.
Since I used cotton voile as my contrasting fabric, I doubled my voile for more opacity (since the voile is semi sheer) and stability.

If you are using three layers, as I was, it is probably wise to baste the layers together along the outer edge before assembling, just to keep everything together and neat.

I trimmed the outer seam allowance and clipped into and cut notches out of the seam for a for the fabric to lay flat when turned right side out.

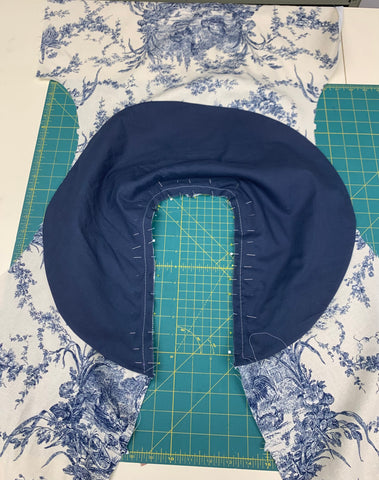
Then I basted the Collar neckline edges together.

I basted the collar to the coat neckline edge between the squares, with non-interfaced collar toward coat if you are using interfacing. I was not using interfacing, so I placed the outer fabric (not my contrasting fabric) toward the coat.
I did not have any trouble matching the notches on the collar to the coat Center Back and shoulder seams. Depending on your fabric stability, you may need to clip along the coat neckline as needed to fit collar smoothly. Another good tip is to hand baste the collar onto the coat before stitching with a machine. This allows you to adjust it and not worry about pins when you are sewing.
Next, I made button loops.
To make button loops, cut a bias strip of coat fabric 1-1/2” x 10” (4 x 25.5cm). To cut on the bias is to cut at a 45 degree angle from the selvage which is the grain direction of the fabric.

Fold strip in half lengthwise, and make sure to press. You want this piece to be pressed really well before sewing because it makes it much easier to sew. I used lightweight fabric for this, and it might have been a good idea to interface my bias binding to make them more sturdy.
With right sides together, stitch 3/8” (1cm) from raw edge and trim close to stitching. Turn right side out and press. Use a loop turner, bodkin, tube tuner, or even a safety pin and string could work.
Cut the strip in half.

Like folding a paper airplane!
To form loop, fold each piece in half, bringing seamed edges together. If your fabric has a mind of its own, do like the instructions say to maintain loop’s shaped end and make a few invisible hand stitches through seam edge at 1/2” (1.25cm) from end to ensure that folded end of loop protrudes beyond button.

If you already know the buttons you will be using, adjust the length of the loops to fit buttons and baste in place along seamline. I didn't know what buttons I was going to use, so I just adjusted the button positioning when I finally pick some out.

Again, I staystitched along the neckline edge of the coat facing.

 .

I also understitched the seam allowances to the facing to keep seamline from rolling to the outside. To understitch, always press the seam allowance toward the lining or facing and stich to about 1/16"-1/8" (1.6-3mm) from previous stitching, or seam line.
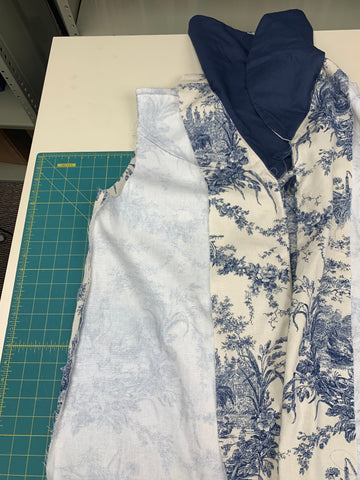
For the sleeves, if you want more structure, baste or fuse sleeve cap interfacing to the sleeve caps. Again, I didn't feel the need to do this with the soft, more gentle, look I was wanting from my coat.
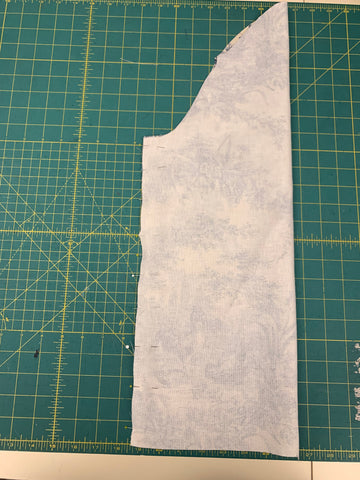 I wanted the lining of my cuff to be my outer fabric and the solid blue to be the outer cuff. I used two layers of the cotton voile again for the outer fabric for the cuffs and pockets.


I like how the cuff is assembled to the sleeve. It makes the lining assembly look more professional. It was a good tip to turn up the cuff 1/2” (1.25cm) from seam so that seam is tucked inside sleeve. This seam was eventually covered by the coat lining.

I really like this fabric combination!

Pressing up the hem of this coat has can be difficult since it is so wide. I used a ruler and marked the hem length on the right side of the fabric so I could see the hem line easily when I pressed towards the wrong side. Here I measured up 3" (7.6cm) from the edge to create my hem for the outer fabric.

I followed the steps of the lining as instructed and finished the coat.
 Lining of my coat inside out on the dress form.
This was a great project with very clear pattern instructions which were easy to follow. I'm really happy with how this turned out, and I think this fabric combination is beautiful. I see that toile is making a comeback again as a trendy fabric to use in garments.
I also made the cloche hat that comes with this pattern! I used the doubled-up voile for the hat cuff and the toile for the main part of the hat, and lined the hat with the scraps from my coat lining. It was a quick project that took very little fabric.
We would love to see what you make with this 262 Spectator Coat pattern! Show us your rendition and fabric combo for this coat in either view.



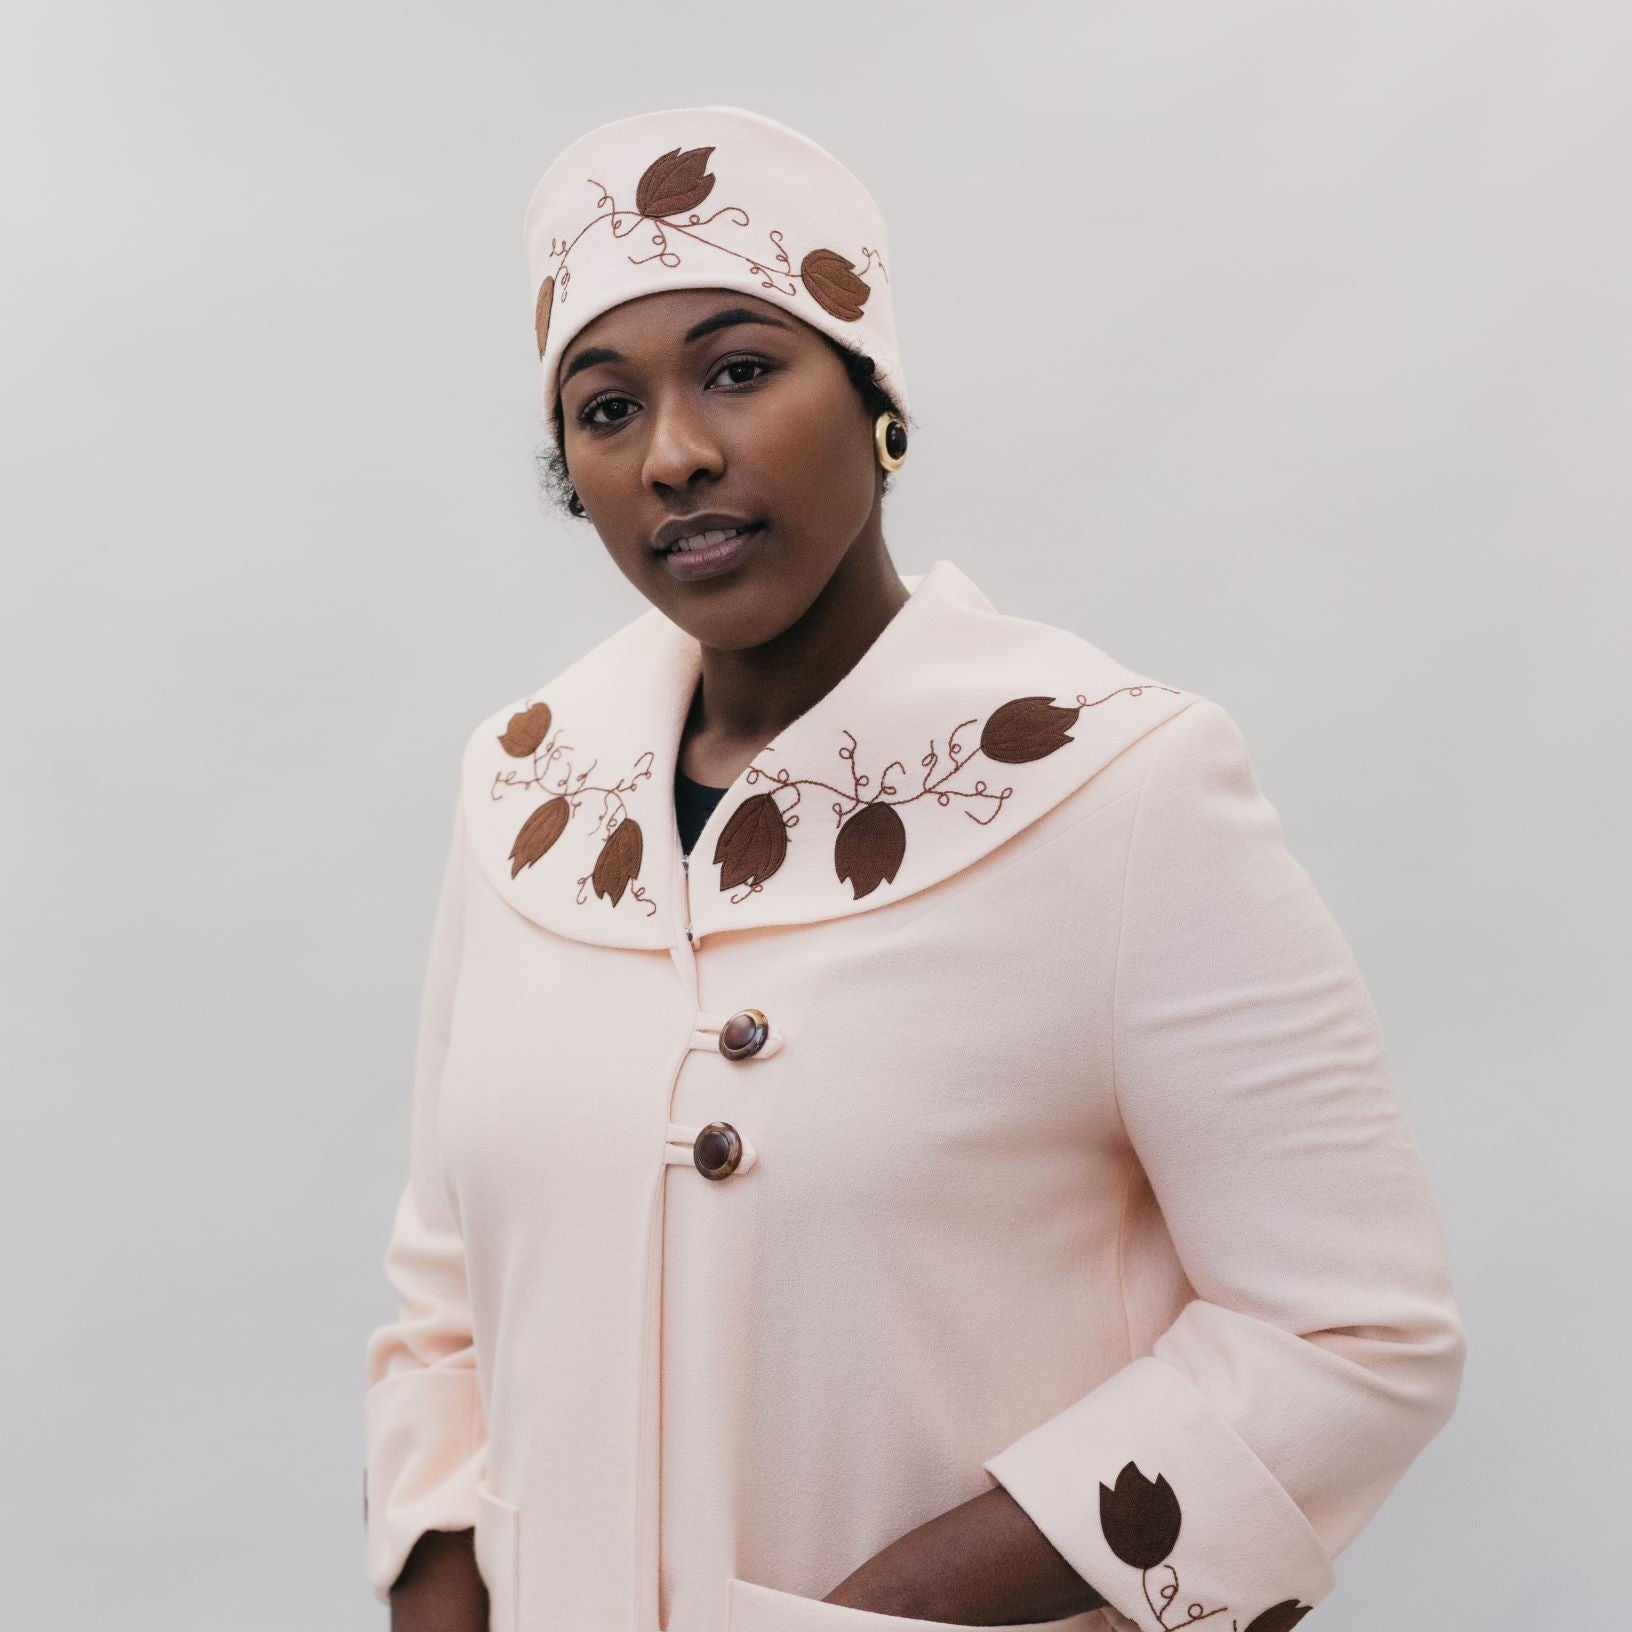
It's getting to be that time of the year again . . . Coat Season! Our featured pattern this month, 262 Spectator Coat, provides and encourages many customizable possibilities for both views - including embroidered applique, hand painting, and contrasting fabrics. When it comes to long coats, the right fabric can make all the difference. Fabric can make a statement, can provide varying degrees of warmth, can make a coat feel formal or informal, and on and on.
Below are some of our current fabric suggestions for the 262 Spectator Coat. These fabrics are also great for the hats. And we just released the hats as their own separate PDF patterns - the cloche and the turban. You should also think about trims and embellishments or contrasting fabrics to use for the collars, cuffs, and hats when looking for fabric for these coats and hats.
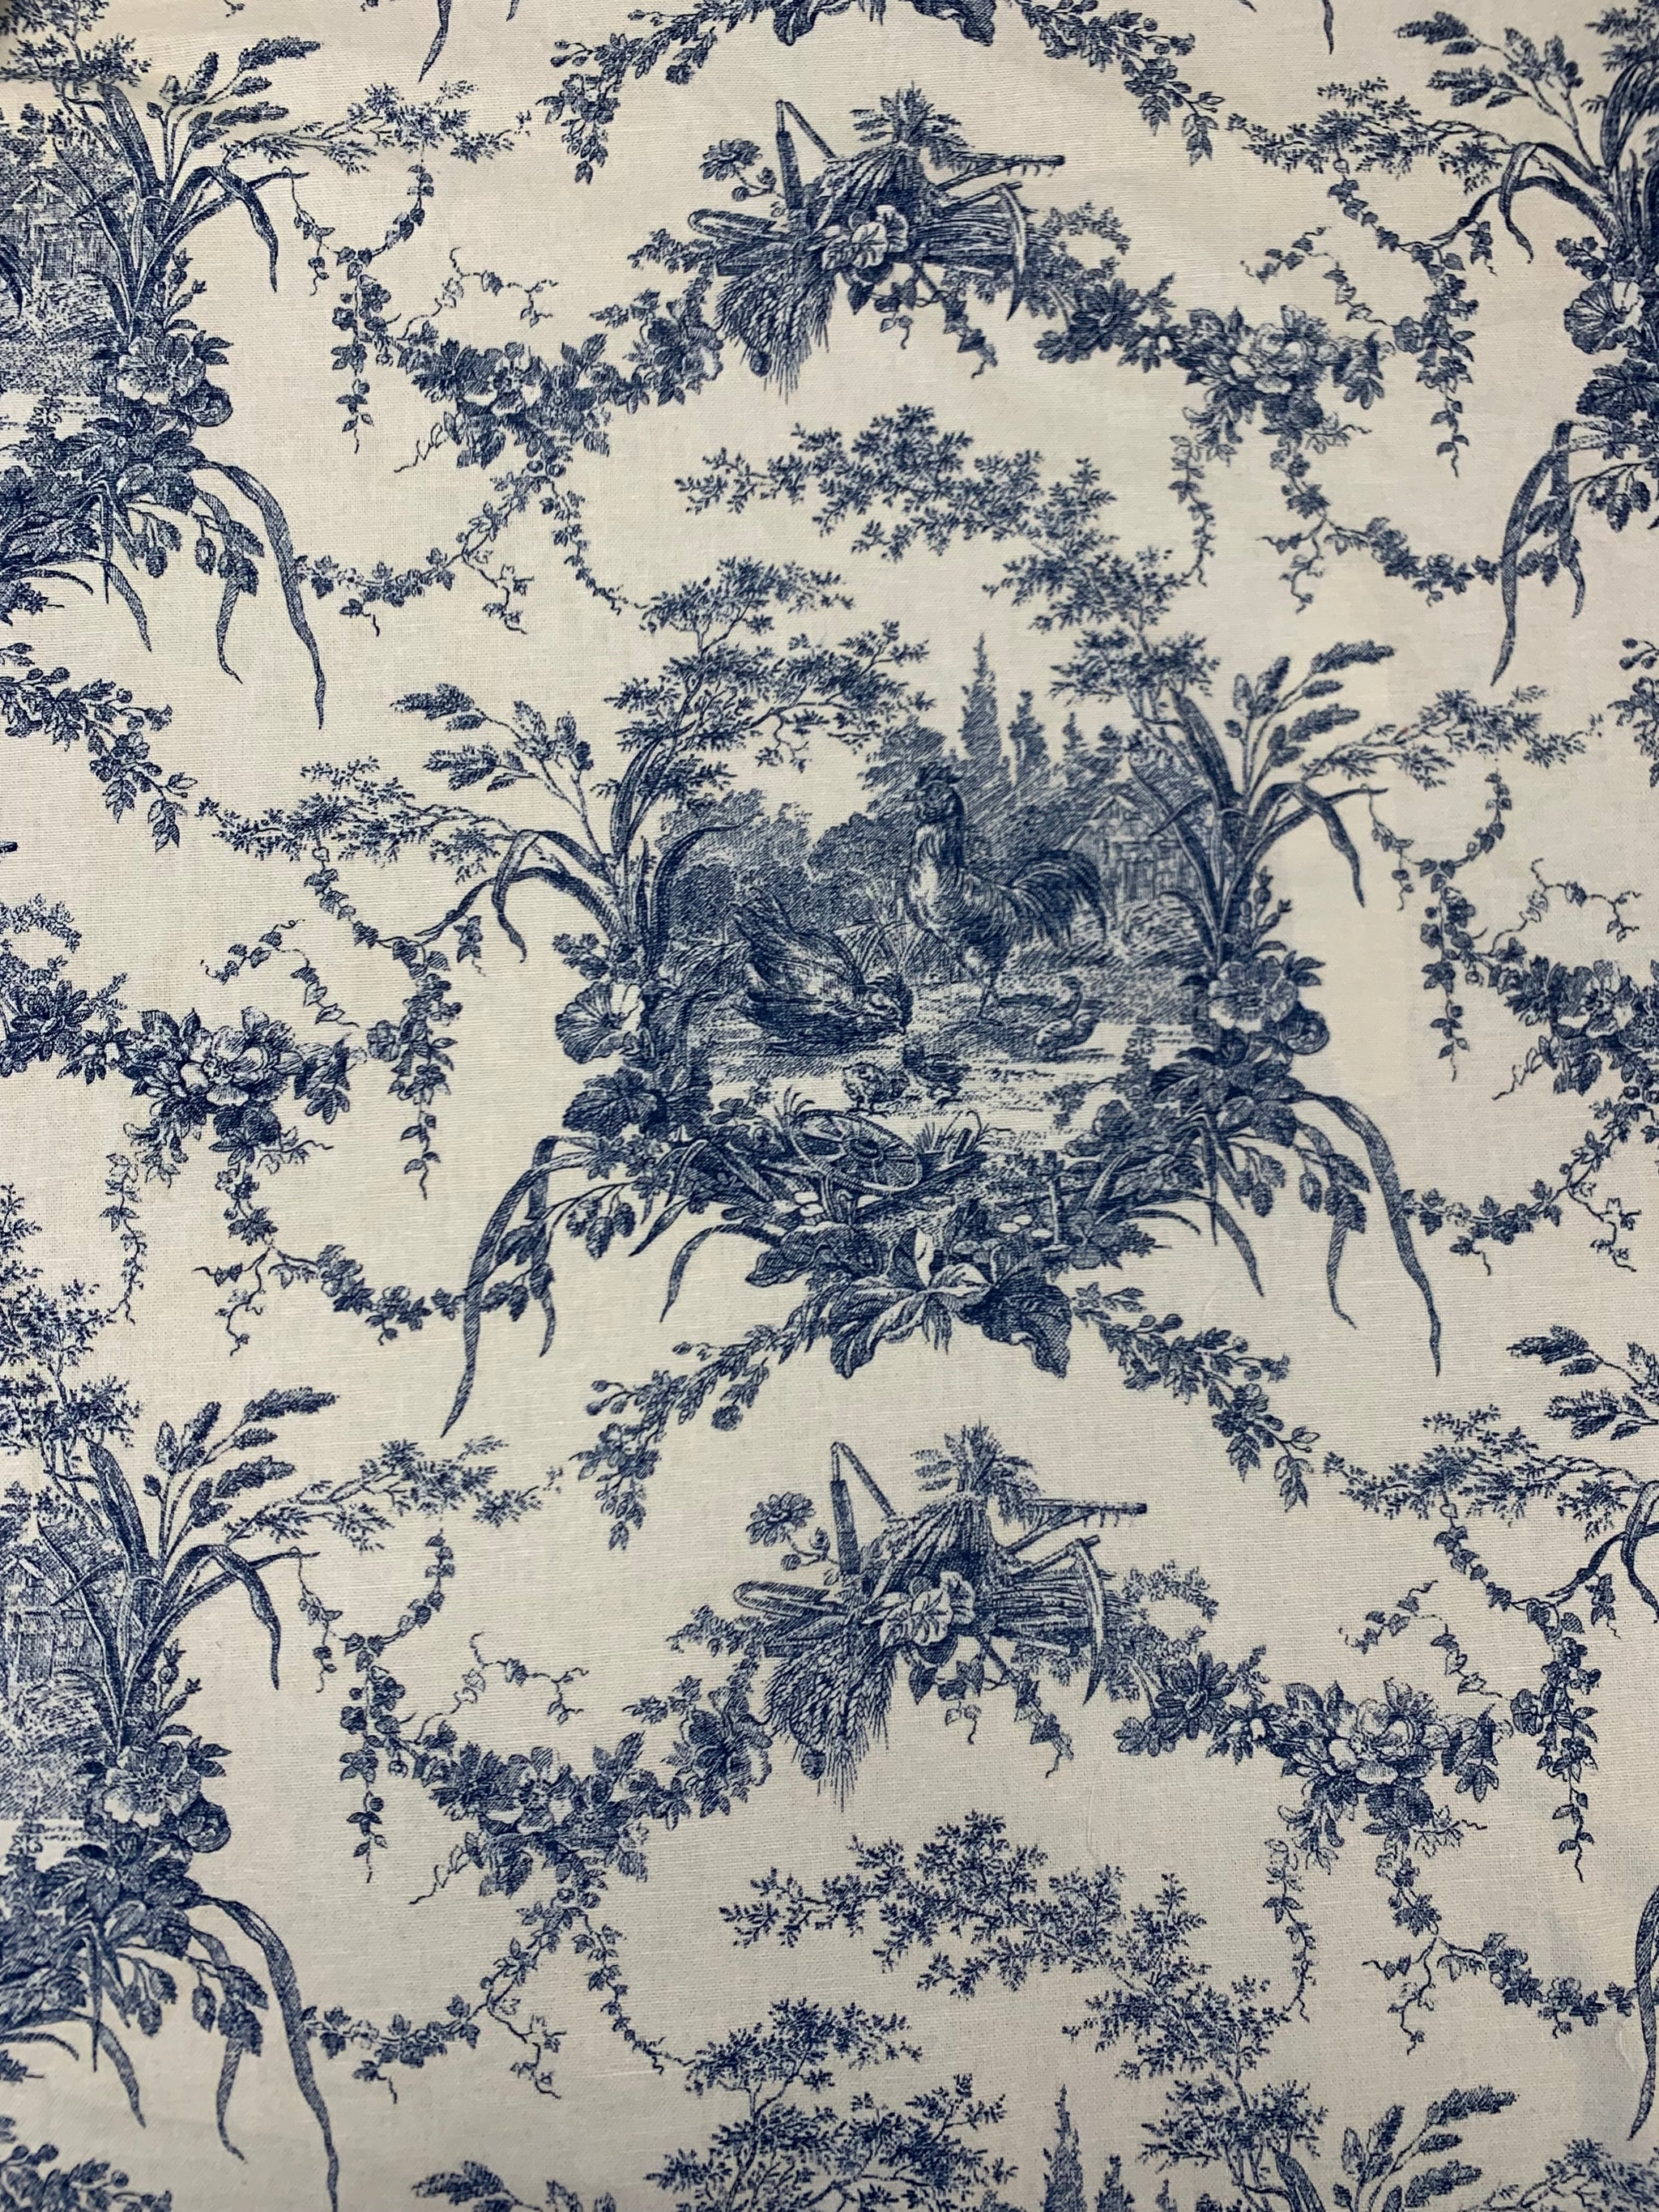
This cream French toile print is a cotton canvas in our own shop. It has a plain-weave with a soft hand, durable and sturdy with a midweight feel. Perfect for a light weight coat for fall and spring - a bit of a statement print (and right on trend) for an informal coat. Love those chickens!

I like this Nara Homespun collection from Harts Fabric features thick cotton fibers woven together in an old-fashioned style to create a sturdy fabric with a stiff drape, which will add to the structure encouraged for the coat. This fabric has a beautiful chrysanthemum design and has a similar color scheme as the French toile above. I think this fabric is pretty and is definitely a statement. Again, great for a lighter weight, informal coat.
This light to medium-weight woven wool woven in a pretty vicuna (light brown with orange undertone) would be a great for the main fabric for one of the coats. The plaid Italian wool below would go really beautifully as a contrasting fabric giving it a casual and vintage look in my opinion. Both of these fabrics come from the Folkwear fabric collection.
Oak Fabrics has some beautiful wools, and this pink wool blend coating is similar to the fabric of our sample above. Add applique and embroidery like the sample or use a contrasting (or complimentary) fabric for the cuffs and collar. We love pink, so this one stood out, but Oak Fabrics has some great wools.
This navy wool blend (mostly wool) is heavy weight and perfect for a classic warm wool coat. This would also be a great canvas for applique or other embellishments, and would work well with contrasting fabrics. This wool comes from Folkwear's collection.
Check out all of Folkwear's wool options here.
Bolt Fabric Boutique has a great little selection of some fabulous felted wools. These fabrics are hard to find and I trust Bolt Fabric to provide high quality fabrics. This lime green felted wool would make a statement coat and would be a great canvas for any embellishments. They also have black for a classic coat, as well as several other colors (and one plaid).
Cotton velveteen makes a great trim for these coats and hats, but it is also priced well enough that the whole coat could be make with it for a luxurious feel and beautiful finished coat. This velveteen comes in several colors at Bolt Fabric.

For something truly decadent, this rayon/silk velvet from Mood Fabrics would be fabulous to make the cuffs and collar and hats of this pattern. You can use these very expensive fabrics for the pieces that don't use a lot of yardage to give your coat (or hat) a luxurious look and feel without breaking the bank. This fabric also gives a period feel to the coat. Of course, if your budget allows, you could make the coat body from this fabric instead. This fabric comes in several colors.
 Brown Bronzed Foiled Faux Fur Fabric
For another decadent, and period look, a faux fur would be amazing for the trims on this coat and to make the hats. I liked this brown bronze foiled fur, also from Mood Fabric. There are a lot of faux furs on Mood's site, and I would choose one with a shorter pile for ease of sewing.
So, what fabric(s) would you want to make your Spectator Coat from? Stay tuned for a sew along for View A of this coat where we used one of the fabrics above for the coat!
Originally written in October 2020 by Cari.
There is no denying that this Halloween will be atypical since we are still needing to maintain social distance due to COVID-19. I've been contemplating how to celebrate the season myself. I have always loved costuming and celebrating Halloween. So, I don't just want to give up on it entirely this year since there is not a social aspect to look forward to.
And, for the past year or two I've been in a between-phase with a young teen who is almost "too big" for trick or treating, but too young for missing out. We have gone back and forth with going out or staying in. Luckily, we live in an area where whole families participate and adults and kids alike fill the streets on All Hallows Eve. We have alternated between hosting friends (to watch scary movies, play games, and eat treats) and hitting the streets ourselves.
Reflecting on this I have been thinking about how to celebrate this year since gathering indoors doesn't seem like a great option and trick-or-treating is not a given either. It may just be a themed movie night at home this year! I can always enjoy the costumes I see on the screen.
Since we haven't been able to go out to see movies, plays, music, etc in a while; I have enjoyed quite a few movies and TV series at home. I though it would be fun to look at some popular shows and movies that I have enjoyed this year for some inspiration. I often find myself watching and noticing costumes that are "just like" some of the Folkwear Patterns.
I recently got really caught up in Masterpiece Theater's Poldark. The first garment that immediately screamed Folkwear was a cloak much like our 207 Kinsale Cloak! Later in the series the 215 Empire Dress continued to grace the screen.

Cloak image from Pinterest from Poldark

Empire Dress from Poldark on Pinterest
The Peaky Blinders 1920's style is an eyeful. Here is a coat that is so very similar to our 262 Spectator Coat. Gorgeous!
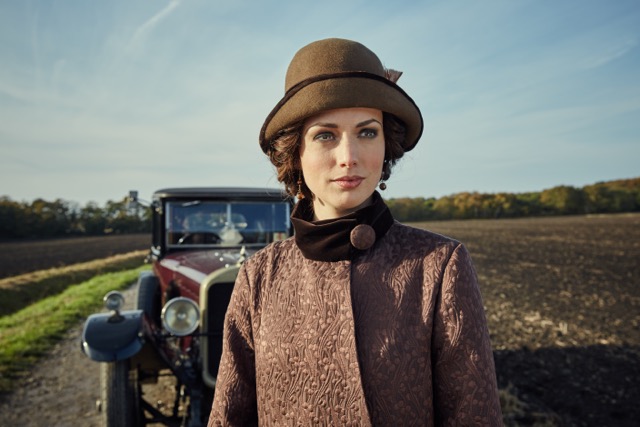
And don't forget the 202 Victorian Shirt, 222 Vintage Vest and 263 Countryside Frock Coat!

Self Made: Inspired by the Life of Madam C.J. Walker features similar menswear mentioned above. There were multiple suits worn by Octavia Spencer as Madame CJ Walker that remind me of our 508 Traveling Suit. There were quite a few references to the 205 Gibson Girl in this film as well.

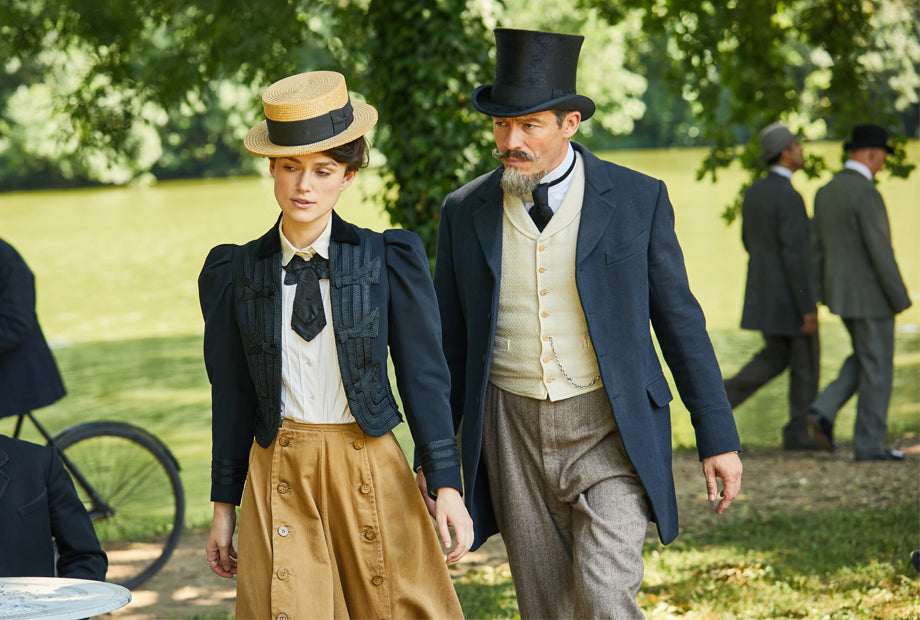
Also, the costuming of the movie Colette was gorgeous! The split skirt worn by Kiera Knightly when riding a bike and walking in the part is "just like" our 231 Big Sky Riding Skirt.

Split skirt (or riding skirt) which can be worn as pants or a skirt (buttons down the side) is such a clever design!
What are your Halloween plans? Are you dressing up? Do you love to make costumes? What films and shows inspire you?
Let us know!

By Esi Hutchinson
Hello and welcome back to our new pattern, 511 Juliette's Dream, a lingerie baby doll dress that comes with two views and in sizes XS-4XL. Today I am going to show you how I made our View B - which has an open front, an unlined bodice with crisscross straps, and a full circle skirt accented with bows on the side seams. Both views of Juliette's Dream can also be made into a casual day wear if wanted, perfect for a spring or summery days - and of course, great for the privacy of home. Find my previous post for a sew along for View A here. In this post, I will go through how I made View B and I will show you how I added a lining for the bodice even though this view has an unlined bodice. This option is good if you don't want to finish the edges with bias tape or edging or if you want more body in the bodice (or if your fabric is sheer and you want another layer).
Fabric and Preparation
This sew along is for View B, has the same fabric options for the previous sew along for View A. This pattern needs fabric that is light and drapey. Use soft and flowy fabrics such as silks like charmeuse, habotai, crepe de chine, or silk synthetics. Cotton voile, lightweight linen, rayon, or rayon/Tencel blends are also great options. Check out our fabric collection we just got a ton of new fabrics added to our beautiful collection. If your fabric is quite sheer you can add lining of the same fabric for this view, but of course a sheer fabric is a great design choice for this pattern.
Always pre-wash your fabric before cutting, unless it is laundered fabric.
For notions, this View only needs bias binding (which I will cover below) and ribbon for the straps and bows. If not lining the bodice, you will need 2-1/2 to 3-1/4 yards (2.3-3m) of 1/2” (13mm) bias binding. If you do line the bodice, you will only need about 1-1/2 yards of bias binding. You will also need 2-1/2 yards (2.3m) of 1/4” (6mm) ribbon or bias binding for straps and another 1-3/4 yards (1.1m) ribbon for bows and ties. You can use slightly wider ribbon, up to 1/2" (13mm) if you prefer. For the ribbon, I suggest something satin or soft. You can also make your own "ribbon" with bias binding - just fold it in half and sew along the edge to close it.
Sizing
Choose the bodice cup size to fit your bust and cut the size that fits best according to measurements in the yardage chart. To find the best cup size, measure your full bust and high bust. If there is a 2” (5cm) difference, choose B cup; if a 3” (7.6cm) difference, choose C cup; and if a 4” (10.2cm) difference, choose D cup. To facilitate cutting out the pattern, mark your size along the appropriate cutting line(s) with a colored marker. The yardage chart also has approximate finished measurements, if that helps you decide which size to cut. I used the size Small for this project.
You may need to adjust the pattern pieces because these are approximate measurements. Making a muslin first is not a bad idea for a perfect fit for you. You can find the finished measurements on the back of the paper pattern or in the PDF pattern.
Seam Finishes
If you are not using a lining for View A , serging, overcasting or zigzag stitching can be used to finish seams if desired, especially for fabrics that fray. Picot the raw edges for the hem; and skirt seams could be finished with a French seam. You could also pink the seams for less bulk and a vintage-style seam allowance.
Learn how to sew a French seam in this blog post.
Cutting Out Your Pattern
Cut out your pattern pieces using the different cutting lines for View B. Remember to also cut lining pieces for Front A and Back B if you want or need it. The pattern indicates to only cut one set of Front A and Back B because this can be an unlined top, but I wanted to line the bodice, so I cut two sets. For View B, you do not need the strap pieces because you are supposed to use ribbon to create the straps. However, if you prefer to have wider fabric straps, you can use the Strap piece and cut two from your fabric. You will use the instructions for straps in View A.
Sewing the Pattern
Bodice
With right sides together, sew center back seam on Back Bodice B, and press the seam open.


With right sides together, sew back to Front Bodice A at side seams, matching notches. Press seam open.

If using a lining, like I did, you should repeat these steps for the lining.
Skirt
With right sides together, sew center back seam on Back Skirt matching notches. Press seam open.

Then, with right sides together, sew Front Skirt E to Back Skirt at side seams stopping at the single notches. Press seams open to notch. Clip the seam allowance to the stitching (but not through) at notches.

Pinned Front Skirt E to Back Skirt F at side seams stopping at single notches
To finish the hem of the skirt, you will create a picot hem. This is a simple hem that can be used on fine and lightweight fabrics to create a tiny, slightly scalloped hem. Use a wide zigzag stitch along hem edge catching the raw edge in the zig-zag to create picot hem. If fabric frays easily fold under 1/8"-1/4" (3-6mm) and zig-zag wrong side up.
You can also hem the skirt with another method if you want - using a rolled hem or turned under hem.

Close up of zig-zag stitch on Skirt hem
Bodice to Skirt
With right sides together, sew skirt to bodice. Finish the seams and press seams toward bodice.

If you are using a lining (like me), sew the lining to the bodice now. First, it will be helpful if you sandwich your straps between the bodice and lining on the front so they are inside the seam of the bodice. You don't have to do this. I did not, and I added the straps later. With right sides together, sew the bodice to lining at the neckline. You will be leaving the front seam allowance open. Trim seam allowance and corners. Turn the lining to the inside and press.

Pinned bodice lining to Bodice outer layer at neckline
Fold under 1/2" (13mm) on bottom edge of Bodice Lining and slip stitching to previously stitched seam leaving front of bodice open, enclosing the bodice hem.
Now, place gathering stitches 1/8” (3mm) from left center front of bodice, catching both layers of fabric if you have lined the bodice.

Close up of gathering stitches at Bodice center front
Pull gathering thread until fabric measures about 2” (5cm) and stitch within the seam allowance to hold. Repeat with right side.

Bias Binding Time!
The front of this View is finished with bias binding. If you are not lining the bodice, as the pattern indicates, you will also finish the neckline with bias binding. Personally, using bias binding is challenging for me. My advice if you also struggle with it is to press really well, and if making your own bias binding try to cut as precisely as you can so you have enough when sewing the binding to the garment. If you want to see an easy way of making bias binding, we have a blog post here and a video on making continuous bias binding here. These tips really help also!
Cut two pieces of your bias to be as long at each side of the front, from neckline to hem plus 1" (2.5cm).
Press open one side of the 1/2” (13mm) bias binding. Sew pressed-open side of bias to wrong side of left garment front. Repeat with right side.

Trim seam allowances to 1/4” (6mm), and fold under 1/2" (13mm) at top and bottom edges of bias binding.

Turn bias binding to right side, folding it over the remaining seam allowance and press.

Press and edgestitch through all layers.

If you are not using a lining, you will sew bias binding to the neckline edge in the same way as the center fronts, trimming and turning under ends of bias so that they line up with the front edges of bodice and raw edges are enclosed.
Straps
My main advice here is to get someone to help you! I would also maybe use string as guides for your final fabric or ribbon so you know how long to cut your straps. Either way, make sure to cut your ribbons several inches (or even 6-12 inches) longer than needed so you can adjust them easily.
Again, you can use ribbon or you can make your own spaghetti straps with fabric or bias tape or binding. Just make sure you have enough length for the straps. Pin two straps to each side of the front bodice where marked on pattern and sew securely to the bodice. The inside straps/ribbons will be about 5” longer than the outside straps/ribbons. The inside straps will crisscross in the back and the outside straps will just go over the shoulder. Adjust to fit the wearer, and pin and sew the straps in place on inside back of garment where indicated on the pattern piece.


All Straps sewn on to Bodice Front and Back
If using straps from View A, follow instructions for View A, and sew in place on inside of the bodice as marked on pattern.
Front Ties, Side Ties
Either make spaghettis from self-fabric or use ribbon and securely sew two 10” (25.4cm) ties to inside of bodice at the waistline and two at inside of the neckline edges on each side of center front, as marked on pattern.

Don't forget to remove gathering stitches if visible.
Using about 10” (25.4cm) of ribbon or spaghettis, tie a bow and hand or machine sew it to garment at the top of the side slit on each side.


We have written many posts on Halloween and costumes over the years! So today I am going to just round up these posts so you can revisit them all, get ideas and inspiration, and get to work on your (or someone else's) fabulous costume.
First, we have a detailed tutorial on making a witches hat. Which is perfect to pair with our 207 Kinsale Cloak (or 208 Child's Kinsale Cloak). We show you how we made the cloak for a child's costume (and decorations) here. And make the cloak even spookier with this tutorial on adding bats, a ruff, and a magic wand to the cloak!

Turn the 213 Child's Prairie Dress into a very cute witch's costume (also perfect for Harry Potter robes).

Dressing up as a character from Outlander? We have you covered in this blog post!

Want to make a great costume from the 1950s? The poodle skirt from our 256 At the Hop pattern is great for a blank canvas for design, as this blog post shows you.

Recently, we put together a list of Phryne Fisher costume ideas. She has constantly been an inspiration to many Folkwear fans (and we love her too!). You can see all the ideas for a costume with our patterns here.

Finally, some compiled costume inspiration from years past:
Costume inspiration for adults and kids from 2022!
Halloween at home - costume inspiration from Hollywood during the 2020 pandemic.

The clothes of Phryne Fisher, or "Miss Fisher", the protagonist of the popular TV series Miss Fisher's Murder Mysteries, have been inspiration to countless people. Phryne Fisher has the best vintage style! The series is set in the 1920s and there are loads of amazing clothes to be inspired by. And she wears them so well! We love Miss Fisher's clothes here at Folkwear as well, and hear from many of you about how much you love them also, so thought we would do a little "Find That Pattern" from some of her on-screen outfits.

First up, this this great bright red cheongsam. Popular in the 1920s, this dress developed from a Westernized version of traditional Chinese dress. You can make your own with our 122 Hong Kong Cheongsam.


Western fashion was strongly influenced by Asian fashion and art in the 1920s, and a kimonos (and haori) show up in several Miss Fisher episodes. This particular one has stunning embroidery on black silk. You can make something similar with our 129 Japanese Hapi and Haori or 113 Japanese Kimono patterns.


To get the look of this safari jacket and suit, you could use our 130 Australian Bush Outfit. The series (and books and movie) take place mostly in Australia, so this pattern is perfect! Our pattern has jacket, trousers, and shorts for men and women.


Next is this wonderful sailor outfit for a jaunty stroll down the boardwalk (or jetty) - a middie shirt with a classic pleated skirt. Use our 211 Two Middies to make a shirt like this! Extend the length to get the same look - lengthen/shorten lines are provided for the body and sleeves of this shirt.


Finally, this stunning coat can be made with our 503 Poriet Cocoon Coat - a design from the early 1920s. So elegant!

We do have a few other patterns that would also work for a Miss Fisher inspired outfit, such as our 269 Metropolitan Hat, our 1920s Flapper Dress (PDF), and our 270 Metro Middy Blouse.
Which patterns do you like the best? What Miss Fisher outfits would you like to recreate?

The lingerie sewing patterns that Folkwear debuted this year (510 Passionflower and 511 Juliette's Dream) are heavily influenced by the baby doll lingerie that developed and was popular in the late 1940s and the 1950s. Baby doll lingerie brings to mind sweet and sexy garments - lacy and loose and very short. Baby dolls are loosely defined as a garments with an empire waist and a skirt ending above the knee. This type of lingerie often has lace, frills, or bows on the hems, seams, or straps, giving it a typical lingerie look.
Baby doll lingerie is credited to clothing designer Sylvia Pedlar who created super-short nighties in the early 1940s as a response to war-time fabric shortages. Before this time, women's nightwear was generally long and voluminous, similar to our 224 Beautiful Dreamer. These newer short gowns were quickly called baby doll lingerie, though Ms. Pedlar reportedly did not like the term and would not use it.
Sylvia Pedlar was a successful designer who studied fashion in New York and quickly started her own fashion brand, Iris Lingerie, in 1929. She ran the company successfully until it closed in 1970, winning several fashion awards for her designs along the way. Ms. Pedlar focused on high quality lingerie and designs that drew on past romance as well as the seduction and sexual freedom of the 1960s. Not only did she bring the baby doll to popularity, she also developed a toga-like negligée designed for women who slept in the nude. In addition, she re-worked Victorian-style nightwear and added exquisite machine-made white work to many of her designs. But, for Folkwear, the baby doll gown she developed and popularized is what inspired our 510 Passionflower Lingerie Top and 511 Juliette's Dream (and several other designs we have in various stages of development).

Sylvia Pedlar design from 1962. Metropolitan Museum of Art, pinterest link.

Sylvia Pedlar design from 1958. Metropolitan Museum of Art, pinterest link.
 Inside label of an Iris Lingerie nightgown designed by Sylvia Pedlar.

The sleeping toga designed by Sylvia Pedlar, on the cover of Life Magazine, 1962. Pinterest link.
Baby doll lingerie balances cute and sexy and has a definite sassiness. The flowing skirts float out from under the bust to a very short, seductive length. And the lace and bows on hems and seams connote innocence of little girls outfits. However, sheer fabrics and often very low necklines are not at all childlike. Baby doll lingerie of the 1950s and 1960s could be made of several layers of sheer fabric in white or pastel colors. And as the lingerie style developed, jewel colors, black, and lace added to the interest of baby doll lingerie. Usually baby dolls were made with nylon, chiffon, or silk, and were embellished with ribbons, bows, and lace, making them flirty and feminine garments to wear.

Early babydoll lingerie designs - advertisement.

Vintage baby doll lingerie styles. Pinterest link.

Vintage baby doll lingerie dress with layers of fabric and short sleeves.

1960s Baby doll lingerie. Pinterest link.
While the baby doll lingerie style has waxed and waned in popularity, it has stayed a staple of lingerie design. Over the years, many changes have been made. The skirts have been made slightly longer, or even shockingly shorter. Necklines have been high and low, square, rounded, or made into deep V's. Some baby dolls have sleeves, some just small straps. Brighter colors have been used and skirts have been made less full. Some styles are open in front, and black has become a popular color. Not only all these changes, but baby doll lingerie turned into dresses - the baby doll dress became popular in the 1960s and 1970s thanks to Mary Quant's designs - and stayed a classic dress design. And now, for instance, now one may see a baby doll lingerie is not just worn as nightwear but worn over jeans and high heels. The nightwear-to-daywear trend includes this cute frock.
The juxtaposition of baby doll lingerie - sweet and innocent and sexy and seductive - has been what is intriguing and interesting of this style. And the style is surprisingly flexible, going from nightwear to daywear, from modest to quite the opposite. We hope you enjoy the options and possibilities with our patterns 510 Passionflower Lingerie Top and 511 Juliette's Dream.

By Esi Hutchinson
We have been excited about our new pattern #511 Juliette's Dream. It is one of a couple of patterns that have been sitting in Folkwear's development stage for many years - for several sets of vintage-inspired lingerie in larger sizes. We released the #510 Passionflower Lingerie Top earlier this year, and now #511 Juliette's Dream.
This lingerie baby doll dress comes in two views and sizes XS-4XL. View A has a lined bodice cinched at center front, and a two-tiered full layered skirt that dips lower in the front and back. View B includes an unlined bodice with an open front, as well an open-front full circle skirt with crisscross straps in the back. Both views have an empire waist with three cup sizes for each view. Juliette's Dream can be made into sassy lingerie in silks or sheer fabric, can be casual day wear with pants or leggings, perfect for a spring or summery day!
I am going to show you how I made View A of Juliette's Dream in this blog post, along with some tips and tricks for successfully sewing this cute top.
Fabric and Preparation
This pattern needs fabric that is light and drapey. Soft and flowy fabrics such as silks (charmeuse, habotai, crepe de chine, silk synthetics) or lightweight cotton voile, or lightweight linen, tencel/linen, tencel/twill, lyocell. For lining, use the same weight (or lighter weight) than your main fabric. For simplicity, I would use the same fabric as your main fabric.
Always pre-wash your fabric before cutting, unless it is laundered fabric.
For fun options, you can use contrasting fabrics for the upper and lower layers of the Skirt or even the Front Band D. Or, make the upper skirt in a sheet fabric or sheer lace. You could also make the outer bodice with sheer lace to match, using a solid lining layer.
I made this sample of View A with a tencel twill, and used the same fabric for all layers (and lining). It is very drapey, but has enough structure (and is not transparent) to make this garment work well as a top to wear out.
Sizing
Choose bodice cup size to fit your bust and cut the size that fits best according to measurements in the yardage chart. To find the best cup size, measure your full bust and high bust. If there is a 2” (5cm) difference, choose B cup; if a 3” (7.6cm) difference, choose C cup; and if a 4” (10.2cm) difference, choose D cup. To facilitate cutting out the pattern, mark your size along the appropriate cutting line(s) with a colored marker. The yadage chart also has approximate finished measurements, if that helps you decide which size to cut. I used the size Small for this project.
Seam Finishes
The bodice of View A is fully lined, but you may still want to finish seams if you have fabric that easily frays. Skirt seams can be finished with a French seam, or you could finish by serging or zigzag stitch. If you are using very lightweight, fine fabrics, you may want to hand finish seams or using pinking shears for a lightweight finish. The skirt hems are finished with a picot stitching, but I'll cover that later.
Cutting Out Your Pattern
Make sure you are using the different cutting lines for the specified view and for the two skirt layers needed for View A. Remember to also cut lining pieces for Bodice Front A and Back B. If you are using slippery fabric like silk, sheers, or lace, we have some great tips on cutting out the pattern here: sewing with sheers and lace, sewing with sheer fabrics, and sewing with bias or slippery fabrics. It really is best to cut everything in one layer of fabric for this pattern, especially for the skirts. And our layouts show how best to do that.


Pattern pieces cut out of fabric
Lets begin assembling!
Constructing the Bodice
First we sew the bodice pieces together. Right sides together, sew center front seam on Front Bodice A, and repeat with lining. Press seams open.

Pinning of Front Bodice Front A Outer Fabric and Lining

Pressing of curved seam for Bodice Front A
Then, right sides together, sew front bodice to Back Bodice B at side seams matching notches. Repeat with the lining. Press seams open.

Pinning of Front A to back B right sides together
Next we add the straps. Fold Strap C in half lengthwise with right sides together and sew along the long edge. Trim the seam allowance, and turn and press. Do the same for both straps. I like to use a safety pin or bodkin here to easily and quickly turn a narrow strap like this right side out. Pin/fasten one end of the strap and thread it through the tube of fabric to turn the whole thing right side out.

Close up of Strap C sewed right sides together
Sew straps to right side of front where marked on pattern, just inside the seam line. I sewed several rows of stitching to secure the straps..

Strap C pinned and basted to Bodice Front A
Now, place a row of gathering stitches ⅛” (3mm) on each side of the center front seam on the front of the bodice. Keep the center front seam allowance in gathering stitches to keep the area neat.

Gathering stitched placed on either side of center front of bodice.
Pull the gathering threads until the center front measures 2” (5mm) or as short as you can depending on the fabric you are using. Stitch gathered fabric close to center front seam to hold gathering in place. Repeat with the lining.


With right sides together, sew the outer bodice to the lining at the neckline and center backs, matching notches. Trim the seam allowance, clip corners, and clip to the center front stitching line. Turn right side out and press.

Pinned bodice lining to outer fabric at neckline and center back
Now, fold Band D right sides together lengthwise and sew using ⅛” (3mm) seam allowance. Turn to right side with a bodkin or saftey pin and press. You can press it with the seam to one side, or with the seam in the middle.

Sewn Band D right sides together at ⅛”/3mm seam allowance
Wrap the band around the center front over the gathered fabric, sandwiching both outer fabric and lining. Sew the band to the bodice at the bottom of center front within the ½” (13mm) seam allowance. I find that hand tacking the band to the bodice with a few stitches at the top and center of the gathers keeps the band in place better and looks good.

Band D wrapped around gathered Center Front.
Finally, baste lining to outer fabric on lower raw edge to keep everything in place for when you sew the bodice to the skirts.
If you want to cover your bodice/skirt seam with the lining, do not baste them together here. You will also want to keep the band on the inside (lining side) free of stitching so you can fold it all together over the seam allowance.
Skirt Construction
First, with right sides together, sew center front seams on Skirt Front E matching double notches. Do this to both the upper and lower skirts.

Pinned Center Front of Skirt Front F
Next, with right sides together, sew the center back seam from the dot to lower hem on Skirt Back F (again for both upper and lower skirts) matching the triple notches.


I serged the seams here to finish the skirt seams.
Now with right sides together, sew the skirt front to the skirt back at both side seams matching notches. Do this to both layers of skirt. This is a great place to do French seams, but I also just finished my seams with a serger.
Press all skirt seam allowances open (if not using French seams).

Pinned Skirt Front to Skirt Back at side seam.
We hem the skirts now to have less bulk to manage if trying to hem later. To create a picot (or false picot, as some call it) skirt hem set your machine for a long, wide zigzag stitch and sew along the bottom edge of your skirt. Work with wrong side of fabric facing up and be sure that outer swing of machine needle falls just outside the raw edge and the inner swing goes in far enough to keep the stitching from pulling out. If your fabric unravels easily, you may want to press under the raw edge 1/8-1/4" (3-6mm) before beginning so that the swing of the needle encloses the pressed edge. Also, you may want to tighten the upper thread tension to create more of a scallop effect. I highly suggest you practice this on a strap of fabric to get the stitch length, width, and tension that gives you the results you want.
For my skirts, I turned up 1/8" and used the folded edge as my edge for the picot hem. The picot hem will also give you a slight wave to the hem since you are working on the bias of fabric so there is a little stretch that happens.
Other hem options include serging, hand or machine roll hems, pressing under raw edge and slipstitching, or topstitching lace edging to turned under hem edge.

Folded edge of hem
Wow look at that hem, I love it!
 Finished hem.
To finish the skirts, clip to dot on both layers of the skirt back.

With right side of upper skirt to wrong side of lower skirt, sew the skirts together at the center back seam between the dot and the waistline.

Turn upper skirt to right side over under skirt and press seam. You will have finished the back opening with this seam, and both skirts should fall with their insides facing the inside of the skirt (upper skirt inside will face outside of lower skirt and lower skirt inside will face the wearer).

Now, baste both skirts together at the waistline. I would also stay stitch the Skirt waistline since its a curve, and this will help it from shifting when pining and sewing to the Bodice.

Skirt and Bodice Finishing
With right sides together, sew skirts to bodice at waistline, matching notches. Press seams toward bodice. Turn under the edge of the seam allowance at the center back and hand stitch to bodice lining.

Pinned skirts to bodice at waistline
Serge or zig-zag (or finish how you wish) this seam allowance.
Another option is to sew just the outer bodice to the skirts. Then fold under the seam allowance on the bodice lining and slip stitch that over the skirt/bodice seam. You will need to keep the front band in place and fold it into the seam allowance of the lining.
For closures, you can attach a wide bra closure to the center back, or sew on hooks and eyes where marked on the pattern. Or you can make your own button and loop closures.
Sew bias strip into spaghetti to form into 3 loops to match your button size, and handsew loops to the inside of the center back bodice as marked on pattern. I cut a bias strip about 10"(25.4cm) long. You don't need that much but it's better to have more than not enough. Your loops need to be at least a minimum 3/8"(9.5mm) longer than your buttonhole size to account for the 1/4" (6mm) to stitch them to the bodice and 1/8" (3mm) extra for the button hole. I'll show how I did mine below, but for more tips and a great tutorial on making buttonhole loops, check out this blog post.

Ironing my hand made bias strips.
Fold bias stirps in half to measure 1/4" (6mm) and stitch the long edges together to make the spaghetti straps.

Folded bias binding in half, ready to sew to make spaghetti straps for the loops.
Cut your loops the size you need and sew in place on the left side of the center back.

Sew buttons to right side back bodice, matching up with the buttonhole loops.
Fit the straps by trying on the top, and sew them into place on the inside of the back bodice where marked on the pattern.
You are now finished!
Super cute right? The layered skirt is a neat feature. I love the picot hem and it drapes and moves so beautifully.