-
Sewing Patterns
-
Fabric
- Sewing Supplies
- About
- Blog
- Gallery
-
July 13, 2021 2 Comments
This is DAY THREE of the Chupa Sew Along. To start at the beginning, click here to see Day One.
Now that the 131 Tibetan Chupa is constructed, all that is left is finishing the neckline and armholes with facings, hemming the skirt, and making a simple loop closures that is paired with a button, and adding hook & eyes for closure security.
Finishing the Neckline
If you have not already cut the facings and interfacing for the Chupa now is the time. Note: If you are working with a bulky fabric, you may wish to substitute a lighter-weight lining fabric for the facings.
To ensure that the neckband facings are made more stable and strengthened, baste or fuse the interfacing to the wrong sides of Left Neckband E and Right Neckband F. Be sure to handle (when stitching or pressing) the facing pieces with care, especially if your fabric is a lose weave. Any time a fabric is cut off grain and especially on a curve the fabric is not stable and may stretch.
Be sure to apply the interfacing to the Neckband pieces, not the facing. It is easy to confuse which is the neckband and which is the facing. When cutting two, the neckband will be pattern piece on top, with the right side facing up.


Simply pick the top pattern piece up and place it on the interfacing to ensure you have the correct pieces paired.
If using a non-fusible interfacing, stitch the interfacing to the Neckband pieces within the seam allowance. Make a stay-stitch 1/4-inch (6mm) from the outer edge this will work nicely, helping to stabilize the curved edges.


With right sides together, stitch the Left and the Right Neckband at the center back, matching the notches. Press the seam open.


Repeat doing the same with the Neck Facings pieces. Don't forget to stabilize the edges with a stay stitch 1/4-inch (6mm) from the edge.

Press under 1/2-inch (13mm) along the curved notched edges of the neckband facings. Trim away half of the seam allowance, leaving to 1/4-inch (6mm). Remember the 1/4-inch (6mm) stay-stitch I made to help stabilize the facing curves? It now conveniently serves as a cutting guide.

Hint: Any time you need to fold and press an edge neatly and cleanly, simply sew a basting stitch to use as a guide. This simple guide technique helps to create a smooth and even edge quickly and easily. Then the basting stitch can easily be removed.
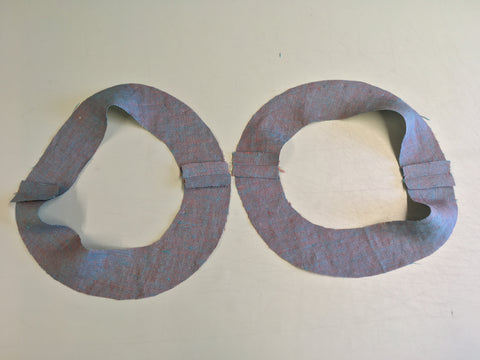
With right sides together, pin and stitch the neckband to the neckband facings along the long curved unnotched edge and both ends, being sure to match the center backs. Trim the seam allowances and the corners, clip the curves to help release the fabric, turn, and press.


Prepare the Neckline for the Neckband and Facing
Clip to the stay-stitching along all the curved neckline edges to release the fabric so that the neckband and facing will lay nicely together along the curves.

With right sides together, baste and then final stitch the neckband to the chip neckline. Match the center backs, notches, and small dots on neckband to shoulder seams. The idea behind basting the neckband on first is to allow you to easily fix any puckers or adjust any easing that might need to occur. Once the neckband and the neckline align and fit together properly, then make the final stitching on the 1/2-inch (13mm) seam allowance. Trim the seam allowances and press the seam towards the neckband.
In the photo below the neckband is sewn to the neckline and I have left pins that correspond to the center back, shoulders, and notches.


Slip-stitch the pressed edge of the neckband facing over the neckline seam. Note: Finish the shoulder seams before sewing the facing down.
If you like topstitch the neckband 1/4-inch (6mm) from the edge, meeting the stitching at the side opening. I decided not to topstitch the neckband this time. I hand stitched the neckband facing in place and decided it looked nice without any extra stitch work.
Finishing the Armholes
The armholes are finished with a simple facing that folds to the inside of the garment and is not visible on the right side.
With right sides together, stitch Front Armhole G to Back Armhole H at the shoulder and the underarm seams, matching the notches. Stitch and press the seams open.


Turn under 1/4-inch (6mm) along the outer unnotched edges of the armhole facings and press or baste to hold the edge down securely. If basting, you will eventually remove the basting stitching. I found pressing was enough to keep the fabric laying nicely after pressing. But this will depend to the fabric you use.


To attach the facing to the armhole; with right sides together stitch the armhole facing to the armholes, matching the notches, shoulder seams, and underarm seams. Trim the seam allowances, clip the curves, turn facings to the inside of the armhole, and press.


Making the Closures
Since the Chupa bodice is a wrap design, it needs a little help from a few pairs of Hooks & Eyes in strategic places to help ensure a secure closure. I also decided to use a couple of snaps just to see how they would work?
The wrap closure to the Chupa is on the right side of the garment as you would wear it. Align all the edges to be sure your hook & eye (snaps in this case) placement will nicely match-up. Sew a hook & eye on the right side opening where the side extension meets the bodice side seam. Typically the eye goes on the top of the underneath edge and the hook goes on the underneath side of the top edge. In the case of using snaps, the part with the whole goes on the top of the underneath edge and the part with the point goes on the underneath side of the top edge.

I decided to add another snap to keep the sides neatly closed. Whether using hook & eyes or snaps be sure to place them inside the edges far enough from the outer edge that they are not visible on the right side of the garment.

With the right side of the garment facing up, sew a couple of hooks on the hemmed edge of Front Underflap, one at the bottom and the other just below the neckband. Be sure to place the hooks in a bit from the hemmed edge. I lined the curved tip of the hook with the stitch line of the hemmed edge (see below). Set the eyes aside for now.
In the photo below the Front Underflap has been pulled to the outside of the garment so you can better see the hook placement.


Making Loop Closure
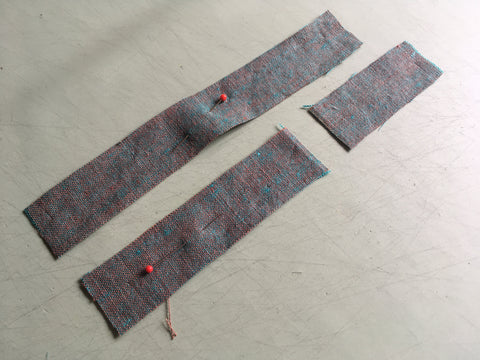
Now, for the decorative wrap closure. This simple closure is make using two strips of fabric cut using pattern piece I (i). One of the strips is made shorter by cutting 2 1/2 -inches off one end.

On both closure pieces, press under 1/4-inch (6mm) along both long edges. Use a Bias Tape Maker to make this task easier. Then fold again along the center foldline and topstitch close to both long edges. It is difficult to back stitch on such a small strip of fabric, so do not feel it is necessary.


Front Loop Closure
Slip the shorter closure into the shank of the button. If the shank is too small to accommodate the closure strip, fold the strip in half and hand stitch the button to the fold. I am using a 3/8-inch vintage shoe button.

Press under the raw ends of the closure strip 1/4-inch (6mm) and position on the neckband so the button just extends beyond the corner edge. Topstitch the pressed-under ends securely in place.


Hooks & Eyes on Front Underflap
Try on the Chupa to help you make any wrap adjustments. The extensions wrap around to the back and tie in the back or wrapped around and tied in the front. Place a pin vertically where the button meets the right side (this may fall forward or backward of the side seam). Also place pins along the left dart on the front, making sure the pins are even with the two hooks already sewn on the edge of the Front Underflap.

Be sure the hooks are securely attached to the dart at the stitching line.


Sew two eyes at the pin markings on the left dart on the inside of the front. The pins will should help determine the spot in which to sew the eyes. The idea is to align the hooks & eyes.
Back Loop Closure
Fold the remaining (longer) Closure strip in half. Press the raw edges under 1/4-inch (6mm), and position on the back. Stitch to the right side of the back using a topstitch close to the folded under edges to secure in place. Be sure to position so the loop end overlaps the pin. Since the front loop with the button is already in place you can also use the button to help in postioning the back loop. I found it easier to topstitch the looped end to accommodate the button first, before attaching the loop closure to the back (as seen below). Either way is fine.
Top stitch close to the edge of the closure being sure to allow for enough space at the looped end to accommodate the button easily.


The Hem
Try the Chupa on and have a look at the hem to see if you need to make any adjustments. When wrapped, the edges of the extension may not be even with the rest of the hemline. Due to the wrapping of this design, there is some forgiveness in the hemming. Personally I am perfectly ok with this as long as there is not an obvious unevenness.
If using a lighter-weight fabric, press under 1/2-inch (13mm) along the raw edge, then turn up along the hemline and slipstitch or machine stitch close to the folded under edge.


If using a heavier-weight fabric, stitch hem tape (or a preferred trim) along the raw edge and turn up once along the hemline and slipstittch or machine stitch into place.

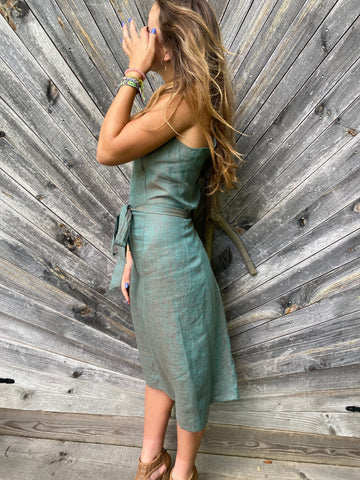
I hope you have enjoyed this Sew Along, and will enjoy wearing your new Folkwear 131 Tibetan Chupa all summer long. If you have not yet made a Chupa, I hope this Sew Along will answer any questions you might have had about its construction. It is such an easy piece to make and so flattering to wear.
Be sure to check out @WeepingMyrtle on Folkwear's Instagram page for a truly beautifully made Chupa! The hand stitching details are so lovely! Not only do we love seeing what you have been inspired to make... we can not help but beam with pride.


April 07, 2025
where is the fabric from please? x

Dino
April 09, 2025
Please let Sarah know, she is a real fan of shot linen and would really like to source some of that beautiful cloth.