-
Sewing Patterns
-
Fabric
- Sewing Supplies
- About
- Blog
- Gallery
-
September 28, 2020
Front Coin Pocket Option and Adding Waistbands to Pants.
We are going to add the waistbands and their pockets to the pants in today. We constructed the welt pocket in the right waistband on Day Three of the sew along. The waistband and waistband curtains were assembled ahead of time on Day Four of the sew along.
With that bit of prep work done we are left with adding a coin pocket to the LEFT side of the front waistband. This little addition is a hidden gem, the construction of this pocket is easy and you will love adding it to other garments as well. I find this pocket perfect for keeping my stick of lip balm readily available or for holding a car or house key. The opening of this little pocket is in the seam allowance at the edges of the waistband, where it connects to the front of the pants. This fun pocket is optional, but I hope you will try it. If you prefer to leave the coin pocket out, just skip ahead to Assemble the RIGHT Waistband to Pants (and do this step for both waistbands).
Check out Day One, Day Two, Day Three, Day Four, Day Five, and Day Six of the sew along to catch up!
The Coin Pocket (K) pattern piece is a single rectangular piece of fabric that folds to create the pocket bag. This coin pocket can be made even more fun with a creative touch. This simple piece is a perfect excuse to use your lining fabric, which is exactly what I am going to do. You can finish the long edges of your fabric piece K now if you like. However, I am going to finish the side edges of my coin pocket with a hand stitched bound seam, after it is assembled to the waistband.

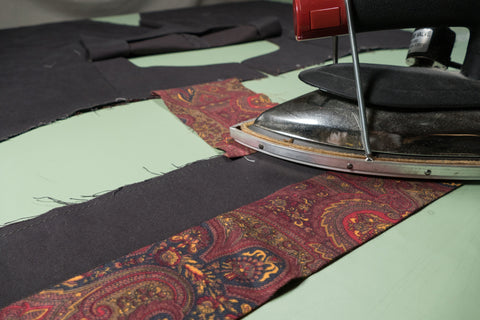
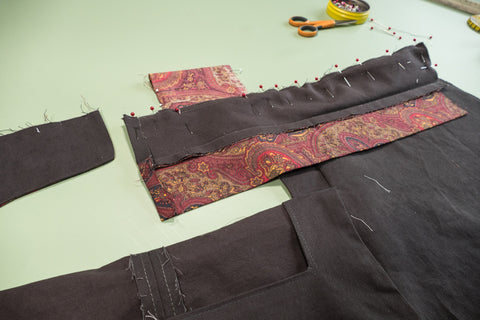
Coin Pocket and waistbands waiting to be sewn to the pants.
Coin Pocket goes on the LEFT front waistband.
Take a minute and orient your Waistband/Waistband Curtain and Coin Pocket like you see in the photo below.
With right sides together, pin one short end of the pocket bag to the bottom edge of the left waistband, matching the dots.


Use pins to align the pocket bag dots.

With right sides together, pin one short end of the pocket bag to the bottom edge of the left waistband.
Keep the waistband curtain out of your way as you work. The idea is to stitch the pocket bag edge and bottom edge of the waistband together, only between the dots. Stitch the pocket bag to the waistband just within the 1/2" (13mm) seam allowance, between the dots. Back stitch at each dot. Making your stitch just inside the seam allowance will keep the pocket bag from being visible when complete.

With right sides together the pocket bag sewn to the bottom of the waist band between the dots.
Coin Pocket Attached to the Front Pant Edge.
Now, we need to sew the pocket bag to the front of the pants, which is actually the left Front Dart Gusset Facing. Orient your work, with the outside of the pant facing up (we are working on the righthand side of the pant as it faces you).

With right sides together pin and sew the other short end of the pocket bag to the left Front Dart Gusset Facing, matching the dots. Be sure to sew through both layers of the Front Dart Gusset Facing, between the dots and just within the 1/2" (13mm) seam allowance just like we did before. Back stitch at each dot.


Another view of the Pocket Bag and Front Dart Gusset sewn together, between the dots.
Press the Coin Pocket Bag
With right sides facing up, press the pocket away from the waistband and away from the pants front as seen in the photos below.


Sewing the Waistband with the Coin Pocket to the Pants.
The waistband containing the coin pocket (left waistband) is sewn to the waist band of the pant in two separate steps.
First, pin the entire waistband to the pant to be secure. Keeping the waistband curtain out of the way, pin only the waistband to the pants and Front Dart Gusset Facing, with right sides together. Match the notches and the pocket edges. Align the Waistband and the Front Dart Gusset center fronts.

Waistband with coin pocket pined to the pant.
Stitch from the back edge of the pant, stopping at the dot on the side of the pocket bag. Back stitch to secure, then pivot your garment to stitch down the side of the pocket to the bottom. Back stitch to secure.
 Start sewing at back of the waistband and stitch towards the dot at the edge of the coin pocket.

Back stitch at the dot, just before pivoting at the edge of the coin pocket.

When sewing the front portion of the waistband to the pant, turn your work over and re-pin the waistband to the pant starting at the center front, as seen in the photo below.
Stitch from the center front toward the front pocket. Back stitch and rotate at the pocket dot and stitch to the bottom of the pocket. Back stitch to secure.

Front of waistband and coin pocket pined and ready for sewing.
Finishing the Coin Pocket
Now that the waistband with the coin pocket is sewn to the pants, the pocket bag should hang down into the inside of the pant. Getting the coin pocket to hang the way it should, depends on how you finish the seam allowance the pocket is sewn onto. You can finish the pocket a couple of different ways. Either press the waistband seam allowance down toward the pants, knowing the waist band curtain will cover the seam.

Seam allowances pressed down towards the pants.
Or, press the waistband seam up toward the waistband and clip the seam on each side of the pocket, so it will lay flat.
Press the pocket toward the pants.

The waistband seam allowance is press upward, clipping at the pocket edges allows the pocket to hang down properly.

View of the front of the pant with the waistband attached and the coin pocket peeking out.

The right waistband with the coin pocket and the waistband curtain laying open.
Assemble the RIGHT waistband to the pant.
Now, it is time to add the the right waistband. In Day 3 of the sew along we constructed a Welt Pocket in the right waistband. Even if you chose to not add the welt pocket, the assemble is the same (just ignore the welt pocket in the photos below). And, if you chose to not add the coin pocket, you will do both waistbands this way.

Welt Pocket with waistband curtain ready to be assembled to the pants.
With the right sides together, pin the waistband to the pants at the waist, matching the center front and notches; stitch together. Keep the waistband curtain out of the way while you work. If your waistband has a welt pocket added to it, be sure to keep the pocket out of the stitching.
Press the seam allowance towards the waistband. Press the front seam allowance to create a clean finished edge.

Waistband with welt pocket pinned to the pants and ready to be sewn.

The left waistband with the welt pocket and the waistband curtain laying open.
Your pants should now have a right and left waistband (with or without pockets), with the seams all neatly pressed. Trim allowances of any bulk.

The inside of the pant with pockets and the waistband curtain folded down hiding the seam allowances.

The outside of the pant with the Front Buttonhole Facing folded down.

The outside of the pant with the Front Buttonhole Facing folded up.
On day Eight of the Sew Along we will work on the back of the pant and add the Center Back Gusset and Eyelet Facings.