-
Sewing Patterns
-
Fabric
- Sewing Supplies
- About
- Blog
- Gallery
-
by Cynthia Anderson
In Buttonhole 101: Part One, the basics about buttons and buttonholes was covered. In Part Two we will learn how the relationship between the partners really works.
Once you understand the particulars about buttons and buttonholes, the trick is to understand how to place them so they work together as they should. Once you master the placement, then your machine is left to do all the work.
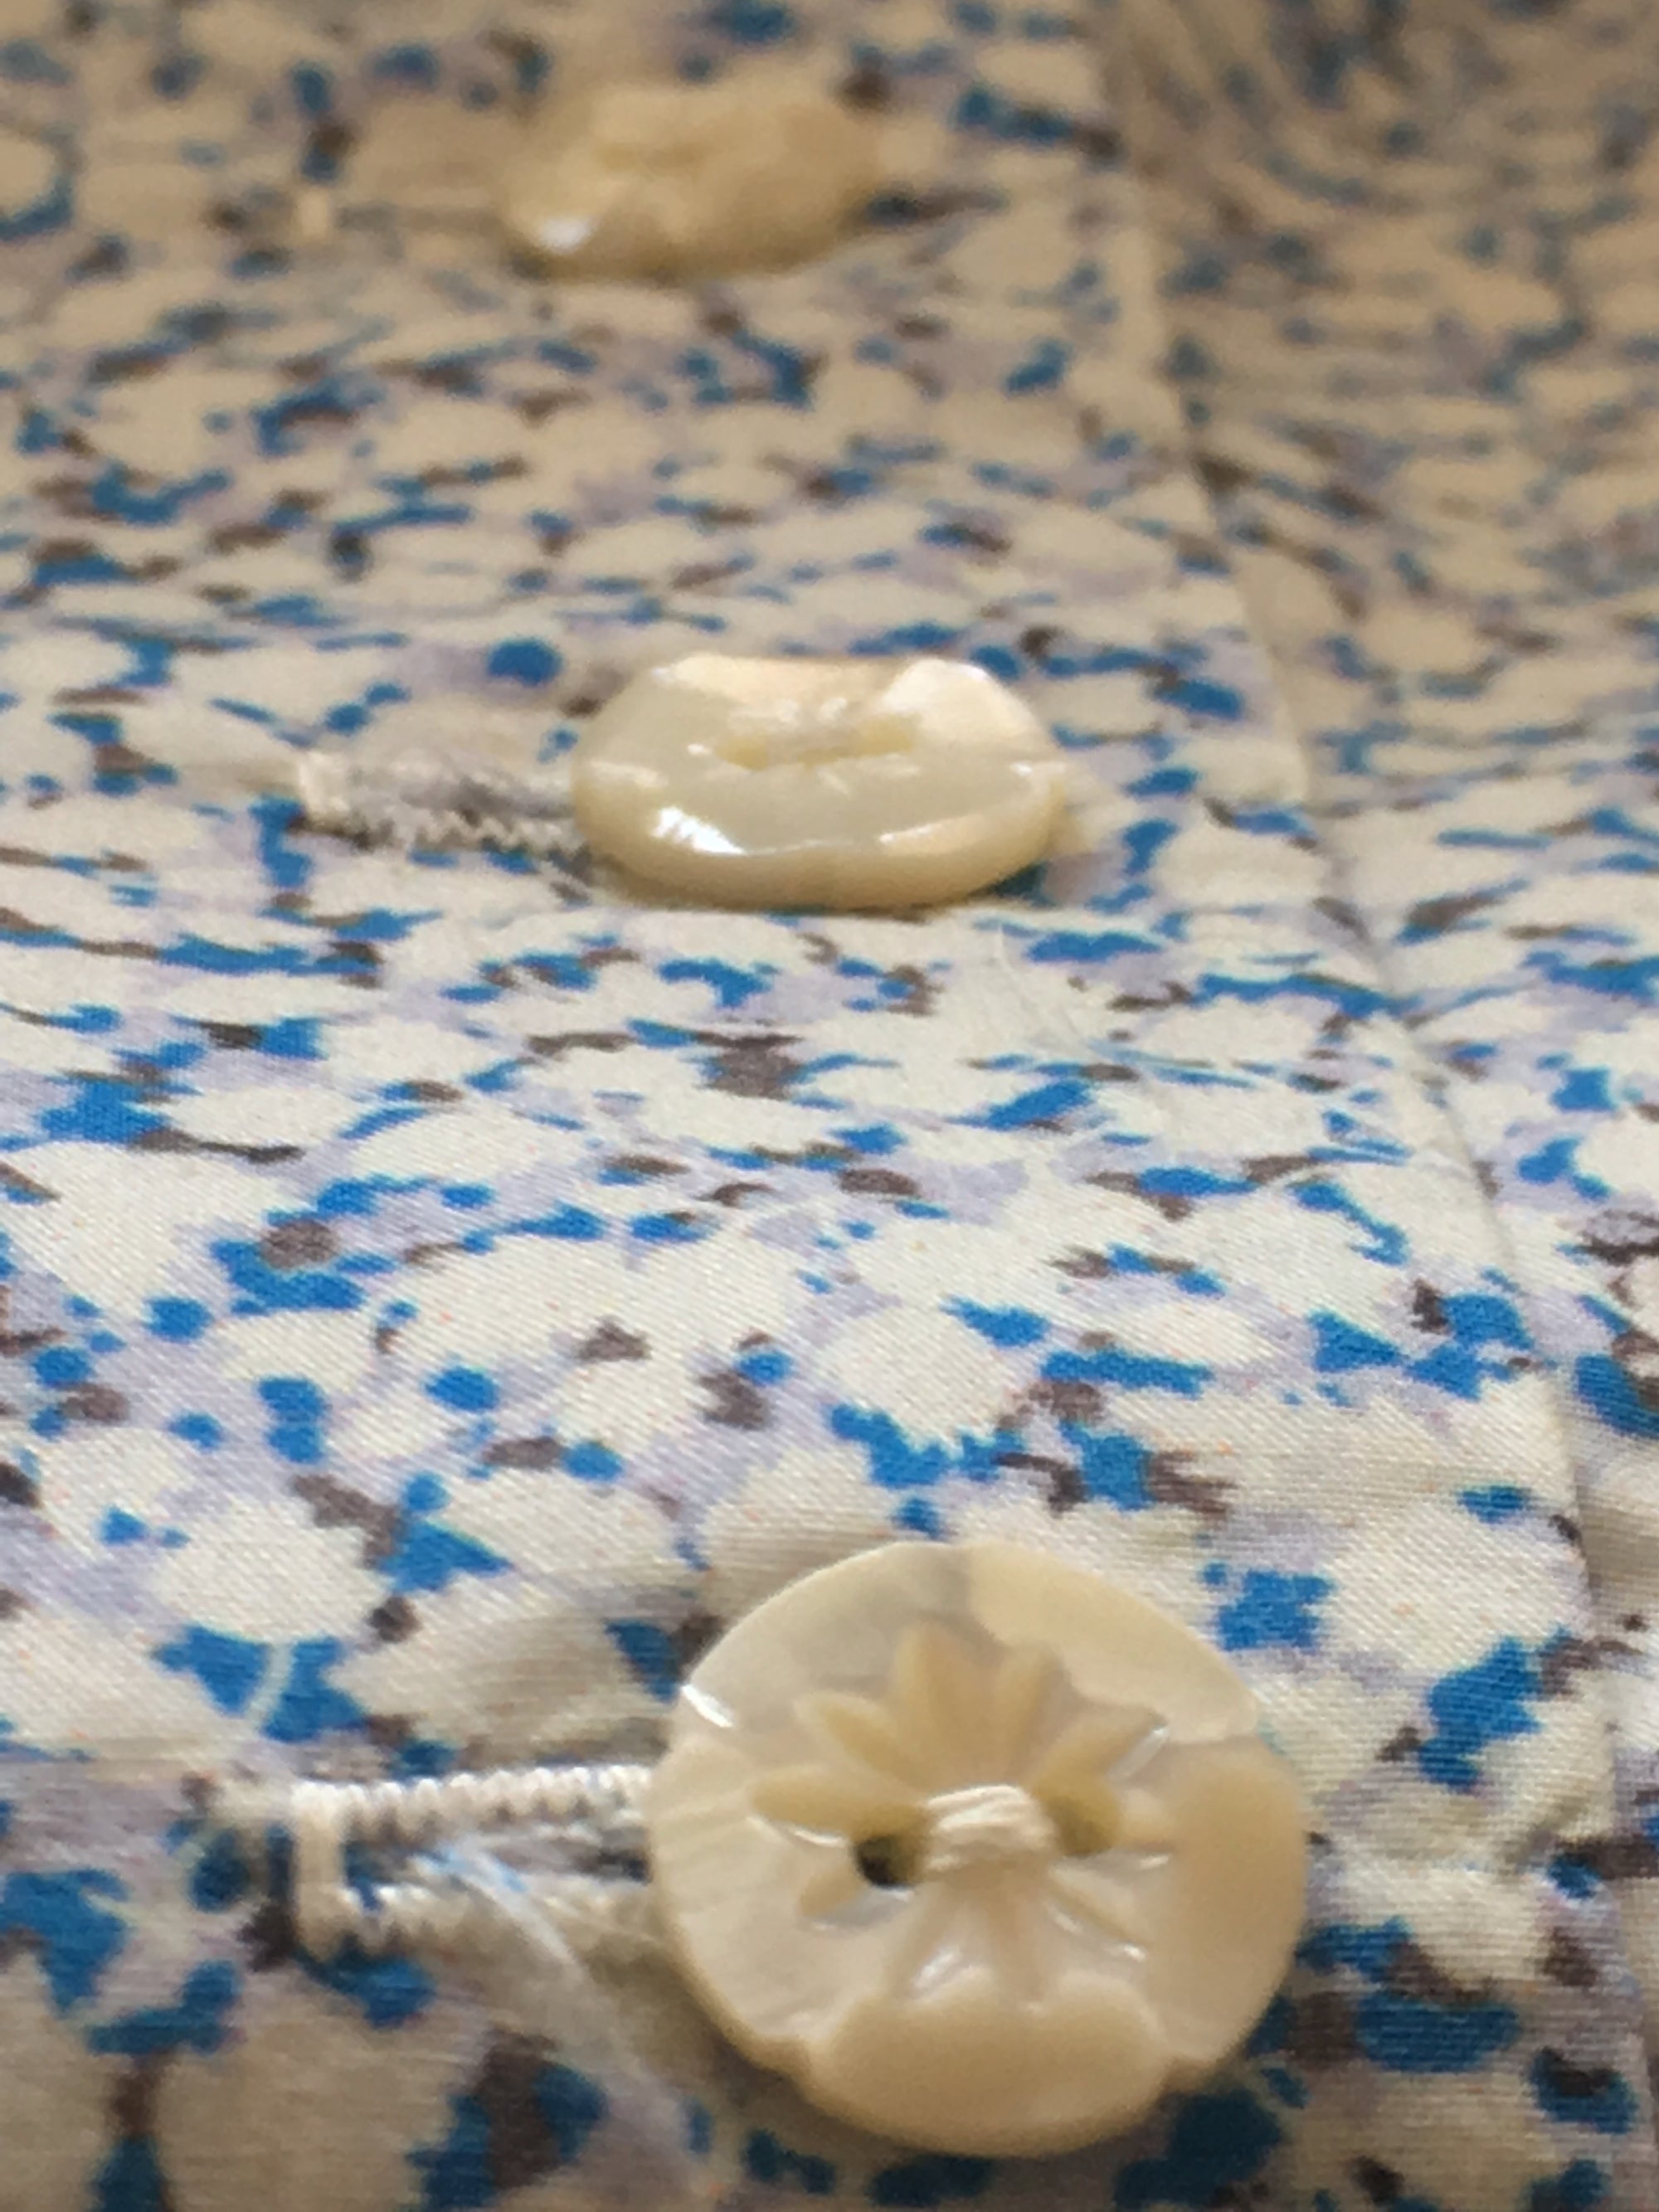
Patterns are designed with a specific button size and buttonhole placement in mind. This affects fit and proportion. This is important because it also establishes the center front of a garment. You do not want to tamper with the location of the center front.
Using a Different Size Button?
That is not to say that you can not use a different size button than the size designated on the pattern. Selecting a button that is 1/4-inch (6mm) larger or smaller is generally not a problem. However, there will be times when you will want more flexibility when it comes to button size. This adjustment can be applied to sizing a button up or down.
If the size of the button you want to use exceeds the 1/4-inch (6mm) size increase or decrease rule, then adjustments will need to be made to the pattern by increasing or decreasing the finished edge. This adjustment is easy, but needs to be made before you cut out the fabric. A correct adjustment is important because it will maintain the proper fit and proportion of the garment.
Note: Remember if making a woman's blouse the buttons go on the LEFT side as you wear it, which is the side that will be adjusted.
Once you understand the correct proportion between the width of the button, the center front placement of the button, and the edge of the garment it will all make sense. Remember the pattern has been designed to correctly fit a specific size. If you use the pattern required for your size as it is, but decide to use a dramatically different size button than the one suggested on the pattern, two mishaps will happen.
For example: The the pattern calls for a 1-inch (2.5cm) button, but you want to use a 1/2-inch (13mm) button instead. Since the pattern was designed for a 1-inch (2.5cm) button the following mishaps will happen.
Mishap #1:
If you place the button on the center front line like you know you should, then the amount of fabric that extends beyond the button edge will grow from the correct 1/2-inch (13mm) to an incorrect 3/4-inch (19mm). While this might not seem like a large increase, it is. When working with small proportions they add up. In this case it would look strange and like a mistake to have too much fabric extending beyond the button edge. See the illustration below.

Mishap #2:
It is not a good idea to move the button 1/4-inch (6mm) closer to the edge to compensate for the extra 1/4-inch (6mm) of extra fabric width. This creates more problems, because now you have moved off the center front. Not only have the buttons moved 1/4-inch (6mm) off the center, but the size is now off. The circumference of the garment has increased a total of 1/2-inch (13mm). Making an increase of 1/4-inch (6mm) on both the left and right sides of the blouse. See the illustration below.

The Correct Thing to Do
In order to use a 1/2-inch (13mm) button the edge of the pattern needs to be adjusted correctly. The is easy, if you follow the rules.
Rule One: Buttons should ALWAYS be placed on the center line whether on the front or back of a garment. This insures garment will fit correctly when it is fastened and the buttons align down the center front. Otherwise, symmetry and fit are off.

To prevent this from happening, extra fabric is added to the edge. Patterns are always drafted with for a specific button width. The pattern we started with was drafted for a 1-inch (2.5cm) button. But we want to use a 1/2-inch (13mm) button. No worries, forget about the pattern being drafted to use a specific size button and focus on the center line.
Note: This adjustment works for sizing up as well as down.
Ok, we need for the button to not hang off the edge. But since the button is already sitting on the center line, all we need to do is add more fabric to the edge. But how much?
Second Rule: Ideal Proportion Rule: The amount of fabric that extends beyond the edge of the button should be equal to the half of buttons width. It is easy... add the width of the button to the center line to extend the edge of pattern.
This should leave a fabric extension half the width of the button. In this case 1/4-inch (6mm) is visible beyond the button edge. See the illustration Below.

When the garment is fastened, the amount of fabric that extends beyond the button should be half the width of the button as well. For example if a 1/2-inch (13mm) button is sitting on the center front line, the the edge of the fabric should extend 1/4-inch (6mm) from the edge of the button.

Now that the edge extension on the left side has been added correctly, the same extension adjustment of adding the width of the button to the center line needs to be made to the right side. Remember the buttonholes go on the right side. Next, you need to draw out the buttonhole length in the correct position on the right side of the garment.
We already know that the buttonhole length equals the width of the button plus 1/8-inch (3mm).

In this case the length of our buttonhole is 5/8-inch (16mm).

The length of the horizontal buttonhole should extend 1/8-inch (3mm) over or beyond the center front line, toward the finished garment edge. The buttonhole should fall in the same spot as the button.

We have cover a lot, but before you make your final buttonholes lets look closer at the variables of using different fabrics and get some tips to making a successful buttonhole on any fabric.
FabricsAll fabrics differ in the way they behave, which is something you should be prepared for when making buttonholes. Fabrics can be thick, thin, or somewhere in-between; loose or tightly woven; light and airy, stiff, drapey, slippery, or stretchy. Some fabrics are stable which means they do not give, stretch, or contort out of shape. Until you become proficient with making buttonholes stick with stable woven fabrics. They are the easiest to work with and are generally thought to yield favorable results.
However, that is not to dissuade you from working with any fabric you like. Just about any fabric can be made easier to work with using a stabilizer and interfacing.
Interfacing
Interfacing is an additional permanent layer of strengthening material that is sandwiched between two layers of fabric to provide strength. This keeps the fabric from stretching, twisting, and puckering during sewing and adds lasting strength. Areas that include buttons and buttonholes greatly benefit from interfacing for all these reasons. Interfacing is either sew-in or fusible (iron on).
Fusible interfacing can have adhesive on one or both sides. Sew-in and fusible interfacing comes as woven and non-woven versions. They also comes in different weights.
Note: Some interfacing need to be pre-washed. Be sure to check when purchasing.
Tip: If your fusible interfacing is crinkled do not iron it. This does not work. You will end up fusing it to your ironing board or to the bottom of your iron. Non-fusible interfacing iron just fine.
Stabilizers
Extra stability often makes sewing easier, especially when it comes to fine stitching, like making buttonholes or machine stitched embroidery. Stabilizers are added to the outside of your fabric to help make it more stable when machine sewing. After the stitching is complete, the stabilizer is then removed. This works well when a fabric is fine, delicate, stretchy, slippery, thick, or has a pile. Stabilizers come as tear-away and even come as water soluble, allowing the stabilizer to dissolve when wet.
Typically stabilizers are added to the underside of your project, but sometimes it is added to the topside as well. Tissue paper, Swedish Tracing paper, and regular paper can be used a well. Experiment to see what your project needs.
Draw out the placement of the buttons on the left side if making a woman's blouse (as you wear it). And draw out the placement of the buttonholes on the right side (as you wear it).
The placement of the button is determined first, then the buttonhole is place on the center horizontal line of the button. The buttons and buttonholes should align as in the illustration below.

Note: Check the owners manual to see if the bobbin thread needs to be threaded through the hole in the finger of the bobbin. This extra step can make all the difference in the thread tension when making buttonholes.
Make one final buttonhole test if you feel you need to. All that is left is to sew your buttonholes!
Once the buttonholes are made clean up any stray threads by either trimming them away or thread the tails to a needle and pull through to the underneath side of the buttonhole, then tie off. You are almost done.
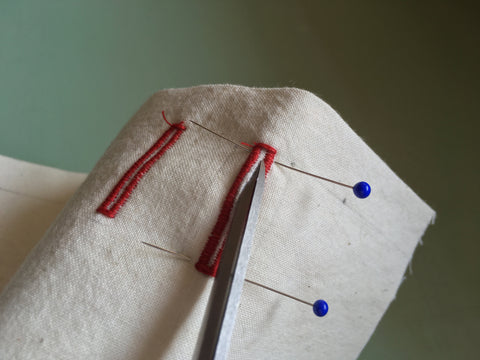
You did it! Now the buttons need to be added, but first the buttonholes must be cut open. Taking care to not cut into the stitching of the buttonhole is important. The idea is to only cut the fabric slit between the thread beads and tacks.
Tip: Before cutting... Use Fray Check.
Fray Check is a liquid seam sealant that works beautifully to prevent the cut fabric from fraying and keeps threads tidy. Apply the sealant to the entire button hole front and back, or just one side.
Some sewist only apply the sealant to the fabric area that is to be cut using a toothpick. Either apply the sealant before of after cutting the buttonhole open. Be sure to let it dry before cutting if you apply before cutting.

Tip: Be sure to test the Fray Check on a sample buttonhole to be sure the color of the thread and fabric do not bleed. Always allow the sealant to completely dry.
Cutting Tools
There are several different tools for cutting buttonholes and it is worth experimenting to see what you feel the most comfortable using.
Tip: Use straight pins placed on the inside of the tack edge to prevent cutting into or past the stitching.

Hint: If you make more than a small cut using scissors, be sure the half foldline matches up perfectly or you may make an unfortunate cut.
Note: If despite your best efforts, if you still end up with a buttonhole longer than needed or if you decide to use a smaller button, simply cut the buttonhole opening slightly smaller. Back off from cutting right up to the tacks.
Now comes the final anticipated touch... adding the buttons! Hopefully, you now have a solid understanding and can implement everything offered in this blog to insure buttonhole success. If everything went correctly, then all you have to do is sew the buttons where you diligently placed them on the center line.
If you need a refresher on how to sew on flat or shank buttons refer back to the Buttonholes 101: Part one.
It may seem like a lot of information just to make a buttonhole, but that's because details add up for successful results. Learning how to correctly execute buttons and buttonholes will enable you to sew them with confidence and ease no matter the project. It is not uncommon for sewists to sew for years, "winging" their buttonholes. Only after making copious amounts of buttonholes does something finally click... and it all makes sense. It is never too late to master buttonholes or learn new tricks and tips!


Cynthia Anderson
September 21, 2021
Yes the “Center Front” rule applies to vertical buttonholes as well. See the section on “Button Positioning” in Part One for a bit more explanation. Thank You for your comment and the link should be corrected now.