-
Sewing Patterns
-
Fabric
- Sewing Supplies
- About
- Blog
- Gallery
-

In fall of 2023, Cynthia made this wonderful tutorial on how to adapt View B of the 211 Two Middies into a long dress with long sleeves. This just shows the versatility of the 211 Two Middies pattern - make it with long sleeves, make it into a dress. You can use this tutorial for adapting the pattern to what works for you. Make the short-sleeved version into a dress and you have a great sundress! Make the dress long or short -- it is a great shoulder season staple that way. It’s one of those designs that continues to inspire, no matter how much time passes or what season we're in.
If you’re looking for a project that blends classic structure with room to experiment, this one still holds up. Whether you’re returning to it or discovering it for the first time, it’s a reminder of how a single pattern can evolve into something entirely your own.
Take a look!
---------------------------------------
With fall weather upon us and the promise of much cooler temperatures, change is in the air. Part of this feeling of change comes with the excitement of a change in wardrobe! There is a simple comfort in being reacquainted with one’s old favorite clothes and being inspired to make new favorites as well.
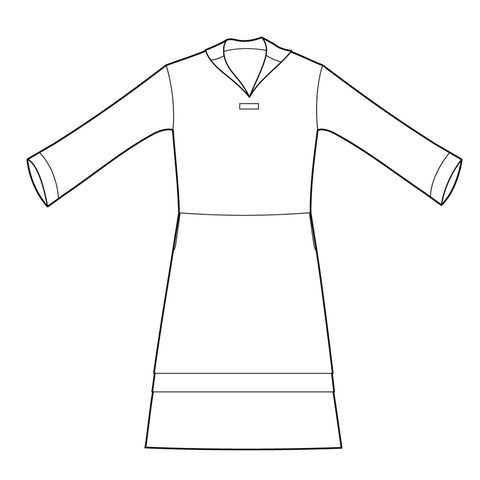
One of the best things about Folkwear patterns is the excellent foundation they provide for making a garment all your own. In this blog post, I am going to show you how I made our 211 Two Middies pattern into a long-sleeved dress!
I turned View B from 211 Two Middies blouse pattern, into a dress perfect for fall! This blouse, with the nautical collar and all its great details, is one of those pieces that is welcome in any wardrobe no matter the season. It is the perfect warm weather blouse with it’s flattering short sleeves and nautical flare. Even if you do not want to make a dress, you can lengthen the sleeves and continue to enjoy wearing the Middy Blouse as the temperature drops. Lengthening the sleeves is easy… just decide on the length you would like and use the “lengthen or shorten here” line marked on the pattern for a warm and cozy version of the Middy Blouse to be enjoyed all winter long. You can also follow along in this blog to learn how.
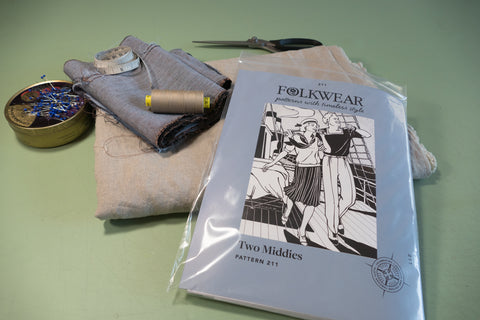
The 211 Middy Blouse pattern, fabric, and thread for making my dress.
The roomy fit of the Middy blouse makes it a perfect candidate for an easy transformation into a comfy dress. The bottom edge of the blouse is made even fuller or wider when the bottom band and little pleats are eliminated. The width of the bottom edge easily accommodates additional fabric for creating a dress.
There are any number of ways of adding a skirt portion to create a dress. The length of the blouse can be shortened or lengthened to change the position of the waistline. It just depends on the look you want and how you want your dress to hang. For a few examples, the blouse could be transformed into a dress by raising or lowering the bottom hem to create an empire waist or a drop waist or somewhere in between. The blouse and skirt portion could be combined and cut as one piece, or the skirt portion could be added separately with gathers or pleats. For this project, I used the Middy Blouse pattern as it is and simply attached a slightly A-line skirt to the bottom edge of the blouse (minus the bottom blouse band).
I made my dress using View B of the Middy Blouse as my foundation with only a few simple changes to alter the fit that allow for a bit of winter layering and a vintage aesthetic. For example, to create a roomier fit, I simply graded the side seams of the blouse to be wider at the bottom edge. To learn how to grade the side seams of the blouse check out the 211 Two Middies Blouse Sew Along: Day Three. The main consideration is being sure the bottom edge of the blouse is wide enough to easily clear your hip measurement to provide a nice hang and give you enough ease of movement.
The other adjustment I incorporated is to make the sleeves longer. I also decided to make the sleeves just a little bit fuller without having to disturb the armhole construction. To do this, I widened the sleeves slightly from the armhole to the bottom sleeve edge.
The blouse becomes a dress when a simple A-line skirt is added. To give the bottom of the dress a bit of interest I incorporated two horizontal pleats. I also added pockets to the side seams, because nearly all side seams are made better with pockets!
All details on how I made these adjustments are below!
Fabrics
I am using a mid-weight linen with a lovely drape and a scrap of leftover linen cross weave fabric for the collar and cuffs. Check out the fabrics for purchase on our website, where you will find some options for this project.
You will need additional fabric yardage for making the skirt portion and for adding length to the sleeves. I added an additional 1 yard (91cm) for the skirt portion and an extra 1/2 yard (46cm) for the sleeves. The fabric I used was 59 inches (150cm) wide.
Note: If you make length or width adjustments to the pattern pieces, be sure to re-check your yardage requirements before purchasing fabric.
Get Started
You will need to make adjustments to your pattern before cutting your fabric or starting to sew the dress.
Adding Length and Width to the Sleeves
The sleeve can easily be made longer or shorter, depending on your requirements. I decided to add width and length to the sleeves.
If you want to add width to the sleeve, do this adjustment first. I made the sleeve 1/2 inch (13mm) wider by grading the sleeve. To do this, I added 1/4 inch (6mm) just to the outer edge of each sleeve side seam, for a total of 1/2 inch (13mm). Remember this sleeve is comprised of a front and a back sleeve piece. Therefore, you do not add any extra width at the connecting center seam. Starting 1/2 inch (13mm) down from the under-armpit seam edge, draw a line connecting to the bottom edge of the sleeve at the added width (in my case at 1/4" wider than the sleeve bottom edge). Use a hip curve to create a smooth connecting line. This is your new outer cutting line for the sleeve. The idea is to widen the sleeve, without disturbing or altering the armhole opening.
After widening the sleeve, I was ready to lengthen it. I decided to lengthen my sleeve pattern to measure 19 inches (48cm) long, keeping in mind the 3/4-inch (1.9cm) cuff to also be added.
I simply cut on the "lengthen or shorten here" line to separate the sleeve into two pieces. Then I inserted another piece of tracing paper behind the two original sleeve pattern pieces, to allow for the increase and connect the top and bottom of the sleeve. Be sure the extra tracing paper is big enough to provide enough overlap on the back side to secure to the original pattern pieces with tape. A bit of tape added to the front side will help as well. Use a hip curve or French curve to create a smooth continuous line connecting the two separated pieces of the sleeve. Trim any access tracing paper away. Now the sleeve pattern has been lengthened and ready to use.
Using Swedish Tracing paper makes this task easy and it can be pinned and reused over and over.

Preparing the sleeve pattern pieces to make a longer sleeve pattern. Notice the graded outer edge.

The front and back sleeve pattern pieces graded and cut apart.

The sleeve pattern pieces separated with more tracing paper underneath to create a new longer sleeve pattern.

The two new longer sleeve pattern pieces.

The new longer sleeves sewn together.
Sidenote: I edgestitched the seams of this dress to add stability to the linen fabric I used. The seams benefit from the stabilization edgestitching provides and this is another way to finish the seam. This is especially relevant if a fabric is not tightly woven (and linen does tend to fray). This edgestitch technique is similar to a faux flat-felled seam, but the seam does not need to be finished together (serged or zig-zagged) so there is a little less bulk in the seam. To edgestitch the seam, press the seams towards the back of the garment and edgestitch on the back side of the seam. I edgestitched the shoulder seams, the sleeve seams, and the waist seam as I constructed the dress. Edge stitching adds a nice finishing detail and strengthens the seams, all at the same time.

The wrong side of the sleeve edge stitched with the seam pressed to the back.

Right side of the sleeve edge stitched on the seam.

The two sleeves sewn together and edge stitched.
Becoming a Dress
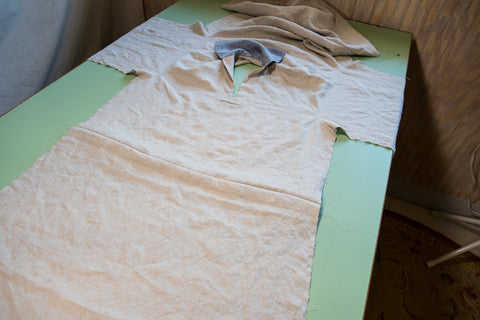
I constructed the blouse portion of the dress according the pattern instructions, but left the underarm and side seams un-sewn. It is easier to sew the side seams all at once, after the skirt and pockets are attached.

The blouse portion is nearly complete, except for sewing up the under-arm seams and side seams.
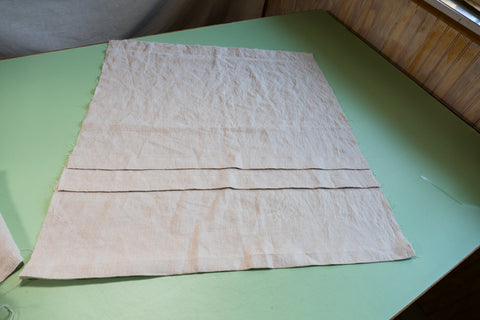
Now to construct the front and back skirt portions of the dress. The skirt I designed is a simple A-line with two horizontal pleats near the bottom to add a vintage touch.
The bottom edge of the blouse determines the width of the top of the skirt portion. The bottom edge of the front and back of my blouse measured 23.5 inches (60cm) wide, therefore the top of the front and back skirt must be the same. I cut the front and back of the skirt with my fabric folded in half, so the bottom edge of the front and back skirt was as wide as my fabric would allow (29.5"/75cm wide or half of the 59"/150cm wide fabric) and the top was 11.75 in.(30cm) at the fold (and 23.5"/60cm when opened).
You can cut your skirt as long (or short) as you want. I wanted my skirt to be a bit longer than mid-calf length, and I wanted to add pleats to the skirt for interest. The pleats meant that I cut the skirt about 4 inches longer than needed, to make two, 1-inch pleats. If you add pleats to your skirt, make sure you make the pleats at the exact same place on the front and back so they match when sewn together.
First, sew the front skirt to the front of the blouse at the bottom hem of the blouse. Then, sew the back skirt to the back of the blouse at the bottom hem of the blouse.
One of the two skirt pieces with its two pleats ready to be added to the bottom blouse edge.

Making sure the horizontal pleats of the skirt align.

The blouse and skirt portions are ready to be assembled.

The skirt and blouse pieces sewn together.
Adding Pockets and Sewing the Side Seams
Add the pockets to the side seams of the skirt before sewing up the side seams of the dress. The pockets are optional, but this is a perfect opportunity to try your hand at putting pockets in a side seam. To learn how easy side seam pockets are to make check out the Pocket Series: Side Seam Pocket blog.

Pinning the pocket pieces into the side seams to the skirt side seams.
Stitch the pockets in place first with one pocket piece on the right side of each side of the front and back of the dress. Make sure the pockets are at the same place on each side so they match when put together. Then press the pockets to the outside of the dress and press the seam allowance toward the pockets. Pin the dress side seams and stitch the seam allowance starting the the bottom edge of the dress and sew to the bottom edge of the pocket, being sure to back stitch. Then start the stitching again on the top edge of the pocket and continue up the blouse side seam, pivot at the arm pit and finish stitching at the edge of the sleeve. Then sew the pocket bags together. Repeat for the other side.

The side seam and pocket bag pined and sewn using the seam allowance.
Add the cuffs and little pleats to the sleeves according to the pattern instructions or simply hem to produce the length you require. Binding the sleeve edges would be a nice touch too.
Hem the bottom skirt edge and enjoy your new dress!

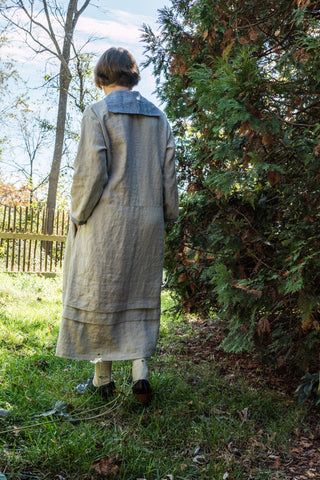

Back view of the Middy collar

Cuff and side seam pocket.

View of the pleat detail.
By using the 211 Two Middies pattern and making some simple changes you can turn this lovely blouse into a whole new wardrobe stable. Learning to look at a pattern with fresh new possibilities is a great way to create new versions of old favorites and enjoy your patterns even more.
We, at Folkwear, look forward to seeing what you are inspired to make!


Joan Cochrane
April 15, 2026
Could this be loose enough for a nightgown in flannel? I can’t find a good nightgown pattern.