- Home
- About
-
Shop
-
Sewing Patterns
-
Fabric
- Sewing Supplies
- Folkwear Clothing
-
- Blog
- Customer Gallery
- Contact

by Molly Hamilton
The cloche hat became popular in the 1920s. It was originally designed in France a decade or so early by milliner Caroline Reboux, and is named with the French word for "bell" because of its typical shape. The cloche generally features a small brim or no brim and was perfect for the new short women's hair styles of the early 1920s. It's popularity surged in the 1920s with new fashions and freedoms. The hat was a huge departure from the wide-brimmed hats that were popular in the previous era, and reflected the changing fashion trends and newfound liberation of women. The cloche hat continues to be a symbol of femininity, style, and the bold spirit of the 1920s.
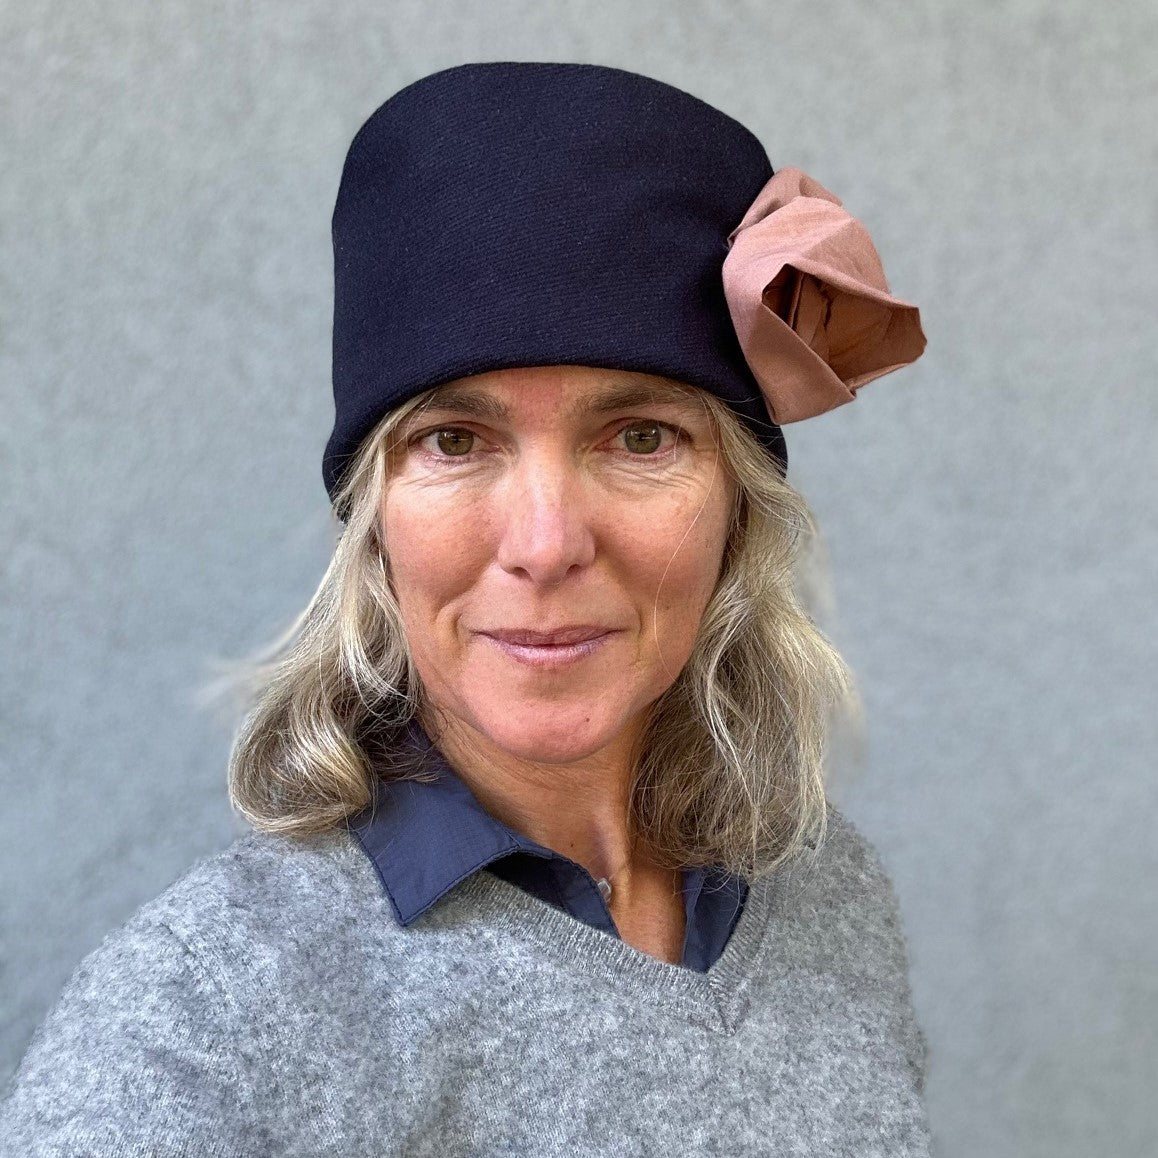
Folkwear's 262 Spectator Cloche hat comes from the 262 Spectator Coat pattern, and features a wide cuff that is perfect to embellish with embroidery, applique, or other trims. It can also be made from a separate coordinating or contrasting fabric or left off entirely. We recently released this hat as its own PDF pattern!
In this blog post, I am going to show you how I made the basic cloche hat. I also made a fabric flower to trim the hat and will share some tips for making one yourself. You can find instructions for making a fabric flower in this blog post.
Choosing Fabric
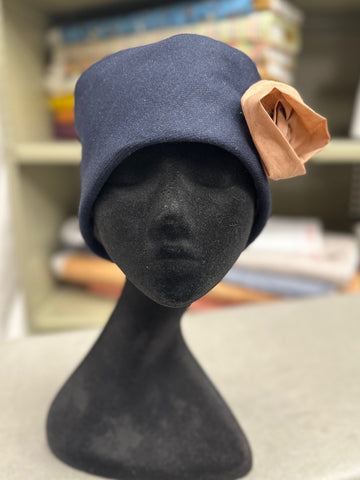
We have made three cloche hats in this office in the last several weeks, and each one was made with a different fabric. In general, you want to use a medium to heavy weight fabric to make a hat that holds its shape. I made the one for this post with a navy heavy weight wool blend from our collection (top photo). This fabric was perfect for a warm hat that is also sturdy. Esi made one with a cotton canvas and several layers of voile, which you can see in this post about making the 262 Spectator Coat.
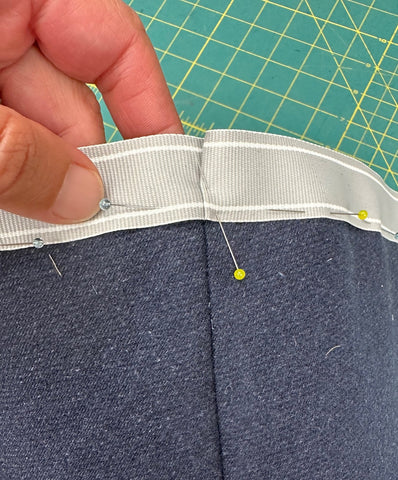
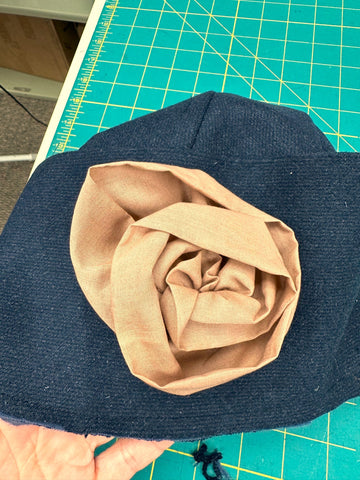
And I made another that I hope to show off soon out of a lighter weight wool that we also have in stock - this vicuna wool. The photos below show the hat while I was working on it. I made the hat without the cuff and added a band of fabric that I added a ruching style to (from 123 Austrian Dirndl) and had pinned onto the hat to see how it looked. You can see the hat without the cuff, then with just a band of fabric, then with the ruched fabric. Which do you like best??


The possibilities for this hat are almost endless!
For the lining, a soft lightweight fabric is best. Think Bemberg, silk, satin, charmeuse, rayon, cotton voile. I used a navy cotton voile for the lining of this hat. Esi used a rayon/linen blend, and I used a scrap of silk charmeuse for my other hat. All were great!
Sizing
The hat comes in sizes XS to XL, which finish at 22½” (57.2cm) to 24-1/2" (62.2cm), respectively (measurements are in the pattern). However, this hat is cut on the bias which means that there is some movement or stretch that is built into the hat. You can adjust the inside ribbon band to make the hat larger or smaller by about 1/2" in either direction for whatever size you choose. So pick the size that you think works best for your head size (measure around the crown of your head), and adjust at the end of the hat making, if needed. I made my hats in size small and they fit great and did not need any adjustments. Esi made her hat size large to have more room for her hair and she was happy with that size also.
Cutting out the Pattern
For the cloche, you will need to cut one hat cuff, one hat front, and two hat backs from the main fabric and from the lining fabric. Be sure to cut the two back pieces so that they are opposites (i.e. if cutting one layer of fabric, be sure to flip the pattern piece print side down to cut the second one).
Sewing the Cloche
It is important to note that this hat pattern has a 3/8" seam allowance. This is to reduce bulk in the hat seams.
First, it is important to transfer the pattern marks to your fabric. For my wool blend hat, I decided tailor tacks would be the best way to mark the pattern. These are easy to remove and do not leave any marks that I have to wash out. Also my fabric was dark so I would have needed a white or light colored marking tool. I did not want to scrub or brush chalk out. Anyway, tailor tacks were perfect. To make tailor tacks, I used white thread and with a needle pulled the thread through the fabric at the mark on the pattern. I clipped the thread so that it marked on my fabric where the dots were located.

On the front pattern piece, I made the darts indicated on the pattern, sewing from the top dot to the dot at the bottom of the dart, with right sides of the fabric together. At the bottom of the dart, I sewed right off the fabric, cut the threads long and tied them by hand so I did not have backstitching at that point. At the top of the dart (top of hat), I backstitched to secure the thread. I matched the dots (not squares) at the top of the pattern, which I marked in the photo below with red dots so you could see it clearly. The other thread in the photo indicates the square at the top of the crown that we sew in the next step. This is important to note and make sure you sew the correct parts to make the darts. I sewed both darts on the hat front in this same way.


Now I sewed between the dot and the square, which I marked with a tailor tack - so I sewed the remaining seam at the top of the hat from my stitching (also marked by a tailor tack in the photo) to the other tailor tack. You can see how it is marked in the photo below.

Next, I sewed the same type of dart at the top of the back hat pieces. And, then sewed the small dart on the center back of each back piece. I marked the smaller dart line with red in the photo below so you could easily see where it goes. This one is a little tricky because it is so small, but it just needs to be marked clearly. I marked the start of the dart with a pin and sewed to the tailor tack.

Once the darts are in the hat back pieces, I sewed both back pieces together at the center back seam, with right sides together. I made sure to match the two dart seams that come together at the center back.
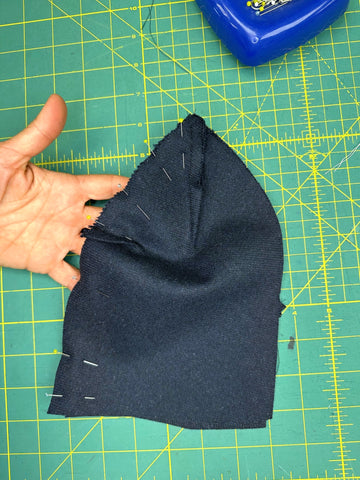
Now I was able to sew the front and back of the hat together. At the top of the hat, several seams come together to create some bulk, but you can a seam jumper to help you get over the fabric hump. My seam jumper is just some plastic pieces that you use under the presser foot to keep the foot level even when it is going over bulky seams. You can barely see my seam jumper below just behind my presser food.


Front and back of hat pinned together.
I did all the same steps for sewing my lining pieces as I did for my main fabric pieces. I have a little tip for sewing the lining darts, or really starting any seam on very fine fabric like like fine cotton voile or silk. I use a scrap of tracing fabric under the seam. This gives the fabric stability and keeps the fine fabric from getting pulled into the feed. After the seam in sewn, I just rip the tracing fabric off and I'm left with a nice seam.

Starting my seam with a scrap of tracing fabric under my lining fabric to keep the fine lining from getting pulled into the feed.

Main fabric and lining ready to be put together.
Next I sewed the cuff of the hat by sewing the center back together on the main fabric and lining. Then I put the cuff lining and main fabric together with right sides together and matching notches and center back seam.

I turned the lining to the inside and pressed it so that the outer fabric was about 1/4" to the inside (so the lining would not show on the right side).
And then placed the lining inside the main part of the hat with wrong sides together. I basted the open edges together so they could be sewn without shifting.


Back of cloche on a hat form.


Cloche hat on me. It is quite warm!
Now, what hat are you going to make? What trim would you add to it? What other questions do you have about this hat? There are so many options! We would love to see what you make with this pattern!


