- Home
- About
-
Shop
-
Sewing Patterns
-
Fabric
- Sewing Supplies
- Folkwear Clothing
-
- Blog
- Customer Gallery
- Contact
by Esi Hutchinson
Hello! I hope you saw Folkwear's blog post I wrote about making the 223 A Lady's Chemise into a blouse. If you have not read it you can check it out here. Recently, I made another chemise to add to the Folkwear sample collection. We wanted a sample that was made of an organic white cotton voile -- a more authentic, or traditional/historic, version. We used View A, which is a bit off the shoulders (though can also be worn wide on the shoulders). Traditionally, the chemise was an undergarment made of light to medium weight cotton or linen and was often white. The lace and eyelet/beading was used to finish the neckline and sleeves openings and add a bit of a romantic touch. For this chemise, I used an eyelet lace that we already had in our stash, and the voile from our fabric collection.
Our eyelet lace already had the ruffle attached (it was eyelet/beading and lace in one!), so I had to modify the instructions to finish this chemise. The instructions have the neckline and sleeves finished with a bias binding, eyelet or beading, and a lace edging - all of which come together to provide a clean and romantic finish. We imagine that often times, you use the notions, like lace or eyelet, that you have in your stash (or have inherited). So when you go to make a garment like this one, you look at what you already have, especially if it is inherited or heirloom pieces. And this means that what you have on hand might not be exactly what the pattern is calling for. As in this case. So, you have to modify how the neckline and sleeves are finished so that you get the look you want with the pieces you have. I will show you how I assembled this eyelet lace to the neckline, and maybe that can help you in a similar situation.

Close up of the eyelet (beading) lace used.
The cotton voile I used is very lightweight so I finished all the seams with French seams. This seam finish is authentic, and it also looks more professional in my opinion. It also really gives the garment an heirloom-quality feel. French seams are also good to use with delicate fabrics like this voile. Here is a blog post on our site you can refer to if you don't know what and how to use a French seam: How to Sew a French Seam.
 French seam on the inside side of this chemise.
Adding the Lace
Instead of first sewing on the eyelet lace (which is also called beading in the instructions), I first sewed on the bias binding like the instructions say. The eyelet I use is finished on each side with lace, so I did not need to "sandwich" it with the binding and lace edging.
I trimmed the seam allowance and pressed the binding away from the bodice, and turned it to the inside. Then I topstitched the pressed edge of the binding through all layers. This finishes the raw edge of the bodice. I did the same to the sleeves.


I pinned the eyelet lace so that the inside edge of the lace (where the eyelet changes to lace edging) was about 1/8" (3mm) from the top edge of the bias binding. I stitched the lace down on that line. And I did the same for the sleeves.


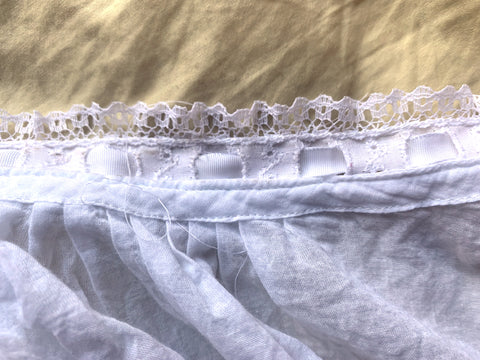
Inside the chemise. You can see the stitching line about 1/8" from the top of the bias binding where the eyelet lace is stitched down.
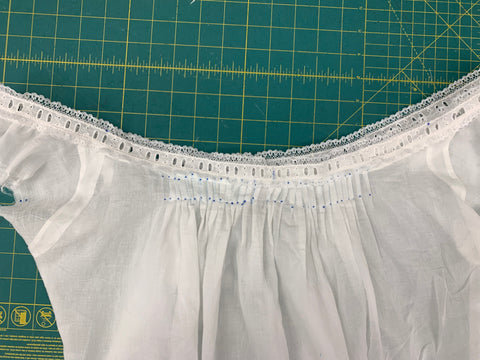
 VOILA! Finished!
You can purchase ribbon to weave through the eyelet or make your own using a binding tape maker and fine fabric. I used a satin store-bought ribbon for this sample. I finished the ends of the ribbon by turning them under twice by 1/4" (6mm) and stitching.
I have a few more pictures of the finished 223 A Lady's Chemise (View A) below. This was a fun project and I enjoyed looking through our lace collection to find something that worked for this chemise.


December 01, 2023
I found using satin ribbon a problem because it unties too easily. I found grosgrain (the ribbed ribbon) works much better as it doesn’t untie as easily as the satin , which I admit is prettier

Cherry Jennifer Foster
January 26, 2024
I’ve no experience with this pattern, but in similar circumstances, I’ve found a tiny safety pin into the back of a satin ribbon bow works to keep it in place. With anything I didn’t need to adjust frequently, I’d simply put a few stitches in.