-
Sewing Patterns
-
Fabric
- Sewing Supplies
- About
- Blog
- Gallery


The 205 Gibson Girl Blouse is a popular pattern that makes up a feminine and romantic Edwardian-era blouse. It is a pattern that can be as simple or complex as you want. The blouse can be made with or without lace at the edges or lace insertion. It can be made with fine silk or with a sturdy cotton. You don't even need to make the open cuffs. The sleeve can be sewn together to the "wrist" and the cuff made as wide as you wish to fit your hand and lower arm. And, the cuff pattern piece provided generally fits this area.

Views A and B are the same, but View A has the collar made of fabric which can be finished with lace. The Yokes can also be finished with lace at the seams for View A. View B (more traditional blouse, pictured above) has a collar that is made with rows of lace that are stitched together, and it has bias bound cuffs (both things which were typical of the time period of the blouse). Lace insertion and pin tucks are optional and can be added to either blouse, but is more typical for View B.
View A (with fabric collar, cuffs, but no lace at seams)
View B (with lace collar, pintucks, bias cuffs, and lace insertion)
We wanted to provide a list of resources all in one place that might make sewing this pattern easier for you.
To start with, read a short history of the Gibson Girl and the (tenuous) connection to Folkwear.

If you are interested in trying to add lace insertion to your blouse, read our post with the basics of lace insertion here. And we have insertion lace and edging lace here.


by Esi Hutchinson
The 231 Big Sky Riding Skirt is a genius example of the evolution of a riding habit (clothing for horse-riding) for women to something practial. The riding "skirt" allowed women to ride astride a saddle rather than sit side-saddle (which seems impossible to me). A flap on the front buttons to one side to look like a skirt and to the other to transform into pants.
Surprisingly, sewing this garment isn't as time-consuming as it may seem at first glance. The only thing that might be a little confusing, or take extra time, is assembling the front flaps, and the one back pleat, and buttonholes. After finishing this pair of pants, I was very impressed with the construction and ingenuity of this garment.
We just resized this pattern, and now sizes XS-3XL are available in the PDF pattern (and very soon the paper pattern). I have always wanted to make this pattern so this seemed like a great opportunity to do a sew along. For this sew along, I made the midcalf length with size medium in the body of the garment and a size small at the waist.

Let's get started!!!
Fabric and Sizing
This pattern calls for medium to heavyweight cottons and blends such as poplin, denim, gabardine or corduroy. Medium weight linen, wool, or silks like dupioni, jacquard, or raw silk would also work well. I made my pants with a sanded cotton twill Cotton Sanded Twill - Tobacco for this blog post.
The first time I made these pants (and after I sewed the buttonholes), I realized I made a size too small by mistake. My measurements fit the size medium, but I needed the waist smaller. Instead of narrowing the waist area, which I usually need to do, I narrowed each pattern piece along the side seams. That was a really silly mistake, but it happens. I had to start over, and I used a dark brown linen instead for my final pair of riding pants. So the lesson is, make a muslin to start out if you are at all unsure how the fit will be on you.
Tips for cutting out the pattern
Make any fit adjustments to the leg pieces (and waistband) before cutting out your fabric.
Don't forget to transfer all the stars and boxes, darts, and pleat lines on your pattern pieces.
You can also label your pieces with a water removable marker or chalk to make it easier for you to see what the pieces are.
Seam Finishes
The seam finishing recommended for this pattern is a flat felled seam if you don't want to do that overcast, serge or zig zag your seam allowances. However, the flat felled seam makes the inside nice and neat and it adds a bit of topstitching to your garment. To make a flat felled seam read this blog post on How to Make Flat Felled Seams.
I like a faux flat felled seams, however. It is quicker and easier to do and looks good on the outside. To make a faux flat-felled seam, serge, overcast, or zig zag the seam allowances and press the seam to one side. Then top-stitch about 1/4" (6mm) away from the seam line, stitching the seam allowance in place.
Sewing the Pattern
Front and Back
To start, stitch front legs C together with right sides facing, at the center front seam, and matching notches 7.

To attach the front panel, pin the left side of the front panel A (as you wear it) to the right front legs C with right sides together and matching notches 2, 6, and the center front of panel A to the center front seam of front legs C. Stitch from the bottom hem to the waist and across the top of the waist to the center front seam of front legs C. Stop stitching at the center front seam, and backstitch to secure.


Clip to the stitching line at the center seam.

Clip the corner to reduce bulk and turn the pieces with right sides out and press.


Put the front of the skirt aside for now.
The back piece B is a bit strange-looking. There is a deep box pleat in the back that gives the skirt its fullness. Stitch the back pieces together at the center back seam, matching notches 3.

Keeping the back pieces with right sides together, stitch on the pleat line, matching the pleat stitching lines. Now, we put this piece aside for a minute.

Sew the darts on pieces E and press the darts toward the side (towards the double notches 5).

You will then stitch the side back E pieces to each side of the back, matching single notches 7.
Now to make the deep box pleat. Place the pleat stitching line over the center back crotch seam and press flat - fabric will to to each side of the pleat line. Baste the waist of the pleat to the waist of the back. The pleat will overlap slightly on the side back pieces E.

Pockets!
I like big pockets, so I made my pockets larger as you can see below.

Sew one pocket piece to each side front D, with right sides together and matching double notches 5. Clip the seam allowance to the stars and press the seam allowance towards the pocket pieces.

Do the same with the back skirt, stitching one pocket piece to each side back pieces E. Again, clip the seam allowance at the stars and press the seam allowance towards the pocket pieces.


You can now stitch the front and back pockets together around the outer edge of the pockets up to the star. Put the front and back of the pants together and start sewing at the pockets.


Waist
There is a little bit of gathering of the pants at the waist. I think it gives the appearance of making the "skirt" look fuller.
Make the two rows of gathering stitches on the side fronts within the seam allowance. Make sure to keep the pockets out of the stitches. Press the pockets towards the side front, if you haven't already. I did not bast the pockets to the side fronts, I did not want it to be bulky when I pull the gathering stitches. I just had to remember to make sure the pockets are towards the side fronts when I attach the waistband.

Waist Plackets
Press under 1/2" (13mm) on the long edge of the placket facing G and placket H on the side opposite of the box. Then press under 1/2" (13mm) on short edges of G and H.

Only on the placket facing G, topstitch the pressed edges on both the long and short edges 3/8" (1cm) from the pressed edge.

Take one placket facing and with right sides together, stitch it on the right side of the front panel A (as you wear it) at the waist.


You will do the same with the remaining placket facing on the left front leg (as you wear it).
Press the previously stitched side of the placket facings to the inside of both panel A and leg C, and slip stitch the pressed edges of facing on the inside.

Now, stitch one placket H to each side front piece D from the waist to the marked box. Clip the seam allowance to the box. Trim the seam allowance of the placket only. Press the seam towards the placket.


Placket H has a center fold line. Press along the center fold line of the placket H and place the pressed edge of the placket over the previously stitched seam line and top stitch on both long and short edges.

Now you can sew the front and back sides of the skirt together. Make sure the placket on the side front and the placket facing on the front panel overlap slightly at the box and 1/2" (13mm) above the box.
Stitch from the hem to the box and 1/2" (13mm) above the box.


You should then secure the bottom of the placket and placket facing pieces (G and H) by stitching, with right sides together, through both placket and facing 1/2" (13mm) above the box on the short edge of the pieces.

I did not interface my waistband. I felt my fabric was sturdy enough to not use it.
Press under 1/2" (13mm) seam allowance of both waistbands I and J as instructed, fold in half along the center fold line lengthwise, and stitch the short ends. Clip the corners and turn right side out.


To attach back waistband pieces, place WRONG side of skirt to the RIGHT side of the waistbands. Pin the front waistband to the raw edges of the front of the skirt. Stitch, clip corners, and turn and press.


I like it when instructions say to sew the waistband right side to wrong side. It makes the outside look neater when you topstitch from the right side rather than the inside of the garment.
Press the folded edge of the waistbands over the previously stitched seam lines (to the right side) and top stitch.


To secure the waistband at the sides. You can sew two skirt hooks on the short ends of the inside of the front waistband and two skirt eyes on the short ends of the outside of the back waistband. You can also sew buttonholes on either side on the short ends of the front waistband, or whatever closure you prefer to secure the waist on the sides. I used buttons.
Buttonholes
This is where my sewing got a little frustrating. I have not mastered buttonholes they do not all end up looking the same -- but it's okay, I am still learning.
You can read a lot about of general information about making buttonholes and attaching buttons in our blog posts: Buttonholes 101: Part 1 and Buttonholes 101: Part 2.
Sew the buttonholes on the left front leg C (as you wear it) and along both sides of front panel A. You can use 8 to 12 (or more buttons), depending on the length you are making, the size of your buttons, and the spacing you want to use. Use the template if it makes it easier to space the buttonholes, or space the buttonholes as desired.


half an hour later....
After I sewed all the buttonholes (I got lots of practice), I realized the pants would not fit me. So I made a new skirt out of dark brown linen and I will be demonstrating the rest of the sew along with my final riding skirt (dark brown linen rather than the brown twill).
You will sew buttonholes on left front leg, and both sides of the front panel. DO NOT CUT ALL THE BUTTONHOLES. Cut only the top three buttonholes on the right side of the front panel, the top three buttonholes on left front leg, and all buttonholes on the left side of the front panel.
There are options to cut your many buttonholes. You can use a buttonhole cutter. This would be my preferred choice (it makes it a lot quicker and neater).
Or, you can pin either side of the short end of the buttonhole and use a seam ripper to cut the buttonhole open. The pins prevent you from cutting past the buttonhole. However, you can still cut the sides of the buttonhole by mistake, so be careful.


You will only cut the top buttonholes that attach to the plackets on the right side of the front panel and the left front leg, as you wear it.


Cut all the buttonholes ONLY on the left side of the front panel A.

Finishing
The bottom hem is 1-1/2" (3.8cm), so press under 1/2" (13mm) then 1" (2.5cm). The instructions say to slip stitch but I topstitched the hem in place.
If you want, you can topstitch the front panel A using a 1/4" (6mm) seam allowance starting from the center front across from the left top half and down to the left side to the hem.
Attach the buttons: I think it's wise to use thread shanks when attaching the buttons, as it will accommodate the thickness of the fabric in the panel. It will prevent puckering and pulling of the fabric if you make a thread shank. This blog post has lots of information about buttons and shows how to make a shank.
Below is the final 231 Big Sky Riding Skirt I made. I love them, this is such a unique pair of pants that fits quite well into modern-day fashion. I've never owned a pair of culottes, and I was a bit nervous I was not going to like the look. However, I think they are great and I will definitely be wearing these! I have always wanted to make this pattern. It was really frustrating that my first skirt didn't work out, but I like what I ended up with. Sewing is always teaching me lessons!
Here I've paired the skirt with 210 Armistice Blouse and all I need now is a helmet and a horse. Haha!


Our pattern for the 231 Big Sky Riding Skirt is one of the most interesting historic patterns we have (in my opinion). The pattern is based on a real split skirt that was owned and worn by rodeo star Fanny Sperry Steele (1887-1983). The split, or divided, skirt enabled her to ride astride, but preserved the "look" of a skirt (and therefore propriety). In actuality, this garment is a culotte with a movable front panel that buttons either to the left, for a skirt effect, or to the right for a pant effect. So even though these are pants, it can look like a skirt. The deep pleat in the back helps with this look (and is flattering). The main change we made from the original design was to add pockets for convenience.
We have a couple of samples of our 231 Big Sky Riding Skirts here at Folkwear and they are all beloved. I am going to show you some of them in more detail today.
First is our mid-calf version, which you can make from the pattern by cutting at the calf-length markings. This one is made from a medium to heavy weight woven brown cotton and has machine appliques (made of silk dupioni) on the side of the legs. The applique pattern was an artistic creation by our sample-maker at the time and shows something interesting that can be done with these pants! In the photos below, you can also see how the panel is unbuttoned and moved from the left to the right to go from a skirt look to a pair of pants. We had help doing this because we were in a photo shoot, but you can easily do this yourself!


2024 was a full and busy year for Folkwear! Below are some highlights from the year. But our biggest challenge as well as our biggest growth came at about the same time. Hurricane Helene hit our area and devasted it tremendously. We were very lucky to have survived as the neighborhood around our business location was flooded and destroyed. We had just moved to this new location as we expanded our business by buying a printer and folding machine. And Folkwear had just purchased The Green Pepper and moved it from Oregon to our place in Asheville, NC. All these events happened within a few weeks of each other in August/September. Read more about these changes here. What a whirlwind! We are so grateful to be on our feet and running both companies. And we are printing our own patterns now!
We absolutely love The Green Pepper, and have enjoyed running Folkwear alongside it. If you feel like helping with hurricane relief, there is still a huge need in our area, and you can find more information here.

Folkwear re-released several older patterns . . . 303 English Cottage Kitchen, 234 Cameos, and the 246 Calico Day Dress.


We put out one completely new pattern, and we love it! 280 Resort Kaftan. And a free pattern - Origami Bag.

Folkwear traveled to Guatemala and Italy this year!

We created several sewing hacks for our patterns that were a lot of fun: Upsized the 106 Turkish Coat and made it as an unlined coat, made the 229 Sailor Pants into a skirt (part 1 and 2), Added front pockets to the 229 Sailor Pants, made the 250 knickers into pants (part 1 and 2), and I made a modern 246 Calico Day Dress.

I also made a kilt from our pattern, which was a great learning experience!


This small Origami Bag is inspired by the Japanese azuma bukuro bags which are also known as bento bags, Japanese market bags, triangle bags, and origami bags. In Japan, they are commonly used as shopping bags (when made a little larger) or for carrying lunches. Azuma bukuro, which translates to "east bag," refers to bags developed in the eastern part of Japan during the Edo Period (1603-1868), a region that corresponds to modern-day Tokyo. We are Folkwear appreciate the ingenuity of this Japanese design, its simplicity, and the small amount of fabric needed to make this bag.
This little bag is perfect for packing your lunch, but it also makes a great reusable and sustainable gift wrap. You can use scraps from your fabric stash to make several of these very quick and easy bags.
If you want to make the bag larger, extend two sides of the bag evenly and extend the folding lines to correspond. Once you get the hang of the technique, you can make bags in lots of sizes!
We are offering this bag pattern for free! You can get the instructions and pattern piece for free at this link, or you can keep reading for how to make the bag.
FABRIC SUGGESTIONS
This bag takes good advantage of fabric bias for stretch and pliability. It can be made in any lightweight fabric, but is especially nice in a silk, rayon, or other fabric with good drape. For a bag to hold, or wrap, gifts, a fabric with more body (like a cotton or linen) is great.
YARDAGE REQUIREMENTS
3/8 yard or .34m of fabric in any width fabric 34” or wider. If you make a larger bag, you will need more fabric (basically the length of the short end of the pattern piece).
SEAM FINISHES
Serge, Overcast, or Zig-zag; OR French Seams. In our original, the bag is made with French seams. We give you instructions for how to do these below. In general, with wrong sides together, stitch seam only 3/16” (4mm). Press to one side. Turn right sides together and stitch on seam line, taking care to include previous seam.
CUTTING THE PATTERN
You can layout the free pattern piece along the edge of a fabric. Or you can cut a rectangle that is 11" x 33.25" (27.9x84.5cm). You can adjust the size of the rectangle as you desire, especially once you understand how the bag comes together.
FOLDING and SEWING
Transfer Fold Lines to fabric, if desired. Fold Lines and notches are numbered on the pattern piece. Though you don't really need them to make this pattern work.
NOTE: If using French Seams, and your fabric has a wrong and right side, fold as below, but start with your fabric with the right side down. If using other seam finishes, start with the right side of the fabric up.
Fold along Fold Line 1 as illustrated below, or fold up bottom left corner to meet top long edge. Pin in place at top edge.

Next, fold along Fold Line 2 on the opposite end as illustrated (fold top right corner to meet bottom long edge). Pin in place along bottom edge.

Then, fold along Fold Line 3 so that outside edges and notches line up (fold bottom right up so that outside edges match).

For regular seams, with right sides together, and matching notches 1, stitch seam at a ½” (13mm) seam allowance. Finish seam and press to toward bottom of bag.
For French seams, wrong sides will be together and you will stitch scant ¼” seam allowance.

Repeat on the other side matching notches 2.

Remove all pins.
For French seams, go back to each seam, turn so the right sides of the fabric are together (trim notches if needed), press, and stitch with a ¼” seam allowance, enclosing the previously made seam.
Finally, hem the top unstitched raw edges of each handle by pressing to the wrong side ¼” (6mm) and another ¼” (6mm) and stitch close to pressed edges. This will be a little trickier with French seams, but works fine. You can also use rolled hems on the handles for a very narrow hem.
Also, if you wish to reinforce the bag corners, above the seams, you can add a small, hemmed triangle of fabric and top stitch it to the hem on two sides.

Turn bag right side out, and tie to close.


And that is all there is to it! Have you made these bags before? Will you be making some? How do you use them, or plan to?


When we decided to bring back the Calico Day Dress from the Folkwear archives, I had my doubts. We had many customers over the years contact us to ask us to bring it back, but I saw the dress as a bit dowdy, maybe only for costume, and I was also concerned that it used so much fabric (making it expensive to make). However, once we started working on the pattern, my mind changed.
When we started the work to bring it back into print, we decided first to grade the pattern up to 2XL. The original only went to our current size Medium (which is pretty tiny). And, then we improved the instructions, clarifying certain areas and making sure it came together easily. It really is a pretty easy dress to sew! Even with the ruffles, the flounce, and the inside bodice lining, it takes less time and effort than I thought to make this dress.
I made the brown Calico Day Dress sample below with a calico cotton print I found at Joann's. I made the inside bodice lining with a cream colored print, which I though made an interesting contrast to the brown. I enjoyed making the dress below a lot and it got me thinking of the ways to make a more modern, everyday type dress I might want to wear.

Then I came across an ad for Boden, and the dress they showed in the ad looked so much like the Calico Day Dress! I had been thinking about a dress that would be warm to wear in winter -- long and with long sleeves. So I decided to make one for myself based on the look of the Boden dress I'd seen.
First, I wanted fabric that would be flowing -- not a cotton, but something with silk or Tencel. We had a couple of lovely Tencel twills in stock (red and green) and I decided to use the brick red colored Tencel. The twill gives the dress just enough weight to make it a wonderful winter dress -- it has some heft and is flowing (and does not wrinkle easily).
I cut a size Small for this dress. I am just about between a size Small and Medium for Folkwear grade rule, but the medium can sometimes be too big for me. If the garment is not very fitted, then a Small is usually perfect. That was the case for this dress. There is actually lots of room at the bust, waist, and hip. The most fitted area is the lined bodice at the waist (but I left that part of the dress off).
For my dress, I did not want the bodice lining because I wanted the front to button up (not the lining) and I wanted less bulk inside. I also did not want the yoke shoulder ruffles so I left those off as they seemed too vintage/historic and I was wanting a modern look. Finally, I wanted just a collar stand and not the full turndown collar. So I only cut the collar stand piece and not the collar. I wanted the belt to be longer so that I could tie it, so I added about 9" to the middle of the belt. If I did it again, I would add more length (and I could always easily remove this belt and make a new one). Finally, my fabric was nearly 60" (150cm) wide, and I was trying to save fabric, so I only cut 2 flounce pieces rather than 3 and I used the whole width of the fabric for the flounce (rather than the pattern piece length). This still gave me lots of flounce and room to gather. And possibly, 3 flounces would have been too much, especially for the size small.

So, because of all the pieces I did not use (bodice lining, ruffle, collar, and extra flounce), I was able to cut out this maxi dress from just 3.5 yards of fabric! That felt pretty impressive to me. Though I was definitely doing some pattern tetris to get all the pieces to fit!
AND, I added pockets to the dress. I had enough fabric from the left over scraps to cut 4 pocket pieces to add to the side seams. We have a whole tutorial on adding pockets to side seams, so you can get a free pocket pattern and read all about it here.

Construction-wise, this was pretty simple, especially without the extra pieces. It is pretty easy to leave off the bodice lining; nothing depends on the lining for further construction. I sewed the the collar stand as I would have a collar (sewed all sides but the one to attach to the neckline) and attached it as normal. It all came together pretty easily. Gathering the flounce is always a bit of work, but marking centers of the flounce and dress front and back is a huge help. I sewed the center front seam all the way up to my waist (which was much higher than the box in the pattern) because I wanted to have buttons just go from my waist up. I only added 3 small buttons to the front seam/hem so that it buttons up the front. Again, there was enough ease in this pattern that I can easily slip it over my head to get it on and off. If you want it to be easier to get in and out of, keeping the front seam attached from the square in the pattern to the hem is a better idea. But, this works perfect for me.

I really like how this dress turned out! I can wear it to work or church. I can wear it with tights or leggings underneath for more warmth, with a scarf, with a jean jacket. It feels quite versatile. I also have some thoughts about adding embroidery down the center front seam and/or the collar stand.
What do you think? Does the Calico Day Dress work as a modern dress? How would you make this pattern up?


By Esi Hutchinson
In a previous blog post, Molly makes a good point that some of the Folkwear Patterns don't have pockets due to the traditional and historic nature of the garments (based on how the fabric was woven and the culture they come from), but that doesn't mean you can't add them. Read the blog post here about adding a patch pocket to your pants. I would also encourage you to read this blog post about the history of pockets and the hierarchical roles they have played in clothing.
In today's short blog post, I will show you how to add a side seam pocket to 119 Saroulles. It is very easy! The pattern pieces make it very simple to add a side seam pocket. You will need a pocket pattern piece, plus the 119 Sarouelles pattern. You can download and print a free pocket pattern piece here, and you can read more about side seam pockets in this blog post. The fabric yardage won't change if you include a side seam pocket for this pattern.
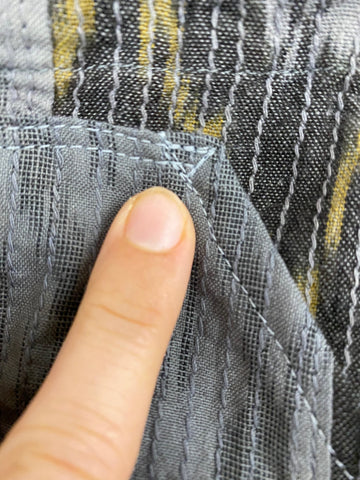
The African and Turkish pants in this pattern are cut with the side of the pants on the fold. So there is not normally a side seam. However, to add a side seam you just need to add 1/2" (13mm) seam allowance on the fold line for your size. I'm making a large, and the green line in the image below is the original fold line and the pink line is my new cutting line.


You can add notches to the new side seam if you like. I included double notches about 18" down from the waistline so it would make it easy to line up my side seams.

With the side seam, you will now be cutting four pants legs instead of cutting two on the fold.

I wanted my pocket bags to be larger than the free downloadable pockets we have (linked above) so added some extra room. This is an easy pattern drafting step anyone can do.

Usually pockets are placed 2" to 4" (5-10cm) below the waist. I marked 2" (5cm) below the waist for the top of my pocket placement.

Sew one pocket piece to the side seam of each of the four pant pieces, from the top of the pocket to the bottom of the pocket, and press the seam toward the pocket. I placed dots 1/2" (13mm) above and below the bottom and top of the pocket. I added the dots to indicate where to start and stop sewing on the outer seam of the pocket when I sew the pants legs together. You can also understitch the pocket so the pocket doesn't roll out -- stitching the seam of the pocket/pants to the pocket.

Sew the two pants pieces together starting from the waist down to the dot of the pocket, around the outer edge of the pocket up to the lower dot and down the rest of the pant leg.


Now you can continue with the pattern instructions to finish your pants. This pocket tutorial was made with my muslin to make sure I cut the size I wanted. I made my final pair out of a Lyocell Twill in the color Balsam.


Below are the African Pants from 119 Saroulles. I picked this fabric for a casual dress pant look. I think these pants are super comfortable and with the right fabric the pants could work for different occasions.


This post continues our series of blog posts on pockets by showing you how to add a patch pocket to garments. More pocket posts are below!
Some Folkwear patterns do not have pockets due to the historic or traditional nature of the garment (read more about the controversial history of the pocket here). But, we want to help you be able to add pockets whenever you wish!
The patch pocket is a useful and easy pocket to add to any garment. It can change the look of the garment because, unlike the in-seam pocket, it is very obvious and in plain site. It can easily become a design feature of your garment if you want to make it in a contrasting color or pattern. You can also choose to make the patch pocket in the same fabric as the garment, matching patterns to keep it as unobtrusive as possible.
You can make patch pockets in many different shapes, but I am going to show a fairly simple rectangular pocket with a diagonal opening. You can find the (free) pattern for this patch pocket here. This pattern can be printed on one sheet of 8.5"x11" paper or A4 paper.

You can change the design or look of this pocket fairly easily by extending or widening the pocket, rounding the corners, making the straight opening into a curve, or adding bevels to the corners. You can use your imagination and think about what shape you like best for your garment. Here you can see a couple of options for different looks of this pocket.


Patch pocket designs: beveled corners, rounded corners, curved opening
I made this patch pocket large enough to fit my phone (since I am usually hauling it around with me), and I made it to add to my favorite pair of Sarouelles. The 119 Sarouelles pattern is perfect for a patch pocket. There are no side seams to add a pocket into the seam on this pattern, so the only other option is to cut in a welt. Which I did not want to do. The patch pocket is so much more simple, and this fabric will be perfect for a patch, seeing as it is already made from pieced together cloth strips. And, I had some extra fabric leftover after making the pants.

To make patch pockets
First cut out the pattern and use it to cut the pockets from your fabric. You can use the PDF pattern we provide, or the measurements I have here in the photo (6" wide by 4.5" tall on one side and 8.25" tall on the other, and 2.5" wide at the top - add 1/2" seam allowance all around and/or 1" at the opening). This pattern does not take much fabric. You will need about 1/4 yard (or less) for two pockets.

If you want two pockets (which is the norm), be sure to cut so you are getting two opposite pockets (i.e. fold the fabric wrong sides together and cut two).

First, finish seams on all edges except the opening edge. You may want to stay stitch the opening edge so that it does not distort while you are stitching (and folding and pressing).
Then, you can turn under the opening edge twice and stitch. Or, you can finish (or serge) the opening edge and turn down once and stitch. I serged my edges, and turned down the opening edge twice. Then, press under all outer edges of the pocket by 1/2" (13mm).

Now place your pocket on your garment where you want it to be sewn. I marked where I wanted my pockets with tailors chalk and pinned the pocket to the pants.


Sew pocket to pants by topstitching close to the folded edges along all edges except the opening edge. I also like to add a bar tack or to sew a small square or triangle at each opening edge to reinforce the opening (I hate it when my pockets rip). You can also add another row of topstitching about 1/8" (3mm) from the first row of stitching to help reinforce the pocket. I like to increase my stitch length a bit for topstitching - to 3 or 4. And, to manage corners, keep the needle down and pivot fabric at each corner. You may need to adjust with the flywheel when nearing the corners so that you don't over- or under-shoot the corner (i.e. go too far or not far enough to make a neat corner).

These patch pockets are perfect! I love that these pants now have pockets, making them much easier more convenient to wear. They look great with lots of tops (this one is actually a dress that I made from silk noil from Stone Mountain and Daughters Fabric).
So I hope you will be able to now easily add patch pockets to your clothes, even after they have been finished!


Watch the video on patch pockets for the 119 Sarouelles below:

by Molly Hamilton
When I was growing up, my paternal grandmother had a shop in Banner Elk, NC called The Gaelic Shop. She sold imported goods from Scotland and Ireland, many of which she sourced from her trips to those countries. She would find crafts people working from their cottages and set up a relationship for supplying her shop. She carried hand knit wool sweaters, scarves, belts, sporrans, leather goods, tea towels, and many other things from classy-but-touristy knick-knacks to estate jewelry. And she also carried kilts, in many of the clan tartans. Her shop smelled like wool, leather, and lavender and I loved it.
We also participated in the Grandfather Mountain Highland Games for many years when I was a child. My grandfather had some kind of leadership position in the Armstrong clan for a few years and we would spend all day, every day of the Games on the mountain. I cherished those times -- an amazing picnic that my grandmother would pack, bagpipes and fiddles playing, dancers to watch, all the games, and the vendors with their beautiful things to buy. And all on top of a beautiful mountain meadow with the summer sun and breeze and everyone having a good time.
When we at Folkwear decided to feature the 152 Scottish Kilts pattern this month, I also decided we needed to make a kilt for our sample collection. We have a (women's) kilt skirt and a child's kilt, but no man's kilt. And I've been wanting to get photos of a kilt for the website too. The woman's kilt pattern is included in the 152 Scottish Kilts (called a kilt skirt), and a child's kilt pattern can be found with our 154 Child's Scottish Kilt and Jacket pattern
And, I wanted to make a kilt from our pattern. Our instructions for making a kilt are slightly intimidating when you read through it -- very detailed and with a lot of steps. They were developed for Folkwear by Ann Stewart, a world-renowned kilt maker (her daughter still makes kilts in her shop). These instructions are detailed and authentic for making a tailored, traditional Scottish kilt. And they do not use any pattern pieces. The kilt is made from a length of tartan. No pattern pieces are needed -- just some good measurements, rulers, thread, and needles. And a bit of time and patience. Once I started the kilt, I found that it went fairly easily if I took it step-by-step.
In this post I am going to go over a few things about making the kilt. I am not going to show you how to make the kilt (that's what the pattern is for - and it is too involved for me to do at this point), but I am going to give a few helpful tips and tricks that I hope will help you navigate this pattern easily and successfully.
Most of the kilt is hand sewn. So keep that in mind when starting on this pattern.
First though, this was also my first attempt at making a kilt. So, if you see something that looks wrong (or is wrong), please forgive (and kindly let us know if the comments). I am not a master tailor and I skipped a few steps (I'll let you know about that below). This may be sacrilege to some, but mostly I want to help make this kilt pattern accessible to everyone. So, don't be intimidated, but also don't be too critical!
Measuring
First of all, I did not have great measurements for this kilt. The measurements I was given turned out to be too big for the person I was making it for (I am not sure what happened!), but the kilt fit the measurements I was given! So just bear with the not super great fit on our model (I need to find a larger man!). But the instructions made the right size for the measurements, so that was good! However, a big tip will be to get good measurements and test the kilt out on the person it is for (if you can) before sewing the pleats at the hip-to-waist (Step 3). You can always adjust pretty easily at that point by adding a pleat to either or both sides (adjusting the over- and under-apron size and darts) and/or adjusting the pleats at the waist to get to the size you need.
Measuring, and measuring accurately, is critical for making a kilt. Waist and hip measurements, length measurements, difference between waist and hip, distance between waist and hip -- all these are important measurements. And I found it helpful to have a sheet of paper with all these numbers on it and space below where I could do some of the basic calculations that are needed for making the kilt. So, I made a simple sheet you can print out and use when you are making a kilt to help you keep track of these numbers and refer back to when kilt-making. Download and print the free PDF here.
Planning Your Kilt
For this kilt, I used a piece of wool tartan that I found in my fabric stash. It was one my maternal grandmother had bought many years ago, and from the label is a Douglas clan tartan. Her family may have had a connection to the Douglas clan, but I also think she really loved the name Douglas and liked the tartan. Anyway, you can search official tartans on the Scottish Register of Tartans to find your family's tartan. Finding tartan fabric is not easy. You likely won't find it at the local fabric store or even your regular online fabric shop. I will list some suppliers of tartan fabric at the bottom, but you can also find these fabrics at any of the Scottish Games or Festivals that happen in various places.
The pattern (and a kilt, in general) calls for 8 yards of single width fabric (30-32" wide) or 4 yards of double width (60" wide) fabric. Again, this might be sacrilege, but I only had just over 3 yards of double width fabric, and I was making a kilt for a large man, and it worked fine. You may not get quite as many pleats (though it seemed good to me), but you can work with shorter lengths than suggested and still get good results.
I cut the long folded edge of the fabric off when I cut the fabric down to the length I needed. Later I used this folded edge piece to make the waistband, belt pieces, and belt loops. I laid out my two pieces on the ground (where I had the most room) and labeled each side with chalk to mark the right-side-up and which side was to be the under-apron and over-apron. This was a huge help and I think very important.

I also used chalk for all my markings on the kilt. Chalk was a great option - works well on wool, can be brushed off (erased), and can be pressed without issues. I did have to re-mark the kilt if I took too many days away from the project or moved it around (which I did often because we moved offices when I was making this kilt).

Pleats and Darts
The pleating and darting was a little tricky, but again, I just started with one step at a time in the instructions. The waist and hip measurements were very similar for the kilt I made, so I made very tiny darts at the apron waists.


I ended up doing dress pleating on this kilt, which meant I kept the tartan pattern with the pleats (you can see the tartan pattern even though the fabric is pleated). I did not use the waistband/cut off piece to test or plan it. I just started folding the tartan to see what I thought looked good and it worked very well. One of the little "tricks" I felt I learned is that the pleats don't have to be exactly the same size all the way through. As long as they are about the same size, and they match up to get the look you want, it is fine.
My pleats were supposed to be .74" wide according to my calculations. I had an even number of setts between the aprons so I took my number and subtracted 7 (36 setts - 7 = 29 pleats). Then I took half of the hip measurement (for me was 21.5") and divided this by the number of pleats (29) -- so 21.5" / 29 pleats = .74". So I went with approximately 3/4" wide pleats, but sometimes they would be narrower or wider by almost 1/4". But it was not noticeable because of how the plaid pattern showed.
I had 2 sections of fabric to work the pleats on and I just put them together as if they were one, pinning them at the center back. I worked the pleats so that this seam would fall in the back of one of the pleats and would lay flat. This was easy to do because I also had several inches of fabric to work with since I was only considreing full setts as part of the pleat plan -- and there were not full setts left at each end of the fabric in the center back.
I will also note that my fabric had a few moth holes in it, but I was able to manipulate the pleats so that they were completely hidden in the garment. Just a little extra bonus to making this kilt!
I also hand basted all the pleats in place instead of using pins as the illustrations show. I think this was really helpful and if I needed to access inside the pleats, I could just snip the basting threads away.


Again there was a very small difference between the hip and waist for the kilt I was trying to make, so I did not have to take in much at the waist on the pleats. But, my feeling was that I would just adjust each pleat at the waist by about the same amount to take out the extra width to get down to the waist measurement. This is a good place to measure your kilt to see if it is coming out the size you expect. Mine was a little larger than the measurements I had, so I took in a little more at the waist than my calculations indicated I should, but that way it finished at the correct waist measurement I was using.


Buttonhole (and finishing pleats)
I did not cut the excess fabric from each pleat in Step Four of the kilt. By the time I got to this step, I was running out of time (and maybe patience?). So I only cut out the extra fabric in the pleats past the buttonhole so I could open the buttonhole pleat up. It wasn't totally clear to me that the pleat where the buttonhole goes has to be cut open. The extra fabric is not cut away, but the pleat does have to be cut open to access the stitching that needs to be opened up to make the buttonhole. And the pleats to the inside of this pleat were in the way of opening up for the buttonhole. So I cut the extra fabric away. But that was all I did. I am sure by leaving all that fabric, I was leaving in quite a bit of bulk, but I just didn't feel like it was worth it for this project.


Interfacing and Lining
I used a medium-weight linen for the interfacing and a light weight white muslin for the lining in this part of the pattern. These fabrics worked well and they were scraps that I had on hand. I thought they did a great job, but I don't know if they are considered totally appropriate for the application they were used for. They worked for me, but perhaps you would want to try something else.
I also trimmed my belt loops down before I turned them right side out (which made them much easier to turn out).

Waistband and Buckles
It was very hard to find buckles for the kilt. There are a number of Scottish wear and kilt shops but very very few that have the kilt-making supplies. I ordered them from Highland Xpress, but also saw them on Amazon (coming from Scotland). Highland Xpress had exactly what I needed for this kilt. I made my own buckle tab as instructed in the pattern, but didn't have it made (because the buckles had not yet arrived) when I took the photos of the kilt.
For the waistband, I used the fabric I had left from first cutting the tartan for the kilt. I could have tried to line up the band so that the vertical lines of the tartan matched, at least for the over-apron. They won't match elsewhere on the kilt because of the pleating at the waist and probably won't match on the under-apron either. And that is because the pleats at the waist are manipulated to fit the waist and so take in some of the extra fabric.
Also this is a good place to note that wool has some stretch to it. You can manipulate it a bit when fitting the waistband (and lining) to get it to where you want it to be.

Back of the almost finished kilt
Finishing
I also did not do the finishing technique that has the hem edge at the double sett pleat and corner of under-apron hemmed.
But I did do a LOT of pressing. I pressed the pleats consistently throughout the kilt making process once I had them basted. I pressed with steam from the front and back. I did not place them under books or other heavy items, but that is not a bad idea and could help keep the pleats super sharp.
Finally . . .
I really did enjoy parts of making this kilt. I liked designing the pleats and getting the kilt finished. I loved working with the fabric -- wool is so nice to work with. And I do like hand sewing and this was nearly all hand sewn. It took quite a while to finish this kilt, but I am proud of it. It is certainly not perfect, but it would look beautiful at the Highland Games on a summer day!


18 September 2024
Moving
First, if you haven't heard, we moved Folkwear to a new location! It is only about 10 miles from where we were located, but has nearly twice as much space and is right beside Western Carolina Sew Co. (and just down the road from non-profit Local Cloth). We feel very lucky to have such good neighbors! I borrowed a needle the other day from the folks at WCSC because I couldn't find my hand sewing needles (lost in the move and showed up today!) -- it is a great fit and so nice to have a related business to work beside.
We are now located nearly downtown Asheville, in the River Arts District, at 240 Clingman Ave Ext. You can come visit us when we are open, which is generally 9 to 4 Monday through Friday. And Western Carolina Sew Co operates a gorgeous boutique of their clothes (sewn right here in the factory) called Rite of Passage Clothing. The boutique is open Thursday-Sunday 11-5. To get to our studio, either ring the doorbell at 240 Clingman Ave Ext. Or, come to the back - behind Ultra Coffee and we are the first door on the wooden walkway.
It has taken some thought to get our space organized and moving all these boxes was a LOT of work! But we are so excited to be here. Personally, I am enjoying walking around the city during breaks and getting good coffee. I am hoping to bring my bike into the office soon and take breaks on the river trail which is near our office.


Printing and Folding Patterns
One of the reasons we needed to move to a larger space was because we bought a printer and folding machine to be able to print and fold our own patterns. If you have been following Folkwear's journey over the last 3 years or so, we have had quite a few changes in pattern printing options (read more about it here). And it has led to some hard decisions and some easy ones. Another wonderful company printed many of our slower-selling patterns over the last few years, but they are located on the west coast of the country so shipping was very expensive (lots of patterns are very heavy). They also could not always keep up with our demand and sometimes we would be back ordered on a pattern for many months. We decided to take control over part of our production and get a wide format printer that could use lighter weight paper, and print our own patterns.
The folding machine was harder to find but we tracked a Germany company down that makes and sells them and now we have a printer and folder. We are still figuring out the folding machine (there are so many folding options), but it certainly is nice to have to quickly and easily fold patterns.


We are now printing many of our patterns on 18# paper (as many very old Folkwear patterns used to be printed). This is a nice weight -- lighter than copy paper, but still very durable. Printing and folding in-house cuts our cost a bit, but mainly gives us control of our process.
We are still printing most of our best selling patterns at the Simplicity factory near Chicago. This saves tremendously on printing costs because they are able to print in much larger volume and on tissue (very lightweight paper). So we are still working on keeping our costs as low as possible so we can pass that on to our customers.
So all that means we do have a variety of different tissues for our patterns -- some are real pattern tissue (brown and very lightweight), some are still around from our McCalls printing days (white 8# tissue, not as lightweight as the brown), and some are on 16-18# paper (lightweight bond, but not tissue). I don't love that we don't have a consistent pattern paper, but it does save (you and Folkwear) a lot of money on printing and it allows many patterns to be able to stay in print rather than just be available as a PDF pattern.
The new printer and folding machine also means that we can print patterns for other people. We are working through the process, but for now anyone can upload their PDF patterns to our site, we will print them, fold them, and ship them. We are offering 25% off of all printed PDF patterns if you order more than one.
The Green Pepper
The other really big news, and bigger reason we needed a larger space, is that Folkwear LLC has acquired The Green Pepper, a sewing pattern company that provides patterns, fabric, and notions for outdoor clothes and gear. The Green Pepper has been around for over 50 years and has over 100 patterns in print for an array of clothes and gear for adults and children (and pets).
Late in the spring, Susan Downs, former owner of The Green Pepper, called me out of the blue and said she was interested in retiring and was seeing if anyone had an interest in taking over her company. She knew Folkwear nearly from its beginning; it was also a small indie pattern company founded on the west coast. And she had followed my journey with Folkwear when I took over nearly 7 years ago. I had heard of the The Green Pepper and knew it to have great patterns for outdoor wear. After talking with Susan for a while, I got really excited about the possibility. Susan (and she and her mother, before) had built a sweet little business with some really great patterns, also offering performance fabrics and notions. The integrity and kindness showed through.
After several months of working through all the details, we finally closed at the end of August. I flew out to Oregon to see what I'd bought and was delighted to meet Susan in person. The Green Pepper inventory is now on its way to Asheville, NC and our new location. Meanwhile, Susan is keeping things running smoothly while we set up inventory here, prepare for shipping, and get our new website online.
I am very excited to have The Green Pepper under the Folkwear LLC umbrella. It will keep its name, website, branding, and incredible patterns and drawings. We are just going to be ushering it into the future by updating the website, gradually adding PDF patterns, and potentially increasing sizing in some of the smaller ranged patterns. We mainly want to keep offering these great patterns and provide exemplary customer service to all the loyal Green Pepper fans.
You can read the press release for this exciting news here.
Finally . . .
All of these changes have come together fairly quickly over the last month. It has been a whirlwind. A bit wild, and a bit stressful, but very exciting. And no big changes would be complete without my children bringing home another pet. We got the opportunity to take a dog back into our house that we fostered for a short time about 9 months ago when my daughter brought him home from a farm. So now we have a large Pyrenees/Golden mix 10 month old puppy at home as well. He's bringing lots of joy to the family and just the right amount of chaos (and so much dog hair). And he does make me laugh with some of his antics.


By Esi Hutchinson
Welcome to Part 2 of how I made 250 Hollywood Pants Knickers into pants. To see how I made the adjustments for this design in my pattern pieces (and how I made the pocket larger), check out Part 1 of this tutorial. In this blog I am going to show you how I made the front fly with a zipper instead of a buttoned fly. While I do like the look of buttons on the fly for a pair of pants, I get frustrated when taking them on and off. So I decided to put in a zipper instead.
The pieces I cut out are below. I used the pattern pieces I made in Part 1 to cut out the fabric (an 8oz sanded twill). I didn't need the Cuff Placket J and Pocket Facing E, but I forgot and cut them out anyway. Whoops!

When sewing these pants I followed the instructions quite closely for the general assembly of the Knickers.
Starting with the right sides together and I stitched from the box to the top of the crotch seam.

I pinned the Back crotch seam and stitched and pressed the seams open and serged the seams.

Assembling the fly front is a little tricky. I highly recommend labeling your fly pieces (left, right) and right and wrong sides. Refer to this blog post where I walked through assembling and sewing the buttoned fly front of these pants if you need help figuring out the fly for this garment. However, if you are adding a zipper instead follow below to see how I did it.
Zippered Fly
Stitch the Right Facing C to the Right Fly C with right sides together on the unnotched edge and around the bottom to the box. I think it is helpful to clip in the seam allowance to the box before trimming. Trim the seam and turn the fly right side out.

Press under 1/2" (13mm) on the long double notched edge of Fly Facing C. Then stitch Fly C to Front Pant A, with right sides together, from the top to the box. Trim the seam.

Press the fly and facing away from the pants. Pin the pressed under edge over the previously stitched seam line to the inside of the right pant and topstitch.
Now work on the left side of the Pants.
With right sides together stitch the unnotched edge of Left Fly D to the double notched edge of Left Front Pant A from waist to the box. Press Fly D away from the Left Front Pant A.

Now we are ready to sew in the zipper.
The top of the zipper teeth needs to be 2-1/4" (5.7cm) below the top of both the Fly/Facing C and D to accommodate the Waistband Facings H and I in later steps.
Place the left part of the zipper with the right side face down onto the right side of the Left Fly D, making sure the top of the zipper is teeth is 2-1/4" (5.7cm) below the top of the Left Fly D and the center of the zipper teeth is 5/8" (1.6cm) away from the Fly D and Pant A seam.
Sew the left side of the zipper onto Fly D using a zipper foot, then stitch again close to the edge of the zipper tape. Try and stitch as far down as you can within the 1/2" (13mm) seam allowance.


Right sides together, stitch the Left Fly Facing D to the Left Fly D along the notched edge, backstitching at the box. I made sure to keep the extended part of the zipper that doesn't have zipper teeth on it out of the way of the stitching, but you do not have to do that. Trim the seams and turn right side out.

Trim 1/2" (13mm) off of the unnotched edge of Left Fly D. Press the Fly to the inside of the Pants along the seam line of the Fly and Pant seam.


Topstitch the pressed Left Fly/Facing D down through all layers including the Left Front Pant A.

Now back to the Right side of the zipper.
You should have already pinned the pressed under edge of Right Fly Facing C over the seam line of Fly C to the right Front pant A and topstitched.
Place the wrong side of the other side of the zipper on top of the Fly Facing C making sure the top of the zipper is teeth is 2-1/4" (5.7cm) below the top of the Right Fly Facing C and the center of the zipper teeth is 5/8" (1.6cm) away from the seam of Facing C/Right Pant A (the same way it was done for the left side).
Sew the Right side of the zipper using a zipper foot, then stitch again close to the edge of the zipper tape, stitch as far down as you can.

Instead of overlapping the Fly and topstitching the triangle as show on the pattern piece Fly C, I overlapped the Fly and stitched through all layers. Starting from the bottom of the fly, I stitched up 3/4" (2cm) backstitcing at start and finish and bartacked (small zig-zag stitches) through all layers.

Sewing the zipper is now finished, let's move on to making the rest of the pants.
Finishing Sewing the Pants
Stitch the Front A and Back B at the inseam, matching notches. I pressed the seam to the front and finished the raw edges with a serger.

I topstitched my inseam close to the seamline then topstitched again about 1/4" (6mm) away from the pervious topstitch. This creates a faux flat-felled seam.

Pockets
I don't need to use the pocket facings because I'm using the same fabric for the pockets as for the rest of the pants, and my fabric is midweight so I'm not worried about it being too bulky.
Right sides together, stitch one pocket side to the Pant Front matching stars and notches.

Clipping to the stars.

I serged the side seams on both Front and Back Pant pieces after I'd sewn the pocket sides to the Front and Back Pants.

Understitch the pocket side seams to prevent the pocket rolling out from the Pants. This keeps the pocket bag in place.

With right sides together, stitch the Front and Back together at side seams. Start with backstitching at upper star of the Pocket and stitch to the top of Pants. Then stitch from the fold at the bottom of Pocket to the bottom star of the Pocket and then down the rest of the side seam of the Pants.

Sew the top of the pocket closed

Waistband and Belt Loops
Make the belt loops and sew the waist facings H and I as instructed.
Pinning the waist facings to the inside of the Pants.

Sew the bottom of the belt loops in place. Then make your buttonhole. I used a 5/8" (1.6cm) button.

I hemmed my Pants by folding 1/2" (13mm) then 1" (2.5cm) and stitched close to the pressed edge.

The rise of these Knickers work really well for my body type. I really struggle when making pants for myself, I usually have to shorten the rise. However this worked out great (I did make a muslin first) and I now have a new pair of comfortable pants to wear. Sanded Twill is by far my favorite fabric for pants. And I really love these pants!


By Esi Hutchinson
Our featured pattern this month is 250 Hollywood Pants, which includes three styles of pants: trousers, knickers, and shorts. This pattern exemplifies the start of the acceptance of women wearing pants for practical, casual, and fashion purposes during the 1920-30's. And right now is a great time to make a pair of wool pants for the coming cool weather, or to whip up a pair of shorts for these lingering hot summer days!
"Knickerbockers", shortened to "knickers" in our pattern, were the summer sportswear attire mainly worn by men in the 1920s and 1930s. These short pants were traditionally baggy, buckled, and sinched below the knee.
Over time, knickerbockers evolved from being just men's trousers to a style of breeches worn by both men and women. They were often paired with knee-high socks, creating a distinctive look that was both practical and stylish. Knickerbockers were especially popular for outdoor activities like golf, cycling, hiking, and gardening as they allowed for ease of movement.
As knickerbockers gained popularity in the fashion world, they also made their mark in the world of sports. Athletes began wearing knickerbockers for comfort and flexibility, leading to being associated with various sports uniforms. Even today, you can see references to the classic knickerbocker style in sports like baseball and football (American football, that is).
I decided to make the knickers from 250 Hollywood Pants into actual long pants for myself. It's difficult for me to buy pants because they never fit me in the right places. These knickers, however, fit me comfortably without any modification, but I felt I was more likely to wear them as pants or shorts rather than as traditional knickers. So, in this blog post, I will show you how I transformed the knickers into pants. I will also show you how to make the pockets larger (because who doesn't want bigger pockets!). For Part 2, go here.
The fabric suggested for the knickers is medium to heavy-weight cotton, wool, linen, and twill. I used a 60" (150cm) wide cotton sanded twill in Monty Tan (weight of 8.5 oz/280 gsm). I would say this is medium weight fabric. I'm a size medium in this pattern and needed 2 yards of this wide fabric to make the knickers into pants. So if you make these knickers into pants, you will likely need 1/2 yard or more of extra fabric, depending on the size you are making and the width of your fabric. I will also point out that we received some beautiful designer lightweight wools last week, and they would also be lovely for this pattern.
Getting Started
First, I needed to recreate the pattern piece A and B, the pants Front and Back.
I used:
I traced out the knickers pieces A, B, C, D, F, G, H, I. Since I was making these knickers into long pants, I did not need pieces J and K (the cuff placket and the cuff). I did not use E, the pocket facings, either because I used a medium-weight fabric that wouldn't make the garment bulky. If you are using a heavy-weight fabric, I would use a light-weight fabric such a broadcloth, poplin, other light-weight cottons, or linen, for the pocket facing E and fly facings C and D.
Transforming the Front and Back
I measured the length of both inseams of the original pieces A and B for the knickers because I know that in a pants pattern, the back leg is usually slightly longer than the front leg. The Back was 3/8 (9.5mm) longer, so when I extended the pattern pieces, I made the Back 3/8 (9.5mm) longer than the Front.
I taped the knickers Back (B) to tracing paper so that I could extend the original lines of the knickers, making them into long pants. I excluded the 1/2" (13mm) extension on the pattern piece that is for the slit of the knickers.

I decided I wanted the pants to be 40" (101.6cm) long with 1-1/2" (3.8cm) hem.
I used the grainline as my straight line and measured from the waist to the hem 40" (101.6cm) and drew my cutting line at the bottom of piece Back B. I also added notches to help match the pants legs together.

I did the same with Front piece A but made it 3/8" (9.5mm) shorter than the Back (i.e. 39-5/8" (100.6cm) long).

I transferred the notches to the Front piece. Then my pants pieces were ready!

That is all I did to change the Front A and Back B pattern pieces to make pants from the knickers. I highly recommend making a muslin to see if you like the fit and make any adjustments you might want before cutting into your fashion fabric.
Enlarging the Pockets
I found that the pocket of the knickers was a bit too narrow for my liking, so I wanted to figure out how to make the pocket wider. These pockets are cut as one piece then folded to make the pocket bag. To enlarge the Pocket F piece to be wider, I traced the pocket piece onto paper, and then I cut it in half using the center foldline.

You don't want the top of the pocket piece to be wider because the pockets are sewn into the waist and get pressed toward the front after you've sewn the pockets on. The width of the top of the pocket might exceed the width of the top of the pant fronts if you made it wider and it would not work or look good.
Instead, pivot the cut-in-half pocket from the top and make it wider toward the bottom. Note that you don't have to cut the pocket in half as I did -- you could just cut from the bottom to nearly the top, creating a pivot point in the pocket. Pay attention to how wide your front pant pieces are so the whole pocket isn't wider than the front pant and therefore interfere with the pant crotch.
Place and tape the pocket pieces on tracing paper and connect the bottom of cut in half pieces together with a curved line. You can make the pockets longer at this point as well. Now your pockets will be wider. I always feel women's pockets are never big enough!

New pocket piece being made. Keep the pocket attached at the top, but open the bottom up so you have more room and a larger pocket.
Once all these changes were made, I was ready to make the final version of the pants. Follow along for Part 2 here!


