- Home
- About
-
Shop
-
Sewing Patterns
-
Fabric
- Sewing Supplies
- Folkwear Clothing
-
- Blog
- Customer Gallery
- Contact
June 11, 2022 2 Comments on Adding Pockets to the 142 Old Mexico Dress

by Victoria Watkins
I believe most of us who have any amount of interest in fashion has had the experience in which we have complimented someone's dress only to be told with enthusiasm, "Thanks! It has pockets!" Or, maybe you've said that to someone who complimented your dress! Today, I'll show you how I added pockets to our 142 Old Mexico Dress pattern, and give you ideas on how you can do the same. Plus, we are offering you a free template for an in seam pocket so you can add them to any garment that needs a pocket!
The 142 Old Mexico Dress is probably our most popular pattern. It is a breeze to sew, makes a dress or a shirt, and has lots of options for fabric or to add embroidery. I choose an orange organic poplin we had in stock at Folkwear to make this dress. I may add embroidery to it later (stay tuned for an embroidery color theory blog post!). Usually you would embroider before constructing the dress, but it is fine to add later as well - you can do whatever suits your fancy.

For this dress, the body assembly includes a yoke, a front, and a back. I could have chosen to just roughly measure to where I'd like the pocket pieces to sit and put them in in the first step, but instead I chose to construct the dress up until the side seams are to be stitched (yoke is finished). That way I could try on the mostly-sewn dress and physically determine where the pockets would fit best.

On the front and back pieces of the pattern, there is a dot near the underarm that designates where to stop stitching along the side seams - and where the lower part of the sleeve is inserted. Coincidentally, when trying on the dress to determine where the pocket would go, I noticed that my ideal spot for the pocket was slightly below that dot. In order to close the side seam and prevent the top of the pocket from flapping open with the sleeve pieces, it's necessary to have some amount of seam above the pocket. For my height, I chose to measure down 1.5 inches from that dot to mark the place where the top of the pocket piece would rest.

Next, I created the pocket pieces. Both sets of pockets (one on each side) need two pieces, so 4 needed to be cut out. This pocket piece has been used in several Folkwear patterns (and will be in a new pattern coming out next month!). You can download this pocket piece here. It prints on legal-sized paper (or A4 paper), or you can print on two sheets and piece together. This pattern piece includes markings for notches as well as alignment dots and stars. Line up the top dot on the pocket with the top of where you want your pocket opening to be.

The above photo shows the general placement of the pocket in reference to the yoke. To sew the pocket to the dress, I placed right sides together and raw edges matching, as you can see below.

I sewed the pockets to each side seam between the pocket dots, right sides together. Remember that these are sewn on before stitching the side seams. Then, I pressed the pocket pieces "out", away from the body of the dress.

With the pocket pieces pressed away from the dress body, you can then place front and back dress pieces together and align the right sides of the dress and automatically have the pocket with right sides together as well. The above photo shows the dots from both the original 142 Old Mexico Dress pattern, as well as the alignment dot I added for the pocket and the star marking on the pocket. These will be your reference for the following steps.
I sewed from the bottom mark (which is a box on the 142 tissue) up to the point where the star mark is on the pocket piece. Next, I sewed between the top dot on the dress and the dot marking the top of my pocket opening.

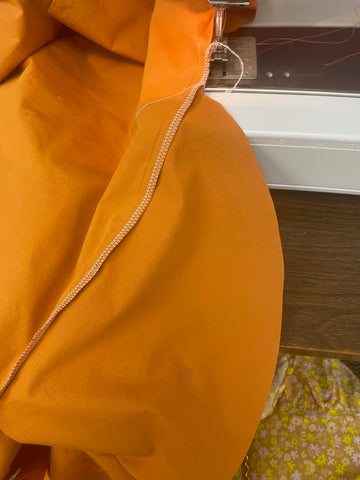
Before sewing the pocket bag pieces together, I chose to serge the side seams entirely to finish the raw edges. You can finish all edges how you like, but it's easier to do this now before the next step, which creates a segment of side seam that is difficult to access for seam finishing.
I sewed around the outside edge of the pocket bag (from the top dot on the pocket piece to the bottom dot), making sure to sew into the stitching of the side seam at the start and finish. I pressed the entire side seam and pocket toward the front of the dress, and then pinked the raw edges of the pocket to finish. Of course, you can use whichever finish you like on the pocket bag.

From there, I continued the dress as instructed in the pattern. I hope this guide inspires you to try adding pockets to your 142 Old Mexico Dress pattern, or any other dress with side seams that you're sewing!
June 17, 2022
Hi! Thanks for this article. I’m currently working on this dress and plan to insert pockets. I wanted to fuly enclose the side seams though, as is my habit, and wanted to ask if there’s any way of adding pockets and French seaming?

Molly
July 21, 2023
Doing French seams with side seam pockets is a bit more tricky. You can do it if you clip the side seams where the pockets will go as they are put in.