-
Sewing Patterns
-
Fabric
- Sewing Supplies
- About
- Blog
- Gallery
-
December 15, 2022 2 Comments
by Molly Hamilton
I really love Cynthia's Cookie Apron pattern. I like the wrap around/cross back apron design (much better, in my opinion, than a tied apron). There are no ties that can come loose, and there is lots of coverage. And the pockets are great and very customizable. However, the one issue I have when I make it, is that sometimes I don't have fabric wide enough to fit the pattern. This is especially true of the larger sizes. The main pattern piece is very wide. However, there is an easy solution to this problem that I will show you today, along with a simple binding finish rather than using the facing from the pattern. This hack will save you fabric when you might not have quite enough.
Actually, there are a couple of solutions to having fabric that is not wide enough for this pattern - one is to cut two separate pieces and have a center front seam (you can read about how to do that here in the sew along, Day 1). Or you could also the apron on the cross grain, which works well for smaller sizes or for wide fabrics.
But, what I wanted to do was to use a narrower width (45"/115cm) fabric and use as little fabric as possible. I wanted to use one of the organic linens that we have in stock and make the largest size. I really didn't need quite such a full apron, so I just let the selvage edges of my fabric become the sides of the apron.

You can see when I laid out the pattern, the pattern hangs over the edge of the folded fabric. I traced the size I wanted (Large) and simply cut to that selvage edge at the top and bottom of the pattern. You could also choose to leave the bottom edge straight if you want, rather than have it curve around. This will also keep fabric waste to a minimum.

If you are using the facing piece of the pattern, you will want to make sure it fits on the fabric the same way (i.e. on the fold and cut to the selvage). You can make the apron just as it says in the pattern, or you can make a few other changes I will show here. If you'd rather not hem all around the apron, you can leave the selvage edges un-hemmed. This is nice, especially if the selvages are pretty or if your fabric is heavy. I chose to turn the selvage edges under one time on my apron, and did not finish them. This reduces bulk and keeps the same tone on the right side of my fabric.

I also chose to not use the facing piece (saving me more fabric) and just covered all the top edges with bias binding. I made 3/4" (2cm) binding from scraps of fabric in my scrap fabric pile (using this tutorial). You will need 4-5/8 to 4-3/4 yards of bias binding if you are just binding the top of the apron. If you are also going to bind the sides and bottom of the apron, you will need an additional 3-1/4 yards of binding.

I like making my own binding because I can use my scraps, and have colors and patterns I can't find in ready-made bias tape. But, that does mean that I sewed the binding twice - once with right side of binding to wrong side of the apron. And once again when it is folded over the the right side of the apron, topstitching it down. If you use ready-made bias tape, there is one side that is longer than the other on the tape, and you could bind the edges in one pass, with the shorter side of the tape on the front/right side of the apron.

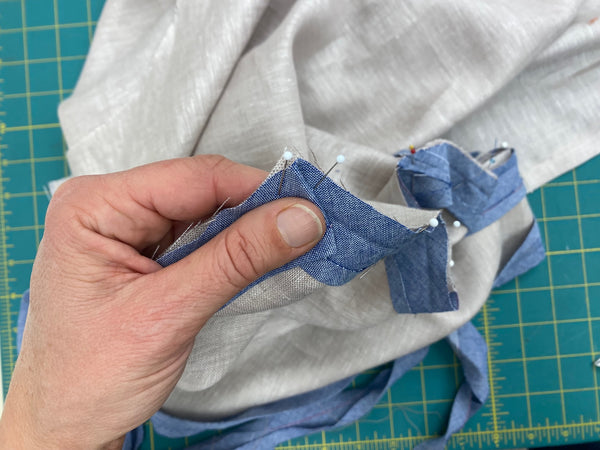
I mitered my corners as I went. On the wrong side of the apron, I sewed to about 3/8" to the corner and stopped, then started again 3/8" on the other side of the corner. I folded the fabric at an angle when it was folded to the other side. This worked well and made sewing mitered corners on the right side very easy (just folded the corners to make the miter and sewed it down with the machine).

I hemmed the bottom edge (turned up 1/4" then a 1/2"). And the apron was done!

I even had room in the fabric scraps from the apron to cut all my pockets for the pattern, but I ended up only using the top pocket and I moved it to waist height. I added some bar tacks to the top corners for security.

I sewed the straps to the front of the apron, but you could use buttons and buttonholes if you like (or sew the straps to the back of the apron).
I am very excited to gift this apron to my mother's husband this year. He happily washes all the dishes after nearly every meal and he recently hinted that he would like one of my aprons to keep his clothes clean while he washes dishes! This project only took me about 1.5 hours start to finish. And, if you have ready-made bias tape, it will be shorter. I highly recommend this pattern - Cynthia's Cookie Apron. And this sewing "hack" gives you more options for fabrics and finishes to use. Happy sewing!

May 29, 2023
What yardage do you need for the 45inch fabric

Molly
December 07, 2023
You will use about 1.75 yards of 45" wide fabric for size large when making the apron like this.