-
Sewing Patterns
-
Fabric
- Sewing Supplies
- About
- Blog
- Gallery
-

This blog post was written in 2020, but has been updated in 2024.
by Molly Hamilton
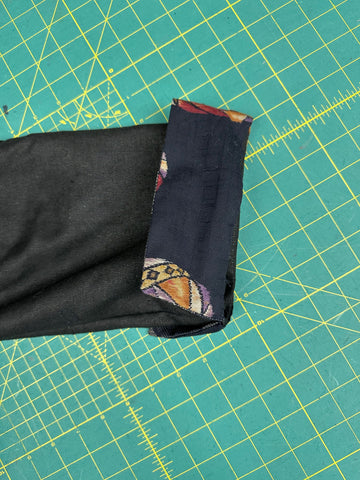
I am still working on my project goal of making our 227 Edwardian Gown from a gorgeous grey organic cotton voile and hand-dyed lace. (Fabric and lace naturally dyed from Botanica Tinctoria.) This is honestly the first time I have done lace insertion, and I am quite enjoying it. It is not nearly as difficult as I thought it would be, but it is a lot more time consuming than I realized. Hence, the dress is not finished. UPDATE: See the finished dress here in the photos in the pattern description (not me wearing it though) and above.
However, even though I haven't finished the dress yet, I want to show you the easy lace insertion technique that is used in this pattern so you can more easily do it on your own - for making this dress or the 205 Gibson Girl Blouse or 210 Armistice Blouse or in any project you want to do (napkins and tablecloths would be gorgeous and easy!).
See all our patterns that have lace insertion here. And our collection of lace here.
First, make sure your fabric and lace are pre-washed, or wash them before working on your project. Wash them as you plan to wash you finished garment. This is because if you wash you fabric and not your lace (or vice versa or neither), you can end up with lace that shrinks and fabric that does not and end up with a garment that is distorted or too small. You do NOT want to go through all the work of lace insertion to have this happen. My lace and fabric were pre-washed with very hot water during the dyeing process, so I don't need to worry about pre-washing/pre-shrinking either.
Another couple of tips: make sure your machine is at a tension that works well for your fabric (you don't want it eating up your lace or making it tight); and if your fabric is very fine, you can use spray starch to help sew and use the lace.
Also, make sure you have enough lace to do the project you have in mind. Honestly, I don't have enough insertion lace for this project, but I am making changes to the design to make it work. I bought out all the lace of this color that they had, so I had limits from the start. Which is fine - I am making it work.
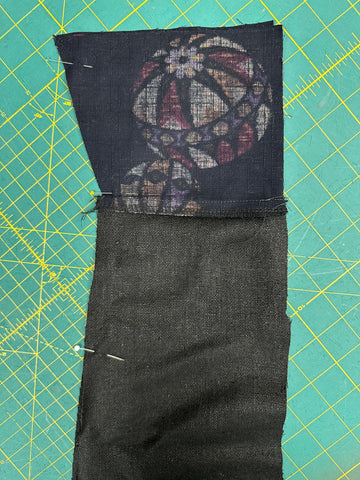
There are two types of lace used in this project. First is insertion lace. This type of lace has two sides that are straight (or mostly straight). This lace is "inserted" in the garment and becomes part of the fabric. You need two straight edges on the lace to work.

The other type of lace is called edging lace and can be pre-gathered (or gathered) or flat edging. Lace with ruffles is gathered, or pre-gathered; lace that lays mostly flat is edging. But, both have one side that is mostly straight and one side that is scalloped or has some shaping to it.

We now carry insertion and edging lace in our shop and plan to add more. Check out all the lace and beading options we have here.
Usually, you start insertion lace on pattern pieces before they are sewn to any other pattern pieces. Sometimes you sew over seams, but we'll get to that below.
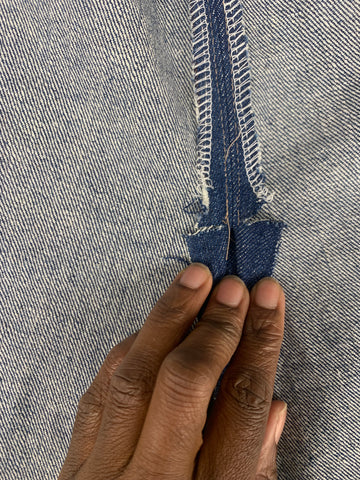
To sew insertion lace on your garment, you pin the lace down right on top of your garment piece where you want it to be - on the right side of your fabric. For corners, make a mitered corner. For curves, ease around the curve. And, don't cut your lace at the end. This allows for some extra lace that might be needed by the end of sewing the lace down.

Then sew along each edge of the lace. For curves (and corners), sew the outside edge first. I like to pin so that I sew on top of the lower end of the pins on the first edge, then pull them out as I sew long the second edge of the lace.


Welcome back to the 280 Resort Kaftan sew along! For Part 1, go here. We left off at finishing the front of the dress by joining the bodice, band, and skirt front. Today we will finish sewing the dress!
Adding Bodice Ties
Adding bodice ties to the inside of the dress allows you to be able to add some shaping to the kaftan when wearing it. You don't have to add the ties; they are optional. When the dress is finished, the ties are tied into a bow in the back when wearing it, under the dress, and pull the front tighter to the body. If you add ties, you don't have to tie them every time, of course. You can let them hang down on the inside of the dress. But, the dress that I made for the post is too short to not tie the ties each time (they hang down lower than the hem when not tied).
If you are adding ties, cut two lengths of twill tape or ribbon to be at least 25" long. You may want the ties longer, depending on the size you are making and how easy it is to tie backwards.
I used some twill tape we had on hand at the office. Place one end of one tie inside the two Center Front Bands, between the outer Band and the facing Band. Tack down the end to the facing Band (the Band on the inside of the dress). Place the end just over the seam line so that it will be sewn into the seam in the next step.
Note that you cannot finish the seams all in one go once the ties are added. I serged the seams, but skipped the area where the ties were placed. You would need to finish the short ends of the Bands before sewing them in place if you wanted them finished/serged.

The tie is pinned inside the Band facing here - you can see this is the inside of the kaftan.

I tacked the tie down to the inside of the facing with a zigzag stitch on my machine. I could have placed the tie slightly more to the inside so when I stitched the seam in the next step, the tie would be more securely sewn.

Both ties are added to the sides of the front.
Side Fronts
Now sew Sides D to each side of the dress front that we made in Part 1. With right sides together, match the notch on Sides to the seam line where the Skirt Front meets the Center Front Band. Sew from the top front to the bottom hem. Be sure to keep the ties free from the stitching, and watch that no gathers or extra fabric gets caught in the stitching. There is a lot of fabric here, so working one side a time is a good idea -- pin and sew the right side, then do the left side. Press the seams open, but if you are using the ties, you will want to press this seam toward the Side since the ties tie in the back.
 Matching the notch on Side D to the seamline of the Skirt Front and Center Front Band. Right sides are together.

Right side (as worn) is sewn to the front, and the left side (as worn) is pinned together. I finished these seams separately but pressed both toward the back since the ties tie in the back.
Back
Now sew the center back seam, with right sides together and matching notches. I actually cut my back on the fold, so I skipped this step. To cut the back on the fold, be sure to take out the 1/2" (13mm) seam allowance on the center back.
Next sew the shoulder seams. With right sides together place the back to the front, pin the shoulder seams together and stitch. Finish seams and press the open.

Shoulder seams are sewn and pressed open here. The back shoulder matches the the front and side shoulders.
Side Seams and Pockets
The pockets are added to the side seams. For detailed information about adding a pocket to a side seam (and to get a free side seam pocket pattern), read our blog here. Use a measuring tape to decide how far down you want the pockets to lie - usually a bit below the waist and just above the hip. Pin one pocket piece to the front and one to the back (be sure they are at the distance you decided upon) with right sides of pocket to right sides of dress. Stitch the pockets in place with a 1/4" (6mm) seam allowance. Press the pocket open and the seam allowance toward the pocket.
Now stitch the side seam. Match squares at the underarm and notches and pockets. Pin, then stitch from the square under the arm (back stitch to secure) to the top of the pocket and around the pocket bag. I usually stop stitching after I finish the pocket bag. And then start stitching again at the side seam, a few inches above the bottom of the pocket bag on the side seam. Stitch from the bottom of the pocket to the bottom of the kaftan.
Again, you can finish these seams before you start stitching, or you can finish them together or separately. The pocket seam should be finished together. If finishing separately, you can clip back seam allowance just above and below the pocket to release it to face the front and press the seams open.

Pocket placed right sides together on front of the dress.

Pocket pressed open and seam pressed toward pocket. I marked the place where I would start stitching the side seam on the lower part of the pocket. You can see I finished my seam before adding the pocket here.

Stitch the side seam from the square under the arm, down to the top of the pocket, around the pocket, and down again to the bottom.

Side seam pinned at the top square under the arm hole.
Now you need to clip the seam allowance at the square (just where your stitching ends) to the seamline, but not past it.
Turn 1/4" (6mm) to the wrong side all around the arm hole, and turn again. Then stitch from the top of the square under the arm all around the armhole, stitching the hem in place close to the folded edge. When I did this, I actually turned under and pressed 1/2" (13mm), then pressed under 1/4" from that seam allowance. I also turned under the corners of the side seam allowance under the arms and stitched with a short set of stitches (you could whipstitch them down).

Clipping to the square on the side seam below the armhole.

Clip nearly to the side seam but not through the seam allowance.

I turned under the seam allowance by 1/2" (13mm) in the armhole.

Then turned under 1/4" (6mm) from there to the inside of the seam, and stitched close the the folded edge.

The finished armhole!

I finished the top corner of the side seam, under the square by folding the corner to the inside of the seam allowance and stitching in place. This just gave a nicer appearance to the underarm, I felt.
Facings
If you are going to use interfacing for the facings, you should apply it now. Interfacing can be helpful to give a little body and support to fine and lightweight fabrics. You can use another fabric (like a lightweight silk) or regular interfacing. If you are using interfacing, be sure to use something that is appropriate for the fabric you are using (lightweight interfacing for lightweight fabric, etc.). Also, you can trim the interfacing by 1/2" (13mm) on each side of the pattern piece to reduce bulk in the seam allowances. I did not use interfacing for this dress since the fabric had a lot of body already.
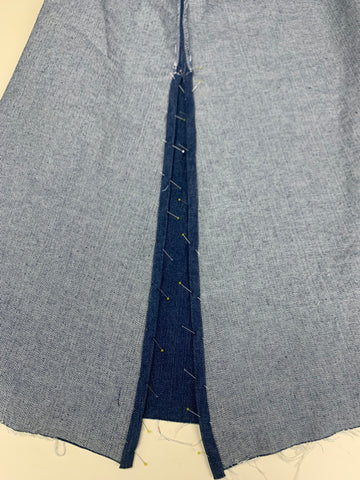
Sew the Front Facing pieces together at the center front, with right sides together, from the bottom edge to the center of the square. You don't have to finish this seam since it will not be seen, but if your fabric ravels easily, it is a good idea to finish it. Press the seam open.

The Front Facings with right sides together, stitched from bottom to square.

Center front seam of the Front Facings pressed open.
Sew the Back Facing to the Front Facing at the shoulder seams, with right sides together. Again, you do not have to finish these seams. Press the seams open.

Front and Back Facings pinned together at the shoulder seams.
To finish the outer edge of this neck facing, press under 1/2" (13mm) on the outer edge of all the way around these pieces. You will need to overlap at corners and some curves. Stitch close to the folded edge to secure. Alternatively, you could serge the outer edge of the neck facing to finish it (or zigzag, bind with bias binding, or cut with pinking shears).
 The facing with 1/2" (13mm) pressed to the wrong side, along all sides.

I stitched this fold down close to the edge.
Now, with right sides together, pin and stitch the facing to the kaftan neckline, matching shoulder seams and center fronts. It is best to start and stop stitching at the center front square. If I don't line up my stitches perfectly, I will clip them a bit to get the centers to work well (or unpick and re-do it).

The facing is pinned to the neckline of the kaftan.
It is a good idea now to understitch the facing. Understitching helps keep the facing turned to the inside of the garment. Press the facing away from the dress and press the seam allowance toward the facing. Then stitch close to the seam allowance (1/16" to 1/8" away). You will not be able to get completely to the center front, but that is fine.
Trim, or grade, the seam allowance and clip the curves. Clip the curves right up to the understitching, but try to not clip the stitching. You can clip at right angles to the stitching, or clip at diagonals, and clip every few inches. You can also trim and clip the seam before you understitch, but you won't have much to go by and the clips can get bunched under the presser foot.

A close up of the understitching - the facing is to the left in the photo and the dress is to the right. The understitching is very close to the seamline.

Clipping the curves on the facing and neckline of the kaftan.
Now turn the whole facing to the wrong side of the kaftan and press well. I also recommend whipstitching the facing to the seam allowances at the center back, shoulder seams, and center front. This will help keep the facing in place.
All that is left is to hem the dress. Press up 1/2" (13mm) on the bottom raw edge and press, and then press up another 1" (2.5cm). Stitch in place near the folded edge. For my dress, I had a slightly larger hem since I made last minute adjustments to how short I wanted it. I also don't like cutting my hems too short in case I want to lower the hem line at some point. I used a blind hem stitch which worked great.
Now the kaftan is finished! And share your kaftan makes with us! Send an email or tag us on social media.
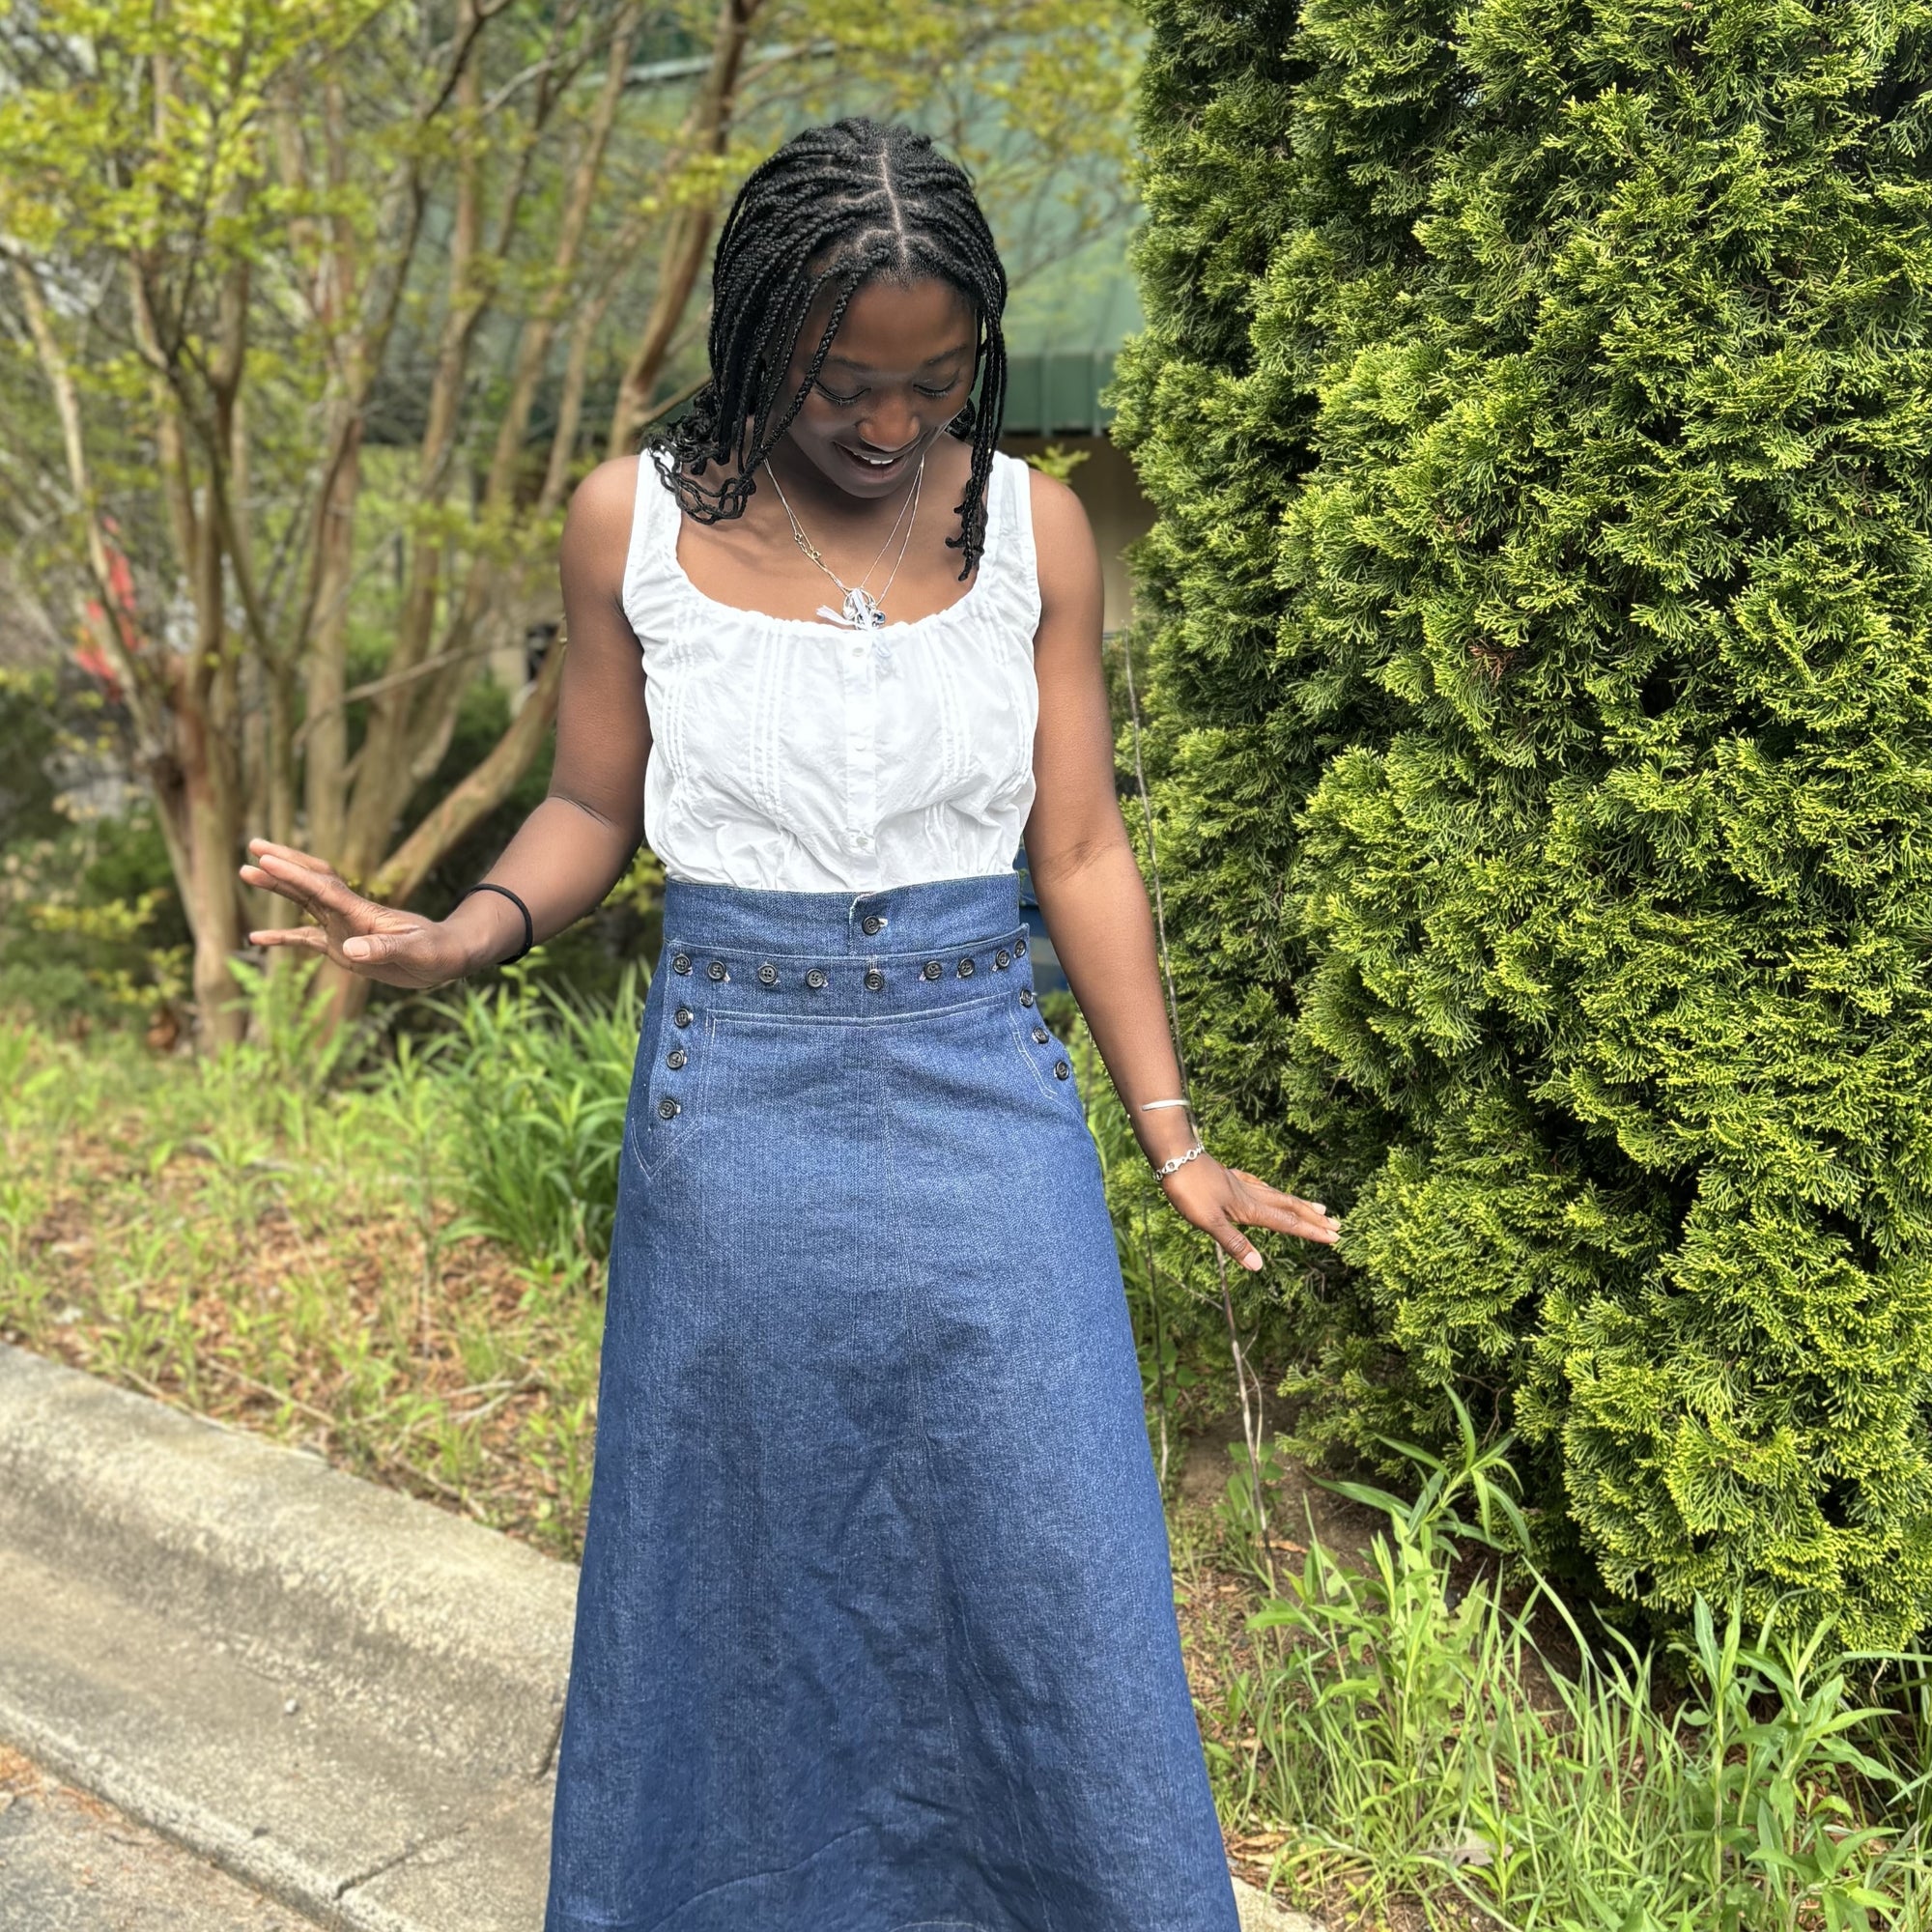
I love my new kaftan and will be wearing it often this summer.


We are so happy to offer this 280 Resort Kaftan pattern! It is an easy-to-sew pattern to make a flowing and fun 1960s/1970s kaftan. The pattern is based on a vintage kaftan that was in our Folkwear garment collection. It features a faced V-neck, gathered bodice and skirt into a small front waistband, elbow-length sleeves, and ankle-length skirt.
In this sew along, I am going to go over the basics of how to make this dress, but I am also going to show some pattern hacks that I used to make this purple Resort Kaftan -- shortening the skirt and adding pockets. But we will start with the basics. This is Part 1; Part 2 is found here.
First, gather your materials!
Fabric
This kaftan is best made with light to medium weight fabric that has a nice drape to it, such as rayon challis, silk chiffon or charmeuse, handkerchief linen, or cotton voile or lawn. However, you could also make it in a slightly heavier or stiffer fabric for a bit of a different feel or look. A medium weight linen (like this Balenciaga linen) would be great and give more body to the dress. A silk dupioni, especially in a print, would make an elegant evening-type dress. A light-weight denim would have a sturdy feel. We had a customer say they were planning to make this pattern in a cotton flannel for winter!
For the dress for this post, I decided to use a seersucker that we had in stock. It is a stiffer fabric and I would consider it on the light side of medium weight. It has a lot of body. It is also a great fabric for summer. I knew I wanted to make the dress shorter with this fabric, so that is one of the modifications I will show in this sew along. And we will be getting some really pretty floral lightweight seersucker fabric soon (deadstock designer fabric) so check back with us. These fabrics will be great for this dress!


Notions
There are very few notions needed for this pattern. Thread, of course. But if you want to interface the facings, you need about 1/2 yard of interfacing. And if you want to add the inside side ties, you will need 50"-75" of ribbon or twill tape. I did add inside ties to this dress and it does make a difference to the shape when wearing it. I like the ties.
Other Supplies
You will also need the pattern, of course, which you can find here.
I also like to use tracing fabric to trace my patterns to cut out (and to make adjustments).
Sizing and Yardage
You can find the sizing and yardage chart on the back of the pattern envelope, in the first pages of the PDF pattern, or at this link (also linked at the bottom of the pattern description).
There is, of course, a lot of ease in this pattern, which makes it fairly forgiving for sizing. Check out the finished measurements to make sure you have plenty of room, but don't be too surprised at the ease. If you want to make adjustments to length, you will likely need to adjust your yardage as well. I made the skirt much shorter (by nearly 14"). If your bust is very large, you may want to make a full bust adjustment to the bodice.
I made a size small for this kaftan.
Cutting out the pattern
Once you have decided on the size you want to cut, cut out or trace your pattern. Again, I like to trace my patterns with this tracing fabric. For large pieces, like the skirts on this pattern, you could cut out the largest size and just fold out the edges that you don't need. This would save tracing fabric and still keep your pattern in tact.
If you are making any adjustments to the pattern, you should do so now. I shortened my skirt pieces (Front, Back, and Sides) by 12" (30.5cm) from the hem line, shortening the whole dress by 13.5" (34.3cm). I wanted a knee-length dress, and I used the finished length measurements (on the yardage chart) to judge how much to shorten the skirt pieces. The skirts are shorted at the hem edge because the side seams are straight edges. You could fold out the length in the lower middle of the pattern pieces instead. If you are lengthening the dress, you can add length to the bottom hems of all skirt pieces (Front, Sides, and Back).

Measuring 12" (30.5cm) up from the hem line. I wanted by skirt about 13.5" (34.3cm) shorter than the original.

Drew in a new cut mark (purple) on the pattern piece.

My new front skirt piece.
Once the pattern is cut out, you can place the pattern on your fabric. I like to wash and dry the fabric (with the same method I would when it is a garment) before cutting any pattern pieces from the fabric. This can be very important for fabrics like rayons which tend to shrink quite a bit.
The Skirt Front (A) can be cut on the fold or cut as two pieces. And, if you don't have quite enough fabric to cut the full width, don't forget that this piece is gathered into the bodice (or waistband of the bodice). So you can save some fabric and be flexible with the width of this piece. I made several of these kaftans by cutting Skirt Front A narrower than the pattern piece and it turned out just fine. So, I wanted to give you permission to do this, especially if you can save some fabric yardage by doing so!
For this dress, I cut Skirt Front A on the fold. I cut the Back and Side Front with the fabric layered so I could cut two at the same time. This was a bit tricky with seersucker (especially striped seersucker) as the fabric does not like to stay straight. I cut it on a carpet which helped a bit I think.

The largest pattern pieces laid out on my fabric on a carpet for cutting.
I cut the Center Front Band and Facings from the same fabric. And, I switched the direction of the stripes for the Center Front Band (still kept the pattern piece on the grainline).

Center Front Bands cut from fabric, on the cross grain.
For the Bodice, I wanted the stripes to go the same way as the neckline, so I cut it on an angle (or bias). I cut each side separately.

Cutting the Front Yoke on a bias angle so that the stripes will be parallel to the neckline.

Cutting the other side of the Front Yoke (note pattern piece is facing down).
I cut the Back and Front Facings as instructed; the Back Facing on the fold and the Front Facing with the grainline parallel to the selvage.
Finally, I cut pockets!
The side seams of this pattern are perfect for adding pockets. And the sturdier fabric of the seersucker made pockets a good idea for this dress. We have a free PDF pocket pattern on our site - you can find it in this blog post. Or you can draw up your own side seam pocket. I used the pocket pattern from our site and cut 4 pocket pieces. You probably won't need any more yardage to get pockets - they can be cut from the scraps of your fabric.

I cut 4 pocket pieces from the free pocket pattern on the blog.
Seam Finishes
All Folkwear patterns include a standard 1/2" (13mm) seam allowance, unless otherwise specified. You can finish the seams in several different ways. For this garment, I serged the seams and pressed them open (sometimes to the back). But, you can also do French seams in most places (at the center front, center back, side front if not using inside ties, shoulders, and even side seams if you clip to the square first). You can also finish by overlocking or with a zigzag stitch. You could also trim very lightweight fabric with pinking shears. Another option is to turn under just under 1/4" (6mm) to the back on each seam allowance and sew down.
Sewing the Front
Since I cut the Skirt Front on the fold, I did not need to sew a center front seam. If you cut your Skirt Front as two pieces, sew them together at the center front and finish the seams. This is a good place to do a French seam, or serge/overcast/zigzag and press the seam open.
Sew the center front seam of the Front Yokes, with right sides together, to create the bodice. Stitch from the bottom of the Front Yokes to the center of the square. Finish the seams and press open.

Front Yokes sewn together at center front. Right side facing up.
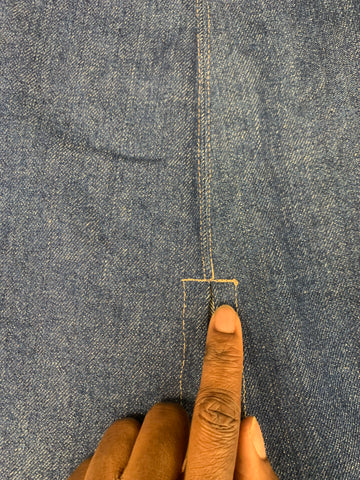
Then sew a stay stitching line at 3/8" (1cm) from the outer edge of the neckline. This will stabilize the neckline while the rest of the sewing is happening. Since I cut these yoke pieces on the bias (not true bias, but an angle), the neckline is quite stable already since it ends up being on the grainline rather than on a bias.
Next, sew gathering stitches at the bottom of the front yoke, between the side seams. Sew two rows of gathering stitches (set your machine to stitch long stitches) - one at 5/8" (1.6cm) from the raw edge and one a 1/4" (6mm) away in the seam allowance. Two rows of gathering stitches at this spacing will help to create even gathers.
Draw up the bobbin thread on each end of the gathering stitches to gather the front yoke to fit the length of the longer long edge of one of the Center Front Bands. Be sure to match the center front seam of the yoke to the notch on the Center Front Band. Adjust the gathers to be evenly spaced.

Bottom of front yokes gathered to fit the longer side of the Center Front Band. Wrong sides facing up.
Pin the gathered front yoke to the Center Front Band with right side together. Then pin the other Center Front Band with the right side of the Band to the wrong side of the front yoke. This will sandwich the yoke between the Center Front Bands. Stitch this in place. Then, trim the seams. You can trim all of them down to 1/4" or grade the seam allowance (trim the outer seam allowances a bit shorter than the inner seam allowance - this reduced bulk in one place). Press the Bands away from the yoke front. The band on the inside is now the Band Facing.

Sandwiched front yoke between the Center Front Band pieces (Band Facing is on top).

Trim or grade the seam allowances.

Center Front Bands stitched to the front yoke. Seam allowance is pressed toward the band.
Remove the gathering stitches.
Now sew gathering stitches along the top of the Skirt Front just as you did with the front yoke. And then gather the Skirt Front so that it matches the shorter long edge of the Center Front Band. Adjust the gathers so they are even, and pin the Skirt Front to the Center Front Band with right sides together, matching center fronts. Be sure to just pin the Skirt Front to the Center Front Band and not to the Facing also. Keep the Facing free and away from the stitching. Sew this seam, sewing the Skirt Front to the Center Front Band.
 Bottom of the Center Front Band pinned to the gathered Skirt Front. The Band Facing is not pinned or sewn to the Skirt Front at this point and is facing away.
Trim or grade the seam allowance and press it toward the Center Front Band.
Press 1/2" (13mm) to the wrong side on the free long edge of the Band Facing. Press the Band Facing over the Skirt Front/Center Front Band seam line and stitch in place. I recommend hand stitching this (with a whip stitch), but you could also topstitch this or stitch-in-the-ditch to secure the Facing over the seamline.
 Skirt Front is stitched to the Band and the Band Facing is free.
 I trimmed the seam allowance to reduce bulk. And folded and pressed down the free long side of the Band Facing to the wrong side of the fabric.
 I folded the Band Facing over the seamline of the skirt and band. This is from the wrong side of the kaftan front.
 Then I pinned the Band Facing in place and whip stitched the facing over the seamline.
In the next part of our sew along, I will show you how to add the ties to the bands on the inside, add pockets, and we will finish sewing this kaftan!
I wanted to give a little background on our newest pattern, the 280 Resort Kaftan. We are happy to have it available to you and are looking forward to sewing up a couple for ourselves in the next few weeks.
Folkwear has a small selection of original garments that have been collected over the years with the thought that they may potentially be the start of a pattern. It was about a year ago that we were looking at a kaftan that was in the collection. An employee had put it in because she loved the vintage garment. It was from the late 1960s/early 1970s and was made of a lightweight cotton in a vintage print that fell in stripes down the dress. It was easy to overlook this garment, and even to think that 1960s isn't vintage. But, I have been assured repeatedly that the 60s and 70s (and even 80s) is now vintage according to the next generation. And people are looking for iconic sewing patterns from the era. I kind of fell in love with the original kaftan. It looked so comfortable, cool, and easy to wear, and so very vintage. It also looked fairly easy to sew! So I drafted a pattern based on this kaftan. Amazingly, the original kaftan was made with one piece of fabric that wrapped from front to back (gathered in places), and had no side seams at all. The bodice was inserted. We added side seams for ease of construction (and to give a place to add pockets), as well as to make it easier to print in larger sizes.

The original kaftan on a dress form in our studio.
Our 280 Resort Kaftan pattern has a faced V-neck bodice that gathers into a high partial waistband, and has elbow-length sleeves. The flowing dress falls to ankle-length and is loose and airy. This pattern is perfect to sew as a beach or poolside cover up, but it is also stunning as dress to wear out in the evenings. Fabric choice is key - a lightweight cotton or a sheer silk or cotton to wear over a bathing suit, or a slinky silk or chiffon for evenings. Add embroidery to the waistband or neckline or armholes for a special touch.

Back and front line drawings of the 280 Resort Kaftan
We knew that the 1960s and 70s style kaftan had its roots in folk wear from North Africa, and it was interesting to research its history. The history of the kaftan (or caftan) goes back to nearly the beginning of civilization (and perhaps before). It is one of the simplest and earliest garments worn by humans – basically a loose robe, closed or open in the front, with holes for the head and arms. What we think of as a kaftan today is thought to have originated in Turkey between the 4th and 6th centuries AD. This style of kaftan spread, often at the same time as the spread of Islam, throughout the Middle East and North Africa. Regional and cultural styles developed in different areas and the garment took on different names such as thawb (Arabian Peninsula), jellabiyas or galabias (Egypt and Sudan), and thobe (Palestine).
The kaftan style that developed in North Africa was for a flowing, closed-front garment with a slit neckline, worn by men and women. This design is helpful for staying cool in hot desert temperatures as well as protecting the body from the sun.
The kaftan eventually came into popularity in European and American culture in the 20th century. At first, designers like Paul Poiret riffed on the Moroccan kaftan with his loose fitting and flowing dresses (a big change from the previous corseted fashions). Dior and Balenciaga also adapted the kaftan to evening wear in the 1950s. In the 1960s and 1970s, “hippie” culture also embraced the kaftan style, as interest grew in folk cultures, fashions, and styles from India to North Africa. And cultural icons from Cass Elliot to Diana Vreeland began to wear the style. Designers and the fashion industry used these street styles to create kaftans for evening and everyday wear.
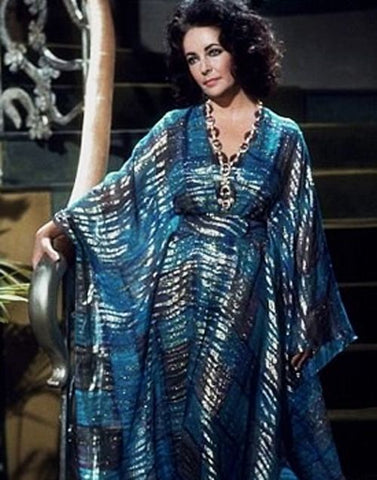
Elizabeth Taylor in an elegant blue evening kaftan (Pinterest image).
By 1970, the kaftan was part of mainstream American fashion. Elizabeth Taylor’s signature look was based on the style of kaftan that had made it to America. She loved the comfort and inherent femininity of the dress. She even wore a kaftan as her wedding dress to Richard Burton in 1975. By the end of the 1970s, the kaftan was out of (mainstream) fashion, but was still associated with resort wear.
Today the kaftan is still associated with tropical vacations, though it is worn more and more as day wear, and still appears as formal wear at times, especially when trends are giving the style a nod. It makes a lovely and easy-to-wear dress to don poolside or out to dinner.
We love this new pattern! It is is forgiving and flattering, easy to wear, feminine, flowing, and fun. It is a classic!


I really like our 229 Sailor Pants pattern, and it is a special pattern because it was designed from an original pair of WWII sailor pants. And, there can be many riffs on these pants - from as simple as adding, or not adding, the pockets or leg godet or back gusset, to making them into a skirt (or shorts).
I got inspired to make these pair of white sailor pants with pockets in the front flap from the pair that Keeley Hawes wears as Louisa Durrell in The Durrells in Corfu (PBS Masterpiece Theater). This is such a great show, and the kids and I really enjoyed watching it. The 1930s costuming and fashion is really wonderful in the show as well. I especially loved that Louisa had pockets in the front flap of her sailor pants. So I set about to figure out how to do it. And, funnily enough, a customer wrote to me last week asking if I had an idea of how to add pockets to the front flap. So I started on this pair that I had in my mind for over a year now.

You can see the inspiration for these pants here from The Durrells in Corfu - side pockets in the front flap.
Preliminary Information
Fit: First, it will be important to get the fit how you want with this pattern before putting in the pocket. The pocket does take away a bit of the ease of getting in and out of the pants (the way I designed the pocket), but not by much. If you make the pocket larger than I did, this is less of an issue. If I do these again, I would make them another size larger for myself because I think I would prefer a looser fit. I added darts to the back of the pants at the waist and made the waistband and waistband curtain a bit smaller. This is because my waist is smaller than the hip measurement that fit me best. I also kept the back gusset for these pants because this also makes getting in and out of the pants easier, especially since you are reducing the front flap availability with the pockets.
Fabric: I chose a white denim that we have in stock at Folkwear for this sample. Using a heavier weight fabric caused me to think more about what I might use for any lining pieces. I used a scrap of lightweight blue linen for the waistband curtain and the lining of the Back Gusset. I did use the main fabric for all my pocket pieces, though you could potentially use a lighter weight fabric for the Buttonhole Facing.
Sewing: If you have questions or get stuck somewhere sewing these pants, be sure to check out our Sew Along! It is 11 days and goes into detail about this pattern and has lots of tips and tricks for sewing these pants. Start here for Day 1 of the sew along.
Designing the Pocket
I made the pocket from the Buttonhole Facing (Piece C) and the Front Dart Gusset Facing (Piece B). The Buttonhole Facing will make up the front of the pocket and the Front Dart Gusset Facing will make up the back of the pocket. These pieces will be sewn together at the inner edges of the pocket rather than just face each other.
I used our free pocket pattern (from this blog post) to design the pocket for these pants. I placed the pocket piece on top of the pattern pieces (C and B) and traced out new pieces, also aligning them as they would be when they are sewn into the pants so that the pocket front and back come out even with each other (so matching dots on the flap dart).

This shows the Buttonhole Facing on top of the Pant Leg with a pocket set in approximately where I wanted the pocket to be placed.

This shows the pocket piece placed with the Buttonhole Facing. I used these two together to trace a new Buttonhole Facing with the pocket bag as a part of it.

This shows the pocket lined up with the Front Dart Gusset Facing. The line on the pocket shows where it will line up with the stitching line on this pattern piece. I traced a new Front Dart Gusset Facing with these pieces together to make a back for the pocket bag.

These were my new Buttonhole Facing and Front Dart Gusset Facing pieces. These became the front and back of my pocket, as well as the facing pieces for the pants front flap.
You can see above my new pattern pieces with the pocket built into the facings. I made the pockets a bit on the small side because I was worried about how much extra fabric it was adding to the front and how that extra fabric would be handled. However, I think I could have made the pockets larger. I could have made them come closer to the pants center front (i.e. made them wider). They could also have been a bit deeper too. But, in any case, this is how to make the pocket pattern pieces! Feel free to make your pockets larger.
I cut the Buttonhole Facing on the fold and cut 2 of the Front Dart Gusset Facings (I did not cut a lining for it, but you could - I would recommend a lighter weight fabric).
Sewing the Pocket
I basically followed the same directions that are in the instructions for putting in these facings, but with a few modifications you will see below. I reinforced the dot at the bottom of the slash lines on the leg with fusible interfacing. And as a side note, you can move the slash line down by about a 1/2" (13mm) if you want your pocket opening to be a little longer. You will need to also adjust the lower dots that match to that point on the Buttonhole Facing and the Front Dart Gusset Facing, but that shouldn't be an issue.
First, I only folded up the center of the Buttonhole Facing by 1/2" (13mm) and sewed in place (I clipped to the seamline to release the center section, similarly to the instructions). I sewed the Buttonhole Facing in place on the front flap, clipped the corners, and turned it to the inside. I pressed it really well.
 Buttonhole Facing piece with the center front marked, as well as where I made my snips to fold up the lower edge by the center front. Also dots for the markings for the front flap dart.
 I clipped to the seamline at these corners so I could turn up this center section and finish it.
 Front section turned up to wrong side (and then sewn down).
 Here I've pinned the top of the Buttonhole Facing to the front flap (I already cut the dart slash lines on the pants). I also matched the lower dots to the pants and drew in a stitching line.
 I also matched the lower dots to the pants and drew in the stitching line from top dot to bottom dot on the facing.


Now you need to sew the pocket front and back together. This is a bit intuitive, but you will sew around the pocket edge - from the bottom dot at the bottom of the dart to the top of the pocket. I used a 1/4" (6mm) seam allowance and I finished the edges with a serger. You can also choose not to sew quite to the top of the pocket, especially if you might need a little more room in the flap to get in and out of the pants. This doesn't really effect the functionality of the pocket much, and does allow a little more room for the front flap. Just figure out how you want to finish your seams. You may want to serge or overlock (or zigzag) your seams first - before doing the construction.
 Here you can see the pocket pieces pinned together. I sewed from the bottom dot on the dart down to the 1/4" (6mm) seam allowance and around the pocket and up to the dot at the top of the pocket bag. I ended up taking out some of the stitching at the top of the pocket bag so that I could have more ease getting into and out of the pants. Note also that the Buttonhole Facing is folded over below the bottom dot on the dart (behind this facing piece). This helps with a cleaner finish.
 This is the front flap folded down so you can see the Front Dart Gusset Facing and the top of the pocket. Again, I ended up taking out a little stitching at the top of the pocket here for ease of getting into and out of the pants.
I finished the pants as the instructions say, though I did not add the leg godet or any of the other pockets (welt and coin) since I added these flap pockets. I did lower the dot on the back gusset where it meets the center back pants because it also gave me a little more room for getting into and out of the pants.
Then I topstitched where I wanted and where it made sense. With the front pockets, you can't really topstitch around the Front Dart Gusset Facing or bottom of the Buttonhole Facing as indicated in the pattern. I topstitched along the front flap and beside the darts (pocket openings), and I added a bar tack at the bottom of each pocket. I topstitched along the waistband and on the back gusset as well.
Buttons: You could add buttons all the way across the top, or just use a couple, or just have one in the center and one at each corner of the flap, as I did. I also just put one button on the waistband. Depending on the look you want and the size of your buttons, you can change up the button number and placement as suits your project.


Trying out a button on the front to see how it looks. I ended up using different buttons, but I did like these grey ones.
That is about all there is to putting pockets in the front flap of the 229 Sailor Pants! Will you try this technique? Let us know what you do and post pictures of what you make!


By Esi Hutchinson
Ahoy! Welcome to Part 2 of making the 229 Sailor Pants into a Sailor Skirt (find the pattern here or the PDF if you want it sooner). And learn about how I started hacking this pattern into a skirt, read Making a Skirt from the 229 Sailor Pants: Part 1. Plus, if you need any other tips on adjustments or making the 229 Sailor Pants in general refer to these blog posts. Fitting Adjustments and 229 Sew Along. In this short blog post I will show you how I finished the Skirt.
This pattern suggests to use medium to heavy weight woven fabrics such as wool melton, denim, twill, cotton duck, linen, flannel, light to medium weight canvas. (Check out our fabric selection here). I used medium weight denim for this skirt.
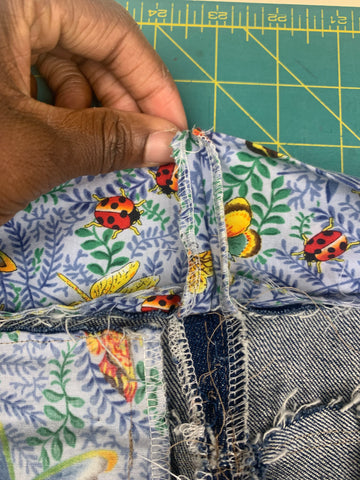
Since there are just a few lining pieces (and they are fairly small), I would suggest using some scrap fabric if you don't mind the linings not matching your outer fabric. A lighter weight fabric can be used for the lining pieces, such as poplin, broadcloth, silk habotai, or even muslin. I used a fun poplin with an insect print for my lining pieces (pockets and waistband curtain pieces).
To make the pants into a skirt, use the instructions given for 229 Sailor Pants except for when you sew the crotch seam in the front and back of course. But, there are a few other steps mostly covered in the previous post.
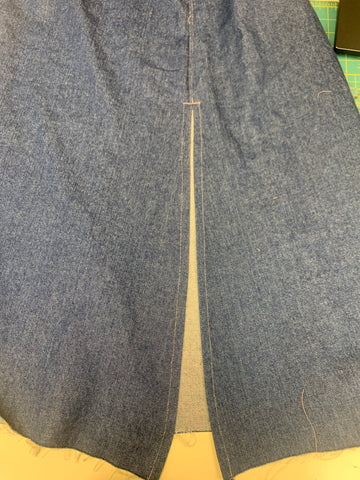
I started by sewing my darts in the back.
Then with right sides together, I matched the notches at Center Front of the skirt and stitched from the top edge to the bottom edge of the skirt. I finished the seams and pressed them open.

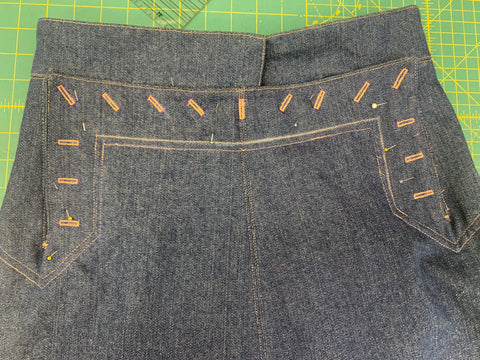
I didn't use the back gusset, so I made the waistband and waistband curtain long enough to fit the circumference of the skirt waistline (from center front to center back, cutting 2 of each).
I continued using instructions to assemble the coin and welt pockets, waistband pieces, buttonhole facings, and front dart gusset. If you are using the back gusset with eyelets, of course, you should follow the instructions given in the pattern.
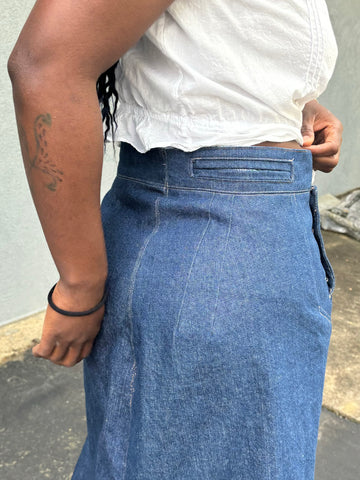
Since I added a slit in the back, I stitched the center back together (including the waistband and waistband curtain) to the dot where I wanted my slit to start. I finished the raw edges like so, and folded the waistband curtain down over the waistband.


To finish the slit, I clipped the seam to the dot on each side.
I folded under 1/4" (6mm) and then 1/2" (13mm) on either side of the slit. Note that when I modified this pattern to make the skirt, I added an extra 1/4" (6mm) to the skirt for this vent slit.
I then topstitched close to the folded edge up from one side, across where the slit starts and backdown to the other side. I also added topstitching where I wanted it to be on my skirt (mostly everywhere the pattern suggests having topstitching).
I then hemmed the skirt folding under 1/2" (13mm) then 1" (2.5cm), and topstitched close to the folded edge. I sewed the buttonholes, added the buttons and I was finished!
Voila! Here is the Sailor Skirt!
I love this idea, and the fact you basically get to use the same instructions is great. You can make the skirt any length with any of the suggested fabric options. It's a versatile skirt in my opinion -- dress it up or dress it casually, this pattern is awesome! Please show us what you make from this pattern whether it's the skirt or the pants, we would love to see it!
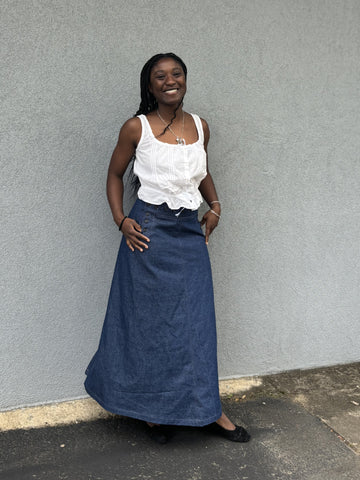
Showing off here with the 203 Edwardian Underthings camisole pattern!

By Esi Hutchinson
A couple years ago, Cynthia, a former Folkwear employee, had the idea to make Folkwear's 229 Sailor Pants into a skirt, but we never had the time to make it happen then. But what a terrific idea! Since Folkwear is featuring the pattern this month, I decided to finally do it. This blog post will show you how I made the pants into a long skirt with waist darts and a bottom back slit for walking.
To make these adjustments, you will need tracing fabric or paper (you can purchase here). I've also found medical table paper to be great for this. You will also need a pencil, different color fine markers or pens, sewing measuring tape, ruler, and a French curve (optional).
First, refer to the sizing chart on the pattern to trace the Front/Back Pant A piece in your size. I traced a Size 30 using a brown marker to indicated that this is the original pattern piece (see photo below). I choose Size 30 because the hip measurement for size 30 fit my hips. My waist measurement would have been a Size 28. This pattern is drafted from a men's pant, so some women may need to make waist/hip adjustments (you can read about this here). For this tutorial, I think it is best to pick the size that fits your hips the best.


To lengthen: Slash between adjustment lines. Place paper underneath and spread pattern apart as necessary. Pin or tape added paper to pattern. To shorten: Make a pleat on adjustment line equal to one-half the amount you want to shorten.


Since I knew I wanted the width of my skirt to be 60" (152.4cm) at the bottom, I knew for this pattern piece, the hemline width needed to be 31" (78.7cm) (30 inches for 1/2 the width of the skirt at the bottom and 1/2" seam allowance on each side).
From the point where my left side cutting line and hemline meet, I can measure out 31" (78.7cm) to the right to get where my back seam line at the bottom will be.

My hip measurement is 40" (101.6cm) and I wanted to add 4" of ease there, so I added 2" to this pattern piece at my hips. I went to where I marked my hips would be on my pattern piece A (just above the bottom of the crotch and draw a horizontal-ish line 22" (56cm) out to the right side of my pattern piece. Note that this pattern piece curves a bit as it wraps around the hip. You'll just make your lines parallel (-ish) to the waist of the pattern piece.

Then, I drew a diagonal line connecting my new hip line to the hemline on the right side. I extended this line toward the waist. I know that my waist is 28" (71.1cm) and I want the final width of my skirt at the waist to be 29" (73.7cm) (28" plus 1" of ease). However, this new side seam had now widened my waist line by 3" (7.6cm). To take out the extra width at the waist, I added darts to the pattern piece. I also added notches to both cutting lines on the right and left side seams and squared off the bottom cutting line to line up with the hem.


I decided to make two darts on that will end by my hipline which is now 7" (17.8cm) below the top of the pattern piece because I shortened my by pattern piece by 2" (5cm).
Starting with the dart closest to the center back, I drew the center fold line 7" (17.8cm) long and 2-3/4" (7cm) in from my center back cutting line. I also made this line parallel to the right side of the pattern piece (or cutting line). I then measured 3/4" (1.9cm) on either side of the center line of the dart and connected these dart legs to the bottom point of my dart. I made the second dart 3/4" (1.9cm) away from the first one in the same way.
I also wanted to add a slit at the back of the skirt for ease of walking. I decided my slit would be 19-1/2" (49.5cm) long. I measured up from the bottom and marked where the slit would end. Then I added 1/2" (13mm) seam allowance from the hem up to the slit mark. I planned to fold out 1/4" (6mm) and another 1/4" (6mm) in the seam allowance and topstitch on both folded edges of the slit.

The finished pattern piece A is above! I only wanted to change this piece and keep all the other pieces of the pattern the same. This makes the skirt so much easier to make! I made a muslin to see if it worked for me. I highly suggest making a muslin to troubleshoot this project before making it out of your final fabric. Better to be safe than sorry. There have been too many times I've skipped making the garment out of muslin, so I have definitely learned my lesson.


Darts on the backside (normally there would be a center back gusset where my hand is, but I will be using a full back seam).
The muslin worked out great! If you need to make more adjustments to the waist or hips, do so with what I have taught you above (or what you may already know) and make another muslin just in case. I was ready to sew the skirt with my garment fabric.
In Part 2 of this post series, I will show you my finished skirt!
Sometimes we are drawn to certain items of clothing for their aesthetic appeal or we are unconsciously stirred by a nostalgic spirit. Often enough, the history that accompanies a garment goes unknown as well, even when a garment is considered a classic.
Folkwear’s 229 Sailor Pants pattern is a revival of an original and an enduring classic. This seaworthy pant has become an iconic design that feels fresh and new every time it it comes ashore.
This pant design is quickly recognized and associated with belonging to the navy. Garments that endure often do so for practical as well as aesthetic reasons. This newly released Folkwear pattern happens to fall into both of these categories. It is a uniform with flair that got its start as workwear.
For a greater appreciation of the 229 Sailor Pant all you have to do is dive deeper into its history.
The origin of this sailor pant or “rig” as referred to by the Navy seamen who originally worn it, is not cemented in clothing history. Prior to the 19th century sailor uniforms among the enlisted men varied widely, not only among different ships, but on the same ship as well. The clothes the sailors wore were considered work wear and the colors and textures of the fabrics were a mismatch. The standard uniform was relegated to the officers and their suits were more closely related to the modern business suit. The United States Navy did not have a standard uniform, in the beginning of it’s history. However, as early as 1817 some sailors did wear wide leg trousers that had a bell-shaped lower leg. It is the British Royal Navy that is credited with setting the popular nautical fashion. The classic sailor’s uniform became extremely popular when first worn by five year old Bertie, the Prince of Wales, in a portrait by Winterhaller in 1846. The painting was a Christmas gift to Queen Victoria from Prince Albert. Dressing Edwardian children in sailor inspired clothing became very popular due to the Royal children and still remains so today.
 Portrait of the Prince of Wales by Winterhaller 1846
There is little agreement about the evolution of bell-bottom feature of the uniform, some scholars argue that the design was simply a variation on the pantaloon and the bell-bottom design was a touch of flair which set the sailor apart from his civilian counterpart. Others claim the bell-bottom appeared for practical reasons, because the leg of the pants could be rolled up securely to free the feet and ankles from getting tangled, while working on the rigging of navy sailing ships. Another theory is that this design would allow the pant leg to be easily rolled up to prevent it from getting wet when swapping the deck. The loose bell-bottom lower leg prevented the pant from chafing the legs when wet.
The design of the sailor pant includes many buttons on the front flap, or buttoned broadfall front. The zipper was not popular on a wide scale at the turn of the century. The zippers that did exist were made of metal and would have corroded in salt air and water, which would have not be practical. Like many historic versions, these pants also have a back laced gusset, a feature that allows pants to be pulled down more quickly for practical reasons.
Sailors also sewed their own uniforms and pants while on the ships they served. The fabrics they used were wool and sometimes denim.
The pant could also be used as a life jacket/preserver. It was not uncommon for men to be washed or blown overboard without donning a life jacket. Once in the water the pants could quickly be removed even over shoes, the pant legs then tied in a knot, and swept over the head. The inflated pant served as a life preserver. If recovery from the water was not immediate, the pant could be un-knotted and refilled with air to continue to provide flotation.
The adoption of the blue color associated with sailor pants comes from Britain’s acquisition of the West Indies and India that provided easy access to indigo. The British Royal Navy uniform had not always been consistent in color and it was the plentiful source of indigo that allowed for all uniforms to be the same color. The dye proved reliable in standing up to the rigors of constant sun exposure and was reasonably color fast. It was also inexpensive during a time when the range of color dyes were limited. Indigo is extracted from the native plant in India and grown in the east and west Indies.
Once sail power vanished in the late 19th century, bell bottoms no longer had any practical purpose. Since WWI sailors wore bell bottoms primarily as a tradition. In 1977 The British Navy replaced the bell bottom with a flares leg.
Even though the sailor pant has been altered by history, it remains an enduring reminder of how a unique and flattering design is always apropos. We hope you find inspiration through history in every Folkwear pattern you make.
Folkwear is excited to introduce the 229 Sailor Pant and we hope you get lots of complements while sporting this iconic classic.
We have a Pinterest inspiration board with vintage and modern photos that you can check out for ideas for what you could make, what fabrics and buttons to use, and how to style them. Here are a few highlights below.
The 106 Turkish Coat is a surprisingly versatile coat pattern. It can, of course, be made with lining and batting and entirely hand or machine quilted. You can add trapunto the the borders (or quilt them). You can mix and match coordinating and contrasting fabrics throughout - in the panels, lining fabric, borders, border linings. You can also make this coat with pre-quilted fabric, and still take advantage of a separate fabric for lining and borders and/or border linings. And, you can make this an an unlined coat - the simplest version. Instructions for an unlined coat are not specifically included in the pattern, but I know many people who have done so, and I wanted to provide this tutorial for anyone who wasn't quite sure what to do to make an unlined version. Plus, this pattern can seem a little intimidating when reading through it - the quilting, the batting, the trimming, the fitting pieces together. So, starting with an unlined version can help you dip your feet into the pattern in general and inspire you to go for a fully quilted version later. And, the unlined version can get you through cool (but not cold) days or nights, especially in the transition seasons, and provide an easy outlet for some artistic creativity. The quilted version is perfect for winter and staying warm in winter months.
Fabric
You can use just about any woven fabric for an unlined version, but a sturdy fabric will likely hold up to the pattern construction best. You can even make one from a nylon or oilcloth for a nice raincoat. You can use different fabrics for the different panels of the coat. The front and back are cut as one piece, but you can add seam allowances and sew them together at the shoulder, if you want. The Front/Back panel is a great one to use for any kind of special fabric you have. You need at least 2.75 yards of fabric to make a full-length version for just the front and back panel. And it will need to be at least 18" wide for the largest size (up to an 1.5" narrower for the smallest size and wider if you want to make a larger size). The side panels, gussets, cuffs, and borders (and sleeves) are great pieces to use that smaller bit of special fabric you have been saving. The hem borders don't use a lot of fabric and you can cut them on the cross grain if you need to. Don't forget that you will need to cut linings for all the border and cuff pieces. So again, you can use your main fabric or special fabric or just use some scrap fabric you have on hand that will work. The bottom borders won't show and you will only get glimpses of the cuff and hem borders if they aren't turned up. And of course, you can use the same fabric for all parts of the coat if you want!
To make this coat, I used a section of printed Japanese cotton for main parts of the coat and a black raw silk for smaller panels and the linings of the borders.
Sizing and Cutting Out the Pattern
Do read our blog post on sizing and sizing up this pattern. It is easy to size this pattern up - you just need to add width to the side seams of the Front/Back.
If you are going to lengthen or shorten the Front/Back, be sure to also lengthen or shorten the front border H (1 and 2) by the same amount.
You will cut out all the same pieces of the coat, but you will NOT cut out a lining for the Front/Back, Sleeve, Side Panel, and Gusset. You will only cut these from the main fabric.
You will need to cut lining pieces for all your borders (and the welt if you are using that piece - I did not for this coat). But, don't cut these pieces out until later in the coat making session. You will be instructed by the pattern how long to make each piece.
Sewing the Unlined Coat
You will, in general, follow the instructions provided in the pattern, but ignore any instructions referring to batting and lining.
You will also need to decide how you want to finish your seams. Since the coat is unlined, the seams will be exposed on the inside. I chose to serge the seams in this coat as it is simple and quick and fairly neat. But you could also turn under the seam allowances and stitch them, do a bound seam, or another seam finish.
First, you sew the gussets to the top of the side panels, matching notches. The straight edges of each piece are the same side; and the slanted edges are on the other.
Then, sew the slanted edges of two side panel sections together, with right sides together.

Now sew each sleeve together from the wrist just to the dot on the pattern; and clip both seams to the dot.

Sleeve is pinned with right sides together and I am pointing at the dot where you stop sewing (and backstitch to secure).

Clip both seams to the dot. This will help with matching the sleeve to the gusset/side panel.
Sew the underarm of the sleeve to the side panel gussets, matching the seams. You will need to open the unsewn section of the sleeve to match the side panel/gusset. Be careful around the sleeve seam, sewing close to the dot on the sleeve, but not catching extra fabric in the stitching. Press seams open.

Sleeve (black) underarm seam matched to the gusset (printed) seam.

Sleeve (top) is sewn to the gusset/side panel section. The seams match at the underarm.

This shows the inside of the sleeve attached to the gusset/side panel section, with the seams finished and pressed open.
Next, you will sew on the front extension pieces to the front panel. Then sew the sleeve/side panel to the front/back section. I found matching the stars first, and pinning the sleeve to the front/back first made it easier to put these pieces together. Press the seams open. If you are wanting to add an in-seam pocket to this coat, this is the time to do it (before you sew this seam completely). See our blog post here about adding an in-seam pocket to a garment.

Front extension is pinned the the front body, matching notches (chalked notches).

Matching the star on side section to star on front/back.
Follow the instructions for finishing the sleeve and adding the cuff. I cut off 1/2" (13mm) at the sleeve wrist, which made my sleeve opening 15.25". So following the pattern instructions, the notched edge of my sleeve cuff should be 16.5" long. I had to add 1/4" to the sleeve cuff. I cut 4 sleeve cuffs; 2 for outer and 2 for lining. I sewed them, right sides together on three sides and trimmed the corners and seams.

Cutting off 1/2" at wrist of sleeve

I added a 1/4" to the sleeve cuff. I used chalk to make markings for this pattern and it worked really well.

My four cuff pieces - 2 outer, 2 lining. The cuff is one place where you might want your lining to be a fabric that would be seen because you can turn the cuff up to show the lining side.

Cuff pieces pinned together to be sewn on three sides.
Next, you sew one open side of your cuff to the right side of your sleeve wrist. The cuff should meet at the underarm seam. Press the seam to the cuff. Then turn under 1/2" on the cuff lining and slip stitch it over the seam.

Here is the finished cuff.
Finished cuff turned back.
Borders
I am going to do a whole section on the borders because it can get a little confusing (not quite just like a normal sewing pattern), but if you follow the instructions, you should have no problems.
You can now cut out your border pieces, I and J and H. Piece I and J have a left and right side, but you can use one piece, just make sure the markings transfer correctly to the proper side. You might want to label the front and backs and left and right sides as well as make sure you get the markings done properly. It is important to measure the coat as the pattern instructs for cutting the border pieces the proper size. If you made changes to the width of length of the coat, you will need to take that into account (measuring is the best option for getting this correct). Finally, even though you cut these pieces larger (or smaller) than the pattern, be sure the transfer your marks by the ends of the pieces; i.e. move the pattern pieces to the end of your fabric piece to transfer those marks. Also note that you will probably ignore the notches - they will not likely match to anything if you changed your sizing at all, but they are helpful for knowing which side to attach to the body of the coat.

Here I have moved the pattern piece to the end of my fabric so I can transfer the markings correctly.
You will sew the main and lining pieces of Back Hem J together like you did the cuff - on three sides. Trim corners and seams and turn. Attach the Back Hem to the back as instructed, and turn under the lining by 1/2" and whip stitch to the inside over the seam.
To put front border to front hem border, you will work with the notched edges to the inside (straight sides go to the outside for H). Put Pieces H and I together with right sides together at the bottom corner and stitch from edge to dot. Do this for the outer pieces on both sides and for the lining pieces on both sides. This puts the front and bottom borders together.

I have pieces H an I lined up ready to go together. The markings on each line up with each other.

Pinned together at the corners. I stitched from the outer edge to the dot.

Do the same for the lining pieces.
Now, you will stitch the outer pieces to the lining pieces of this border - from the short end of the front hem border, around to the long side of the front hem border, around the corner you created by putting H and I together, and up the front border. Trim the seam, turn and press. Do this for the left and right side.

Lining and outer fabrics for front borders pinned together on the outer edge.
Clip the seam at the corner to the dot. Now sew the outer border to the right side of the body of the coat to about 3 inches to the center back. You will turn the corner at the front and stitch up the front. I stitched the front hem border first, then stitched up the front to within 3" of the center back (basically to the stars). Follow the instructions for finishing the back neck. And finish stitching the border to the coat. Press the seam toward the border. You will then turn the open border linings to the inside by 1/2" and whipstitch the lining over the seam line for the front hem and front border.

Corner of borders clipped.

Front hem border stitched to bottom of coat. Border lining is free from stitching and will have 1/2" edge turned under later and stitched.

Border attached to body of coat.

This shows the front border pinned to the body of the coat on a dress form.

And where I stopped stitching in the back. The border and the neck is stitched together at the center back, then attached to the body of the coat.

Finally, all the border linings are turned under and whip stitched to the inside of the coat, over the seams. This really doesn't take too long and is quite easy. I do like to pin or baste my border linings in place so they don't get distorted while I stitch.
You coat is completed! The 106 Turkish Coat is a great pattern for doing so much, and this unlined version still allows for so much artistic creation and inspiration!


I spent a week in Guatemala earlier this month with my oldest daughter. I have been wanting to travel to Guatemala to see and experience the textiles for a long time, and I realized her spring break would be a great time to do this trip. She was very excited to travel with me and see this beautiful country. I am going to share some highlights in this post, particularly focused on textiles, but if you have other questions, please leave them in the comments and I will try to answer them.
First, we only had a week (really, with travel times, less than a week) to explore so I decided to pick one place and venture out from there. I chose Panajachel on Lake Atitlan due to the beauty of the area, ability to make day trips out, and it has a lot of textiles to explore. It is also a great place for young people - there are young backpackers, nomadic workers, etc. everywhere and it was easy for my daughter to connect with other young travelers. If I had to do this trip again, I would spend a few days in Antigua instead of the whole time in Panajachel. But, now I have an excuse to go back. There are lots of places to explore in Guatemala!
I highly recommend the book A Textile Traveler's Guide to Guatemala by Deborah Chandler. I bought it over a year ago and it was helpful to plan this trip and understand what I was seeing. This book came out right before (or maybe during) the pandemic, so some things have changed since then, but for the most part, it was a great resource, especially if you are coming to Guatemala for the textiles.
As I said, my daughter and I stayed in Panajachel which is a small town located on the shores of Lake Atitlan, a large and beautiful lake, about 4 hours drive west from Guatemala City. The lake is surrounded by mountains and dormant volcanoes. And there are small towns around the lake, each one with its own feel (or vibe) and its own textile scene. We explored a few of these towns, but not all.
Panajachel
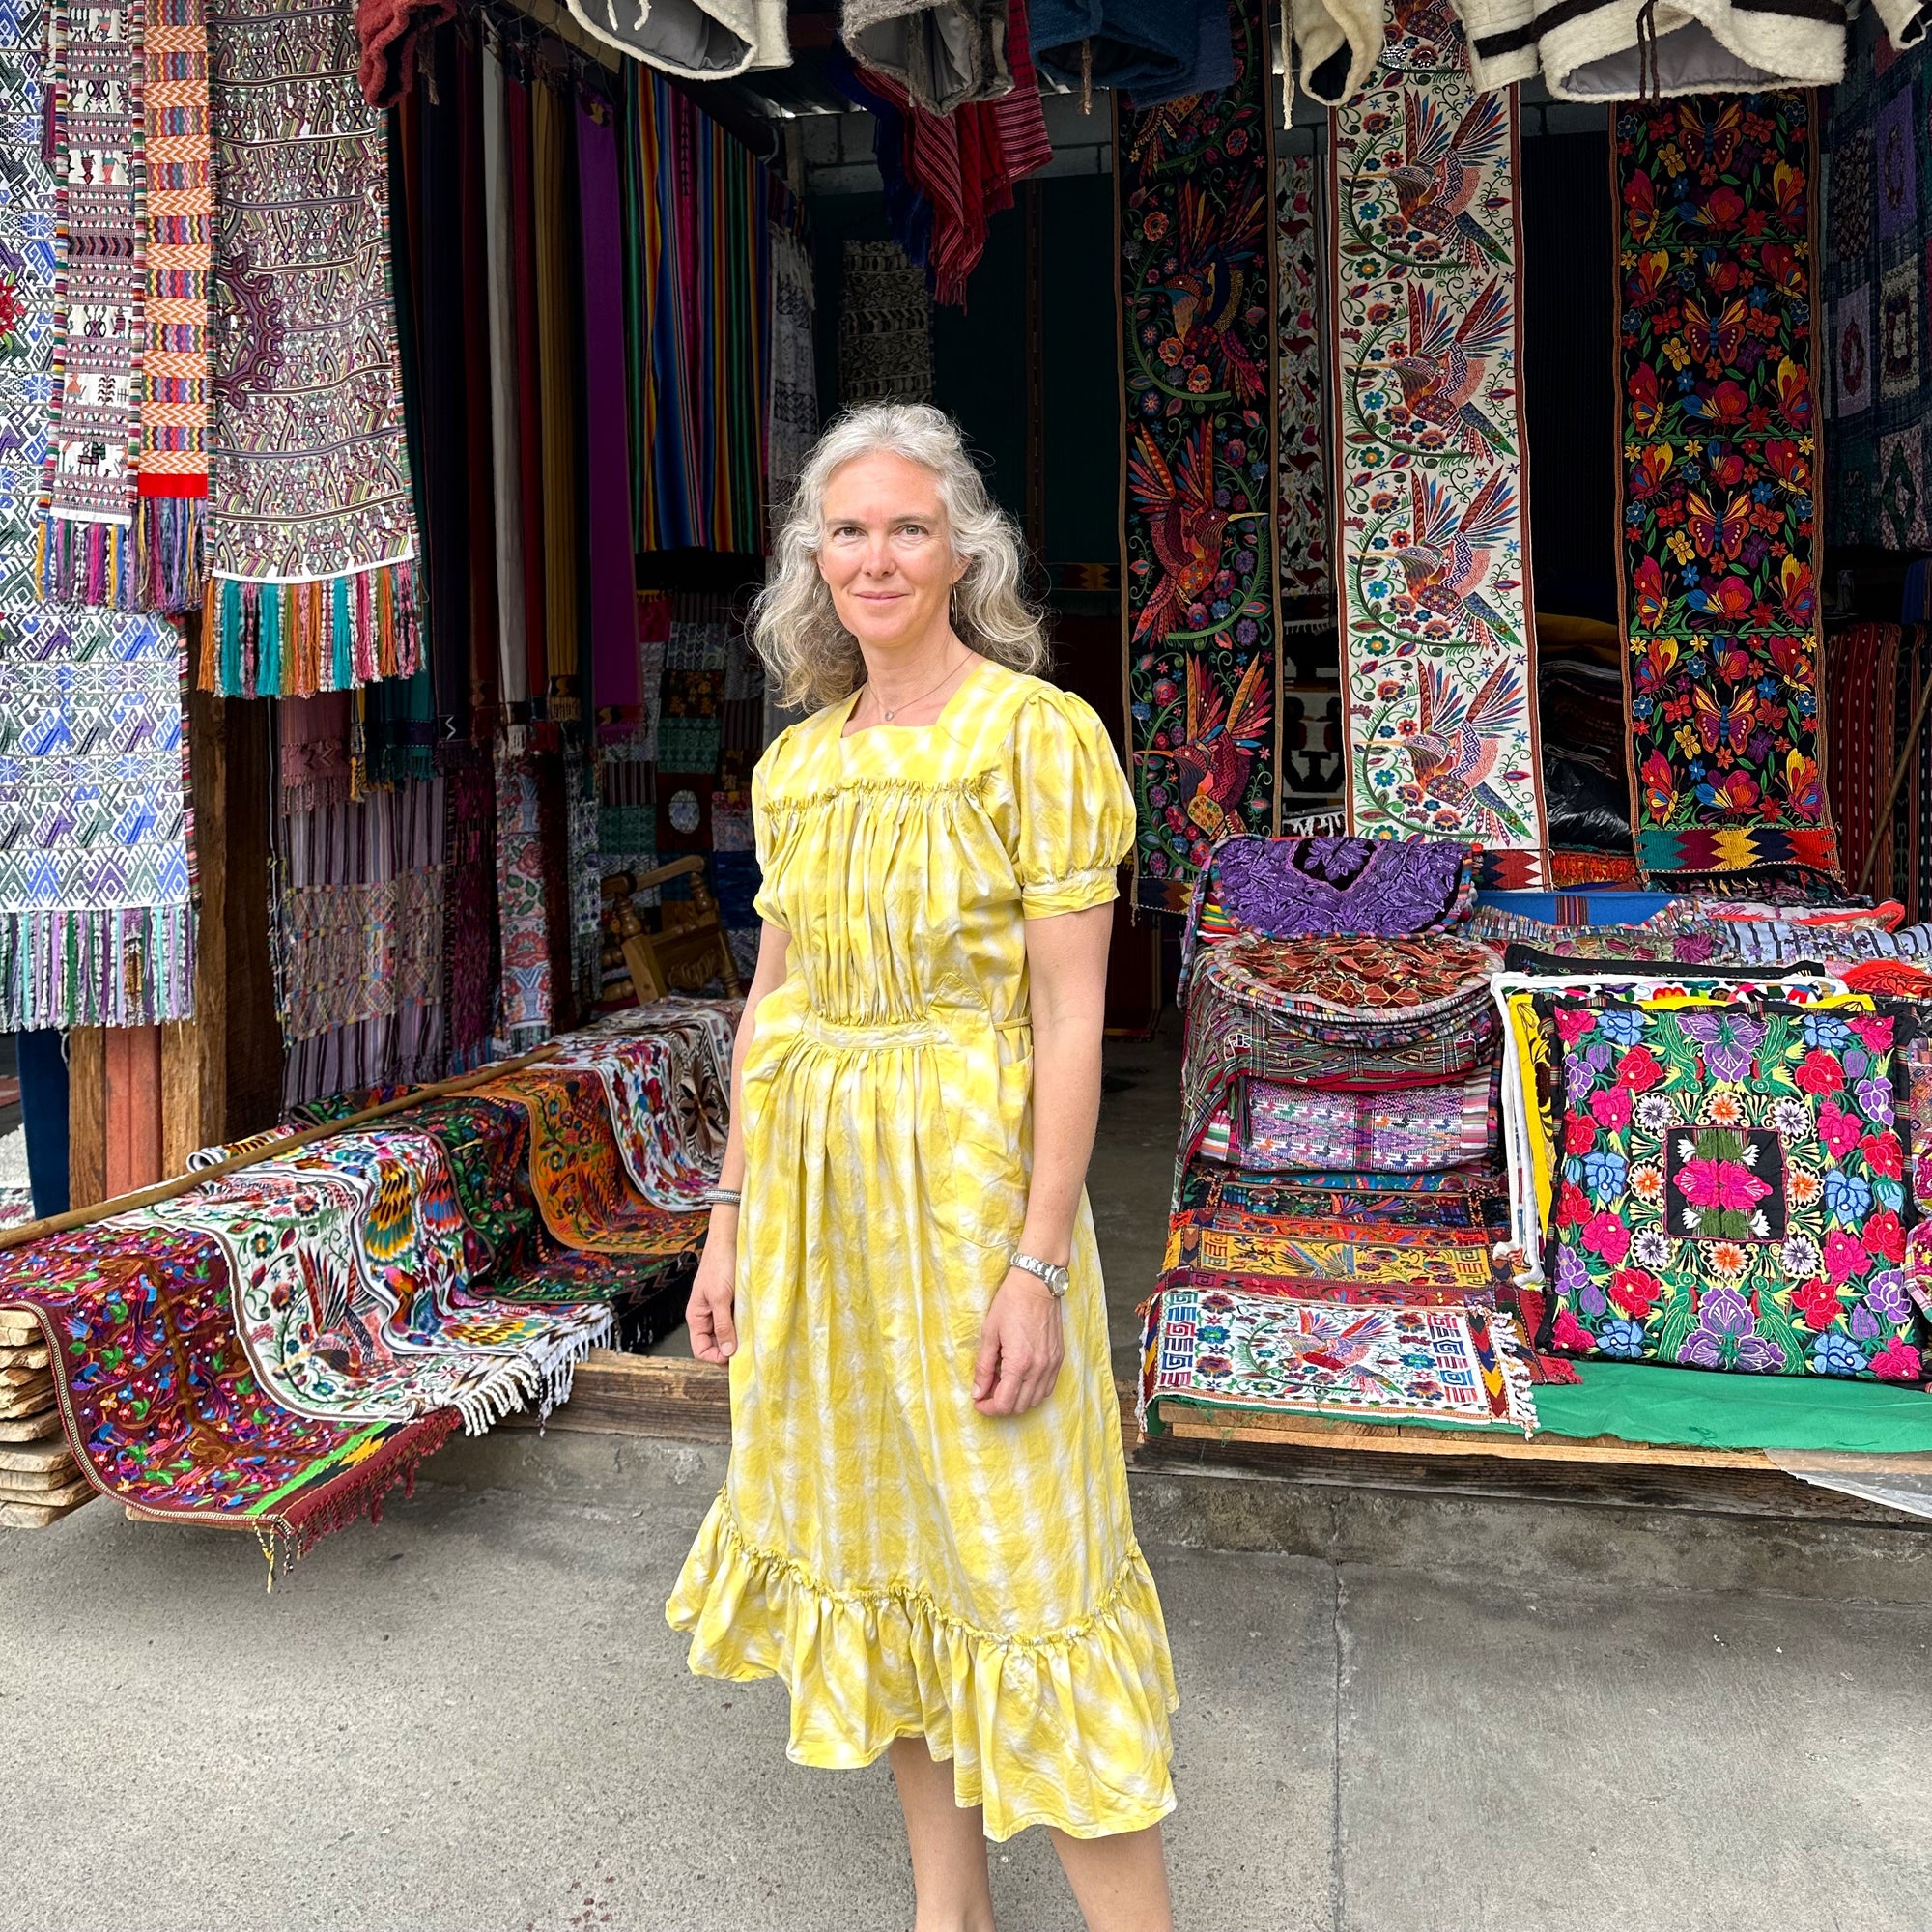
Panajachel seemed like the busiest, and perhaps grittiest, of the towns. It is a central place for tourists to come before going on to another village or town around Lake Atitlan. It is the largest town on the lake, busy with workers, businesses, and traffic. But it is still very small. The main street, Calle Santander, is lined with shops and restaurants, going from the edge of the lake (where there is a beautiful view) back about .75 miles. We really enjoyed walking up and down this street, and "window" shopping. There were very few windows as almost every store and restaurant is open-air, and the shops ranged from trinket shops with cheap souvenirs to high end shops with beautifully made one-of-a-kind garments and bags. There is a small "market" that goes away from the main street in a U shape and is lined with textiles from rugs to huipils to bags and belts and cheap t-shirts. This was a fun place to look through and the sellers are quite pushy. I am not a great bargainer, but we did get a few deals without meaning to and I bought a few items that I am sure were overpriced (but still felt like a fair price to me). The wool rugs in this market were beautiful and there were lots household items.

Wearing my 121 Guatemalan Gabacha at the market stalls in Panajachel.

More market stalls in Panajachel.

Some of the pretty rugs in Panajachel market stalls.
There are also some good restaurants along Calle Santander as well as some popular street food stalls that pop up after dark.
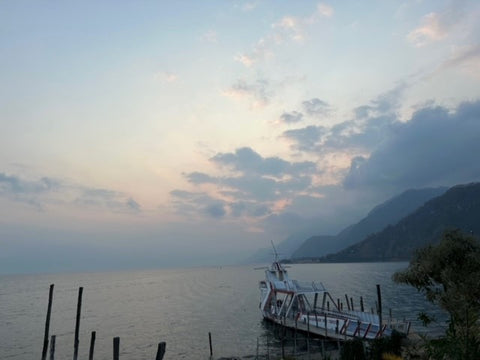
Panajachel is also a good place to get on a boat to just about any town on the lake. There are several public boat docks that have boats leaving every 10-15 minutes to the other villages.
Finally, there is a small textile market that happens at the fire station (Bomberos) every Tuesday and Friday morning. I walked to it on Friday morning and saw about 10 women selling huipils (traditional shirts), cortas (traditional skirts that is a large tube made of cloth), tablecloths (or things for the table) and a few other items. These were mostly older textiles, which I found out are highly sought after by many textile enthusiasts. These are always handspun, hand dyed, handwoven (usually on a back strap loom), and hand embroidered. They are very beautiful and exquisitely made, though sometimes their age shows with stains or faded colors. You can see in the photos below the front and back of hand embroidered band on a corte and how good the back side of the embroidery looks! The women who make these textiles are truly artists.
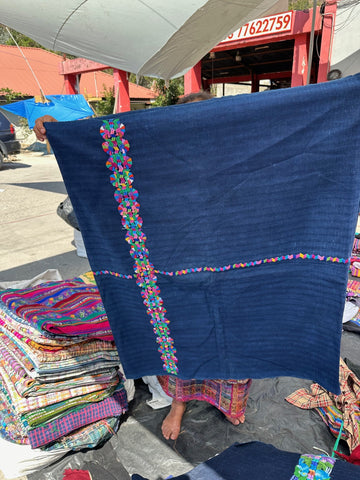


And, I heard (and saw) that most of the textiles in Guatemala are still handmade. There are some factory made, but most are still woven in homes all over. They are often now using factory spun and dyed threads, but the weaving still happens in the homes. Many of them are woven on back strap looms, but some on larger looms. Each village has their own type, or specialty, of textile - whether it is in the color scheme, pattern, or way of weaving. There is a type of ikat dyeing and weaving that is done in Guatemala, called jaspe, and it has different forms and colors. Some of it is very intricate and used on finely woven cloth and some is simpler and used in more coarsely woven or heavy cloth.
Santa Catarina Palopó
We took a boat over to the village of Santa Catarina one morning. From Panajachel, you should probably just walk (1.5 miles) or take a tuktuk (small taxi on 3 wheels). But, I didn't know, or think things through very well, and we took a private boat and it was actually a very beautiful ride over. Santa Catarina is a tiny town and is most know for its blue painted walls and the blue/aqua/teal weavings that the women in the village produce. From the docks we walked through a pretty avenue where women were selling textiles, and weaving them.

The street coming up from the lake in Santa Catarina.

Weaving at a stall in Santa Catarina.
There was also a small textile cooperative that was beside the school. The profits from this coop go to support this local school. I found some very pretty things there and they were very willing to sell me yardages of fabric also.
We wandered through the village on the many steep and windy foot paths and admired the walls and views. We came across a small "house museum" where there was a little bit of information about the village, weaving, and the lake. It took about 10 minutes to see everything, but it was interesting. Red used to be the traditional color of Santa Caterina's weavings and huipils, but in the 1940s someone told the women that blue would be better, to match the color of the lake and to create some interest in their textiles from tourists. So they changed their main color! And the whole village embraced it.


 The blue walls of buildings of Santa Catarina.
San Juan
On another day, we took a boat across the lake and explored San Juan. In the morning we did a big hike and the hike ended in the village of San Juan. San Juan is a pretty little town with a nice church, good views of the lake, and some interesting small attractions. One of which is a small bee farm and museum. We got a small tour (no photos allowed) of the Mayan bees and their hives as well as a honey tasting. Very interesting.

Lake Atitlan from a point overlooking San Juan (on the right).
There is also a wonderful women's weaving cooperative in San Juan, Casa del Tejido y Tours. We stopped by and got a personal tour of the process - from ginning cotton by hand (pulling out the seed and processing the fiber), to spinning, to dyeing, to weaving. Many of the colors they use are natural dyes, made with the plants and insects (cochineal, for example) that they have in the area. They use banana stem charcoal for mordant. It was a beautiful stop and inspiring. The shop was also impressive, and not cheap, but after you see all the work that goes into making one item, you can understand the cost.

Being shown how to process cotton for making thread (all the colors in the background!).

Demonstration of spinning the cotton on a drop spindle. She could do this very quickly to make a uniform, fine thread.

Anne got to try her hand at spinning cotton on a spindle!

Small dye vats with banana stem charcoal as mordant. You can see some of the dye materials in the background.

And finally, the backstrap loom weaving. This loom is low-tech, yet intricate, and the weaving is fine. In the background, you can see the stool where the thread is wound and overdyed to make the jaspe, or ikats.

Chichicastenango
The largest Mayan market in Guatemala happens in Chichicastenango every Thursday and Sunday. We took a shuttle from Panajachel on Thursday to Chichi for the market -- only 14 miles, but it took an hour of winding over steep mountains to get there.
As suggested in the book, A Textile Traveler's Guide, I hired a guide right when we got off the shuttle at the beginning of the market. Carlos took us through the market, the churches, the cemetery, the Mayan sacred sites, and to his mother's stall who was selling old woven textiles. Again, you are supposed to be able to get amazing deals on textiles at this market. I am sure you are, but I am not a great bargainer and the older textiles, tablecloths, huipils, etc. are more expensive than the more recently made garments and cloth. They are antiques and are treated as nicer quality.
The typical colors of textiles in Chichicastenango are red and orange in zig-zag patterns on the huipils and black cortes with bright red/orange crosses embroidered in. And bright belts, or fajas. There were many stalls full of these garments and they were gorgeous!
The churches and cemetery were also good places to visit on market day and we learned a lot about Mayan traditions and ceremonies and how the Catholic church and traditional Mayan beliefs exist hand in hand here. I found the church and the offerings very moving.
We ended up at a fiesta for one of the town's minor saints (San Sebastian), where we drank atole and were blessed by a Mayan shaman (for a small fee). Atole is a thick corn masa and water drink. I've heard it is sweet and often flavored with cinnamon, but I think ours was just masa and water, served in a small gourd. That was another special moment and so very interesting.
My impressions of Chichicastenango were that it was a lot smaller than I expected. It may be the largest market in the country, but the market in Accra, Ghana was maybe larger than the whole of Chichi. I think it is a function of population (Ghana's population is much larger) and geography (Chichi is situated in the middle of steep and rugged mountains). I loved the colors, the activity, the churches, and the people. It was an interesting visit and we learned a lot. I would highly recommend a guide - it made the visit so much more interesting and informative. And they are not expensive.

The church of Saint Tomas in Chichicastenango with a Mayan alter in front (lower right).


Part of the Chichi market - inside with lots of vegetable, fruit, and herb/medicine booths.

Lots of fajas, or belts, hand embroidered and handwoven. The zigzag, or chevron, design is common in Chichi.

Rows and rows of the traditional cortes in this part of the market - dyed black with the bright red/pink/orange crosses embroidered on.


Old (antique) huipils in the Chichicastenango market.

A seller of backstrap looms (and all the pieces for one) at the Chichi market, right outside the main church. She was carving the loom pieces right here!
Overall, we thoroughly enjoyed this trip! I highly recommend Guatemala if you are interested in textiles. There are several tour groups that organize textile-based tours, and I nearly booked our own itinerary with Anywhere Guatemala which came up with a trip for us which was customized (and I felt it was at a decent price). Again, I would also visit Antigua if I went again. I heard lots of great things about Antigua from its beauty to great restaurants to amazing textiles.
The weather was really wonderful - it was warm during the day (you need sunscreen) and it was cool at night (you need a jacket). But the afternoons got hazy, and one guide told us that is typical of this time of year. December through February it stays very clear, and May through July/August is rainy. The food was great, and very fresh. People were nice and friendly. And, there were interesting views everywhere! While we focused on textiles during this trip, we also did a wonderful long hike, did yoga most days in front of the lake, danced salsa one night, and had one day of rest by the pool (interspersed with the "window" shopping mentioned above).
And if you have more questions about this trip, let me know in the comments! If you have been to Guatemala, also feel free to leave suggestions in the comments also!
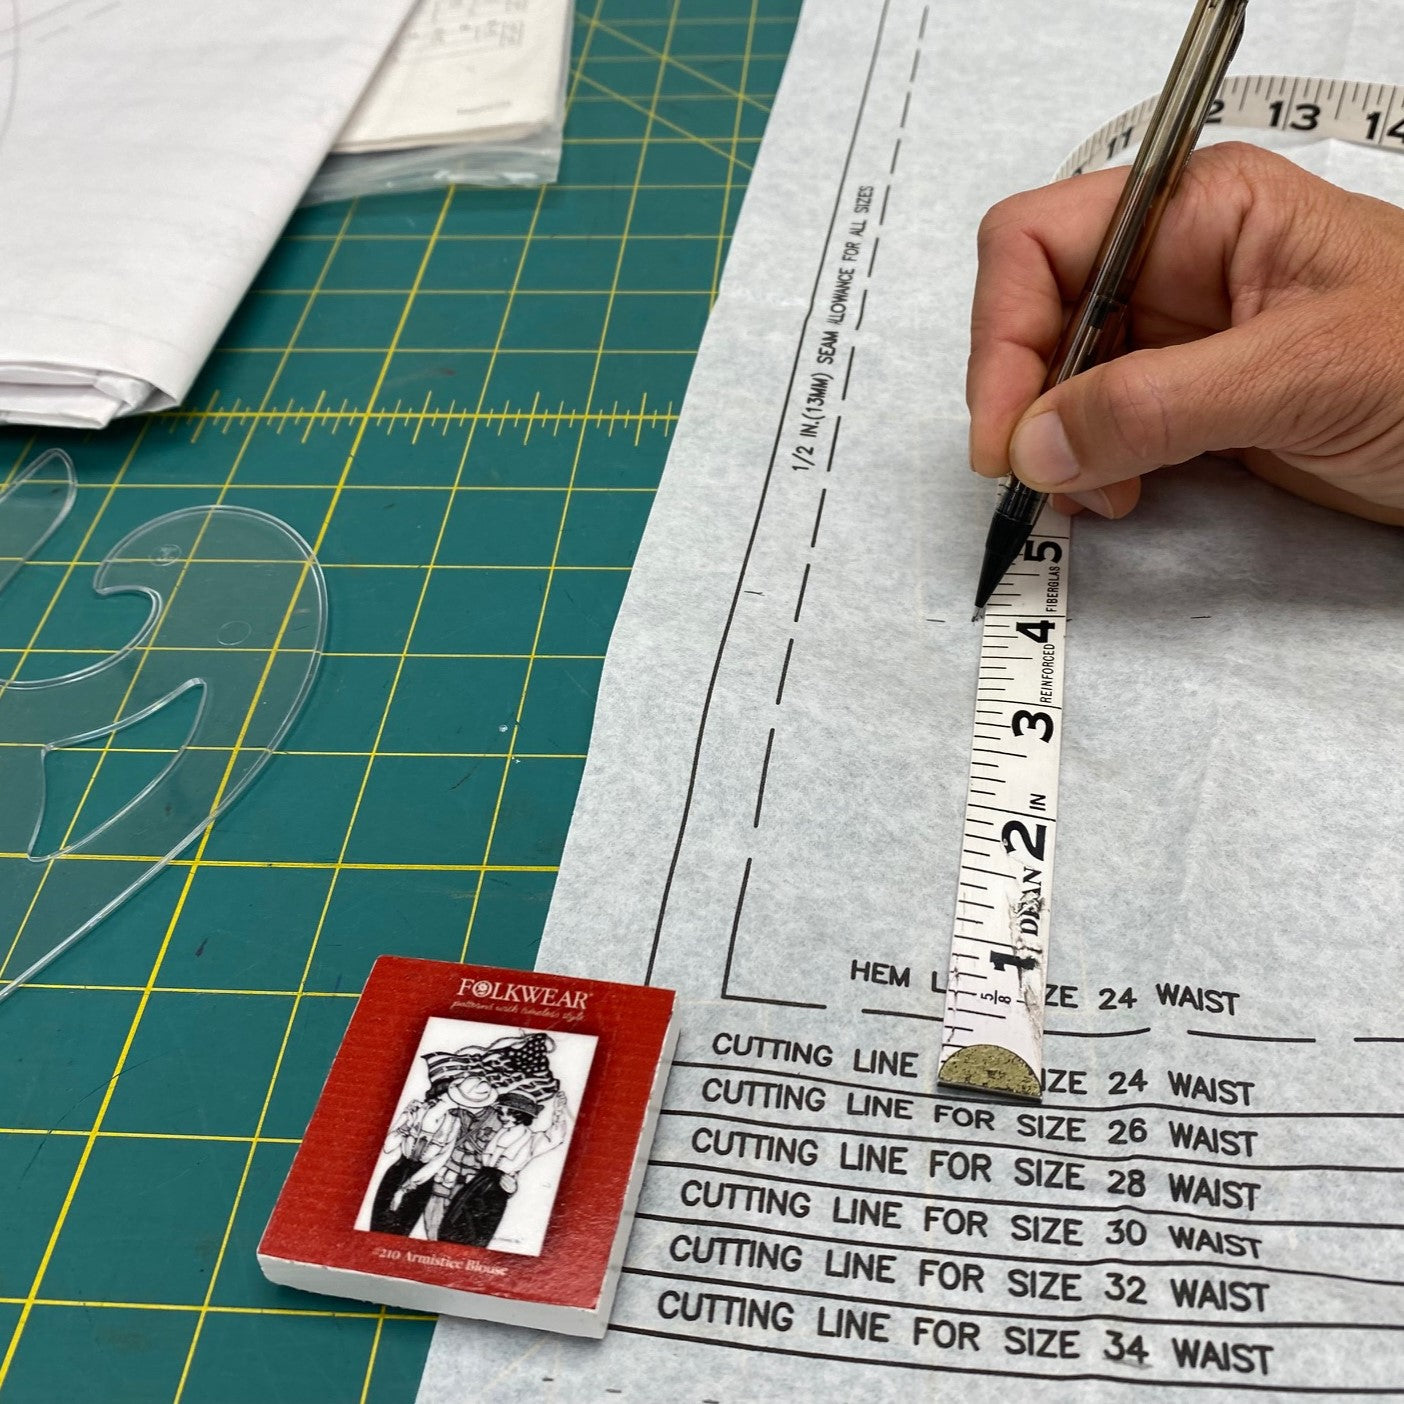
Folkwear has a 40+ year history in pattern making. And, some patterns from certain eras of the company are only available in a limited range of sizes. While we work on grading up our patterns when they come up for re-printing, there are some patterns that are easy to grade up on their own (and some that are truly uneconomical to grade up). Some of our traditional patterns that have very simple geometric shapes - are easy to add width or length. This pattern, 256 At the Hop, is not one of those patterns at first glance. The shirt would take quite a bit of adjustment (so we did add two more sizes to this pattern recently for the PDF version!). But the skirt is actually quite easy to grade up (or down). And I'm going to show you how in this post.
This skirt pattern is a circle skirt which you can make very simply, or embellish with embroidery, applique, etc. (check out the amazing RBG skirt that one or our employees made). First, this skirt is really only fitted at the waist. Your hip measurement is not really important for this skirt (though you may want to make sure the zipper opening is large enough to pull over your hips -- double check to be sure, and install a longer zipper with a little more room for the zipper if needed). Your hips will definitely fit in the skirt if you fit it at the waist.
The skirt is only graded for a 22" waist to a 34" waist. For this example, I am going to show you how to grade up one to two sizes. However, you can keep going with this technique to just about any size you need. You can also use this same technique to grade down a size or two. If grading down more than that, you can probably use the child's sizes also provided in the pattern.
Start with the Skirt Front/back
The skirt is cut on the fold: one front, one back. The waist of the skirt is graded at 5/16" between each size. So, to grade up one size, you will add 5/16" to the largest size, and increase in 5/16" increments for each size larger you wish to make.
I marked 5/16" from size 34, all the way around the waist to make size 36 using a regular measuring tape and marking between the 1/8" increments on the tape. You could use metric measurements/rulers for even more accuracy.

Then I connected all my marks with a curved ruler to make the cutting line for size 36.
If you want to make size 38, add 5/8" (5/16"+5/16") to the size 34. To make larger sizes, just keep adding 5/16" for every size up you wish to make the skirt.
Then, because we have taken away fabric at the top of the skirt, you want to add it to the bottom of the skirt (unless, of course, you want a shorter skirt!). Again, add 5/16" for each size up you are grading, marking along the curved edge and connecting with a line to create the new size.

You can see the new pattern line at the bottom for new size 36.

Close up of the new size line (for 36). I used a clear plastic curved ruler to help connect the markings.
This is also a great place to adjust the length of the skirt. If you want a shorter skirt, measure up from the cutting line for your size to however much shorter you want the skirt. For instance, if you want to make the skirt 4" shorter, measure up from the cutting line by 4" all the way around the hem curve, marking, then connecting the marks with a line.

The last thing to do on the skirt is to mark new a new notch for the bottom of the zipper. Mark 5/16" down from size 34 for each size up you are grading.
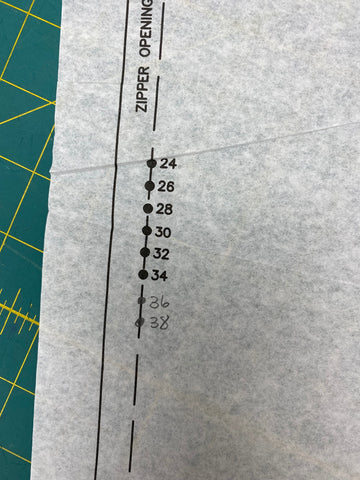
Waistband
You will also need to adjust the waistband of the skirt. The waistband is straight which makes it very easy to adjust, and you only need to adjust one side of the waistband, plus the notches. You'll only add length to one side of the waist band because the other side has the overlap. The waistband is graded 2" between each size. So, to make a size 36" waistband, add 2 inches to the graded end of the waistband. To make a size 38" waistband, add 4 inches to the graded end of the waistband. A clear plastic rectangular ruler is helpful here to keep right angles and make measuring easy. I taped some Swedish tracing fabric to the pattern to have enough room to add the extra inches to my waistband end.
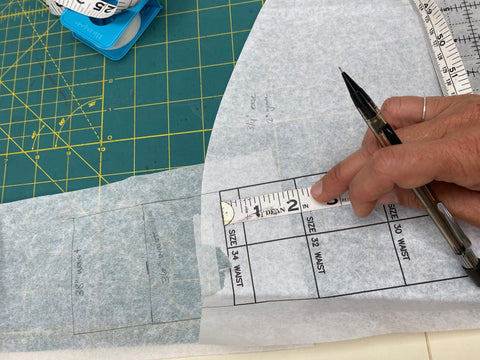
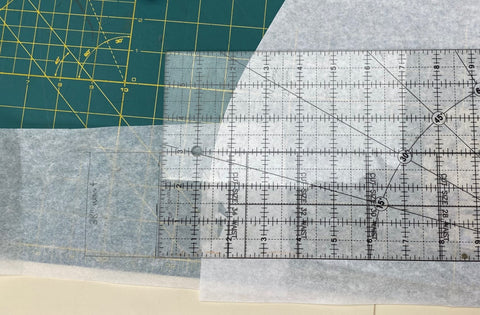
A clear plastic ruler can help you see the lines underneath when measuring straight lines and adding to the waistband end.
You probably also want to adjust the notches on the pattern. The square notches are set 1" apart for each size and are for marking where the side seams of the skirt connect to the waistband. Just mark notches for the new size by going up 1" for each size up you are grading up.
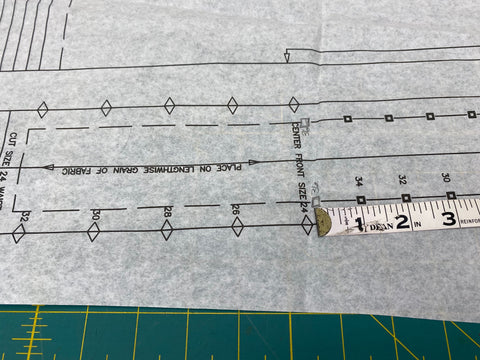
The triangle notches are graded at 1.5" between each notch and mark the center front and center back of the skirt. So mark new triangle notches 1.5" from the notch for size 34 for each size up you are going.
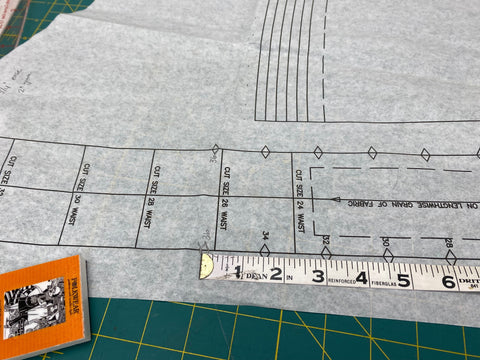
That is all there is to it! Just a few adjustments to make to get this skirt made into larger sizes. This pattern is an easy sewing project and a fabulous canvas for your creativity!

Our 106 Turkish Coat is one of the first patterns Folkwear released in the late 1970s. The pattern is still true to the original - providing instructions for creating a fully quilted coat with quilted or trapunto borders, plus all the information (and designs) need for doing so. And the pattern also instructs how to make a coat with pre-quilted fabric.
The pattern also stays true to the original sizing, which is labeled as "slender", "average", and "large". These aren't very precise sizing labels and I think that is exactly what the pattern designers had in mind. There is a lot of ease in this coat as it is meant to go over clothes, even outerwear, as a final outer layer. I recently went back to this pattern and calculated the approximate finished measurements as well as assigned sizing labels for the size chart to the original sizes (slender, average, and large). This gives an idea of how large the coat is and can help you decide what size you want to make.

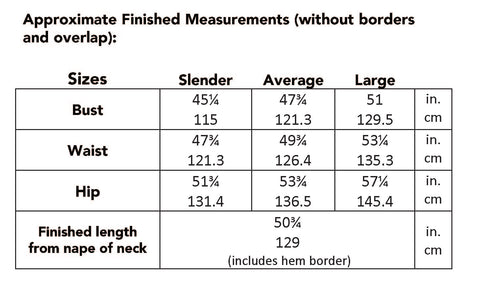
We occasionally get requests to size this pattern up as we have done with many other patterns we have in our collection. However, this one is difficult, not because of the actual pattern pieces that need to be graded, but because of the designs and traditional nature of the pattern. It is not as straightforward as some of our vintage patterns that have regular sizing and grading; and would change the instructions and detailing in complicated ways that a simple tutorial doesn't do. Plus, this pattern is extremely easy to make in larger sizes due to the simple geometric shapes of the pattern pieces. And really only one part needs to sized up to get to most sizes that would be desired.
So in this blog post I am going to show you how to easily increase the sizing of the 106 Turkish Coat.
Front and Back
First, the front and back of this pattern are cut as one piece. You tape them together so the shoulder seams meet. And then lay them out as one piece on your fabric.
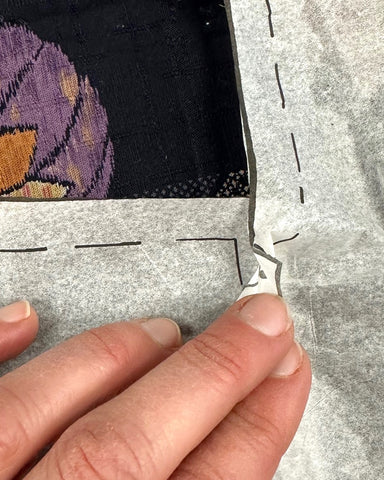
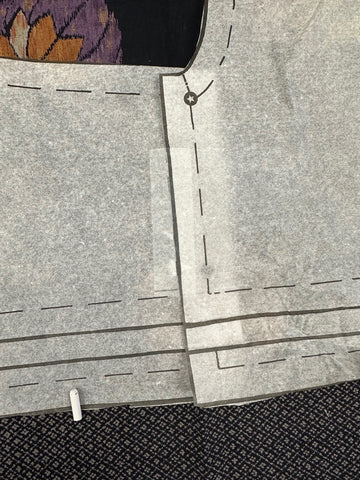
If you have a directional print or napped fabric, you can cut the front and back separately, but be sure to add in the 1/2" seam allowance (it is included on the pattern piece). It will take likely take more fabric than the pattern calls for.
This Front/Back piece is the only piece you really need to make larger to expand the sizing of the whole coat.
The finished measurements for the largest size is approximately 57-1/4" (not including the borders and overlap section). This provides approximately 12"-13" of ease at the hips. So if we were to go up to a 52" hip (our current grade rule size of 2XL), you would want the coat to finish at 64" at the hip (52" hip + 12" ease = 64"). So we would want to add about 7 more inches to the pattern to get the desired width (I am disregarding the 1/4" on the finished measurement for these calculations); 57" (current finished largest size) +7" = 64". So we need to divide 7" by 4 because we are going to add width to each side of the front and back to get to 7". So, we are going to add 1.75" to each front and back side. To do this, you just need to draw a line 1.75" wider than the largest pattern size on each side of the Front/Back.
For this example, I am going up to XL, adding 5" to get a finished measurement of 53" (finished largest size)+5"=58" (48" hip + 12" ease) finished hip. So I am going to add 1.25" to each side. You can use these calculations to get whatever size and fit you want. If you want more ease, add more width to the sides of the Front/Back pattern piece.
I use a straight clear ruler to do this, but you can use any kind of ruler to mark the new cutting lines.
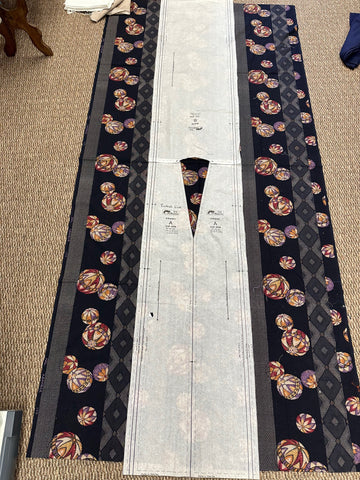
You can see here that I am laying this pattern out with the front and back taped together at the shoulders. I am using a Japanese cotton with a fun print. I have centered the Front/Back over the center printed part of the design. My fabric is slightly shorter than the pattern pieces, so I am going to make the coat a little shorter than the pattern calls for. It is easy to shorten or lengthen this coat, but it important to note how much you are shortening the coat so that when you cut the front borders, you cut the correct length.
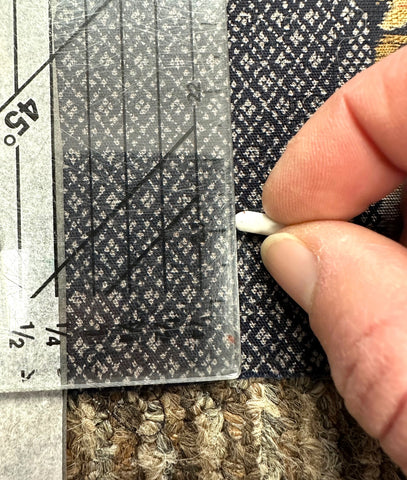
Marking 1.25" on each side of the Front/Back pattern piece.
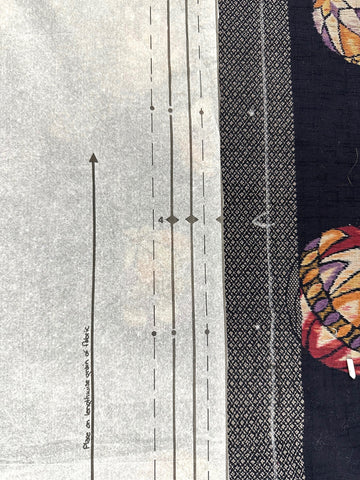
Be sure to put in the notches and dots where they are on the pattern, just transposed to the new seam allowance that you have drawn in.
You will need to do this for the main fabric, lining fabric, and batting. And if you are expanding the sizing of this pattern, you may need more fabric than what the pattern calls for. Be sure to have extra fabric. For this coat, we made it as an unlined coat so did not need to cut out the lining or batting.
Borders
As the pattern instructs, do not cut out the border pieces until you are instructed. You will follow the directions in the pattern to get the border pieces that will fit your new Front/Back. Be sure NOT to cut out the border pieces until you are instructed, and follow the instructions in the pattern. You will need to a measuring tape to take a few measurements on the coat once the main body has been put together.
When I cut out the border pieces, I had to add some length to each of them (except the front borders), and I added the length to the side of the pattern piece that had markings.
Also, you basically don't use the notches on the borders for placement of any of these pieces. They are mainly there to tell you which side is going to go against the main body of the coat. So it does help to have them, just don't bother trying to line them up with anything, especially if you have changed the sizing of the coat.
Finally . . .
We also highly recommend making a muslin for any pattern that you are adjusting. This with help you know if you need to make further adjustments before cutting out your garment fabric. A muslin for this coat would not need the borders or cuffs to make sure the fit is what you want.
This is pretty much all there is to expanding the size of this pattern. There is a lot of ease at the shoulders due to the underarm gusset (which adds 4") and the side panels). The sleeve itself also has a lot of ease. But, if you are wanting to make the sleeve larger, add the extra you want to expand it by to each side of the underarm of the sleeve. Then you will also need to adjust the dots on the Front/Back that indicate where to attach the sleeves by the length you increased one side of the sleeve width. Your side panel may be slightly longer than the Front/Back, but you will just trim off the extra at the end of body construction and before you add the borders to the coat.
I hope this has helped you figure out how to easily expand the sizing of this coat to fit you. It is simple! And the 106 Turkish Coat is so fabulous!