-
Sewing Patterns
-
Fabric
- Sewing Supplies
- About
- Blog
- Gallery
-
By Esi Hutchinson
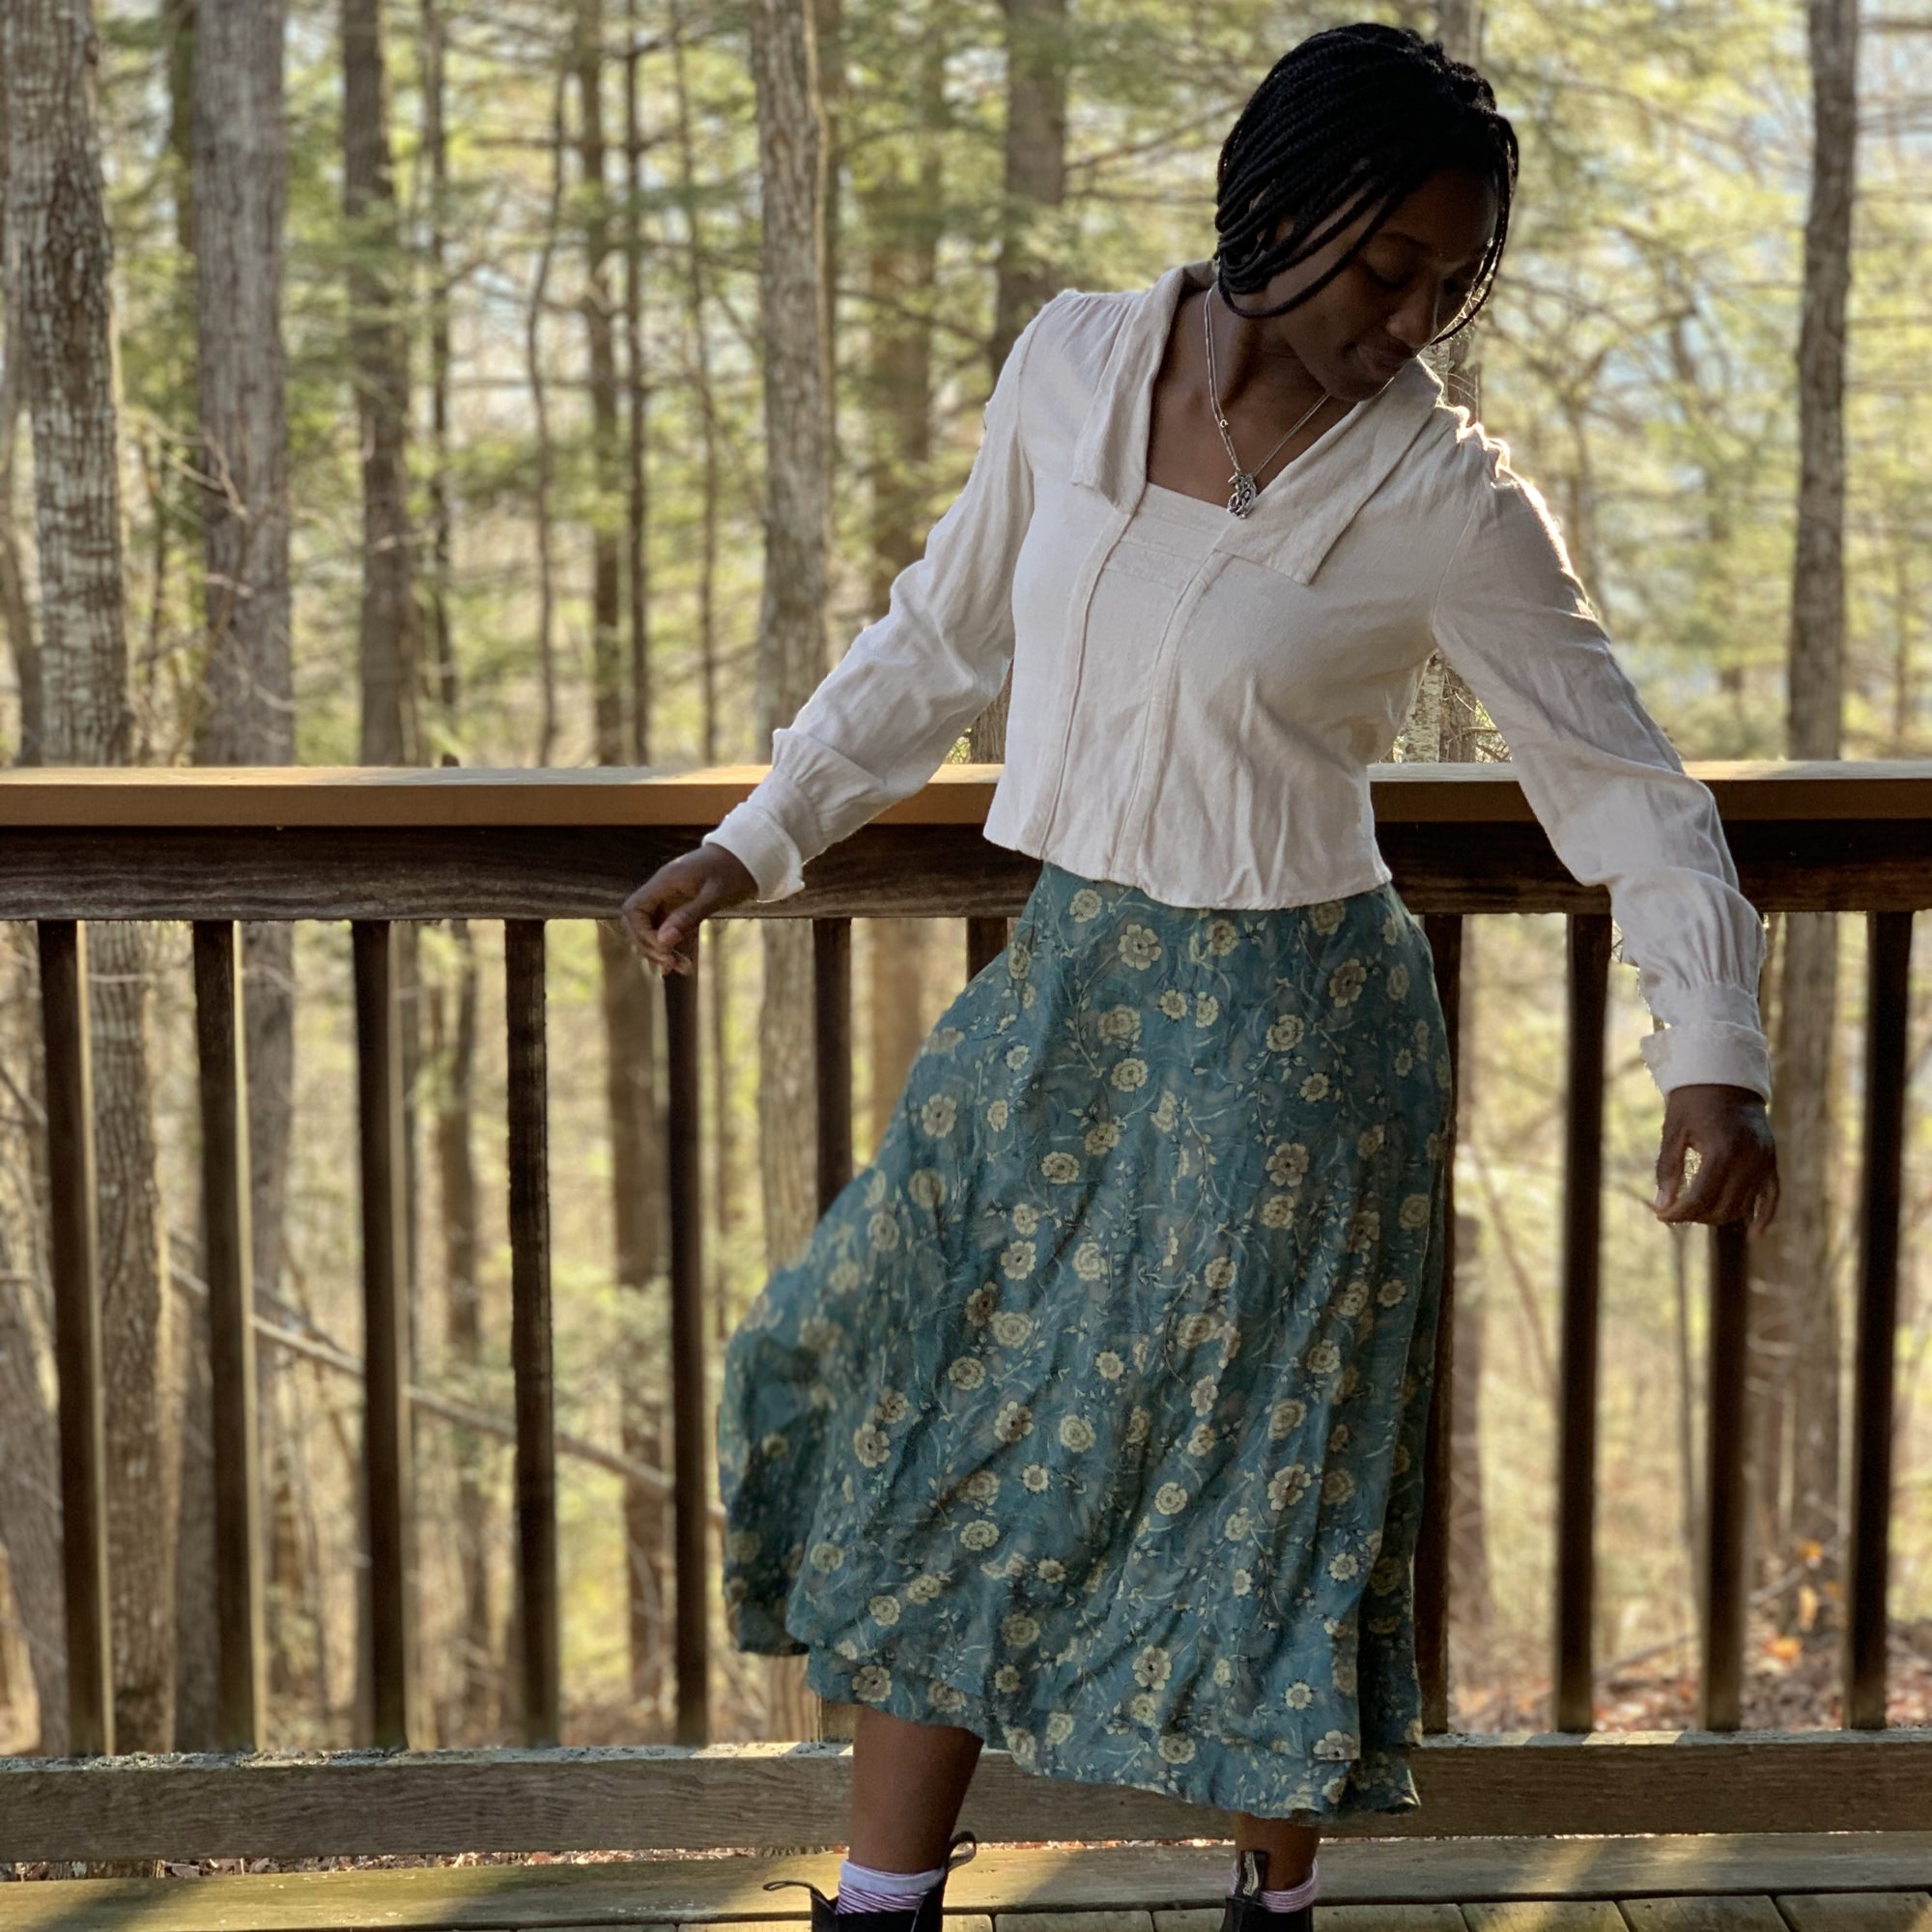
If you read my previous blog post, I wrote about the sizing adjustments I made for my own 209 Walking Skirt. I also wrote a tutorial on how to make the back placket of this skirt, since plackets can be tricky. In today's post I am going to show you what other modifications I made to my skirt as well as some things you can do when making your own Walking Skirt. I added a zipper and a decorative hem flounce. Again I think this skirt would be flattering on everyone, and we always love to see what you make from Folkwear so please share when you can (social media or review a pattern).
Adding a Zipper
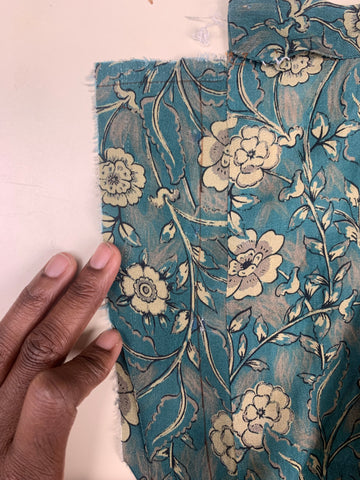
The back placket of 209 Walking Skirt is perfect for medium to heavy weight fabrics and fabrics with some structure, but I wanted to make my skirt from a lightweight rayon. This floral rayon did not have the structure to hold up to a simple placket and stay closed. I loved the feel of this fabric and the colors work really together in my opinion. I really wanted to use this fabric for this pattern, however I decided that for a fabric like this, a zipper would work much better as a closure. I made a sample placket on the skirt to test it, but, as expected, it turned out to be floppy and didn't keep closed even with a hook and eye closure secured at the top. So even if you have the placket, it is easy to add a zipper closing in the placket placement. It is basically a lapped zipper.
I unpicked the waistband seams about 3 inches on both the left and right side of the skirt (it's always a drag to have to unpick your seams).
Starting with the lefthand side of the back of the skirt (as you wear it), I unpicked the folded over edge of the facing that I topstitched to the right side of the back and pressed it out. The length of my placket was 9" (22.9cm) long. I purchased a zipper slightly longer than that just in case I needed more room. Once I decided I only needed 9", I made a couple of large zig-zag stitches to make a new zipper stop about 9" (22.9cm) down from the top of the zipper.
I drew a line 5/8" (1.6cm) away from the seamline of the facing and the skirt back and a line 1/2" (1.3cm) from the top short edge of the facing (lefthand side of skirt).
I placed the right side of the zipper tape onto the right side of the facing. The top of the zipper should be right below the 1/2" (1.3cm) line and center of zipper teeth should be right next to the line I just drew that is 5/8" (1.6cm) from the seamline. I sewed the zipper to the facing using a zipper foot. I stitched twice - once close to the zipper teeth then again close to the edge of the zipper tape.


Then I pressed under 1/2" (1.6cm) of the raw edge. And I pressed the facing to the wrong side of the skirt along the facing and skirt seamline. I topstitched on the folded edge through all layers.

Next I sewed the left side of the zipper to the placket on the righthand side (as you wear it) of back skirt. First, I zipped up the zipper and see where the edge of the left side of the zipper tape would meet the placket and drew a line to indicate where I would sew this side of the zipper.
I put the zipper stop 1/2" (1.6cm) below the top of the placket before stitching the zipper down.

I then attached the waistband and added hook and eye to secure the waistband. You could add a button or snap instead.

It looks like a zipper that you would see on a pair of pants - similar to a fly, but much simpler.

You could also eliminate the placket all together and sew in an invisible or lapped zipper, cutting the skirt back straight at the center back and eliminating the placket and facing pieces. Or, you can add the zipper into the placket while you are making the skirt!
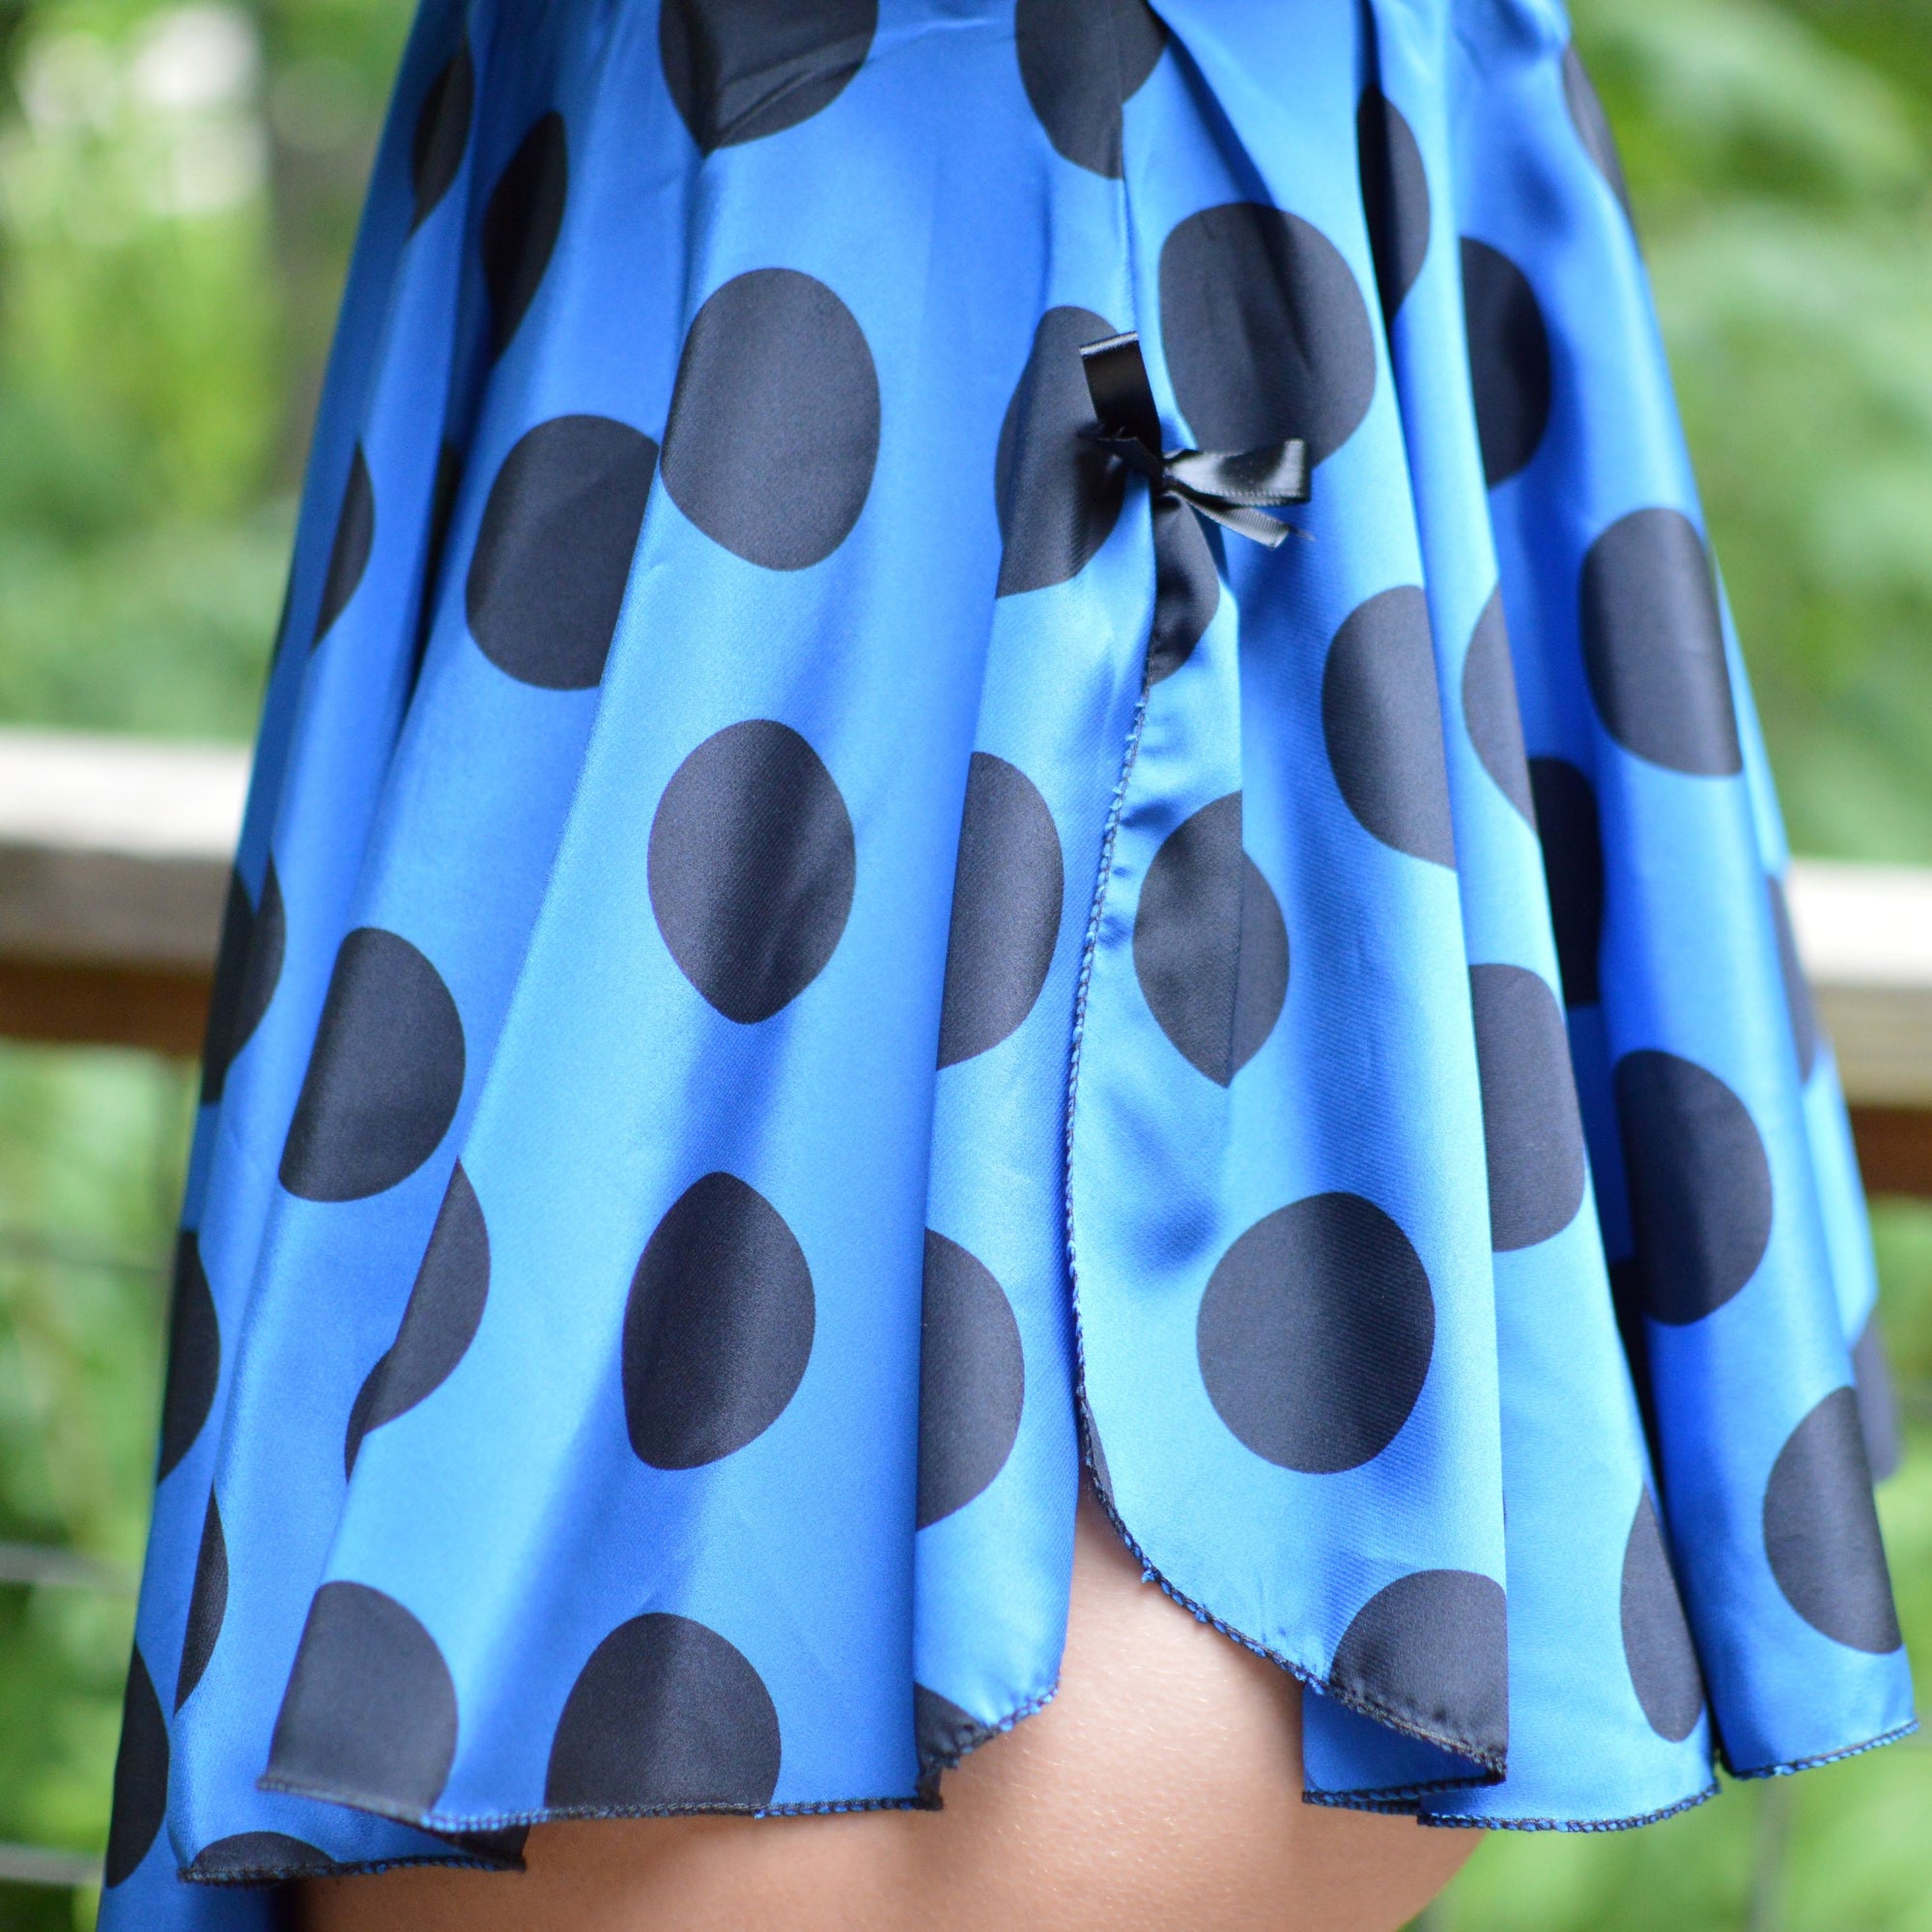
Decorative Hem
I also added a decorative hem flounce to my skirt. The fabric I chose moves so beautifully, it's bouncy and flows really nicely, and the decorative hem I made adds to its character even more. The extra weight at the hem adds great movement.
I wanted my decorative hem flounce to be 4" (10.2cm) wide, and to end 2" (5.1cm) above the main skirt hem.
My hem flounce pattern piece would need to be 4" wide, but also needs 1/2" (1.6cm) at the top to fold over and be topstitched to the skirt. And, the flounce would also need an extra 1" (2.5cm) at the bottom edge so that it could be hemmed (turned under 1/2" twice - same as the hem of the main skirt).
I used the same 209 Walking Skirt pattern pieces to make my hem flounce pattern pieces so that it would match the skirt. Basically cutting a strip from each skirt gore pattern piece to make the flounce so it fit the skirt. First, on the skirt pattern pieces I marked a line 2" (5.1cm) above the bottom cut line of the skirt pattern pieces. This is where my flounce piece would end before it is hemmed. Then I marked a line that was 5.5" (14cm) above that (4" for flounce, plus 1" for the hem and 1/2" for the seam allowance).

Measuring up 2" (5.1cm) from the cutting line of the skirt hem takes into account the skirt hem will be 1" (2.5cm), and the flounce hem will be 1" (2.5cm) so it will still finish at 2" (5.1cm) above the finished skirt hem.
I did that for all the skirt pieces, making sure to add the notches (or label the pieces) to know what part of the skirt gores they match to. I cut the pieces out as I did for the main skirt and sewed them together in the same way - sewing them end to end.


I hemmed the bottom of the hem flounce by folding under 1/2" (13mm) and another 1/2" (13mm) and stitching near the fold. I serged the top raw edge of the hem flounce because the fabric frayed a bit, and then I folded under 1/2" (13mm) to the wrong side at the top of the flounce.

I drew a continuous line 6" (15.2cm) above the hem of the main skirt around the whole skirt for my placement line (4" for width of flounce and 2" above the skirt hem line). I topstitched the flounce to the skirt at its top edge with the wrong side toward the skirt.


By Esi Hutchinson
Folkwear's pattern for this month of February is the 209 Walking Skirt. I really appreciate the shape of this skirt and I personally think it would be flattering on anyone. When we decided we would feature this pattern, I knew I wanted to make a skirt for myself. And, I made some alterations to this skirt to fit my style more. I'm always altering my sewing patterns, and you should too if that means you'll wear what you make more often.
For the Walking Skirt, the gathers in the back of the skirt gives a slight fullness in the back that is reference to the overlapping of the Victorian and Edwardian era and the S-curve shape that was popular then. The skirt is finished with a buttoned placket. However, I did not want the gathers in the back (I have a nice bum and don't need extra fabric there, nor was I wanting to go for the period look).
I took out the gathers in the back of the skirt, and added a zipper to the placket. I also added a decorative hem flounce similar to the hem on the skirt in the 216 Schoolmistress' Shirtwaist & Skirt pattern. I thought the fabric I used (a rayon challis) suited these alterations. In my next blog post I will show you how I added the zipper and the decorative hem flounce. But today I am going to show you how I took out the gathers and adjusted for my size.
Note that in the photos below I am mostly using our Swedish tracing fabric to make my pattern adjustments. I usually trace my pattern, then make adjustments to the tracing fabric. I can write on this sturdy fabric/paper as well as fold it, tape it, and even sew it. Since this fabric/paper is not cheap (but it's not terribly expensive either) and we hate to waste things at the Folkwear office, we often tape used pieces of this paper fabric together from past projects to get enough to have whole pattern pieces. So that is what you are seeing in the photos below! Find this Swedish tracing fabric here.
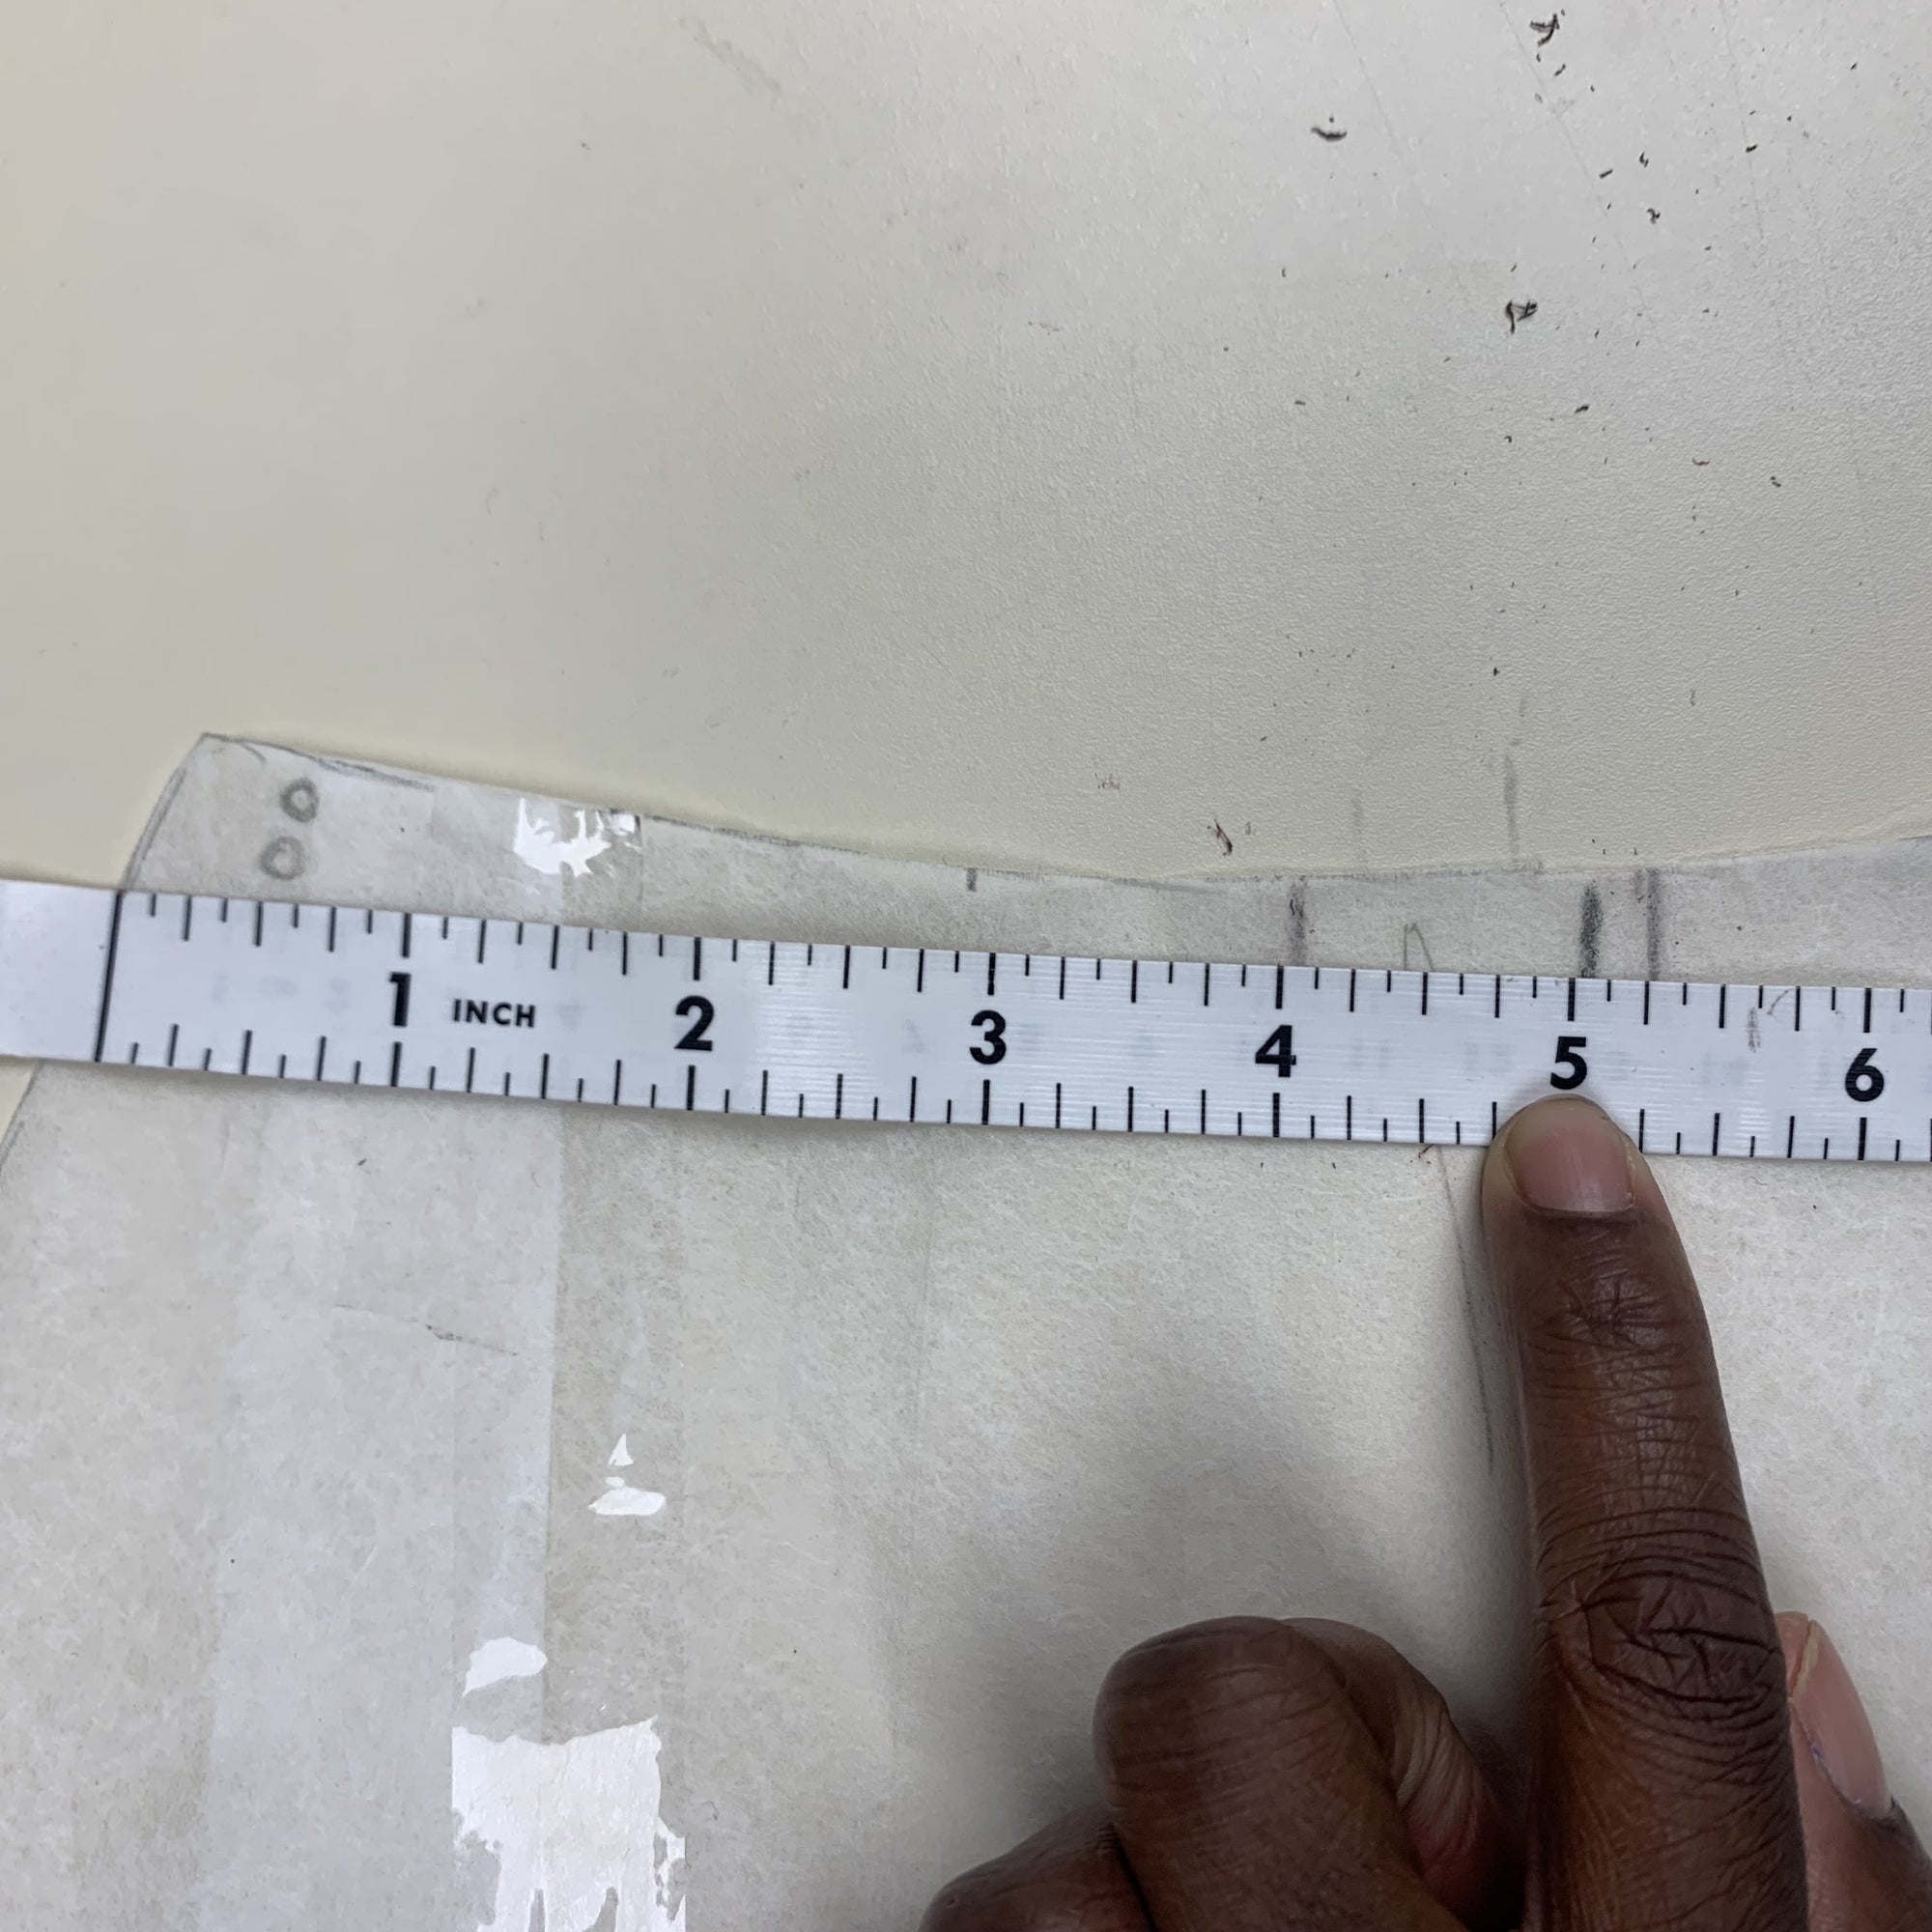
Taking the gathers out was a little confusing for me, but this is how I figured it out. I measured from my cutting line to the square for my size on the Waistband. This square signifies where the Back piece B and Side piece C meet. For me, this was 5 inches.

Then, I took that measurement and measured from the side of the back B pieces toward the center back, and I drew a line to show where I would fold out the pattern to eliminate the gathers. So, 5 inches from the cut line on my Back pieces, I drew a line to show how much I wanted to take out from the Back.
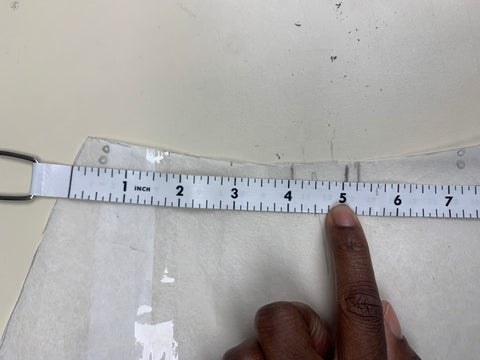
I folded the Back pattern piece lengthwise along this line.

Then I folded the Back again to create a pleat so that the 1/2" (13mm) seamline (and mark where the dots are) lands just outside of the first fold I made.

This is what my piece looked like after I made this adjustment. This does take some of the width of the skirt at the hips and bottom out, but for me, this was not an issue. You could make a dart on the skirt back instead. Or just fold out a dart at the waist of the skirt pattern piece.

I'm in between Folkwear sizes Small and Medium, so I wanted to graded the pieces a bit to fit my body. I drew a gradual line from the size small at the waist to the size medium about 3 inches down from the waist. I did this to all the skirt pieces after I took out the gathering for the back piece B above, which maybe I should have done before, but I wanted a flat pattern piece to make the rest of my fit adjustments.


By Esi Hutchinson
Plackets serve important functions in the history of garment making, they provide a neat and finished look to the garment, as well as making it easier to put on and take off clothing. They occur at necklines, wrists, waists, and occasionally at ankles. A fastener, such as a button or snap, is often used to secure a placket closed. Not only functional, but they can also be incorporated as a decorative design on your garment. They can be designed in various ways, such as hidden plackets, exposed plackets, or decorative plackets with contrasting fabrics or unique stitching patterns. These design elements can enhance the overall look of the garment, making it more visually appealing and fashionable, as well as functional. Some Folkwear's patterns that exemplify the differences and similarities of plackets are 212 Five Frontier Shirts, 204 Missouri River Boatman's Shirt, 206 Quilted Prairie Skirt, 102 French Cheesemaker's Smock, 116 Shirts of Russia & Ukraine and of course the featured pattern this month February, the 209 Walking Skirt.
Today we are providing you with a tutorial on making the buttoned placket for this pattern, 209 Walking Skirt. This tutorial will show you exactly how to manage sewing this particular placket. Plackets can be tricky at times, but making sure you line the pieces up exactly and in the correct way makes a huge difference.
For this tutorial, I've labeled all the pieces required for assembling the placket and I've cut the back skirt pieces so that you just see the top center backs (so that you can easily see how the placket goes together). You will need the left and right Skirt Back pieces B, Facing D, and Placket E. Be sure the Skirt Back pieces are cut out at their designated cutting lines that are indicated on the pattern piece (the left side extends further out than the right side). NOTE: on some versions of the pattern, Facing D should be cut with the printed part of the piece face down on the fabric. If your fabric is the same on front and back, this does not matter. But if you have a wrong and right side of the fabric, you will need to flip this pattern piece over when cutting to get the notches to line up correctly.
Also make sure you transfer the dots, stars, and top stitching lines onto the pattern pieces. It also is a good idea to label the left and right side of the Skirt Back pieces just to make it easier.


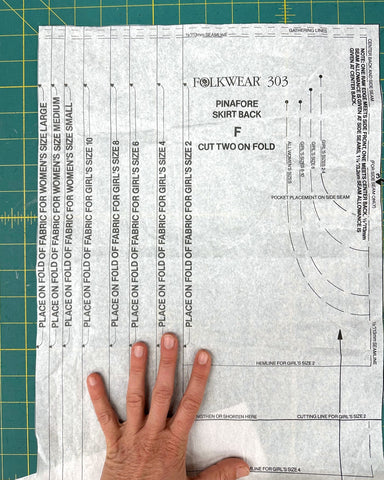
We have been excited to get our 303 English Cottage Kitchen sewing pattern back out into the world! It is such a great pattern with so much to make inside of it, and so much information and sewing inspiration. It is certainly beloved for the pinafore apron that can be made for girls (sizes 2-10) or for women. The size range for the women's apron is somewhat limited, so we wanted to include a tutorial on sizing this pattern up.
In general aprons are very adjustable. They don't close in the back so you have usually have ample room for different sized bodies. The pinafore version of this apron does close in the back with buttons. So if you are making the pinafore, in particular, you will want to make sure the waist fits your body. The other parts of the apron that might need adjustment are the skirt and the bib. By design, the bib is fairly small, so a larger bust might want a little more coverage. However, it is up to you! The final adjustment that might need to be made would be for the straps. If you have large shoulders or back, you may want to make the straps a little longer.
This blog post will show you how to make all these adjustments. Plus, we have a video that shows how to make the adjustments on the pattern as well!
Waistband
The waistband is sized by waist size. You can choose the size closest to your waist measurement. There is about 1.75" (4.4cm) of ease at the waist, however if you are going to have a closed back apron/pinafore, you will take up about at least 1" (2.5cm) of this ease with a button and overlap. So keep that in mind.
Each size up for the waistband adds 1/2" (12.5mm) to each end of the waistband. So if you want to make a waistband for a 31" waist, you would add 1/2" (12.5mm) to each end of the waistband. If you want a waistband for 32" waist, add 1" (2.5cm) to each end of the waistband, and continue that pattern for each size up you want to go.

You can see there is a 1/2" (12.5mm) between each waistband size.


Mark 1/2" increments for each size up you want to make the waistband larger.

Be sure to do this to both sides of the waistband!
Apron Skirt
You may or may not need to adjust the apron skirt. The top of the skirt is gathered into the waistband, so especially if you are making an open-back apron, you may be able to just cut the largest size skirt for women and be done. But, if you want it to button in the back (like a pinafore), you may want a little extra room. The largest size of skirt finishes at about 53" (135cm) at the hip, but you will loose an inch or so if you are adding buttons to the back. So if you want to add more room in the skirt, you can just add to the folded edge of the Front and Back of the apron skirt and even amount.
For any Skirt and Waistband adjustments, be sure to gather the skirt evenly into the waistband. You may need to adjust the marks on the waistband for the sides seams (or ignore them) and just make your skirt gathers evenly all the way around the waistband.
Apron Bib
The apron bib is fairly narrow, but also fairly tall. You probably won't need to make adjustments for height on the bib, but if you do, you can draw a lengthen/shorten line above the notch on the bib and lengthen it as needed. Be sure to adjust the star notch on the straps (or ignore it) when you got to put the strap on the bib if you adjust for height.
To make the bib wider, you can add to the center at the fold. Add the extra width you need, and be sure to remember that whatever you add there will double. So if you add an extra inch to the center fold line, you are adding 2" to the width of the bib.


Here I am adding a 1/2" (12.5mm) to the center of the bib pattern piece. This will add 1" (2.5cm) to the center of the bib and to the width of the whole piece.
The bib is gathered at its bottom and top. To add a little extra width, you can also not gather it as much as indicated by the notches on the waistband (and by the bib stay, but we'll get to that in a minute). Again, either ignore the notches on the waistband or adjust them to the width you desire. However, do line up the center of the bib (notch 6) with the center notch on the waistband so everything comes out evenly.
If you are making the bib wider (or just not gathering it in as much), you will also need to adjust the Bib Stay. This is a small rectangle of fabric that goes over the gathers at the top of the bib to create a ruffle at the top of the bib.
The Bib Stay is a simple rectangle. You can add 1/4" (6mm) to each side for each size up you want to go. OR, add the extra length you need to get the size you desire.

Here I used my ruler to add 1/4" (6mm) to one end of the Bib Stay to make it a size larger. You can add as much as you need to get the width you want for this.

Be sure to add the same amount to the other side of the bib stay as well!
Straps
Your straps may or may not need to be adjusted, but if you have large shoulders or back, you may want to add some length to them. The longest straps are 33" (84cm) and cross in the back. There is a little extra length built into them so you already have some adjustment room. But, you can easily add length to the front and back of the strap. Again, use your ruler to add the same size increment to create larger sizes for the straps. Do this to the front and back of the straps.

Back of the strap with markings for adding larger sizes (just as the waistband).

Front of the strap with length added for larger sizes. Be sure to add to both sizes.
Another thing to note about the straps, is that adding length to the straps will make the notches on the bib and strap not match. You can adjust your notch on the strap by the same amount you added to the strap front, or just match the pieces together and ignore the notches.
If you lengthened the straps, you may or may not need to adjust the Strap Ruffle. If you didn't add much length to the straps, you may not need to adjust the ruffle since it is gathered and will easily gather into the strap. If you don't adjust the ruffle and you added a lot of length to the strap, your ruffle just may not be quite a full as normal. However, if you want to, you can adjust the ruffle by adding length to the ends or at the shoulder. Just extend the ends by the amount you want to add. But if you want to add more than a 1/2" (12.5mm), you can add to the shoulder. Just cut the pattern piece at the shoulder line and spread apart the pattern by the same amount that you increased the straps (or as much as you want to add), then tape a piece of paper in place to keep the new length. This will also keep the ruffle very full.

Ends of strap ruffle. You can add a bit to these ends to make the ruffle longer.
Or . . .

Add length to the Strap Ruffle at this shoulder line. Spread the tissue apart here to add length.
You can always add extra buttons to the strap ends with a few inches between them so that you have an adjustable apron for different sizes. You can do this with both straps (instead of sewing one side to the skirt waist).
I hope this tutorial helps you to adjust the sizing of this apron. If you have questions, let us know at info@folkwear.com. Or drop a question in the comments below!

by Esi Hutchinson
Are you tired of your biscuits getting cold too quickly? There is a way to keep them warm and toasty for longer. Well, Folkwear has a solution to your biscuit woes: the biscuit cozy! From the 303 English Cottage Kitchen which has many kitchen accessories, this is my personal favorite. I love making sweet potato biscuits, and now that I can make a biscuit cozy (which I didn't know even existed), my biscuits can sit in the most darling looking cozy to keep them nice and warm when I take them to a potluck or to a breakfast table.
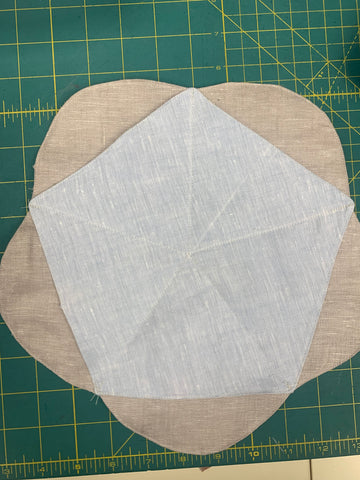
This project is also a good way to use scraps. However you should use sturdy fabric such as canvas or twill, and one that is easy to wash. If you don't have fabric that's sturdy on its own you can use interfacing as I will show you below.
I used interfacing for each layer because I wanted to use a linen we had and it was not very sturdy. So, I cut two fabric pieces instead of one for each layer as well, because I didn't want the interfacing to show on the wrong side. If you are using sturdy fabric and don't need interfacing, be sure to know that the wrong side of the fabric will show in this biscuit cozy.

Cutting one interfacing piece.

I applied the interfacing to the wrong side of one piece for the bottom.

Right sides together, I sewed the two pieces together for the bottom layer of the cozy, using a 1/8" (3mm) seam allowance. I also left enough room open to turn the piece right side out. Once turned right side out, I slipstitched the opening closed. This was now my bottom layer.


Do the same for the rest of the layers.

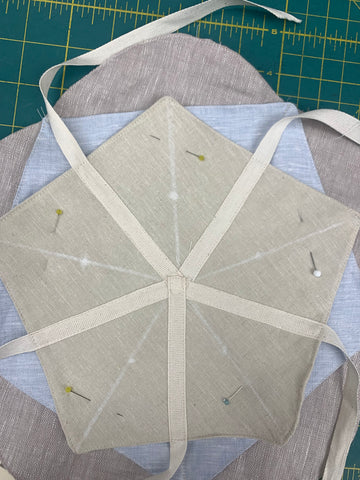
Next I sewed on the ribbons. As instructed, I cut ribbon (or twill tape) into three lengths: one 9 in. (23cm) and two 18 in. (46cm).
I pinned the shorter ribbon on one of the stitching lines for ties on the TOP LAYER and stitched along both long edges of ribbon.
I sewed the longer ribbon along two opposite stitching lines for the ties, pleating it at the center. Then I stitched the remaining long ribbon along the last stitching lines for the ribbon, covering the ribbon edges at the center.

Then, I stitched the wrong the side of MIDDLE LAYER to right side of BOTTOM LAYER from the center to each corner of the Middle Layer, matching stitching lines at the center.
Next I pinned the wrong side of the TOP LAYER to right side of the MIDDLE LAYER only. DO NOT catch in Bottom Layer. I stitched along the stitching lines from small dots to the corners of the Top Layer. This part was a little tricky. If you can't make it to the dot of the stitch line that's okay, just get as close as you can.
Look how cute!!! I love it, all I need are some biscuits!

Say goodbye to cold biscuits! I'm sure there are other ways to keep your biscuit warm, but this has been the best looking so far in my opinion. The next time you bake a batch of biscuits, don't let them go cold, give them the warmth and comfort they deserve with a beautiful biscuit cozy.

by Esi Hutchinson
We have just reprinted the 303 English Cottage Kitchen pattern again after many years of being out of print. And what I especially enjoy about this pattern is the authentic detailing, which gives tips and how-to's, on stenciling, quilting, embroidery, and how to make your own tatted lace. On the whole this pattern is perfect for tabletop accessories, napkins, placemats, tablecloths and more that just brighten your experience when eating your favorite meals and having a cozy time at home.
Are you looking for a fun and creative way to add a personal touch to your home decor? This blog post will focus on making a stencil out of the floral designs given in this pattern. You can add them to your linens, to your furniture, to your clothes! This post is helpful to refer to in addition to the pattern instructions on stencils.
The earliest evidence of stenciling can be traced back to ancient Egypt, where stencils were used to decorate the walls of tombs and temples. Stenciling techniques were also widely used in ancient China and Japan to create intricate designs on fabrics and ceramics. Its a great way to duplicate designs you want to use more than once.
You will need: Stencil paper, or something sturdy like carboard or cardstock , fabric paint, blade knife, and a cutting mat.
Before you begin stenciling, make sure your surface is clean and free of any dust or debris. You may want to use painter's tape to secure the stencil in place or you can use fabric weights.
Cutting the Stencil
I printed out the stencil and cut out the design. I then taped the design down on to the stencil paper and started cutting the design out.
Make sure your blade is sharp and go slow, try to cut as clean as possible.


I cleaned up the edges of the stencil.


by Molly Hamilton
We are very excited to bring this special pattern back into print! The 303 English Cottage Kitchen is a treasury of sewing patterns for lovely kitchen items that will make any kitchen feel like a sweet and cozy place to cook and eat and visit. This pattern has been out of print for many years, but was the very first Folkwear pattern I ever owned. It appealed to my sense of creating a home wherever I was. I could imagine making tea and scones, and sitting in a chair by a table with my tea pot covered by a tea cozy and set on a placemat. There would be a vase of peonies and a sweet little tea towel too. Ideally, I would have all this set in a garden or maybe a cozy kitchen overlooking a garden. But it was also perfect for whatever apartment or room I was temporarily renting - to give me that feeling of an idyllic, romantic cottage. Sometimes that is the power of sewing patterns - to help you envision a look, a life, you want. Or to just give your imagination some fun exercise.
We have brought this pattern back as a paper pattern for those who prefer a physical pattern and a PDF version for those eager to sew it as soon as possible. The PDF pattern has copy shop versions (A0 and 36"). There is a print at home file (with all the page numbers noted for printing the different items - so you don't have to print it all to get just the placemat, for instance). The A0 and print at home versions are layered for printing the kitchen items or the apron (and apron is layered by size). And for the first time, we have a projector file as well! Sewing instructions and detailing are also included, of course!
We loved this pattern so much that we even have a few items from this pattern that we have released as free patterns over the years, but 303 English Cottage Kitchen as a whole is exceptional. Not only do you get sewing patterns for a tea cozy, egg cozy, placemats, napkins, oven mitts, tablecloth, and an apron, but you also get all the instructions for adding designs to these items. The pattern provides 8 pages of instructions on stenciling, quilting, and embroidery as well as several interchangeable designs for flowers to stencil, quilt, or embroider onto the kitchen items. Or make up your own designs, and using the instructions provided, add them to the things you make! Plus there are instructions for tatting your own lace! It's not that hard. On a side note, my great grandmother (born in 1898) told me many years ago that tatting lace was her favorite handwork. After seeing this pattern, I can understand why. I thought it was impossible until I read through the instructions here.

Stencil design for 303 English Cottage Kitchen. We will have some tutorials soon about using this pattern.
Stenciling information is given for application to a floorcloth, as well as instructions for how to make a floorcloth. Floorcloths were used in the 1700s and 1800s to protect floors (and rugs) and to insulate rooms, but they were also decorative and often covered in stencil or painted designs.


I don't know what my favorite item in this pattern is, but I do love napkins. And they are a great way to use smaller sections of fabric. They also make wonderful gifts. I really enjoy the biscuit cozy as well. It is so cute and makes presenting biscuits (or scones or cookies) memorable.

Many of these patterns are perfect for using smaller sections and scraps of fabric. And, they make wonderful gifts.
I also find the apron to be romantic! The words Apron and Pinafore are often used interchangeably in this pattern, but I generally call the garment an apron. However, it can be a pinafore, especially if made for girls. The pattern is sized for women (SM-LG) and girls (2-10). We will have some tutorials for sizing the adult apron up very soon. The Pinafore apron pattern can be made so that the skirt buttons in the back and the bib straps are buttoned in the back. And, it can also be made like an apron, with the waistband ending in a large sash which is tied in the back (and apron is open in the back).

All this to say, we are thrilled to be re-releasing this pattern and re-introducing it to you! If you have any questions about this pattern, let us know! We are glad to talk more about it, and we hope you enjoy it as much as we do!
by Molly Hamilton
When we picked the 243 Rodeo Cowgirl Skirt sewing pattern to feature this month, we got excited about the possibilities. All the different yokes, hem treatments, fabrics, embellishments to choose from! It was almost overwhelming. We had a great time making a Pinterest board of inspiration, and narrowed down some possibilities in this blog post. Esi made a beautiful skirt with some lovely floral silk and Western flair hem applique.
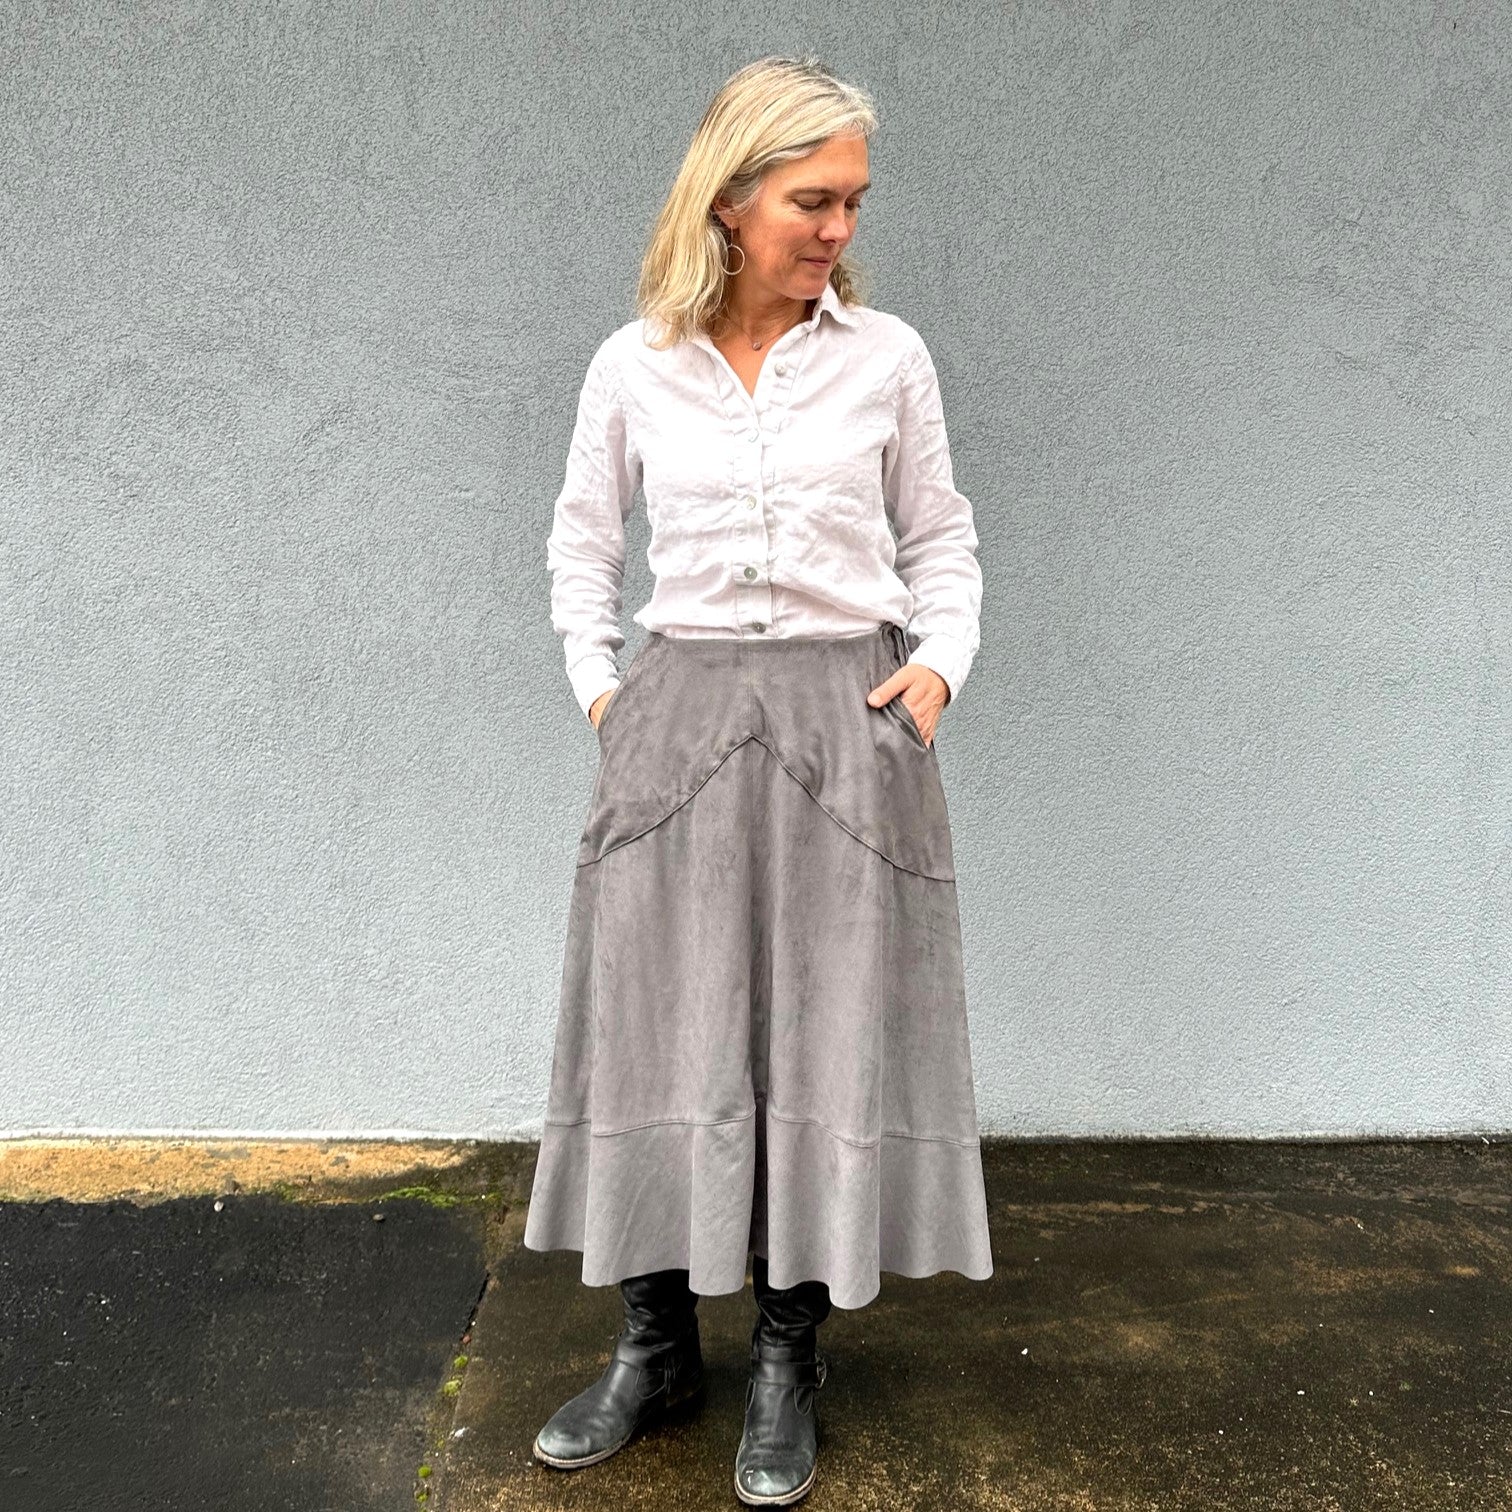
I went a slightly different direction with my skirt. There was a version I saw where the almost one-toned leather skirt laced on the side and had a slightly darker very small yoke. I remembered I had a nice length of grey Ultrasuede that I thought would make a great Western-style skirt. I loved the way the fabric moved and the texture it had. I decided to make View B of the pattern. View B has a skirt that is cut a little bit shorter and has a flounce sewn to the bottom of the skirt. The flounce was a good fit for this fabric because of how well it moves. And I wanted it to lace with long laces on the side.
My Modifications
The Ultrasuede had a little bit of stretch to it, so I decided to cut a size smaller than I normally would. I fall between the Small and Medium in Folkwear's grade rule, so I decided to cut a Small for this pattern. I really didn't want a skirt that ended up being too big because of the stretch. The front and back skirt facings help stabilize any stretch also.
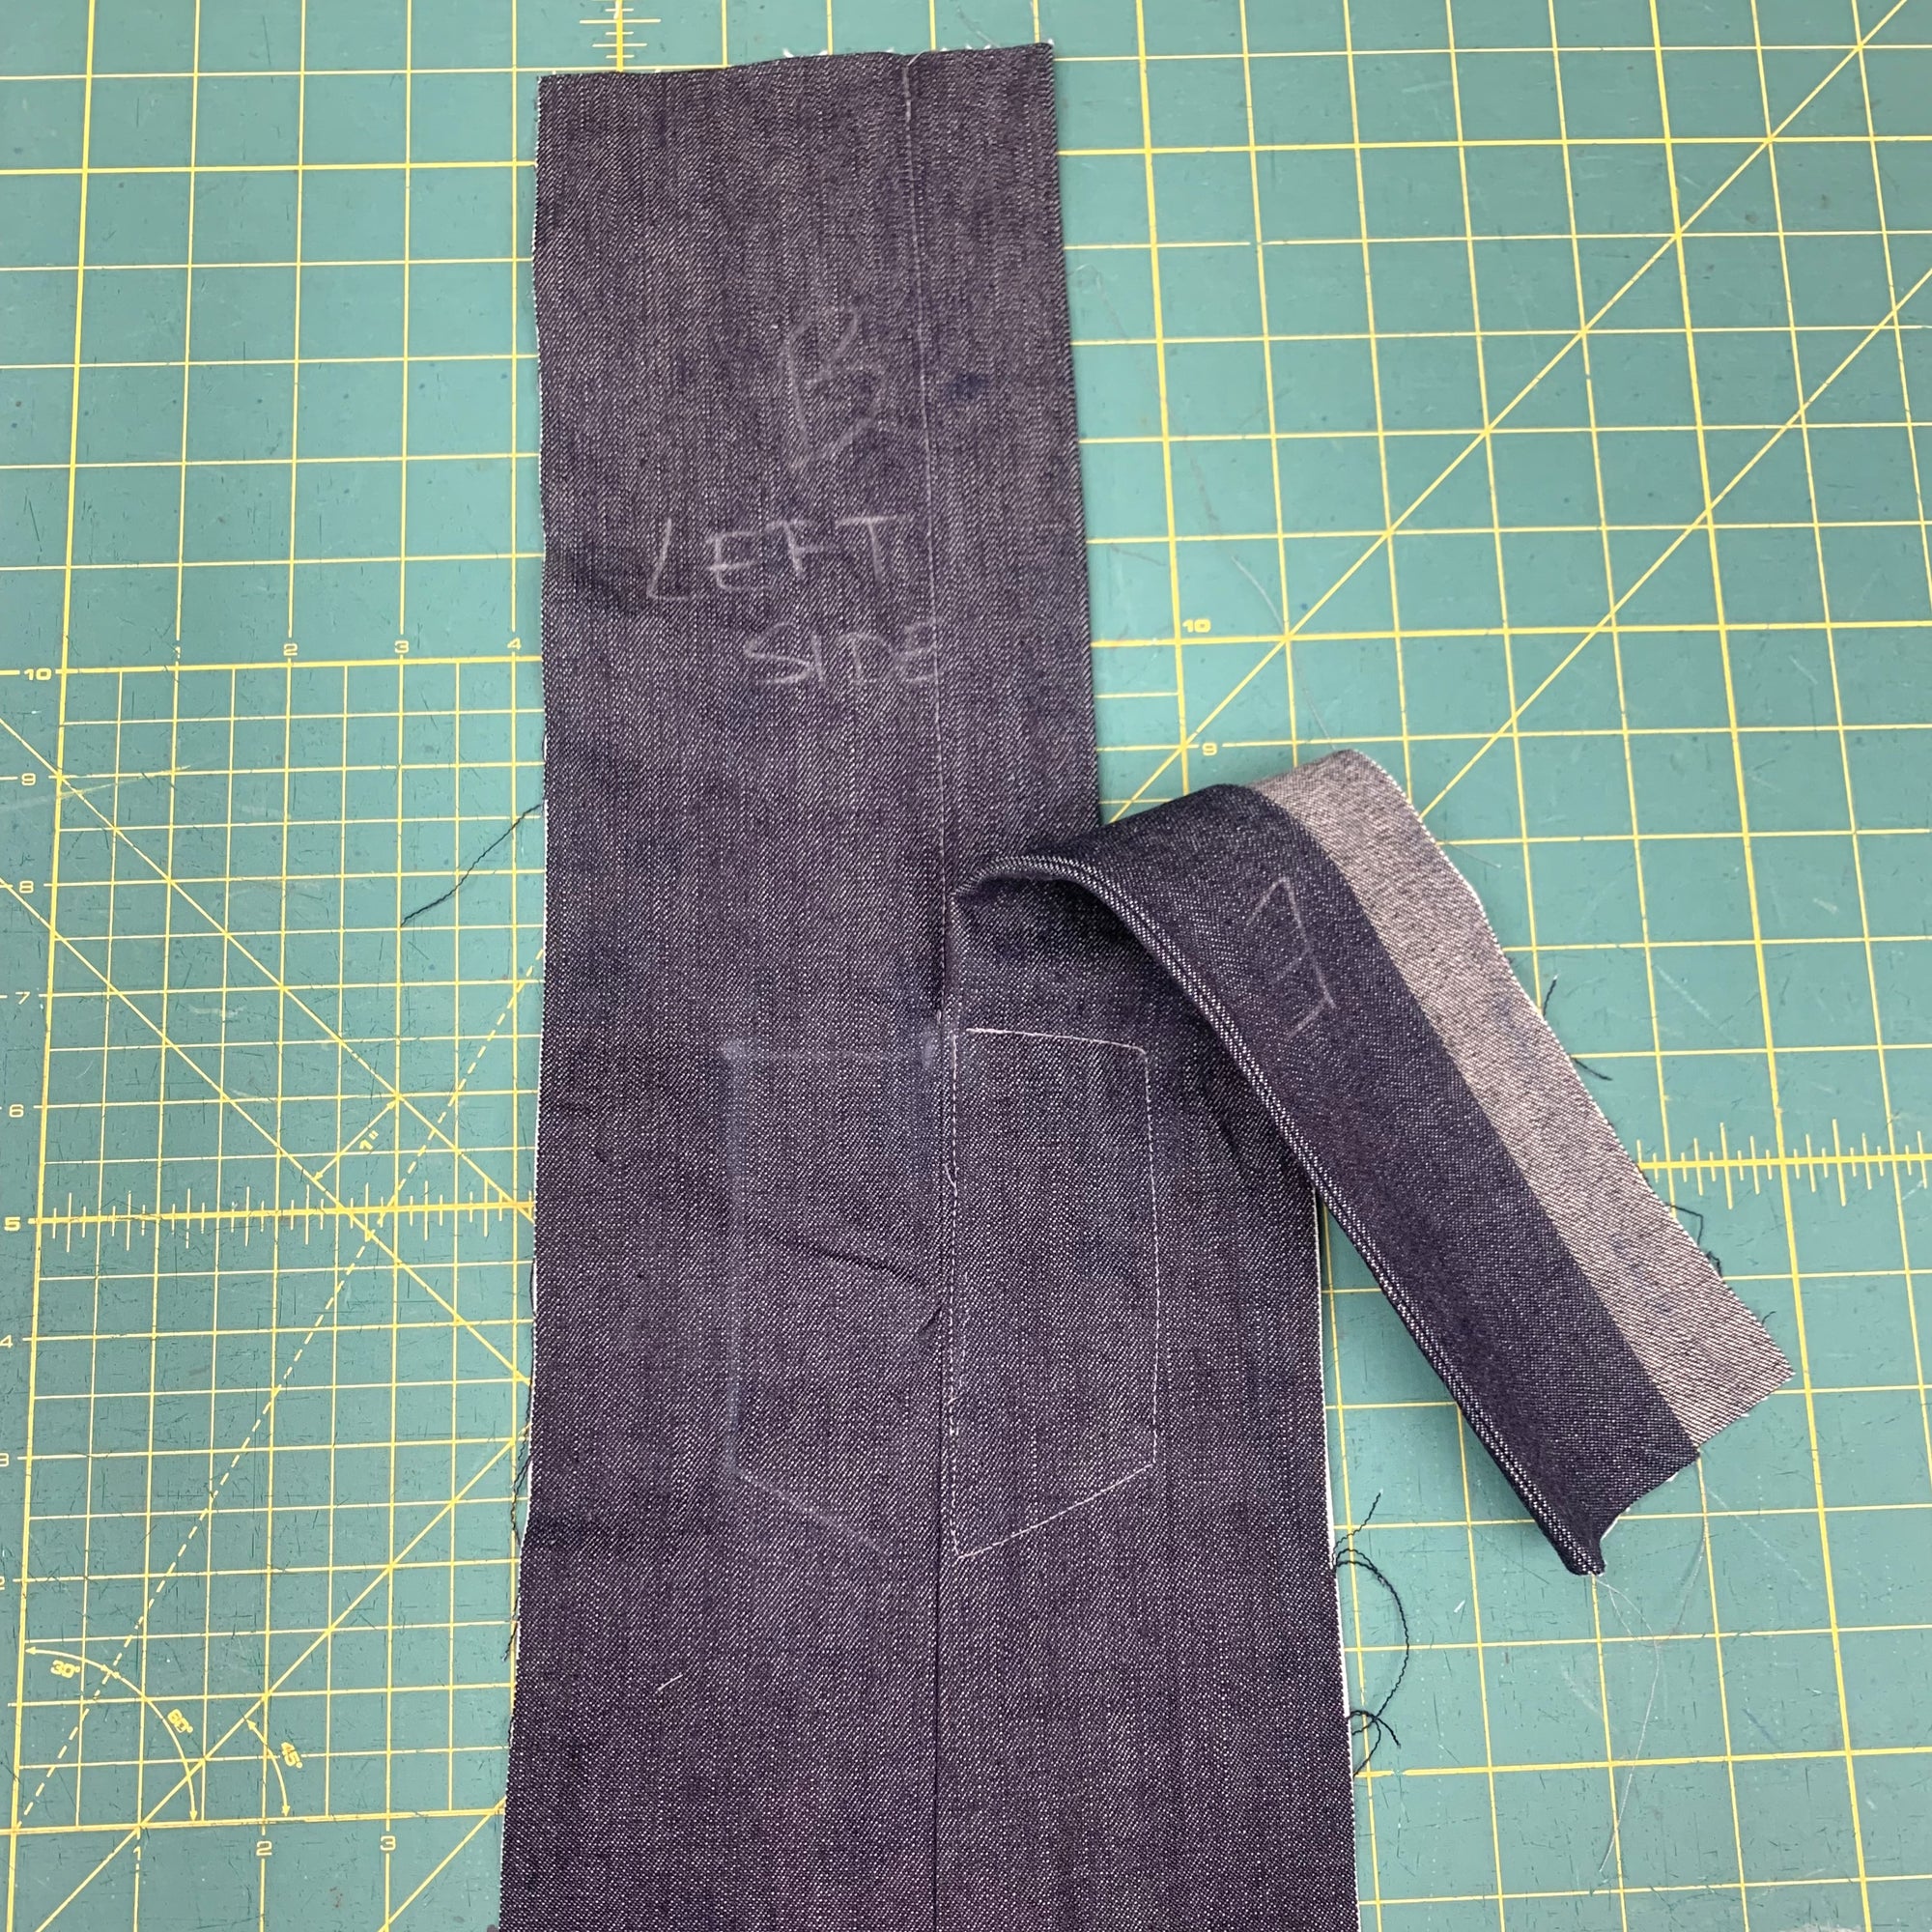
I also moved the back plackets to the left side of the skirt. These plackets are for the laced closing, but I wanted mine to be on the side. This meant that I treated the left side of the skirt as if it were the back in the instructions for the placket and laces. I sewed the back up with one seam instead of putting in any closures. I was a little worried that having the placket and lace on the left side of the skirt would interfere with the pockets, but it really did not. I just had to be careful of not catching the pocket/front yoke in the stitching when I stitched down the plackets. Of course, you can make this skirt with a zip closure (as Esi did and shows you how in her post).

Here you can see the placket I sewed onto the skirt on the left side of the front (it will be on the wearer's left, but here it is on the right side of the skirt piece).

For the front yoke pockets, I wanted my yoke to be one smooth arch, instead of scalloped as the pattern shows. I traced the pattern, used a curved ruler to make a new cutting line, and then had a new pattern piece to use.

Original front pocket yoke with scalloped edges traced on paper.

Here you can see where I connect the two peaks of the scallop with the curved ruler.

You can see the new line drawn with the hip curve ruler. This will be my new pattern piece.
I topstitched all the seams. On the side seams, I pressed the seams to one side and stitched (like a faux flat felled seam), and for the center seams at front and back, I pressed the seams open and topstitched on each side of the seam. I pressed the seams toward the skirt at the flounces and topstitched there. I trimmed the seam allowances for all seams. Since this fabric is a little thicker than a similar cotton or silk, I wanted to reduce bulk where I could. I also used a longer stitch length than normal when topstitching.

Close up of the topstitching at center front and at the flounces.
For the ties, or laces, I used long strips of fabric left over from cutting out my pattern. I used the lengthwise stretch (or "grainline) since it felt the most stable when pulled. If you are making this skirt with laces, I think a soft leather would be amazing, but you can also use twill tape (which comes in many colors) or make your own bias tape. I think bias would work better than a straight grain woven fabric to give some flow to the ties and string.
I did not hem this skirt! The Ultrasuede does not ravel at all, not does it roll. So I just trimmed it up to be completely even, using a curved ruler where I needed to.
Sewing Tips for this Pattern
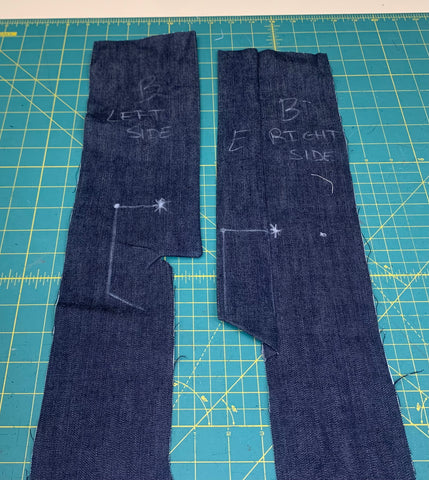
First, a very important tip for View B that I would use next time for sure, would be to label your flounce pieces clearly. Label front and right and wrong side of fabric as well as center fronts and backs. I had to rip out nearly all of my flounces because I put them in backwards on each piece! That was a huge pain. The flounces have notches that indicate front and back and side. There is one notch for center front, two notches for sides, and 3 notches for center back. But if your fabric is the same on each side (as mine was), it is easy to switch them around. I would even caution that you should label your skirt front and back fabric pieces also. They look very similar and it is easy to confuse them.
The yokes call for a lining in this pattern. You can make and attach them, as Esi did, by folding in a hem and stitching down, but for the front pocket yoke, a fabric lining is best. You can use the same fabric you are using for the skirt or yoke, but if it is a thick fabric, it is not ideal and will add quite a bit more bulk at the seams. I used a Bemberg silk to line my pocket yoke and it worked really well and hardly added any bulk at all.
Also, when placing the yokes on this pattern (or even the hem applique), I would baste them by hand (or maybe by machine) to get them to lay even and flat when you are working. For this yoke, you can stitch from the center to the edge for each side. This technique is the best way to do the yoke. You could also use the sticky seam tape at the seams of the yoke and appliques so they don't shift while you are stitching.
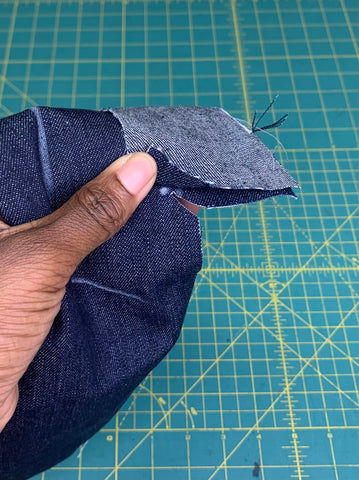
Finally, I hand sewed my eyelet holes for the laces. At first I thought I would put in grommets, but I decided to try hand stitching the eyelets. I cut the holes in the fabric with a grommet punch tool which was by far easier than trying to cut with scissors or even making a hole with an awl. I needed the holes to be big enough to easily sew a blanket stitch around the edge. I also needed to get through several layers of fabric. The punch in the grommet tool was perfect. I punched where I'd marked the lace holes (from the pattern) and I used a tiny pair of scissors to trim any bit of the hole that did not get cut completely.

The tool I used to cut the holes for the laces.
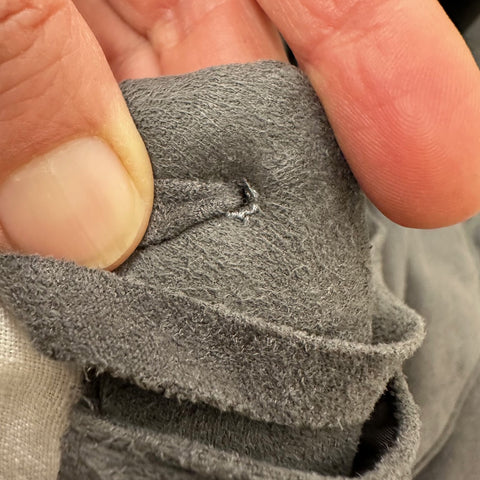
Close up of the hand finished lace holes. This fabric is forgiving and my stitching is not nearly perfect, but you can't really see it!
I really like this skirt! It came out very much as I imagined. I loved finding a great pattern for this fabric. And I am glad to have another winter skirt! Here I am wearing it with my version of the 212 Five Frontier Shirts - and you can see the details of how I made this shirt here.


by Esi Hutchinson
I've been wanting to make this 243 Rodeo Cowgirl Skirt for some time now, so when Molly and I decided to get this pattern ready for re-print I was personally thrilled, however it took me a while to pick out fabric for this project. Molly and I joyfully looked through Pinterest to find some inspiration and there were some amazing options one could do with the shape of the yokes, contrasting fabrics, embroidery, bead and sequins applique, so much to choose from. Check out the inspiration post for 243 Rodeo Cowgirl Skirt here.
I decided to go with this floral silk cotton blend fabric we still have in stock. It is a deadstock Dolce & Gabbana fabric and it is lightweight and stunning! It is not super slick like a charmeuse - it is a bit more like a crepe. If working with silk or silk-like fabrics I recommend looking at this blog post Cynthia Anderson wrote on tips for sewing tricky fabrics.
I always think it is a good idea to use French seams when applicable with delicate fabrics. I used French seams for all the seams in this skirt, except when attaching the top yoke and bottom hem flounce. Here is another blog post you can refer to for how to make French seams.
Another small change I made to the pattern (though it is suggested in the pattern) was to sew in a zipper instead of lacing the back closed. I will show you how I did that below.
This pattern is very straightforward and not difficult at all. The hardest part for me was picking my fabric and deciding how I was going to change the yoke and hem appliques, or if I was going to use contrasting fabric. I'm still wondering if I should change it!
I decided to make up my own yoke by using the shaped yoke piece H and simplifying the yoke with a large scallop. I eliminated the pockets because I felt like the fabric was too delicate for something to be tugging at it from the inside.
I followed the instructions when applying the yoke and used the same fabric for the yoke lining. The yoke is not part of the construction of the skirt, but an overlay on top of it. For my skirt, since I didn't use a contrasting fabric, so gives a slight texture to the skirt as well as a little more body at the top of the skirt.

I made a yoke for the front and back of the skirt. For the yoke going on the back skirt pieces I left the back yoke open for the zipper and just basted the yoke's raw edges to each of their back pieces.

You can barely see the yoke, but since I wanted a little more weight and structure to the skirt on top especially if I used a heavier fabric of the bottom for the hem applique.


For the zipper you will need about an 8" (20.3cm) zipper, you can purchase a longer one if you'd like. If your zipper is longer then you need make a couple large zig-zag stitches over the zipper where your would like it to end. After you've sewn in the zipper your can cut off the excess.

I used a French seam when sewing the backs together to the large dot where the Back Placket would have gone if I was using the lacings.

I used a serger to finish the raw edges of the rest of the seam. Then basted the seam together using a 1/2"/13mm seam allowance.

I placed the center of the zipper teeth on the seam line, I think its helpful to baste the zipper in place before sewing it on. Then I turned to the right side of the skirt and stitched about 1/4 (6mm) away from the seam line on each side and squared off at the bottom right before the zipper stop.

To finish I folded under on the back waist facings 1/2" (13mm) and slipstitched the facing to the zipper like so.

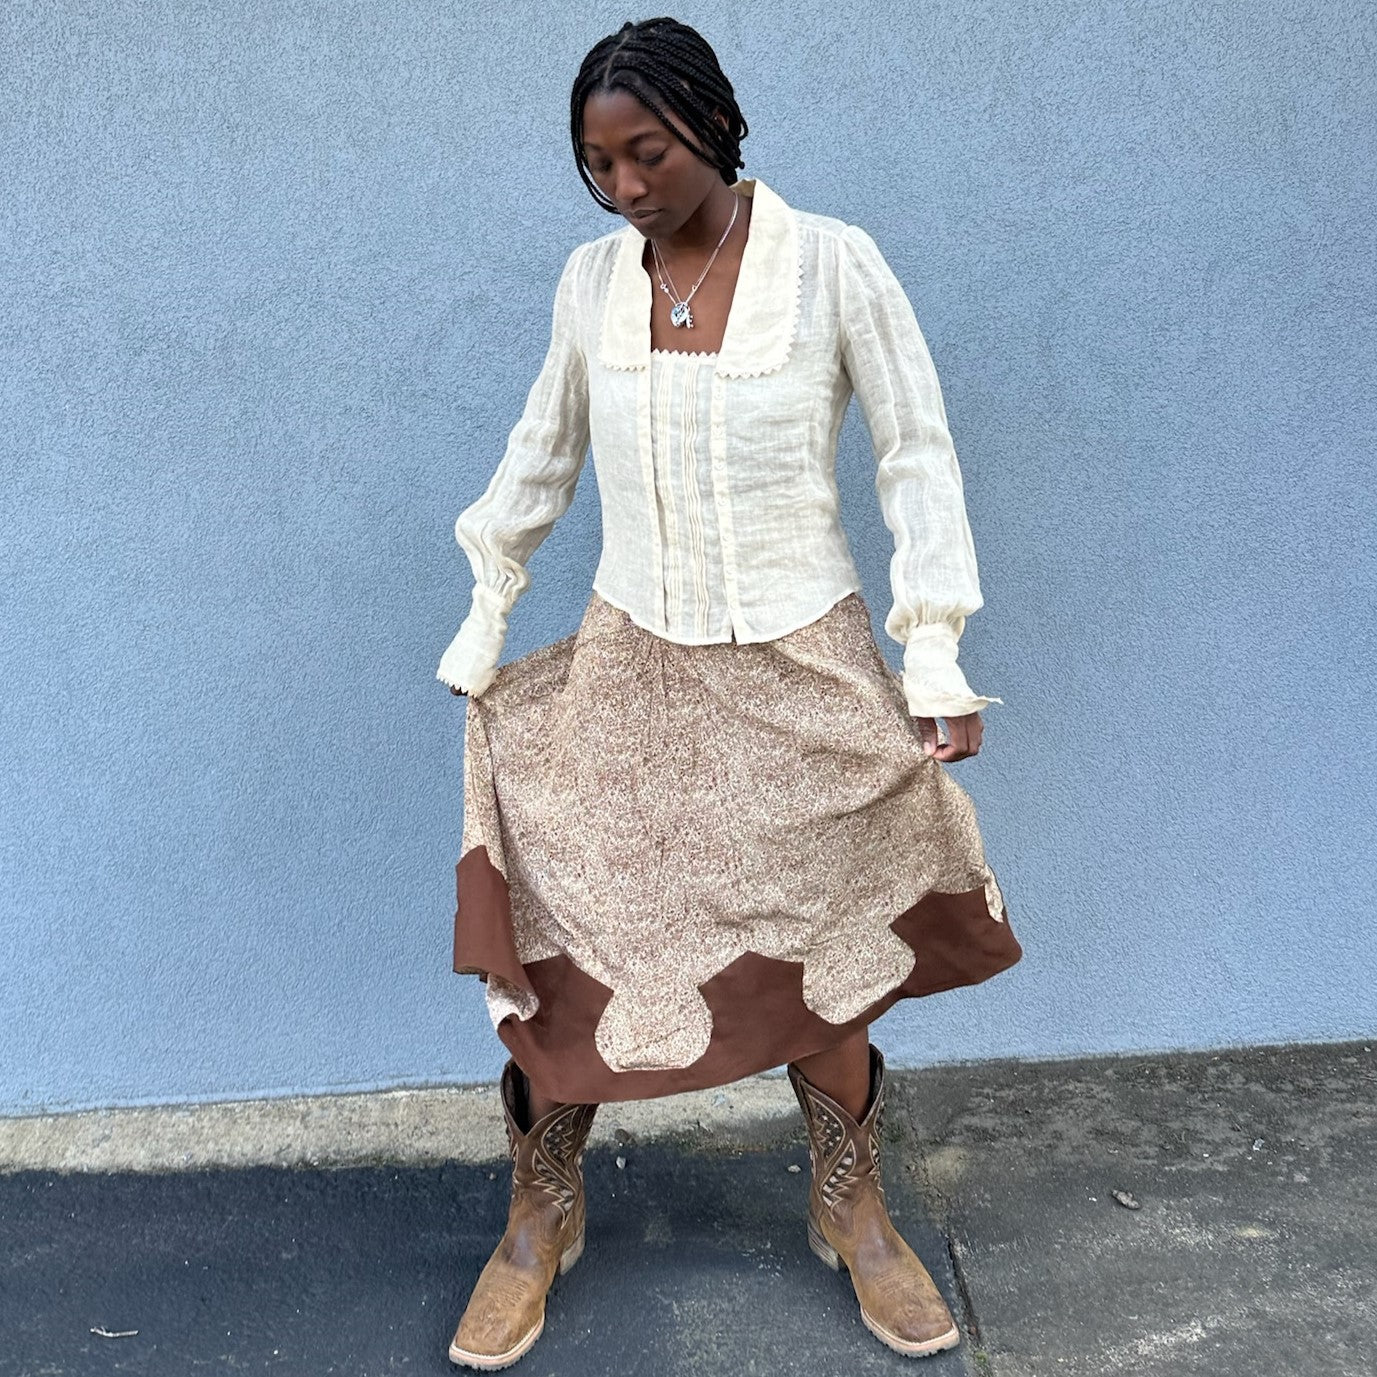
I wanted to give my skirt a western look by using the bottom hem applique that is provided in the pattern. I found a large scrap of light weight brown twill, heavier then the silk of course, but it worked fine.
I didn't use lining for this applique; I just folded under 1/2" (13mm) on all the top edges of the hem applique, clipping at the curves to allow them to turn easily. Then I topstitched it to the skirt hem as instructed in the pattern.

Here is how it turned out. I really do love the look, it fits the western style I was going for. I just don't know if it is an everyday skirt for me, which I would like it to be. Maybe over time I will decide it suits my style. I could also take off the hem applique if I wanted to, or shorten the skirt. Lots of ideas and options!
I am wearing the skirt here with our 210 Armistice Blouse, and it really does make a pretty outfit!


When we were thinking about bringing 243 Rodeo Cowgirl Skirt back into print, we looked at western and vintage western skirts on Pinterest to get some inspiration. We quickly had several styles we loved and ideas for what we wanted to make for ourselves. Esi will show you the silk floral skirt she made (and its variations), and I was inspired to make a simple grey Ultrasuede with a flounce for my version.
But, there are so many great ideas for western skirts, and this pattern really does provide a fantastic foundation for all of these. The yoke appliques are amazing and so versatile. Add fringe or lace, make with the ties or with a zipper, use various fabrics - there are so many options!
FRINGE
Make your own with leather or suede, or add some your purchase. Fringe is quintessential western wear and looks amazing on this skirt. Our pattern even teaches you how to make your own fringe. Or see how to make and apply it here.
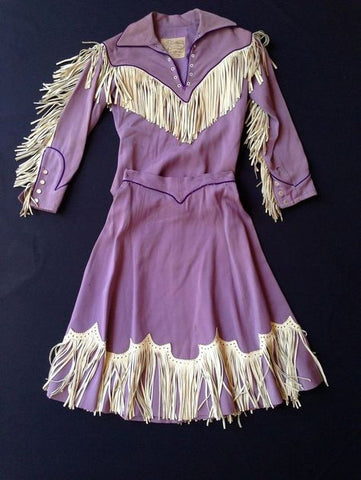
 This suede leather skirt has fringe just coming from the bottom hem, and has a small embroidery design above it. Pinterest link.
This cute outfit features the fringe hanging from the hem applique (similar to our pattern). There is also piping used in the waist yoke applique (also similar to our pattern). If you want a shirt or jacket to complete your outfit like this one, check out 212 Five Frontier Shirts and 242 Rodeo Cowgirl Jacket. Pinterest link.

Another similar skirt with fringe hanging from the hem applique. Piping is used on the applique also. Here paired with a western shirt. Pinterest link.

This leather skirt also has the fringe hanging from the hem applique. This skirt also has topstitching at the seams (and belt loops were added). Pinterest link.
FRINGE and APPLIQUE
Fringe and applique go so well together. We found lots of examples of extra fun appliqué on the yoke or hems of skirts, paired with great fringe. You can use the many appliqués in the pattern, or add more of your own to the sides of the skirts. Or, adjust the ones provided in the pattern to fit the look you want.

This one has two layers of fringe and some amazing reverse appliqué on a cotton skirt. Pinterest link.

This skirt has a simple straight hem appliqué with fringe, but also has a great appliqued rodeo scene on the skirt. Pinterest link.

This skirt has fringe on a shaped yoke and appliqué of beads. Pinterest link.
APPLIQUE and EMBROIDERY
The skirt (and shirt) below is stunning with the western themed applique and embroidery.
LAYERS OF FABRIC
Another option for this skirt is to use different fabrics for the appliqued yokes or even as part of the skirt. You could use lace for the yokes or hem appliques. You could use different colored leather or suede on a leather skirt. You could layer several lightweight skirts.

This skirt has a layer of darker leather with scroll work on top of this suede skirt. I also like the lace moved to the side of the skirt. Pinterest link.

This lightweight skirt has a top yoke with fringe and studs and layered with a lace up ribbon. A lace-up yoke is included in our pattern too! You could also use an eyelet fabric for a similar look. I like the fringe at the top of the yoke. Pinterest link.

This skirt shows how you could place lace as the yoke applique for a really interesting and romantic look for the cowgirl skirt. Add lace at the hem instead of fringe. Pinterest link.

Pair the 243 Rodeo Cowgirl Skirt with the Petticoat from 203 Edwardian Underthings for a romantically layered skirt. Add lace or eyelet to the side seams and lace or eyelet to the bottom hem. I love the layered look! Pinterest link.

Make the skirt from a tulle or shear fabric and layer it on top of a pair of shorts. Or make a two layered skirt! Perfect for showing off some pretty farbric! Pinterest link.
We hope this post provides some great inspiration for making your own western skirt. The possibilities are endless (and so fun!). And western wear is very much in right now. My family is always wanting to pair clothes with cowboy boots and Stetson hats, so we enjoy these western looks!
While we plan for 2024, we always reflect on the past year and honor our accomplishments. We did a lot this past year, but mostly we enjoyed connecting with you over sewing and our patterns! We absolutely love seeing what you make with our patterns and hearing about your projects. Thank you for being loyal Folkwear customers! Check out the Customer Gallery here.
NEW PATTERNS
510 Passionflower Lingerie Top
262 Spectator Hats - Turban and Cloche
PATTERNS BROUGHT BACK INTO PRINT
224 Beautiful Dreamer (size up from original)
241 Fifties Fit and Flair (sized up from original)
PATTERNS RELEASED AS PDFS
204 Missouri River Boatman’s Shirt
237 Tango Dress (sized up)
253 Vintage Bathing Costume (sized up - also sized up the paper pattern)
241 Fifties Fit and Flair (sized up)
224 Beautiful Dreamer (sized up)
230 Model T Duster (sized up)
We have had a great year at Folkwear. While the sewing market seems to slow down a little bit each year (since Covid), we are grateful that we have a wonderful customer base and fabulous stockists. This year, we also picked up Joann’s as an online retailer of our patterns. And we loved collaborating with Sarah Pedlow of ThreadWritten for embroidery workshops with our patterns! Next workshop is January 20 on Romanian Blouse embroidery. We are looking forward to 2024! We plan to release a few patterns over the year, but our bigger goal for the past few years has been to continue to digitize all Folkwear patterns. We want to have all our patterns available as PDF patterns, and keep in print as many as we can (bringing back out-of-print patterns whenever we can). We plan to continue to work on these goals throughout 2024. We are also planning to release more tutorials for sewing tricky patterns and to cover techniques used in Folkwear patterns. If you have pattern suggestions or tutorial suggestions, leave them in the comments below!
This recipe comes from our 310 Cynthia's Cookie Apron pattern. Cynthia worked at Folkwear for many years and has been a life-long Folkwear fan. She developed the pattern for the apron from a garment that was a staple of her grandmother's who made and wore it all her life - for cooking and doing house and garden chores. An apron to make cookies in should have a delicious cookie to go with it!
This cookie recipe is a variation on Cynthia’s family recipe. Her grandmother loved cordials and liqueurs, so the Grand Marnier was her secret. This cookie is sturdy enough to withstand icing, as well as additional ingredients such as nuts and dried fruit. It is not overly sweet, and so makes a great foundation recipe for changing up the flavors or being made plain.
2 cups all-purpose flour
1/4 teaspoon salt
zest of two oranges
1 cup (2 sticks) unsalted butter (room temperature)
3/4 cup powdered sugar
1/2 cup or more of dried cherries or substitute cranberries
1 teaspoon vanilla extract
1 teaspoon fresh orange juice or 1/2 teaspoon Grand Marnier
For a variation, add 1/2 cup of pecans
Preheat oven to 325 degrees.
In a medium bowl, whisk flour, salt, and orange zest together. In a separate bowl, cream butter, and sugar until smooth. Add vanilla extract, orange juice, and dried cherries, (and pecans if using) combine.
Slowly add the flour mixture to the creamed butter mixture until fully incorporated. Form dough into ball, wrap in wax paper and refrigerate overnight or at least few hours.
On a floured surface roll dough out to 1/4-inch thickness. Cut using cookie cutter and place on lined cookie sheet. Bake 12-15 minutes or until barely golden on the bottom. Transfer cookies to cooling rack to cool completely.
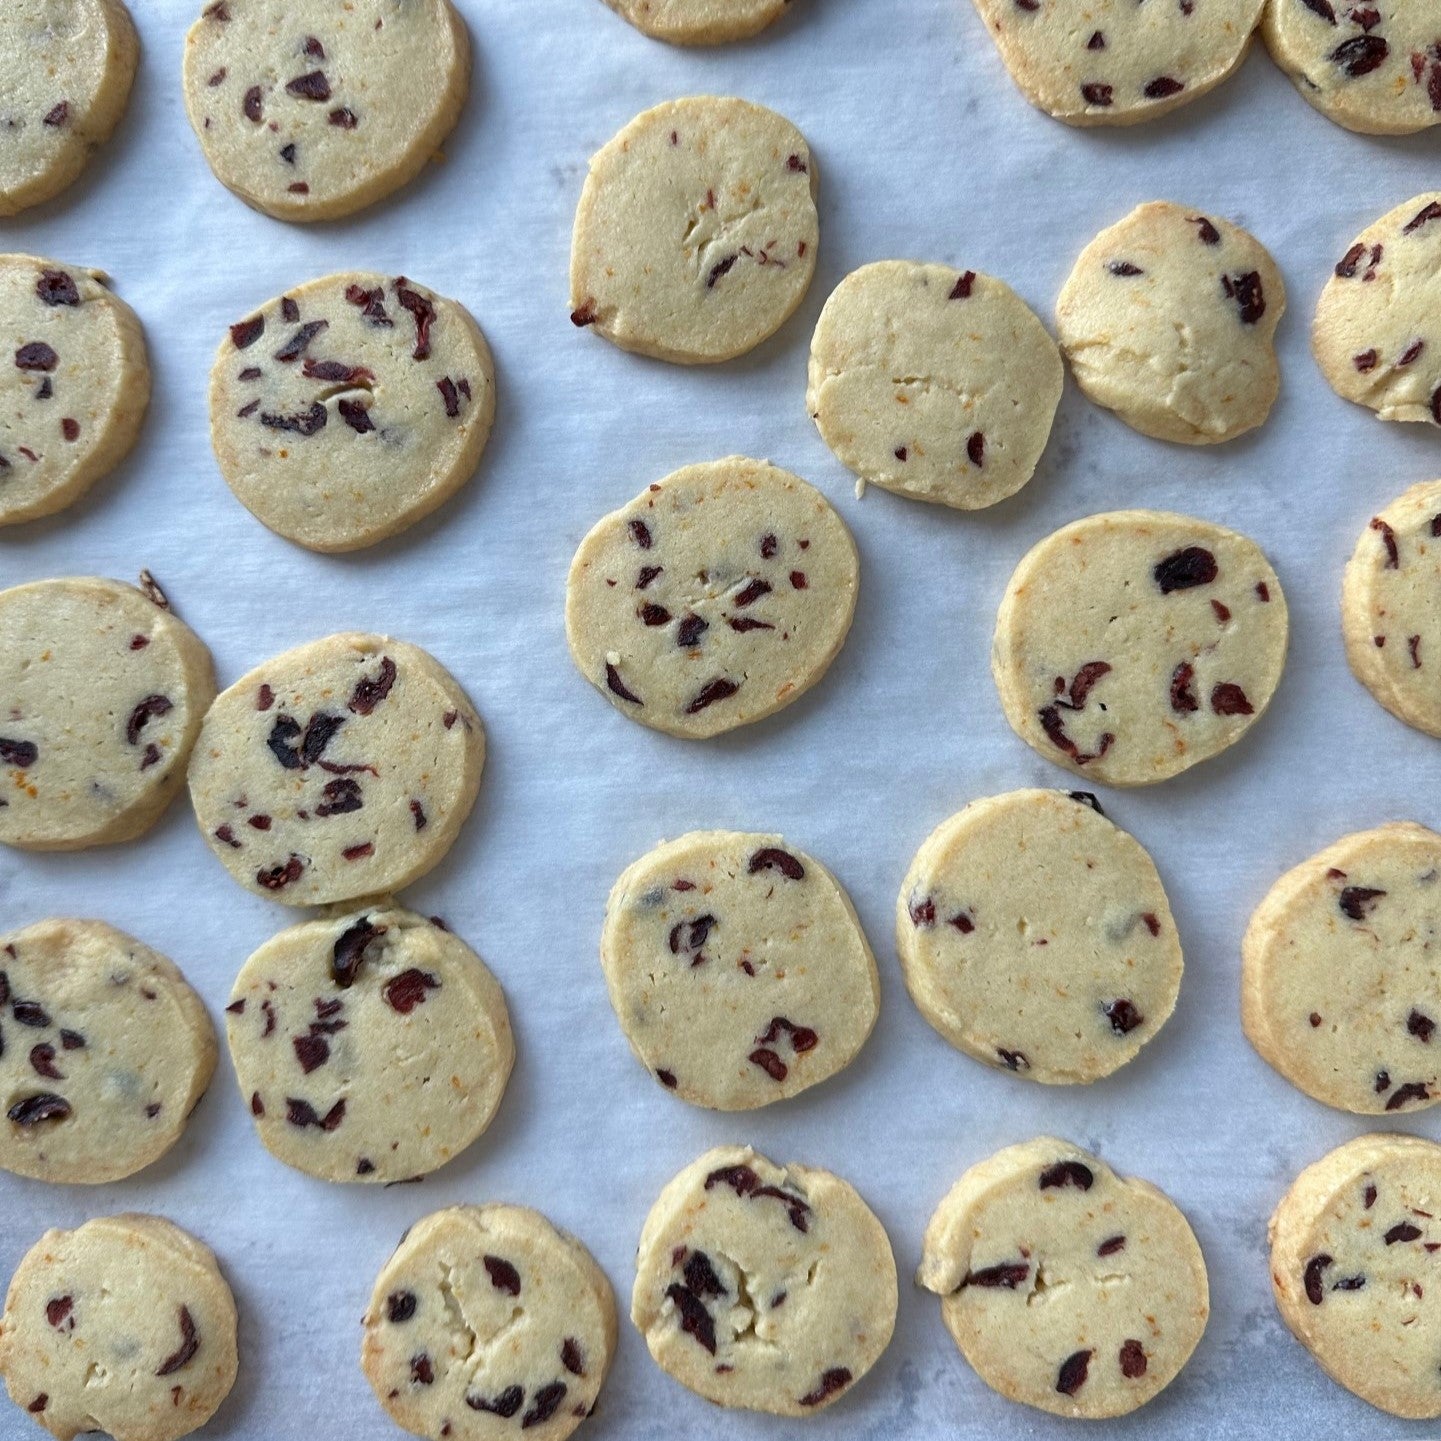
NOTE: You can also shape the dough into rolled logs about 1.5" to 2" (3.75-5cm) thick, chill, and slice into rounds to bake the same way. I used dried cranberries here, rather than dried cherries. I also find that I had to bake the cookies for 16-18 minutes to get them done with golden brown edges.
Happy Holidays from Folkwear!


These cookies make for great holiday gifting!


