-
Sewing Patterns
-
Fabric
- Sewing Supplies
- About
- Blog
- Gallery
-

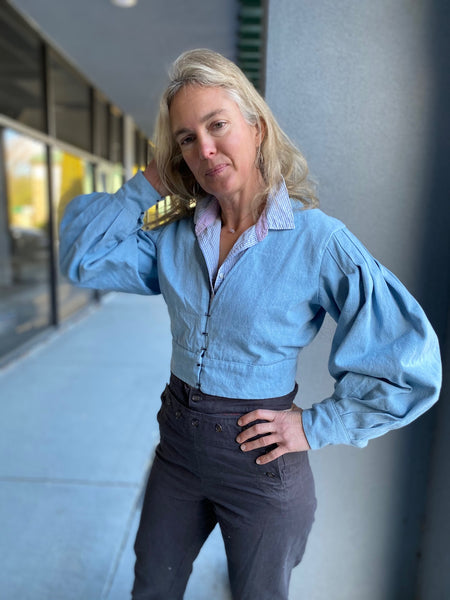
by Cynthia Anderson
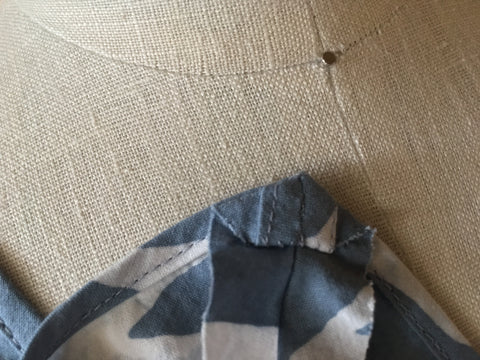
Learning how to make bias tape for binding is a liberating skill and one every sewist should have in their arsenal. Understanding all the possibilities available to you when faced with any task, gives you not only more options, but added confidence. In this blog you will learn how easy it is to make your own bias tape and how to use it to create a neat and clean finish to any raw fabric edge. You will then learn how to apply this same technique to make a front button-loop closure.
Bias tape can be used to cleanly finish the raw edge of fabric. The raw edge of the fabric is sandwiched between a strip of folded bias tape and stitched together to keep the fabric from unraveling and to create a finished edge. The bias tape is cut on the bias to allow it to slightly stretch and give, making it easy to smoothly go around curved edges. This is extremely important when binding a neckline or armhole. This finishing technique is used in any number of applications, like luggage and handbag construction... but most commonly used in making quilts and clothing.
There are a number of Folkwear patterns that incorporate bias tape binding! For this purpose of this blog, the Folkwear 108 Turkish Dancer pattern is featured. This pattern includes three easy to make and wear basic garments, an Entari (robe), vest, and cropped jacket. All three garments incorporate finishing edges using bias tape. And the Entari and vest both have a front closure made of button loops, using the same bias tape technique. Learning to make bias tape will open up a whole new world of sewing possibilities, and the 108 Turkish Dancer Entari is the perfect piece to entice and inspire you!
You can always purchase bias tape binding. However making your own is not hard, and it saves money, and helps give your scraps new purpose. And your creativity has no bounds!
Making Bias Tape
There are endless schools-of-thought, when it comes to making bias tape. However, the technique used in this video is ingenious and well worth learning, especially if you require copious amounts of binding and have a limited amount of yardage. This technique is also perfect for using up the scraps in your cabbage bin. The discouraging part of making your own seam binding often comes from the toil it takes to create one continuous strip that is long enough to meet the requirements of your project. While making bias binding is not hard, it can be bothersome to not have enough. This video is is a game changer!
Using a Bias Tape Maker
Once a long continuous strip of bias tape is cut to the width you plan to work with, the easiest and quickest way to make bias tape is to use a Bias Tape Maker. This handy tool is easily found where sewing notions are sold and are available in five different sizes; 1/4"(6mm), 1/2"(12mm), 3/4"(18mm), 1"(25mm), and 2"(50mm). We have three commonly used sizes in our shop.
It is important to predetermine the size (width) of binding you intend on using, before you cut any strips. Typically, the pattern will provide you with a recommended width and length. In order for your bias maker to make neat and tidy folded edges, you need to use a strip of fabric that is appropriate size for the size of maker you are using. The width of the small end of the maker is the width your bias tape will be. This small end is half the width of the large end. Therefore, the width of your bias fabric strip should be double the width of the final results. For example, I am making a 1/2-inch (12mm) binding and my strip is 1-inch (25mm) wide. There is a little bit of wiggle room in the width of the strip you use in the bias tape maker tool. It is preferable to have just a hair too much than too less. The idea is for the folded edges to be as even as possible and for the folds edges to barely touch in the middle. If your fabric strips are too wide or too narrow it will not work so well.
I am using a bias strip that is 1-inch wide. Insert the bias strip into the widest end of the the Bias Tape Maker, using a straight pin in the slot on the top of the tool, ease and pull the fabric strip through the small end. See the photos below to see how to get started feeding the bias strip through a Bias Tape Maker.


Keep the strip evenly fed through the wide end. This will help in keeping the folded edges even as the strip comes out the other end. Pull slowly, using the folding handle on the the Bias Tape Maker, pressing with a stream iron, as the folded tape comes out the end. Use the steam of the iron as you go to set the folds of the strip. The Bias Tape Maker folding handle ensures your fingers are as far from the steam of the iron as possible.

The following photos illustrate how to use the Bias Tape Maker in tandem with a steam iron. Of course, you can make your own bias tape, by meticulously measuring, folding the sides toward the middle, and trying to avoid singeing your fingers, but it is not recommended.


Next fold the folded strip in half length-wise and press again to set the fold. This creates the binding, and makes it a "double fold bias tape". Take your time to ensure a nice fold. Ideally, you want to fold and press so that the top edge is ever so slightly shorter than the bottom edge. The idea is that the underneath edge is wider, so that when sewing the binding from the top, the bottom edge gets caught in the stitching. See the photo below.


If required, trim the excess seam allowance according to pattern instructions. In this case, I trimmed leaving 1/8-inch seam allowance before attaching the binding.
Sandwich the raw edge of your fabric in the fold of the bias tape and secure in place using as many pins as needed to hold everything neatly together. Be sure to leave a bias tape tail of a few inches at the beginning and end of the edges you are working on (see third photo below). The tails will get trimmed and turned under in the end.


Using matching thread set the stitch length and tension so it is not too short or tight and not too long either. On my machine the this setting is around 3. Using a regular straight stitch presser foot on your sewing machine, place your work securely under the foot so that the fabric has good contact with the feed dogs. Use the edge of the foot as your stitching guide. In the photo below, you can see I am using the inner left edge of the presser foot as a guide. Position the needle so it aligns as close as possible to the inner edge of the bias tape, but not too close as to not catch the bias tape in the stitching. It might take a little fiddling to figure out what alignment configuration works best for you.

Once you are ready to stitch, take your time and stitch slowly to keep the stitches as aligned and evenly spaced with the edge of the bias tape as humanly possible. The idea, and sometimes the trick, is to catch the underneath edge of the bias tape in your stitching (this is why the tape is folded unevenly, as mentioned above). Often this is easier said than done. In part because you can not see the underneath of the fabric and the margin of error is hard to control. Do the best you can, knowing that it is highly likely that the underneath edge of the bias tape may have not gotten ALL caught in the stitching. It is ok. Simply enjoy a little hand stitching to secure the spots that were missed. You want to make the top of your bias tape stitching as neat as possible. This is the side that shows and therefore the only side that really matters. Remember, perfection can take the pleasure out of sewing.

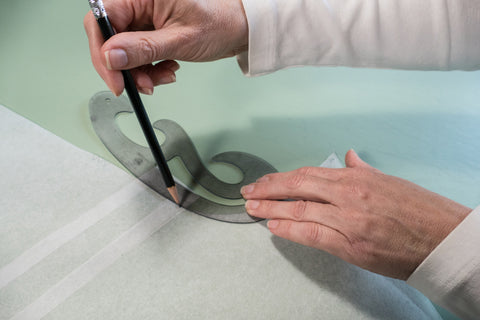
To finish the raw ends of the bias tape edge, trim away any excess, leaving enough turn under the edges of the bias tape according to the pattern instructions (usually 1/4-inch). Using your fingers or pins to hold the folded under edge in place, use a simple hand whip stitch to secure neatly into place. There are times when only hand stitching gives you the control you need. Below is a photo showing the pointed edge of the Entari sleeve hand stitched to finish. Notice how the binding is turned under and meets at a neat finish.
That's it bias tape made and edges beautifully finished.

Neck line edge finished.

Sleeve edge finished.
Making the Front Button-Loop Closure
This same easy bias tape technique is used to make the front button-loop closure for the Entari (robe) and vest featured in this pattern. These techniques are not exclusive to this pattern, but can be used on any garment that needs an interesting closure or a simple finishing detail. Not only is this perfect as a front closure, but works beautifully for a front or back neckline detail, a sleeve or cuff closure, a vent detail, or anything else you can dream up.

Bias Button-Loops Tips and Techniques
When making binding and loops the only rule is to avoid fabrics that want to unravel. Depending on your experience level and bravery, you may want to avoid fabrics that are too slippery or heavy to start with. Lighter-weight stable fabrics are much preferred when first attempting to make button-loops out of bias binding.
When making your own binding for button loops, consider how large or small button-loops need to be. This will in part depend on the size of the buttons, how many buttons, and spacing of the buttons and loops. Logically... small buttons will function and look better with small loops. Large buttons will need larger loops and more space.
Aesthetics and personal preference plays a part as well. The pairing of buttons and button-loops is an opportunity to get creative. Consider how much you want this detailing to stand out or fall back. Make the most of of the details in anyway that you choose.
As before, the fabric will need to be cut on the bias, in a fabric with a weight that will allow the fabric to nicely fold in on itself... just like we did with the edge binding. The bias cut will also allow your button-loops to bend and loop smoothly. By keeping your binding and button-loop fabric choice relatively light-weight will help avoid bulk and ensure ease of making, especially if you are working relatively small, as I am with this project.
Make the binding tape as you have already learned to. Fold the tape evenly, with the edges matching this time, and press to create clean edges. Pin to hold the fold securely in place with as many pins as deemed necessary. See the photos below illustrating these instructions.


Stitch as close to the edge as possible, being sure the top and bottom edges are caught in the stitching. See the photos below.


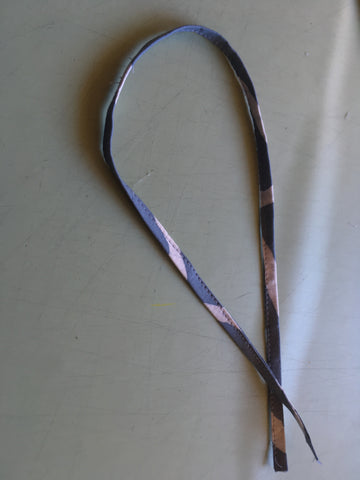
Now, that the binding tape is sew together, cut out the number of loops you need in the length needed, or according to the pattern instructions. You need to determine what buttons to use and their spacing out ahead of time.

Make a loop out of each cut strip, keeping the stitched edge turned to the inside of the loop. This detail simply makes for a cleaner looking loop. Be sure that all the loops have the stitched edge situated in the inside of the loop.


With each stitched inner edge of the loop touching, machine stitch each loop together approximately 1/2-inch (12mm) in from the raw edges. Sewing the loops together now will eliminate fiddling with trying to place them later.
Give the loops a bit of a study and take notice of what is the the right and wrong side of each loop. The loops in the photos pictured so far, are all right-side up. The scoop-shape of the loop will cradle the buttons and create a secure closure.

Turn each each button-loop wrong side up, as pictured below, and this time secure the loops again a little further up toward the loop. Instead of using the machine this time, simple use two or three whip stiches to secure. The idea is to close each loop up just a bit more, without the stitching showing on the front side.

Set the loop making aside for now. It is time to make the strips that the button-loops and buttons will be sewn to, creating the front closure to the 108 Turkish Dancer Entari pattern.
The button-loops and buttons need a platform or base that is both stable and strong. The closure point of any garment is considered a stress point, because of all the wear and tear this area inevitably experiences. So, this time the two strips will be cut on the straight grain and not the bias. Remember, bias stretches and gives. Therefore, not the stability and strength needed this time.
Cut two strips of fabric on the straight grain according to the pattern instructions. Again use the Bias Tape Maker to make strips with neat folded edges. Turn under the top and bottom edge 1/4" (6mm) and press.


With wrong sides together, pin and then stitch the button-loop strip to the right front, sewing around all edges to secure. Be sure the button-loops point toward the center front.


Even if you use a heavier weight fabric for the garment, the binding and loops could be made of a lighter weight fabric. It is perfectly fine to mix fabrics - just be sure to launder before cutting!
Now, sew the buttons to the left front so they correspond to the loop placement. You may find that a button with a shank works the best when using small loops.


When we made the 124 Bolivian Milkmaid's Jacket in a PDF pattern last year, I fell love with it. The lines of this waist-length jacket are really great - and the statement sleeves are very fun! Add in embroidery options and this pattern is fabulously unique.
This traditional jacket, worn by working women in Bolivia, has its roots in colonization by Spanish from the 17th century. Hence the fitted, short-waisted look with large sleeves and tight cuffs. And, often this jacket was made of velvet and embroidered with chain stitching and beading. You can see the back of our original jacket below.

There are three versions of this jacket in the pattern, with slight differences at the waist. View A has a wide band at the waist, but View B continues below the waist (no waistband) and the last version expands the look at the waist to include a flared peplum made of small triangle godets. And, of course, you can make many variations with the pleats, embroidery, adding length, adding collars, etc.

I had a vision of making an unembroidered jacket with a waistband (View A) with a modern fabric. A jacket that would show the lines off of this pattern - that would showcase the sleeves, cuffs, and fit of the jacket.
I chose a light-colored denim from Fancy Tiger Crafts (Robert Kaufman 10oz denim). For the sleeves, I decided to make regular pleats (rather than box pleats) and sew down the pleats (an option given in the pattern). I tried the same idea for the pleats at the cuffs too, but I did not like the way it looked because the sleeve was so fitted quite a way up my arm. So I took out the stitching on the pleats and left them open. I liked that look much more.

I also left off the pockets because I did not think I would use them and I did not want to disrupt the simple-ness of the jacket. And, of course, they are optional. This was also an unlined jacket, so I wanted an simple inside as well. I let the hook and eye closure be very visible. I may change this later, but for now, I like it. A little hint about hook and eye closures is that if you alternate which side you put the hook and eyes, it is less likely to fall open or un-hook.


I really love this unique jacket - how it looks and what a great sewing project it was. I knew this jacket would look great with our 229 Sailor Pants. It would really look great with any high-waisted pants or skirts.


Now I want to make another one and add lots of embroidery! Stay tuned for some tutorials on the embroidery ideas from this pattern.
And, tell me! There are so many options from fabric choice to embroidery to design . . . what would you make with this pattern??

According to Elizabeth Ewing in her 1978 book, Dress and Undress: a history of women's underwear, the origins of the corset were rooted in Italy. But it was Catherine De Medici that first introduced it as an undergarment in France, in the 1500’s. Due to the intermarriages among Western European royal families the corset became an identifier of royal status. The corset’s appeal traveled throughout royal courts all over Europe, where the attending ladies of these courts were also quick to embrace this body altering apparatus. The idea that ladies could alter their figures to mimic that of royalty and therefore follow the latest in fashion trends was just too irresistible! This new trend would find its way to the masses and the corset would become the under-garment du jour. Unwittingly, this trajectory would literally alter the shape of women’s fashion for centuries to come. While the corset may not be worn on a daily basis as it once was, this undergarment continues to tantalize with its mystique and myths, some seven hundred years later.
The corset eventually became an essential piece of every European woman’s wardrobe, no matter the class or socio-economical divide and would endure throughout most of modern history. It would seem that every era in history would produce it’s own varying versions of the corset. Even regional folk dress was influenced by the corset - the Polish vest (found in our 126 Vests of Greece and Poland) is called a "gorset" (i.e. corset) in Poland.
When the Folkwear 267 M’ Lady’s Corset was designed, we sought to create the impression of a Renaissance garment, rather than a pure authentic re-creation.

M’Lady’s Corset is a representative of the late 16th- and early 17th-century under-garments. The Square-neck version would have been worn by upper-class women in the royal courts and working class women would have worn the Scoop-neck version. If you consider that one laces up the back and the other closes in the front, you can deduct who was being waited on by a ladies maid and who was dressing themselves.

Both versions feature a dropped waistline at the center front to give the V-shape that was characteristic of the Elizabethan era, and wide set shoulder straps to further emphasize the small-waisted impression. The Square-neck corset laces in the back with purchased eyelets or handmade eyelets, and adjustable straps that lace through eyelets in the front. The Scoop-neck corset fastens in the front with purchased hook-and-eye tape, and features a peplum that reflects the waistline tabs of the 16th-century doublets and corsets. You will find all you need to make your own eyelets and so much more in the instructions included in the pattern.
Our 267 M’ Ladies Corset while not purely authentic to the Elizabethan era, does take advantage of the form-fitting technique that princess-type seam construction easily allows. Princess seams were incorporated into the design of our corset because it is a successful and versatile method of achieving good fit. This type of seam construction is easy to adjust for individual fit and does not require major re-drafting of the pattern pieces.


While well-to-do ladies’ corsets would have provided figure shaping support through the use of stiffening materials such as boning and sturdy underling materials. Both pattern versions included in the M' Lady's Corset, gives you the option to add supportive materials or not. Depending on how serious you are about the construction of your corset… is up to you.
For the purpose of this blog (and lack of having a proper ladies maid), we are featuring the front entry, scooped-neck version. Which easily transforms into a romantic and comfortable top for warmer temperatures to come! This version of 267 M' Lady's Corset, may not have been what peasant women would have worn in their daily lives, but it is still charming none-the-less. And really makes a great modern-day top or sexy undergarment.


Sans boning
I made this particular corset for causal warm-weather wearing, so the boning and any stiffening materials were left out. Instead the princess seaming is relied upon to provide a corseted effect. Any fabric with a bit of body and that can easily be lined without creating bulk will work. Cotton, linen, silk, and summer weight wools would all work nicely for the main outer fabric. Handkerchief linen, cotton lawn, cotton voile, cotton batiste, cotton muslin, rayon, and silk habotai would all make good linings. I made this corset using a light-weight quilting cotton, combined with cotton seersucker for the outer fabric. And I used a finer-weight cotton shirting for the lining. The fabrics used for this blog literally came from my stash and cabbage scraps. Depending on the look you want, this pattern is a perfect candidate for mixing limited amounts of yardage.
Of course, you could make this pattern out of a single layer of fabric and wear more like a bodice blouse. Just be aware that finishing the seams and edges will need to be considered.
In addition to the easy to make construction of his pattern, it provides plenty of good coverage in all the right places for a flattering and comfortable fit. All of which makes it perfect for everyday-wear. Try this corset alone or paired with a light weight linen or cotton top underneath, layer it over a dress length chemise for a modern look with a nod to history. Pair it with a skirt, high-waisted shorts, or pants for a charming and fresh summertime feel. Even paired with your favorite jeans it makes for a great sassy look!
A bit about hook & eye tape
Hook & eye tape makes for a neat and clean closure when two fabric pieces meet, but do not overlap. When purchasing hook & eye tape, know that it comes in different types of fabric. Purchase your tape that most closely matches the fabric you are using if you can. Most tape are made of synthetic or cotton. Cotton is always nice because it can be dyed to match your fabric. Typically, hook & eye tape comes in white, black, and natural linen (for historical use).
Not all hook & eye tapes are created equal when it comes to the spacing of the hooks & eyes. The spacing generally ranges from 1 to 1-1/2 inch spacing. For better closure results, 3/4 inch to 1-1/4 inch spacing works better. You can always add extra hooks & eyes if necessary.
Note that some hook & eye tapes have an underlap or under-curtain, that over lap. While others tapes meet together. Depending on the look you prefer will depend on which tape to use. If hook & eye tape has an underlap, you can carefully trim it away if you like.
Of course you could always create a closure with loops and tiny buttons running down the front of the corset for extra added interest. If you wanted to add buttons with buttonholes, you can adjust the pattern to allow for the center front to overlap. Notice in the photos below, that the buttons are purely decorative. If you look closely you can see the hook & eye closure.


Tip: Hooks go on the wearer's right; eyes on the left.
Supply sources for all your corset making needs, including boning:
www.farthingalescorsetmakingsupplies.com
https://www.braandcorsetsupplies.com/
Find more sources included in the 267 M' Lady Corset pattern!
Whether you make a more historical version or transform this corset pattern into an everyday garment, the 267 M’ Lady’s Corset pattern is a versatile option for anyone who would like to give corset making a try. Be sure to get your paper or PDF pattern on sale during the month of February! The perfect Valentine's Day gift for yourself or for someone special!
The next time you are watching your favorite period piece film, or the modern fashion trends, pay attention to the corsets and remember the Folkwear’s 267 M’ Lady’s Corset pattern. As always, we look forward to seeing what you have been inspired to make!
I would like to thank Sarahbeth Larrimore for her allowing me to use her as my muse and model.


If necessity is the mother of all inventions… then figuring out how to stay warm is as good a catalyst as any. Our ancient ancestors created a simple yet highly effective technology that kept people warm, and enabled them to migrate to otherwise uninhabitable corners of the globe. Our ancestors figured out that sandwiching lofty natural fibers, such as wool or cotton, between two layers of cloth, then stitching the layers together, would create a highly insulating fabric known as quilting.
Generally, we associate quilting with the cozy bed coverings that our grandmothers made, but not necessarily with clothing. There is evidence that quilted fabric was actually worn in China and Europe as far back as we have been able to trace. Quilted petticoats and skirts, as it turns out, have played an important part in fashion history, providing much needed warmth along the way.
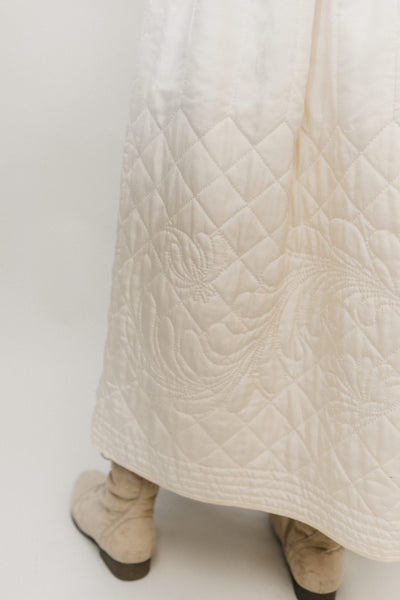
Folkwear's cozy and beautiful 206 Quilted Prairie Skirt is the link to the old ways of designing warm clothes while providing ways to make modern versions of this classic. We hope you will find inspiration in this blog to make a version that is all your own. Be sure to check out all the additional historical information and tips provided with the pattern.

You do not have to be a master quilter to enjoy making this skirt. The quilting can be done by hand or using a sewing machine, or a combination of both. Or use a pre-quilted fabric like the skirt featured and modeled above. Folkwear’s very own Molly made her skirt out of a jacquard fabric (pre-quilted look) with this fabric!
The design you choose can come from your own creativity, inspired by traditional quilting, or somewhere in-between. Use a fine fabric like silk or velvet, for a fancy evening out. Or make an everyday quilted skirt out of wool, cotton, flannel, denim, fleece, or linen for any activity made better when encased in your very own wearable quilt. The possibilities are only limited by your imagination.
Let's learn more about the history that inspired the 206 Quilted Skirt pattern and why this garment was so popular for so long! And, we hope you will make your own version and enjoy a truly personal statement piece that will add warmth to any wardrobe.

The history of quilted petticoats or skirts can be traced to at least 1644 in Europe. It is possible these garments were worn a early as 1530. This period saw the advent of an extremely important innovation in clothing. For the first time since the Minoan culture of Crete some three thousand years previous, long gowns with voluminous bell skirts, shaped by bulky petticoats became popular in Europe. This popular new skirt design was split from the waist to hem, displaying the lavish pleated petticoat underneath. This split created a long upside-down “V”, a mirror image of the “V” shaped neckline.
This Renaissance split-skirt fashion persisted until about 1630, when women were still exhibiting their magnificent undergowns by holding up their long skirts while walking. After 1670, skirts became even more full and reached to the ground, splitting again in the front to reveal richly worked petticoats underneath, which, according to the famous English diarist, Samuel Pepys, was often the most ornate and expensive item of the dress. Elaborate methods were used to hold back the overskirt to make the most of the precious petticoat; a particularly ornate procedure was to bunch up the overskirt like a bustle and fasten it in place with a ribbon attached to the shoulder of the bodice.

These petticoats were made of three layers; a bottom and top layer, with batting made of wool, cotton, or linen sandwiched in the middle, the layers were then stitched together resulting in a quilted effect. Petticoats were worn not only for layering warmth but to create a desired shape and structure to the skirts worn over them. Batting or wadding as it was also called, often did not extend up the entire length of the petticoat, leaving the waistband free of extra bulk. All kinds of extra padding were used during this era to enhance the natural body form, depending on the desired effect and style of the day. Quilted petticoats served through the addition of extra padding and a top layer that smoothed out and concealed any combination and variety of hoops, panniers, bum rolls, etc., hidden underneath.

Caraco jacket in printed cotton, 1770-1790, skirt in quilted silk satin, 1750-1790
During this time, fashion changed in incremental steps, which in this case, helped to ensure the petticoat to remain as popular as ever throughout Europe. However, it would be in eighteenth century England, that the quilted petticoat hit it’s peak in popularity. It seemed just about every lady was wearing one! This was in part due to the cold damp weather of the British isles and the availability of a broadening range of fabrics made possible by the expanding trade industry. These fabrics included cotton, linen, silk, and wool. Hence, the quilted petticoat would become synonymous with the Georgian Era. This popularity extended to France and America as well.
During the Georgian Era, a change occurred in fashion that brought petticoats out of hiding and to the visible foreground. Petticoats were now worn as the outer most layer, often with many separate crinoline layers made of cotton or linen underneath. This quilted petticoat design was typically tied at either side of the waistband, with gaps in the side seams that allowed for easy access to a pair of pockets worn underneath. Learn about the History of the Pocket here. This visible quilted petticoat was so popular that it translated to all segments of society, from nobility to laborers.
Well-to-do ladies wore their gowns open at the front, not unlike a stage curtain that revealed and showed off the highly prized, elaborately stitched, decorative statement piece underneath. This staging or framing showed off the petticoat typically in a contrasting or matching colored fabric made or silk or satin. Fabrics made of vivid and highly saturated colors in red, pink, blue, green, and yellow were highly fashionable. Shades of white, silver, and gold fabrics were very popular as well.


The hand stitching used could vary greatly to create patterns and designs that ranged from simple to elaborate. Geometric patterns such as stripes, and diamonds were common. More realistic motifs such as florals, animals, swirly flourishes, even scenes and landscapes were popular, as well. Usually the most elaborate and detailed stitching work was centered at the front of the petticoat where it was the most visible. The amount of details on the remainder of the skirt would vary depending on how much of the petticoat was visible due to the drape of the curtaining fabric used to set it off. The more elaborate stitches and quilting designs were very much an indication of wealth and status. Fine and elaborate petticoats could take months if not years to to make, therefore an extravagance only the wealthy could afford. Even among the rich a used petticoat was a welcomed and prized gift.
The outer most display of the petticoat may have been the focal point of the outfit and an indicator of the status of the wearer, however the underneath or backing was not an overlooked afterthought. Just because the underneath side of the petticoat or skirt was not seen, did not mean it was denied creative consideration.
Granted the underneath or backing material of petticoats was not as elaborate as the featured side, even for the wealthy. This was in part due to a modest nod towards economics and practicality for those with more than enough means. The underneath side was not seen, so cheaper fabrics like sturdy linen or calico cotton were used. The underneath sides of historical petticoats often demonstrate how more common fabrics were combined to express whimsy, sophisticated color and texture combinations, while providing a possible insight into the individuality of the maker or wearer -- no matter their economic status.
Because women had little opportunity to express themselves creatively as individuals and had very little true privacy, their clothing became an outlet of individual expression and control. Throughout history, we often find hidden elements left behind in women’s garments that reveal a secret peek into the personalities of the individual who wore them.
The wealthy women who wore these beautiful garments and the poorer women who made them, lived lives on polar ends of the social and economic spectrum. While some wealthy women crafted beautiful hand work and sometimes made their own petticoats, this was generally work relegated to the poor. It was not only the fine fabrics their gowns were made of, or the degree of detail and artistry in which they were stitched, that separated the classes. Petticoats had a way of revealing the story of the haves and have nots.
 A romanticized depiction of field work.
Makers of these fine garments were paid a pittance for their talents and labor. It was not a lucrative way to earn a living by any means. It took copious amounts of time to create such works of art and the rewards were barely enough to survive on. The poor women who created such stunning beauty for others to show off, were not only denied a fair wage for their efforts, but denied the ability to indulge themselves in their own talents.
Poor women made many fewer and simpler versions of petticoats for themselves and their families. These petticoats were made of everyday durable fabrics, like calico cotton, wool, and rough hewn linen. Their petticoats were much more practical to fit their lifestyles. Figure shaping under paddings encumbered and restricted the movement of women who worked and labored. The extra expense of such unnecessary items were not a priority to the poor. Therefore, petticoats were worn more simply and plainly, due to the need for practicality and warmth. Aprons generally tied or looped at the waist, replaced the fancier framing fabric counterparts of wealthy women's outfits.


Poor women may have not been able to afford the fabrics they would have chosen, but that did not keep them from paying attention to the aesthetic of the days fashions. Just like their wealthy counterparts, poor women were interested in fashion and took pride in displaying their knowledge of current fashions the best they could. They used the best fabrics they could acquire for the outer layer of their petticoats and they economized for the underneath layer, often creating charming and sophisticated displays of artistic talent. Often these petticoats were made of a miss-match of what ever fabric they had on hand or could be traded with other women. This did not mean these women lacked in displaying a sophisticated design sense. Besides needing fabric that could withstand the rigors of physical labor, they simply did not have the luxury of extra hours to spend on their own clothes. Their stitching was much simpler and less of it, because of the time required to do more. Simply stitched channels were often the extent of any quilted details. Despite having to make do with what they had or could afford, these women still managed to make petticoats worthy of admiration.
Even though quilted petticoats were hugely popular among almost all women of the period there was a harsh distinction none-the-less. Women of polarizing economics may have been bound by a desire to partake in fashion on whatever level they could afford. However, their common bond may have only been a shared warmth provided by their quilted petticoats, but little else.
Eventually this practical fashion made it's way to the "new" world, where women on the cold prairies wore these skirts - and where Folkwear got the inspiration and samples for our pattern.
Clothing has always held more meaning for women that just protecting one’s body from the elements. Even when women have been denied beauty due to their economies, they have found ways to create their own. I hope you find inspiration in making something beautiful for yourself or someone else and continue to forge the bond that unites those who appreciate what it takes to make something from nothing.
The Folkwear 206 Quilted Prairie Skirt Pattern is the perfect canvas in which to celebrate your own creativity and at the same time recapture a bit the spirits of our ancestors. As always we look forward to seeing what you have been inspired to create!


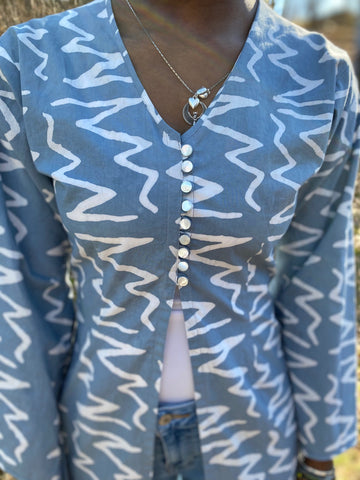
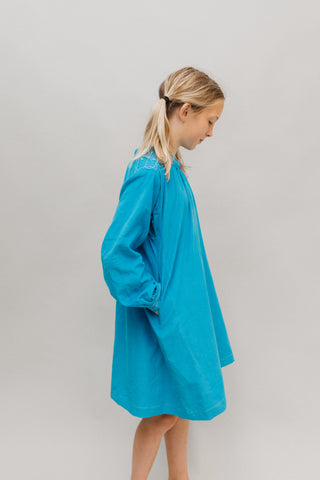
This month Folkwear is featuring the 111 Nepali Blouse Pattern, which is a beautiful piece, often worn by Nepali women as an over blouse. While this blouse is considered a traditional garment, typically made of velvet, it has a truly contemporary feel, which makes it a perfect complement to any wardrobe.
This versatile pattern can be made for any season or occasion. For everyday wear it would be lovely made of fabrics such as cotton, linen, rayon, light wools, or even knits. Any fabric with a bit of drape and a light to medium weight would be suitable. When made in velvet or silk it is transformed into an elegant and comfortable garment whether for a special occasion or for blissfully lounging about. Shorten the sleeves for warmer temps and enjoy year round. The blouse can be worn open at the collar (simply omit the top sets of ties and cut just four ties for the waist). The ties could also be made of ribbon or even be replaced with buttons, hooks, frogs, or snaps.

Since the Nepali Blouse is traditionally made of velvet, this is a perfect opportunity to learn more about velvet and how to handle it. Velvet can be a tricky fabric to sew with, but the tips below will make it much easier and less intimidating to work with.
Most velvets available today are made of rayon or silk. They generally have a very drapey effect and sometimes a bit of stretch, that work well for tops, blouse, skirts, dresses, pants, and scarfs. The photos below shows the soft silky drape of silk rayon velvet. This type of velvet has a distinct nap, which captures the light creating a beautiful shimmer.


Velvet can also be made of cotton and polyester blends, which generally have a more stiff hand or feel, and are perfect for more structured pieces, like coats and jackets. The velvets in the photos below are made of cotton and have a stiffer drape and the sheen is typically more subdued than silk and rayon velvets.


While silk and rayon velvets are stunning and rich fabrics, they are not the easiest fabrics to control and require a bit of extra attention. This blog will help provide some tips to ensure successful sewing for any velvet sewing project on your list. Use these tips for making the 111 Nepali Blouse, as well as the 120 Navajo Blouse and the 124 Bolivian Milkmaid Jacket, which are also traditionally made in velvet.
Also view or download these tips as a PDF.

PRESSING TIPS
Because of the different nature of velvet fabric, it is a good idea to practice and experiment on a few scraps before you make your final project. Here are a few experiments to try using velvet.
While working with velvet takes more time and effort, the benefits are well worth it. No other fabric compares with the unique quality of a stunning velvet. Use these tips to make a 111 Nepali Blouse and for all your other velvet sewing projects.
View or download this as a PDF.


What a year this has been. While it has definitely been less busy on the home front, at Folkwear we've had a surprisingly busy year.
We started the year with a new employee, Cynthia, who has helped with pattern designs, blog posts, and lots of sewing. And, Esi joined us half-way through the year to help with sewing and digital pattern work. Then, when the pandemic started we closed our in-person retail section and set up safety measures for the office.
The resurgence of home sewing was delightful to see. From sewing masks to creating elaborate costumes, sewing gave people a task and a way to help as well as a way to escape difficulties and create.
One of the bigger challenges we faced this year, behind-the-scenes, is updating older patterns. We realized that when we go to re-print many of our patterns, the original printing plates have gone bad. Which means that we have to re-create the pattern and digitize it. This also gives us the opportunity to re-size some of our patterns to make them available in larger sizes. And, since we have a digital pattern, we have also started making the patterns available as PDF patterns. And, we have found that you all really like PDF patterns. Certainly, the paper patterns are not going anywhere (most people still love paper patterns), but PDF patterns have become much more popular. There is no shipping cost, so international customers appreciate the PDF patterns, and they are instantly available.
Here are a few accomplishments we've made at Folkwear this year:
Pattern releases:
PDF patterns released:
Patterns re-sized this year:
Tutorials:
Free Pattern releases:
Cynthia wrote several interesting fashion history blogs this year. One of the most popular was History of the Pocket.

I also did a bit of Folkwear sewing for myself (trying out patterns and tutorials, making modern versions and samples, etc.). Some of my favorite makes are the 140 Flamenco skirt that I still wear and absolutely love; the 212 Five Frontier Shirts in linen; the 240 Rosie the Riveter shirt and dress I made from our tutorial (my favorite summer dress); 202 Victorian Shirt dress that is so warm and cozy; 126 Vests from Greece and Poland that is simple and easy; and 148 Back Forest Smock Dress I made with knit fabric (it's so pretty).

Though I was not able to travel as much as I had hoped, I was able to get to Spain for a short visit in early February and learn more about flamenco and fashion.
There have been other challenges this year too. Our main pattern printer shut down twice this year for a total of 4 months. Which meant that we ran out of patterns occasionally and had backordered patterns fairly often. We are really hoping this problem will not continue in the new year.
Looking forward to the next year, we have lots of plans - for a few new patterns (lingerie and the like), for more PDF patterns (your favorites made into PDFs), and for more content such as tutorials, sew-alongs, and videos (we did add to our YouTube channel a bit this year, and hope for more in the new year). We also plan to make more Folkwear samples and everyday wear. And I, personally, want to make the 227 Edwardian Gown for myself.
We are looking forward to 2021 - to better health, to more traveling, and to lots more sewing and creating.
And we wish all the best for the new year for you as well!
- Molly and the Folkwear team

One of my greatest joys working with Folkwear is to see the creativity of the Folkwear sewing community. I love the photos that customers send us showing off their unique garments made with Folkwear patterns. It is truly fantastic to see how each sewist has their own personal touch and style imprinted on a pattern. Thank you to all who have shared and contributed to the customer gallery. It's why we keep on keeping on here at Folkwear!
We love sharing our creations too, and as you probably know, we carry a limited selection of fabrics here at Folkwear. The fabrics we select to carry are sourced with our patterns in mind. We have a hard time not wanting to keep them all to use ourselves, but alas, sharing is more fun! This blog post highlights some of our recent sample or personal garments that we have made using the fabrics from our shop. We hope they inspire you and bring a smile to your face.


Molly sewed the 242 Rodeo Cowgirl Jacket above for her mother using our Merchant & Mills cotton needle cord and organic yarn dyed linen. The colors were so good together. Read more about the jacket in our blog post.


Molly also made herself a very cute version of the 212 Five Frontier Shirts in organic yarn dyed linen from Birch Fabric. The body is made using the Dusty Rose and the yoke and cuffs are made with Azure. We are limited to the Apricot Brandy linen at the moment. But, we should have more colors available again soon. Did I mention that the linen is preshrunk? Bonus!

We had so much fun working on developing the 229 Sailor Pants and reinvigorating the 211 Two Middies pattern. It has been very rewarding to see them being made and worn!
The picture above shows the 229 Sailor Pants and 211 Two Middies. The pants on the right are made with our 8oz Washed Denim from Merchant and Mills. And, our Japanese selvage denim (three versions) would be great for these too and would look very similar. His Middy (View A) top is made with our Cotton Chambray. The pants on the right are made with Gray Cotton Sanded Twill also from Merchant and Mills. We also have this soft and sturdy fabric in Navy as well.


Above, we have the 229 Sailor Pants made in our Navy Cotton Sanded Twill also from Merchant and Mills. Also with the 211 Middy View B.
We hope you find fabric you like in our selection. We continue to update what we carry as we cycle through inventory. So always keep an eye out for new products. We source these fabrics from all over the world and strive to select fabrics that are sustainably produced, as well as provide the best price possible! Yardages are limited. All fabric sold in 1/2 yard units (for 2 yards, order 4 units, etc.).

We often put together a simple holiday gift list this time of year. And, I am excited about a few of the things we have on this year's list. They are not all Folkwear - we want to point you to some amazing craftspeople and small businesses we have come across in the last year or so. And, craftsfolks, small businesses, and artists need lots of support. It has been a tough year for lots of people.
So on to the list.
First, (and free) Folkwear has several free patterns for some great gifts that are easy and quick to sew up. The cravat for any stylish gentleman/woman, the carry-all tote bag, a knitted 1950s stole, and a beautiful kimono ornament.
 Cravat on my father-in-law
We also have several patterns that make wonderful, and quick-to-sew, gifts:
And, while you may have fabric in your stash for these projects, we love the following small business fabric stores: Stone Mountain and Daughter Fabrics, Harts Fabric, Bolt Fabric Boutique, Oak Fabrics, Elfriede's Fine Fabrics, and Urbanstax (UK). Check out their shops - they have nice online selections, good customer service, easy shipping, and great quality fabrics.
Folkwear also has a couple of bag kits to make, or give as gifts - the Japanese Carpenter's Bag Kit and the Turkish Drawstring Bag Kit.


Bianca, of Thanks, I Made Them, has a wide selection of pattern weights that are beautiful and fun. Get the Folkwear pattern weights for 20% with code FOLKWEARLOVE for the rest of the year!

I also really love the sewing tools from Modern American Vintage. These gorgeous wooden tools are perfect to bring a natural element into your sewing room, and are nice gifts for sewists in your life. Love them!

The beautiful fabric store, Bolt, has a really nice selection of toweling in stock, as does Harts Fabric. Make a set of pretty kitchen towels for someone by just hemming the two unfinished edges (or zig-zagging and fringing). So pretty (and simple)!

And, if you love gorgeous hand-made textiles from around the world, these towels from Sabahar would make an amazing gift (they are fair-trade too, made in Ethiopia).

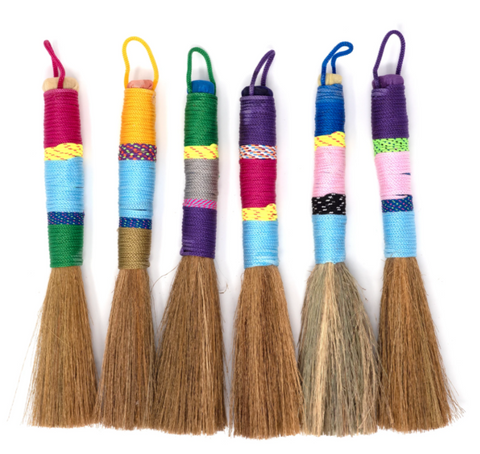
If you are in the UK, or don't mind the shipping (often its not too bad), Foundland has some beautiful and interesting items that would make fun gifts: Korean tabletop brushes, Japanese slippers, or a sweet little flower press (and lots more).
I just discovered the beautiful beaded earrings at Lillie Nell - made by Native American artist, Holly Nolan. These would be special!

Finally, for sustainable, organic, fair-trade, textile goods (that you don't have to sew), check out Global Mamas. Their bags, clothes, jewelry, and accessories are all made in Ghana by women who batik the fabric, sew the items, and manage the workings of the business. And, their prices are great!


The smock is a traditional garment that has long been a favorite for its easy comfort and romantic billowy styling. In this blog you will learn how to make size adjustments to two of Folkwear's favorite smock patterns, the 102 French Cheesemaker's Smock and the 148 Black Forest Smock.
The Folkwear 102 French Cheesemaker’s Smock pattern was taken from an original smock worn by cheesemakers in Roquefort, France. The Folkwear 148 Black Forest Smock, or Kittel, as it is also called, was an over-garment worn by workers in Germany, Switzerland, and France. Smock wearing goes as far back as the medieval period, worn by laborers and craftsmen who needed easy to wear clothing that allowed for a full range of movement for all kinds of work. For this reason the smock became an enduring wardrobe stable for centuries. Because of its practically and comfort, the smock became an iconic look for cheese maker’s, agricultural workers, artists, gardeners, pirates, school children and others. Medieval and Renaissance reenactors also love these smocks designs. And, they make beautiful and simple everyday dresses, tunics, or shirts.
Traditional smocks are made of simple-to-construct rectangles, which means they can easily be made to fit anyone. They are easy to size up or down and anyone with a needle and thread can make a one.
These are two of Folkwear's oldest patterns, and the sizing is not typical of most sewing patterns. There are basic sizes for large and small and/or men and women. There is a lot of flexibility in the pattern design, because there is a LOT of ease built which can accommodate many different sized bodies (~10-12 inches of ease at chest and hip). However, if your fall out of the range of these sizes, or want to add more ease to the garment, it is fairly easy to make these patterns larger, and that is what we are going to show today. The finished measurements for both smocks are below. You can use them as a starting point to decide if you need to add more width or length to your garment.
Finished measurements:
You can see that there is a lot of ease in the patterns and while your measurements may be larger than the sizing, the pattern may still fit you well, with 6 inches of ease.
Keep in mind that the "Men's" size is just the largest size, and the "Women's" sizes are just the smaller sizes. They can be used by any gender, of course (and at some point, we will probably change the size "names").
Also, keep in mind that both of these patterns utilize an under-arm gusset to attach the sleeve to the body of the garment. This was originally a way to save fabric - it provides room in the arm/chest for working, while allowing the sleeves and body pieces to be cut as rectangles. When you are using your own hand-woven fabric, as they were when these patterns were originally used, you did not waste fabric by cutting curves for sleeves and armholes. Geometric shaping also helped with finishing edges and preventing fraying. These gussets actually add a little bit more room in the chest - an inch or two. And, the gusset for the French Cheesemaker's Smock can be eliminated for very small people who do not need or want extra room.
Because the 102 French Cheesemaker's Smock and the 148 Black Forest Smock are constructed in much the same way, making size adjustments for each design is the same. The French Cheesemaker's Smock can be made longer to make a tunic, dress, or night gown. The Black Forest Smock already comes in a shirt and dress length.
In this blog you will learn to make the same easy sizing adjustments that have been passed down through history, using the French Cheesemaker's Smock as an example.
Comfort, practicality, and romantic styling make smocks a great choice for any wardrobe and can be made of any number of fabrics. Cotton flannel, light and medium weight linens, cottons batiste, lawn, flannel, faille, fine wale corduroy, silks habotai, silk de chine, knits, and any fabric that allows for a nice drape and is not too stiff. Also, be sure to to see Making the Black Forest Smock with Knits featured on our blog.
Adjust the 102 French Cheesemaker's Smock
This blog will concentrate on adding width and the length to the men's 102 French Cheesemaker's Smock made from muslin. The neck opening and placket are already generous and will remain unchanged for this blog. Sizing adjustments are made to the pattern pieces Front A, Back B, Sleeve C, Shoulder Yoke & Facing F, and Wristband H.
Note: The measurements added for the purpose of this demonstration are not significant, but simply used to illustrate how to make the adjustments. When making adjustments of any consequence, be sure to make a test muslin.
The largest size of the pattern finishes at 58 inches (147cm) at the chest. For the purpose of this demonstration, 1 inch (25mm) has been added to the chest width to give a bit more ease to fit a 48-50 inch (127cm) chest. The final measurement will be 59 inches (150cm) in circumference, and gives the smock a good drape and plenty of ease.
An additional 2 inches (51mm) has been added to the length of the smock for a final measurement of 29.5 inches (749cm). The smocks may need to be lengthened or shortened to adjust for personal preference or for height of the wearer.
I also widened the sleeve by 1 inch (25mm) to accommodate a 14 inch (36cm) bicep. Again, there is lot of ease in the sleeve, but if you want more or need a larger size, this is an easy way to do it. The sleeve has also been lengthened 2 inches (51mm) to fit a 24 inch (61cm) arm length. The final shoulder/sleeve/arm measurement is 31.5 from the neck edge to the wristband edge.
Add width and/or length to pattern piece Front A, Back B, and Sleeve C.
Determine the width you desire, adding half the width measurement to either side of pattern pieces Front A. In this case, I added 1/2 inch (13mm) to each side of Front A for a total of 1 inch (25mm) of added width.
An additional 2 inches (51mm) has been added to the length of Front A.


Because pattern pieces B is cut on the fold, add half the width requirement to the non-fold edge of the pattern. In this case 1/2 inch (13mm) I added to the non-fold edge of Back B for a total of 1 inch (2.5cm) of added width when cut on the fold.
I also added 2 inches (51mm) has been added to the length of Back B, as well.

Be sure any width or length adjustments made on pieces Front A and Back B are the same.
I added the same 1/2" (13mm) measurement adjustment to the outer, or sleeve edge, of the Shoulder Yoke & Facing F.

Both Shoulder Yoke & Facing F and Front A with width adjustment and aligned matching notches.

Both Shoulder Yoke & Facing F and Front B with width adjustment and aligned matching notches.
Pattern piece Sleeve C is also cut on the fold, so I added half the width requirement to the non-fold edge of the pattern. In this case 1/2 inch (13mm) is added to the non-fold edge of Sleeve C for a total of 1 inch (2.5cm) of added width when cut on the fold.
Adjust the sleeve length to the measurement you require. In this case, I added 2 inches (51mm) to the bottom of the sleeve. .


Once the pattern sizing adjustments are made, I used the adjusted pattern pieces to cut out my new pattern. Use the sewing instructions to construct the smock.

Front View.


Front view with Gusset added under the sleeve for extra room.

A Back View. Notice the soft gathering at the back neck.
A Quick and Easy Adjustment for the 148 Black Forest Smock
The adjustments for 148 Black Forest Smock are the same as the 102 French Cheesemaker's Smock, with the exception of Side Panel C. This panel should not receive any added extra width to it's sides. If you adjust the length of the smock, then the length of Side Panel C should be adjusted to the same length. When getting started, have a look at the pattern instructions to see how this portion of the smock is constructed.
The idea is to add additional width to the Front, Back, and Shoulder Yokes. To do this, add half the width needed to the non-fold side of Front A and Back B. In this case I/2 inch (13mm) is added to the non-fold edge of Front A and Back B for a total of 1 inch (2.5cm) of added width when cut on the fold. Widening the Front and Back will allow for more fullness to both the shirt-length or the dress-length versions of the smock.


Add the same adjustment to the outside of the Shoulder Yoke pieces as you did to the front/back pieces (here I added 1/2"/13mm).

And, that's all there is to it.
Note: If you add width measurement adjustments to the sleeves, then, the gusset notches on the front and back (where you attach the gusset) may move slightly. That is normal and fine. You should be able to easily see where the side panel, gusset, and sleeve connect.
Once the measurement adjustments are made, construct the smock according to the pattern instructions.
You can use these typical adjustments to size up many of Folkwear's oldest patterns, the traditionally constructed garments with rectangular pattern pieces.
Both the 102 French Cheesemaker's Smock and the 148 Black Forest Smock are perfect for adding layering warmth to any winter wardrobe. When the weather turns warm, shorten the sleeves and enjoy the comfort of a smock made of a billowy cool fabric. Either way, add a touch of romantic comfort to your wardrobe and enjoy wearing an easy to make Folkwear smock.
There is so much to love about both of these easy to make smock patterns and the 148 Black Forest Smock pattern is on sale this month... so there is no excuse not to try making a great smock for yourself or as a holiday gift for someone special! As always, we love seeing what your have been inspired to make using Folkwear Patterns!

I feel that the 148 Black Forest Smock and the 110 Little Kittel are under-appreciated Folkwear patterns. They are fun to make, and really quite easy, with lots of options for special customization. Embroidery can be added to the neckband, cuffs, pocket openings, and/or shoulder yokes. And, the patterns include embroidery designs to use! Different fabrics combined for fun color blocking. And, the smocks make a simple silhouette that is easy to wear and can be made formal or informal depending on fabric - and made into a dress or shirt, depending on length!
I made the 110 Little Kittel for my daughter a few years ago from a beautiful blue corduroy. I really wanted to add embroidery, but did not have time to do hand-embroidery, so I tried out some stitches on my machine to simulate the embroidery designs included in the pattern. It was not hard at all and a lot of fun to figure out which stitches to use (and finally use some of those stitches my machine can do, but I never use). If you use your sewing machine to embroider, make sure to use a stabilizer on the back side of the fabric - interfacing or a tear-away stabilizer will work fine.

This past week, I decided to make a 148 Black Forest Smock for myself. I wanted to make a simple smock (no embroidery) made into a short dress that I could wear with boots for winter. I had a great, warm brown fabric in my stash, but it was a knit. I decided that the medium-weight knit might be perfect for this pattern and it would be fun to see how it could work out. And, then I could show you how to do the same!
The fabric is some combination of wool and/or mohair and synthetic. It is thicker and heavier than a jersey and is a 2-way stretch, with over 50% stretch. It is probably easier to use a knit with a little less stretch, but this fabric worked just fine.
There were only a few adjustments I made to the pattern to work for a knit fabric, and I am outlining those below. I followed the instructions in the pattern for everything else. I did not cut the welts (noted below) and I did not cut or use the shoulder yoke facings (only cut and used one set of shoulder yokes and did not face them). I used a serger for sewing most seams; exceptions are outlined below as well. If you don't have a serger, just use a zig-zag or stretch stitch for seams. I cut the smallest size, and since this pattern has a lot of ease, and I would be making it from a knit, this was perfect. This is a traditional-style garment and one of our oldest patterns, so the sizing and construction is a little different from typical modern construction. It is fairly easy to size the pattern up by adding to the front and back side seams and to the sleeve seam, as needed.

Pockets
First, I cut all the pattern pieces as I would have for a woven fabric, except that I did not cut the welts for the pocket.
But, I cut all the pocket pieces with an extra long section where it joins the smock so that I could use the technique for welt pockets that is a little easier to do and does not require an extra welt piece. I added about an inch extra to the part of the pocket that juts out to join the body of the garment.
The first step in making the smock is to add the pockets. To do this one-welt pocket without the welt, I started by putting the two pocket pieces (front and back) together over the pocket opening. I've marked the corners of the welt pocket and the opening on the side piece with a purple marker. Then, I centered the pocket pieces over the opening and lined up the edges of the pocket with the opening line of the pocket.

I sewed, with a regular sewing machine and a straight stitch, along both long edges of the welt pocket, starting and ending at the corners of the welt pocket (marked with purple).

Then, I cut the welt pocket opening to 1/2" of the ends and snipped to each corner (don't cut the pocket pieces, just the side panel piece, as seen below). Note that the side panel is facing up in the photo below, and the pocket pieces are on the other side.


Any one who sews, knows what a challenge fitting can be. The ultimate joy in learning to sew, and what makes it so rewarding, is the pleasure that comes from wearing clothes that fit and bring you joy.
This blog is intended to help you make minor changes that can make a big difference in how your Folkwear's 229 Sailor Pants fit. If you are in between sizes, a simple grading technique can make all the difference. Or, if your waist is quite a bit smaller than you hips, a couple of easy-to-make darts can be all that stands between you and a good fit. Adjusting the depth of the crotch can make a difference too.
The 229 Sailor Pants pattern was directly taken from an authentic pair of sailor pants from the 1940's. Part of the authenticity of this design, means there are no side seams. However, side seams do allow for more options when it comes to shaping a garment, especially when considering the curves of the female body. However, adding side seams is a future blog.
Despite this sailor pant design having no side seams, a few simple and helpful adjustments will give you a better understanding on how to make the 229 Sailor Pants fit your shape. Because, there are no side seams to this pant design and the front has all the opening flap and darts, most sizing adjustments need to be made to the back of the pants.
Even though the techniques demonstrated here are simple, it is always best to make a test muslin first. All the adjustments for this blog are done making a muslin. Other than the adjustments, the pants are made according to the pattern instructions. We will be focusing on the back seam and waistband of the pants, mainly. Since the fit of the leg is not the focus of this tutorial, I only constructed the pants to the knee.
To make sizing adjustments you need to consider the widest part of the body first. The widest part of your body can vary depending on your body shape. If your waist is the widest part, start by choosing the waist size that matches your measurement. The focus of this blog concentrates on making adjustments for the waist, hips, and crotch.
If your hips are the wider part of your lower body, there are a couple of approaches to take depending on how much difference there is between your waist and hip measurement.
Simple Grading Between Sizes
Sometimes, the difference between your hip and waist measurements are not all that dramatic, but you still fall in between pattern sizes. For example, while the size 32 might fit nicely in the waist, it might be too narrow through the hips. In this case, keep the size 32 waist and make the hips wider by using the size 34 pant pattern. This the technique Molly used when making her red corduroy Sailor Pants above.
So you can more clearly see what is being demonstrated, I traced (using Swedish tracing paper) the size 32 pants pattern piece and laid it on top of the size 34 pattern piece. These pattern pieces are not nested next to each other, so it helped to trace it and move it. I used the Center Front edge and notches for alignment. The grain line and "lengthen or shorten here" line printed on the pattern can be used to ensure alignment as well.
Draw a Grading Line
Below, the line between sizes, or grade line, is drawn in red between the size 32 at the waist and the size 34 toward the hip area. You want to create a smooth continuous line between the sizes. Doing this widens the hip area to size 34 while allowing the waist to remain unaltered. Notice this grading line runs slightly into the crotch area without altering this area too much. Trace your new pants pattern piece, staying with size 32 at waist and following the red line to size 34 for the rest of the pants.

A size 32 traced on Swedish tracing paper aligned over the original pattern and the new grading line drawn in red.
This technique works fine when grading between just two sizes. However, this technique does not always work well if you need to grade between more than two sizes. Too much grading forces the fabric off grain or distorts the crotch area, which results in an unfortunate wonky look. When making a minor grading adjustment, the measurement threshold or limit is approximately 1/2 inch (13mm) or less.
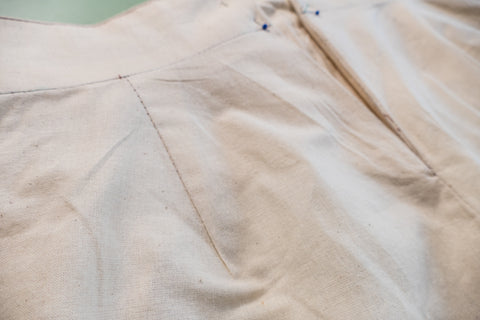
Adding Darts at the Waist
If the difference between your hip and waist measurement greater than one size, a different approach using darts can be used. For example, I started with an original size 36 pant pattern (because of my hip measurement) and then shaped the excess fabric using darts to create a 32 inch (81cm) waist. Below is the size 32 waist band and the size 36 pant cut from muslin.
In this case, the difference between the size 32 waist band and the hip of the size 36 pattern is 2 inches (51mm) for each back side of the pants. The idea is to reduce the extra two inches (51mm) to fit the waistband. To do this, the 2 inch (51mm) dart needs to be folded in half, creating a one inch (25mm) width at the widest part of the dart. The location of the dart should be positioned, at the waist edge, over the fuller part of the body, or where you are round. The point of the dart points toward the fullest part of the rear end, and ends about one inch from the fullest part. Often this is about half-way between center back and side waist, but try out the location in a muslin and adjust before making your final fitting. Add a dart in the same location (mirror image) to each side of the back waist to create the needed shape.

With wrong side facing up, the dart drawn at the pant waist.

The dart folded in half takes up the excess fabric.
A "V" shaped dart is used to eliminate the excess fabric at the waist and create a 3-dimensional shape. Start with a back stitch at the widest part of the dart and stitch along the angled guide line, ending in a point. At the end if the point, leave a long thread tail and tie the the treads off to secure.
Press the darts to create smooth finish.

The dart sewn starting from the widest point and ending in a point.
Hints: Generally, you press darts toward the center front or back. Also, the curvier the body, the larger the darts usually need to be. You can even create two darts, one larger, one smaller.

The dart pressed toward the center of the pant and pinned to the waistband.

Another view of the waist with a dart, pinned to the waistband and ready to be sewn.

The waist and waist band now align due to the dart.

A close up view of the dart pressed toward the center of the pant and sewn in place.
View of the dart on the right side of the pants.

Darts with the right side of the pants laying flat.

Pants with darts creating shape at the waist and curve of the hips.

Another view showing how the darts allow for the curve the backside.

Side view... notice the dart placement.
It is worth understanding the varying methods for calculating dart positioning. However, it is also acceptable to let the excess fabric determine where the darts need to go. This is often an adequate method of figuring out good dart placement in order to give a pleasing shape to your garment. If there is excess fabric in the sides, then the dart should be at the side seam area. If the excess fabric is at the side back area, then your darts need to be positioned there.
Some curvier figures may required a combination of dart positioning, or two darts (one smaller, one larger) in the waist and/or side seam areas. Because everyone is shaped differently, it is worth experimenting to determine what works best for you. The rules of sewing are not written in stone. But it does help to understand prescribed methods and techniques, to help you determine what works best for you.
Adjusting the Crotch Depth
The final fit adjustment to consider is the depth of the crotch. The "lengthen or shorten here" line printed on the pattern, can be used if you need to adjust the depth of the crotch area. To shorten the length, simply fold your pattern piece up making a pleat equal to one-half the amount you wish to shorten.

Make a shortening pleat.

Pin the pleat in place and ready to use.
To add depth to the crotch, simply cut on the "lengthen or shorten here" line to separate the pattern into two pieces. Then insert another piece of tracing paper behind the original pattern piece, to will allow for the increase. Be sure the extra tracing paper is big enough to provide enough overlap on the back side to secure to the original pattern pieces with tape. A bit of tape added to the front side will help as well. Use a hip curve or French curve to create a smooth continuous drawn line connecting the two separated pieces. Trim any access tracing paper away and the adjusted pattern is ready to use.

Separate the pattern by cutting on the "lengthen or shorten here" line.
Use a French curve to create a smooth continuous drawn line connecting the two separated pieces.

Pattern separated, adjusted, trimmed and ready to be used.
I hope these basic fitting adjustments prove helpful in fitting your Folkwear 229 Sailor Pants. Learning to fit is a process and patterns are meant to be the starting point in this process. Learning how to take a two dimensional fabric and mold it to a 3-dimensional body is an art form in itself. I hope this blog will help you in your fitting journey.

The in-seam pocket, or pocket lining, as it is often called, is perfect to add to the side seam of a pocket-less skirt or dress. You can add this pocket to any pattern, or garment in your wardrobe, that has a side seam.
Be sure to see how to make other pocket options on our Pocket Series blogs. Have a look here to learn how: Pocket Series: Make a Welt Pocket and Pocket Series: Patch Pocket.
Choose a pocket fabric lining much like the fabric of the garment you are adding the pockets, or a lighter-weight fabric. A lightweight woven cotton will typically work well as a pocket lining for any woven fabric. Silk pocket linings are particularly nice in wool garments. If using a knit fabric, stick with a knit fabric for the pocket lining too. The idea is to choose a fabric that is similar in weight to the fabric the garment is made of, but have some fun and use a pocket fabric that might add a bit of the unexpected.
Using a tape measure and decide how far down you want the the pocket to sit below the waistline. This measurement should be situated so that your hand finds a natural feeling entry into the pocket. If the pocket is placed too high or too low it will feel awkward.
You can draw out your pocket shape freehand, or use our downloadable pocket (link at the bottom of the blog). Cut four pieces to make the front and back of the pocket bag - two for each side of the garment.
Using your predetermined pocket-placement measurement, mark the placement for the top and bottom edge of your pocket on the side seams of the front and back of your garment. Align and pin one pocket piece to the front and back of the garment on each side of the garment. With right sides together stitch the straight edges of the pocket to the garment edge, matching the top and bottom markings for the opening, using a 1/4 inch (6mm) seam allowance. Using a 1/4 inch (6mm) seam allowance keeps the seam from being too visible, because it sits further inside the pocket.

Press each pocket piece to the outside, then press the seam allowance toward the pocket. You can understitch the pocket seam here if you want. It can help prevent the pocket bag from coming out when being worn. To understitch, stitch the pocket to the seam allowance just on the inside of the seam.
Now with both pocket pieces sewn and pressed in place, place front and back of garment together (right sides together), and stitch the seams of the garment above and below the pocket. Use the seam allowance that already exists in your garment or the seam allowance indicated on the pattern.

Stitch the pocket pieces together using 1/2 inch (13mm) seam allowance or the measurement specified, being sure the straight edges and notches align. Clip the back seam allowance at the corners where the garment and pocket seams meet. Press the pocket toward the front.
Trim the the pocket seam allowance if you like. Depending on the weight of your fabric, will in part determine how or if, to finish the raw pocket edges. The idea is for the pocket to not be visible and create a smooth finish that will not be visible from the right side of the garment. Using a pinking shear finish or trimming the pocket seam allowance will suffice in most cases.


Remember when making your next project that nearly all side seams are made better with pockets!